Members can log in to your website with their X (formerly Twitter) account credentials. To allow this, you need the MemberPress Social Login add-on and the X (formerly Twitter) App connected to it.
This document will provide step-by-step instructions on how to create the X App and connect it to MemberPress.
X (formerly Twitter) Application
As mentioned above, you can connect MemberPress to a custom X application. The X App can be created through the X Developer Portal with your X developer account.
Create your X App, and add its credentials to MemberPress Social Logins settings to enable X as a login method.
Create an X App
To create your X App, you can follow these steps:
- Log in with your X (formerly Twitter) credentials if you are not already logged in.
- Navigate to X Developer Portal.
- You will be prompted to create the developer account unless you already have one.
- Once logged into your X developer account, navigate to the Overview page within Project & Apps.
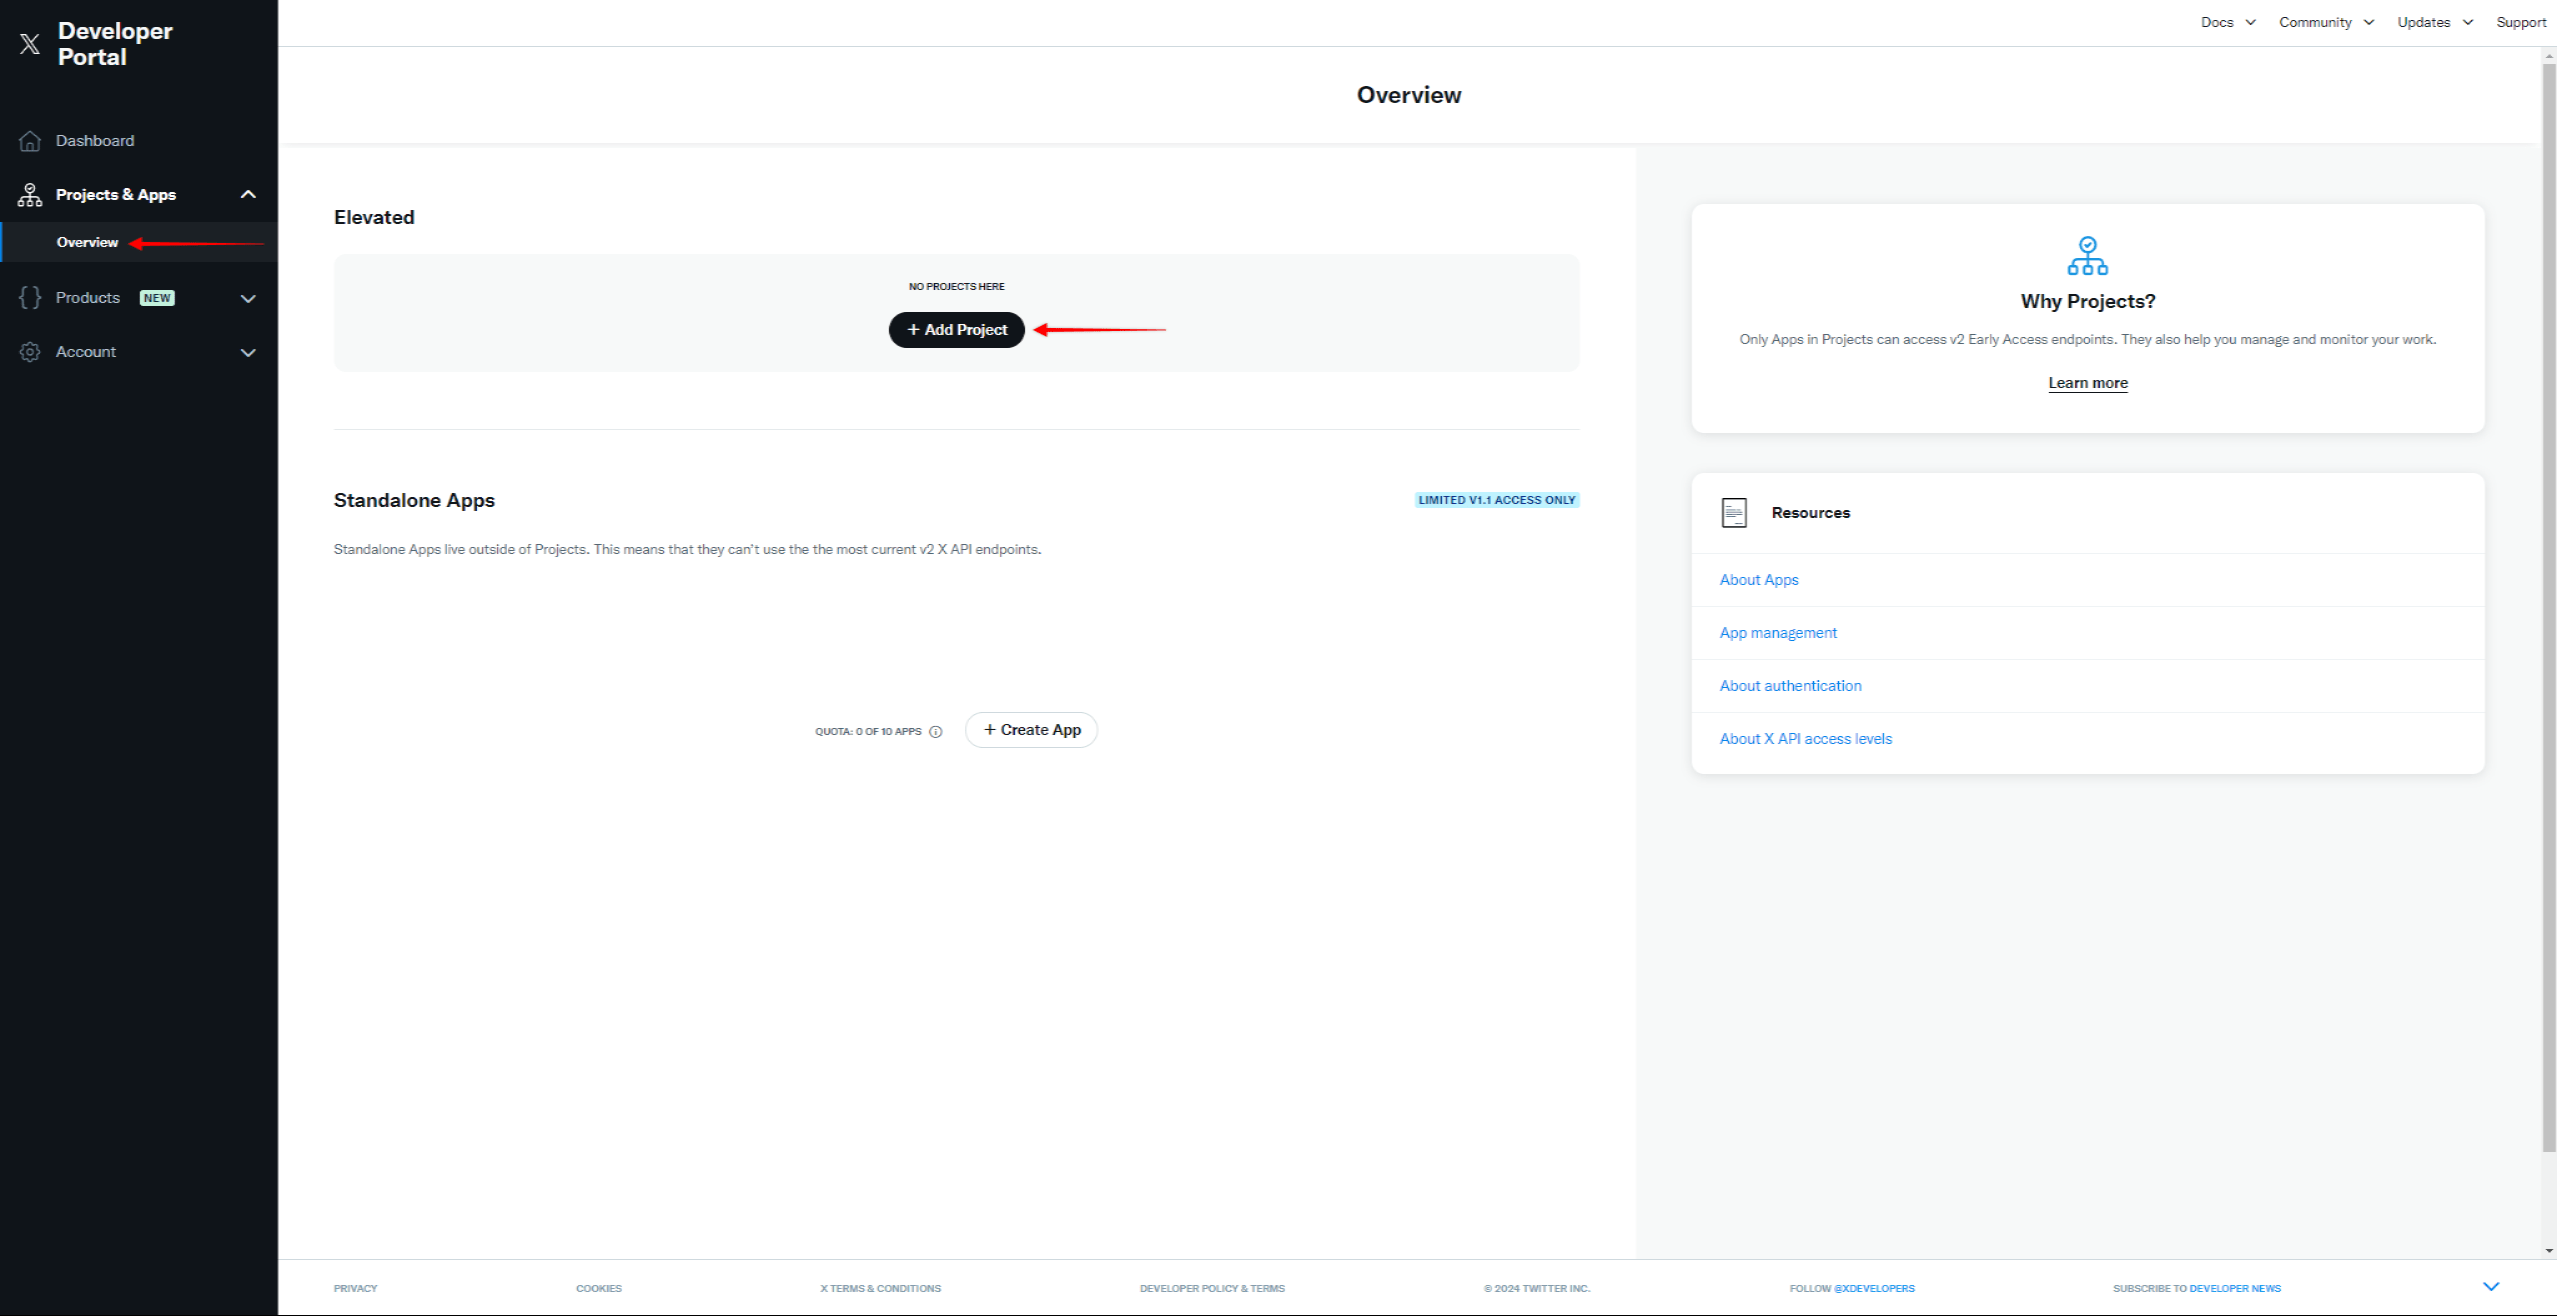
- You can use one of your existing projects or create a new one by clicking Add Project.
- When creating a new project, you’ll need to name the project, select your use case, and add the project description.
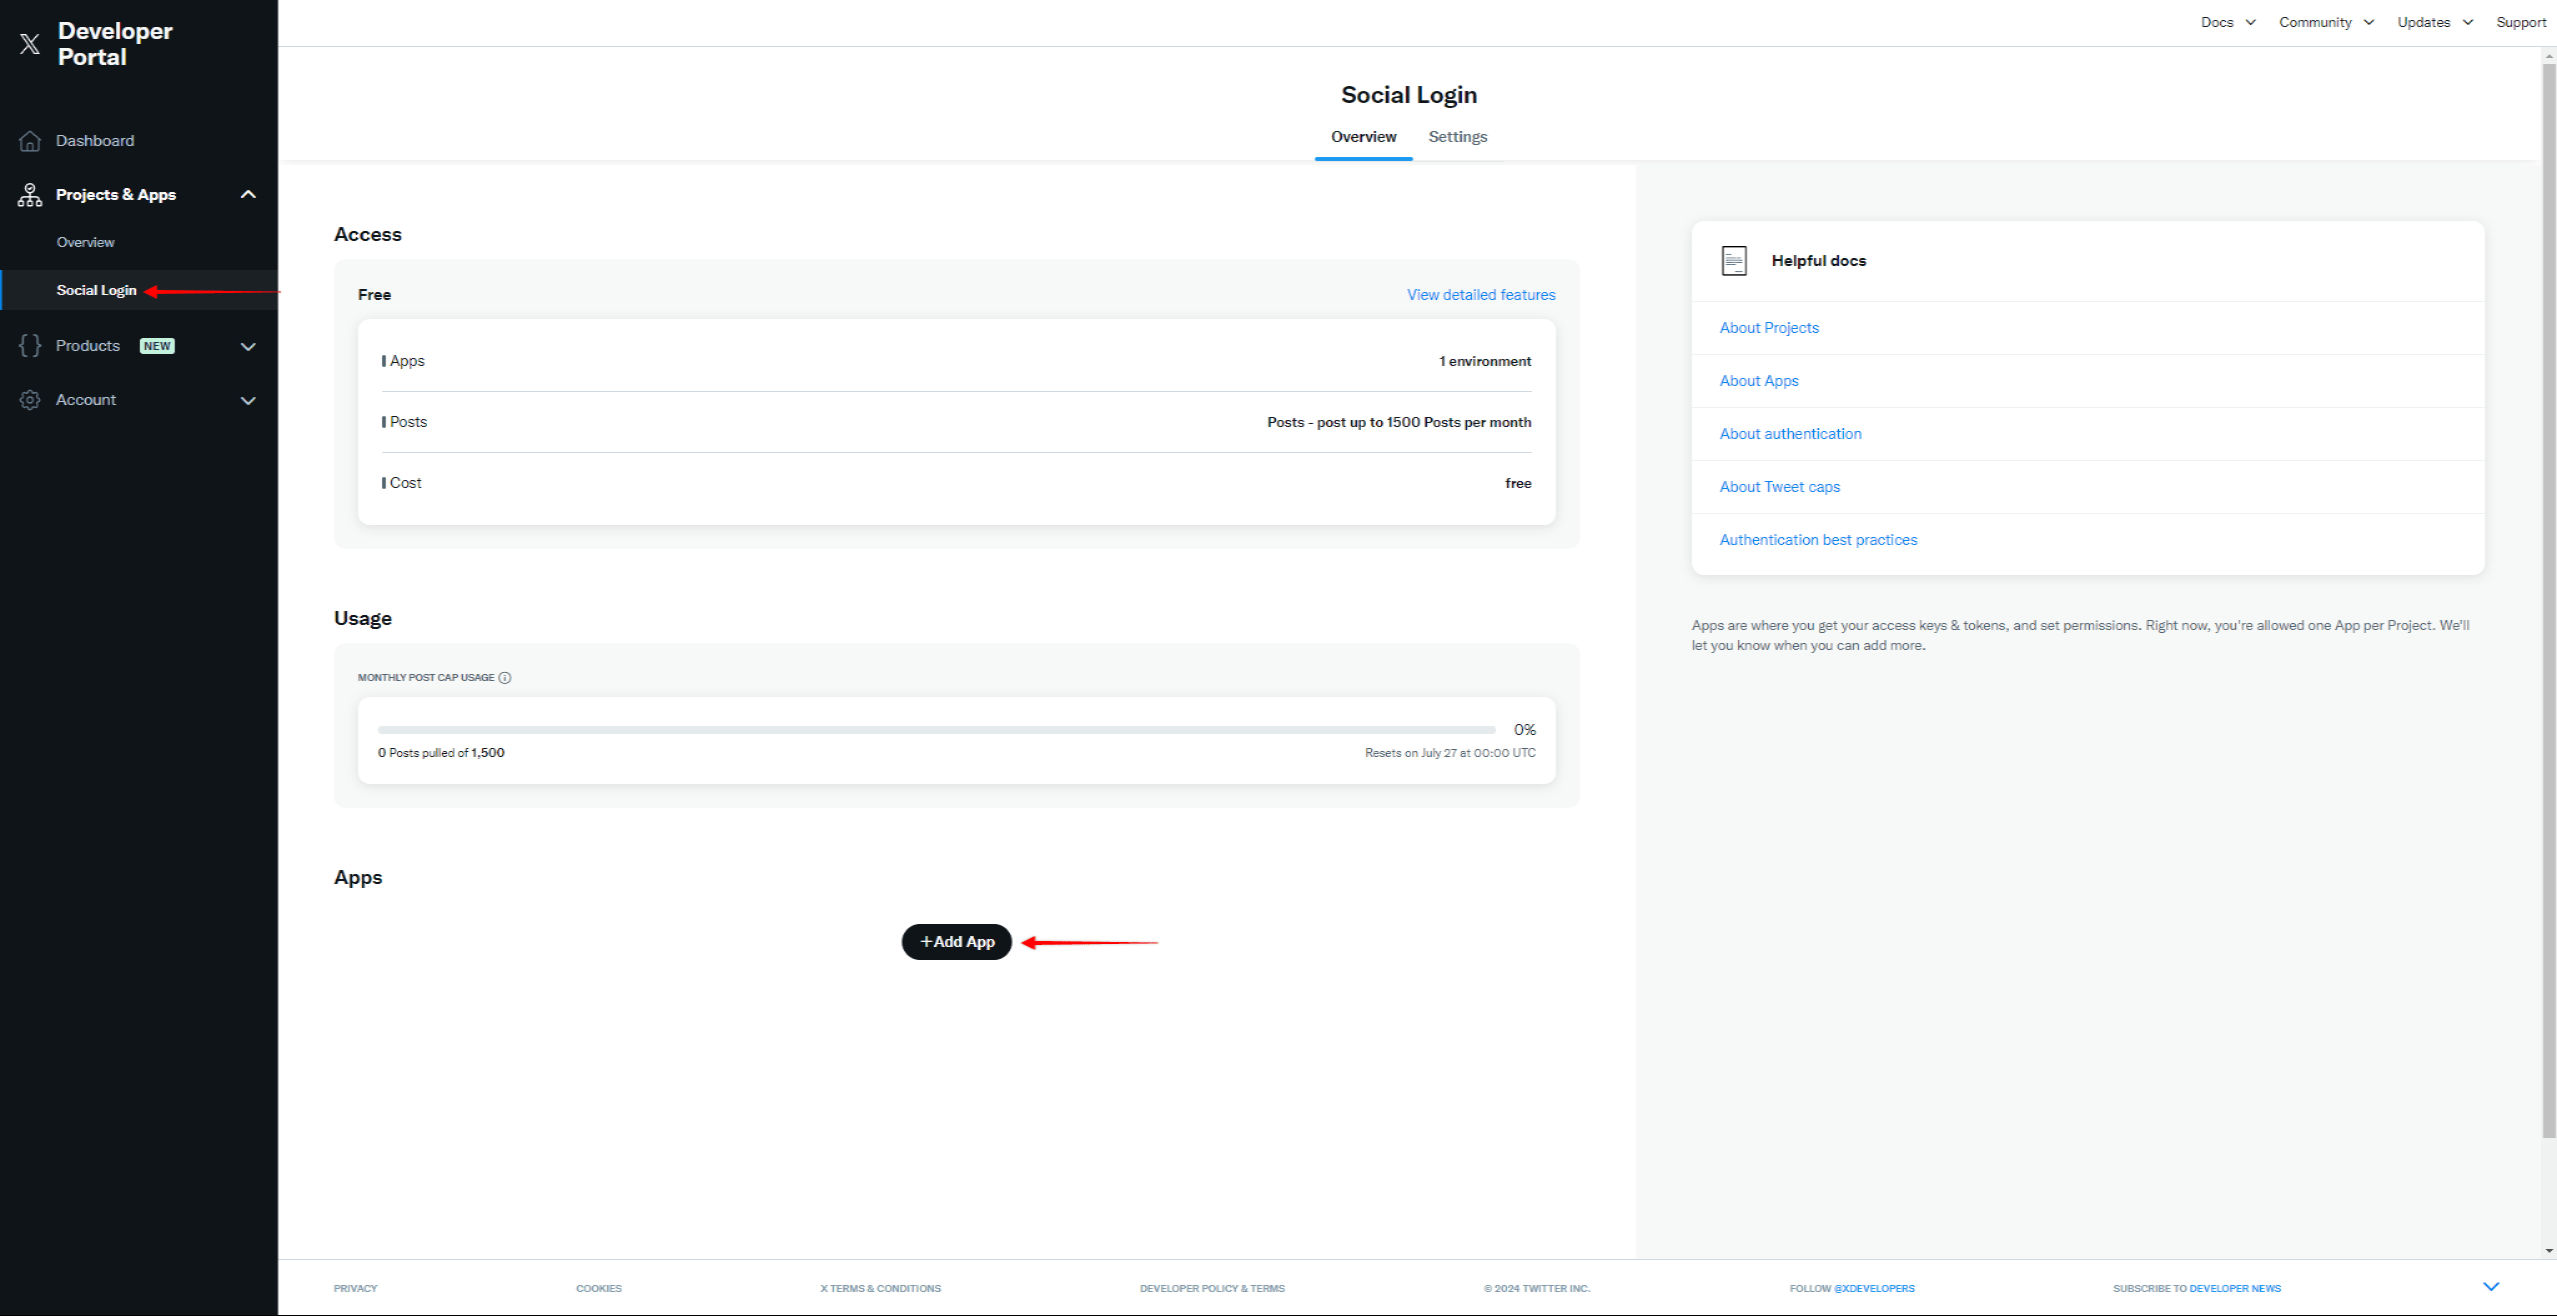
- Further, you will be asked to create an App for your new project. If you’re adding the App to the existing project, navigate to your App, and click the +Add App button.
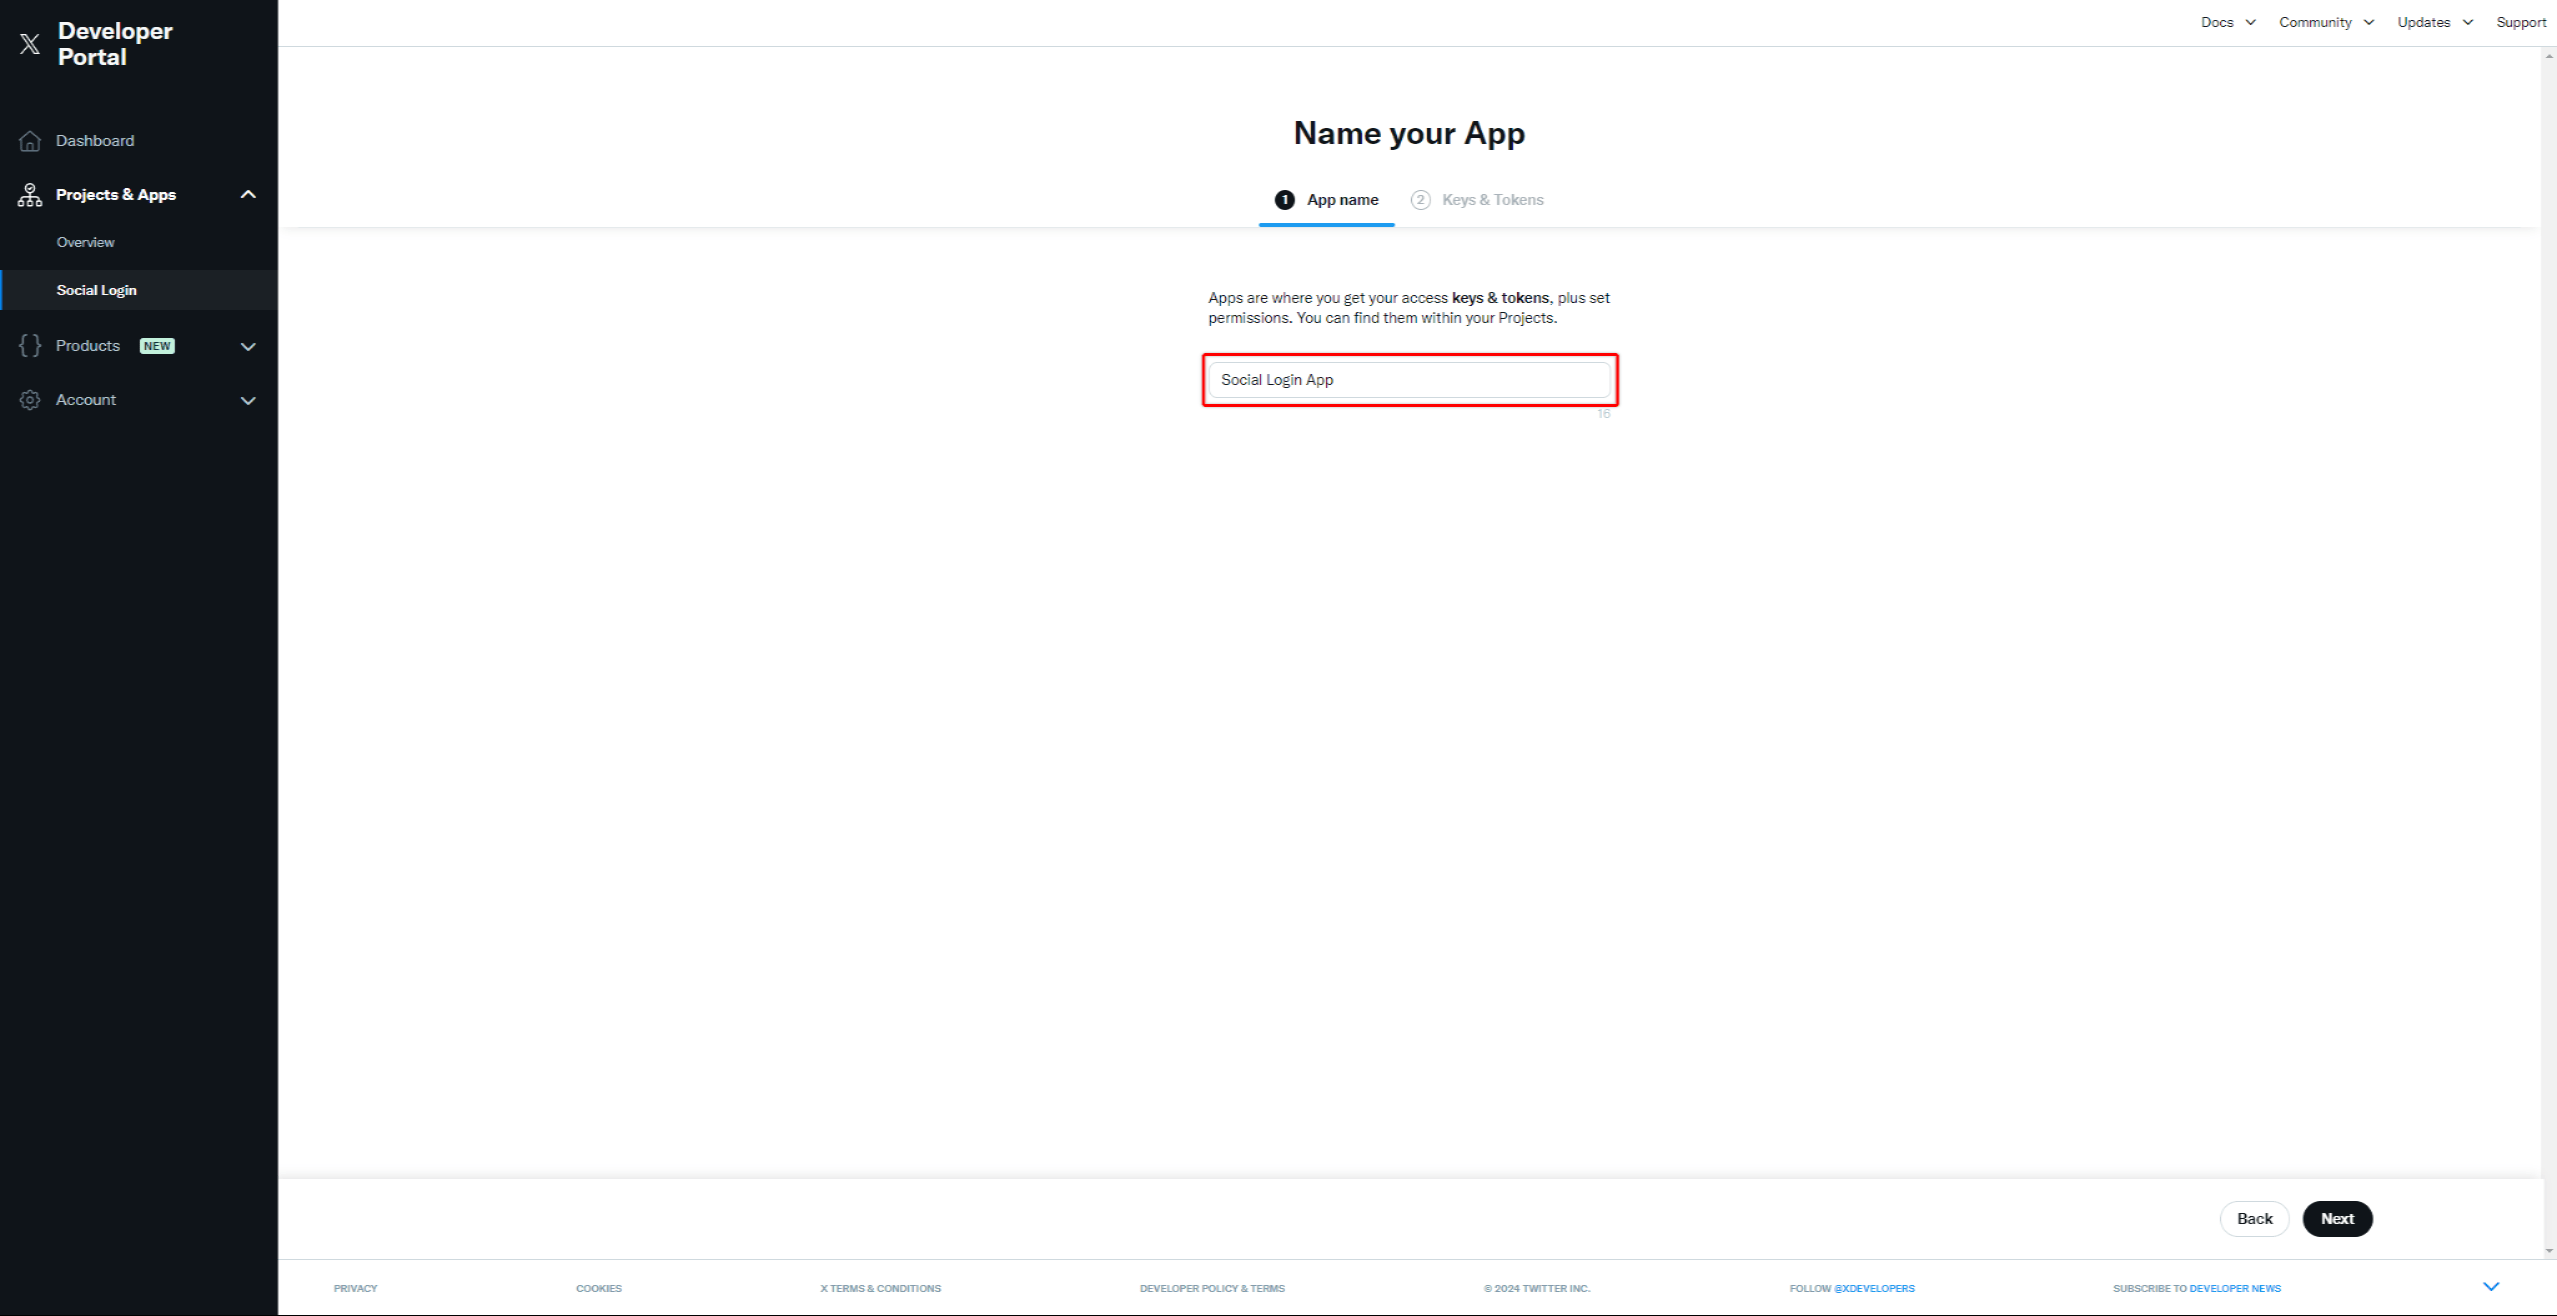
- Add the App name and click Next. This will create your X app.
On the next page, keys and tokens will be automatically generated for the X App. Though this data isn’t required to connect your X App with MemberPress, you should save it for potential future use.
X App Settings And Credentials
Now that you have created your X App, you need to set it up and generate the app credentials:
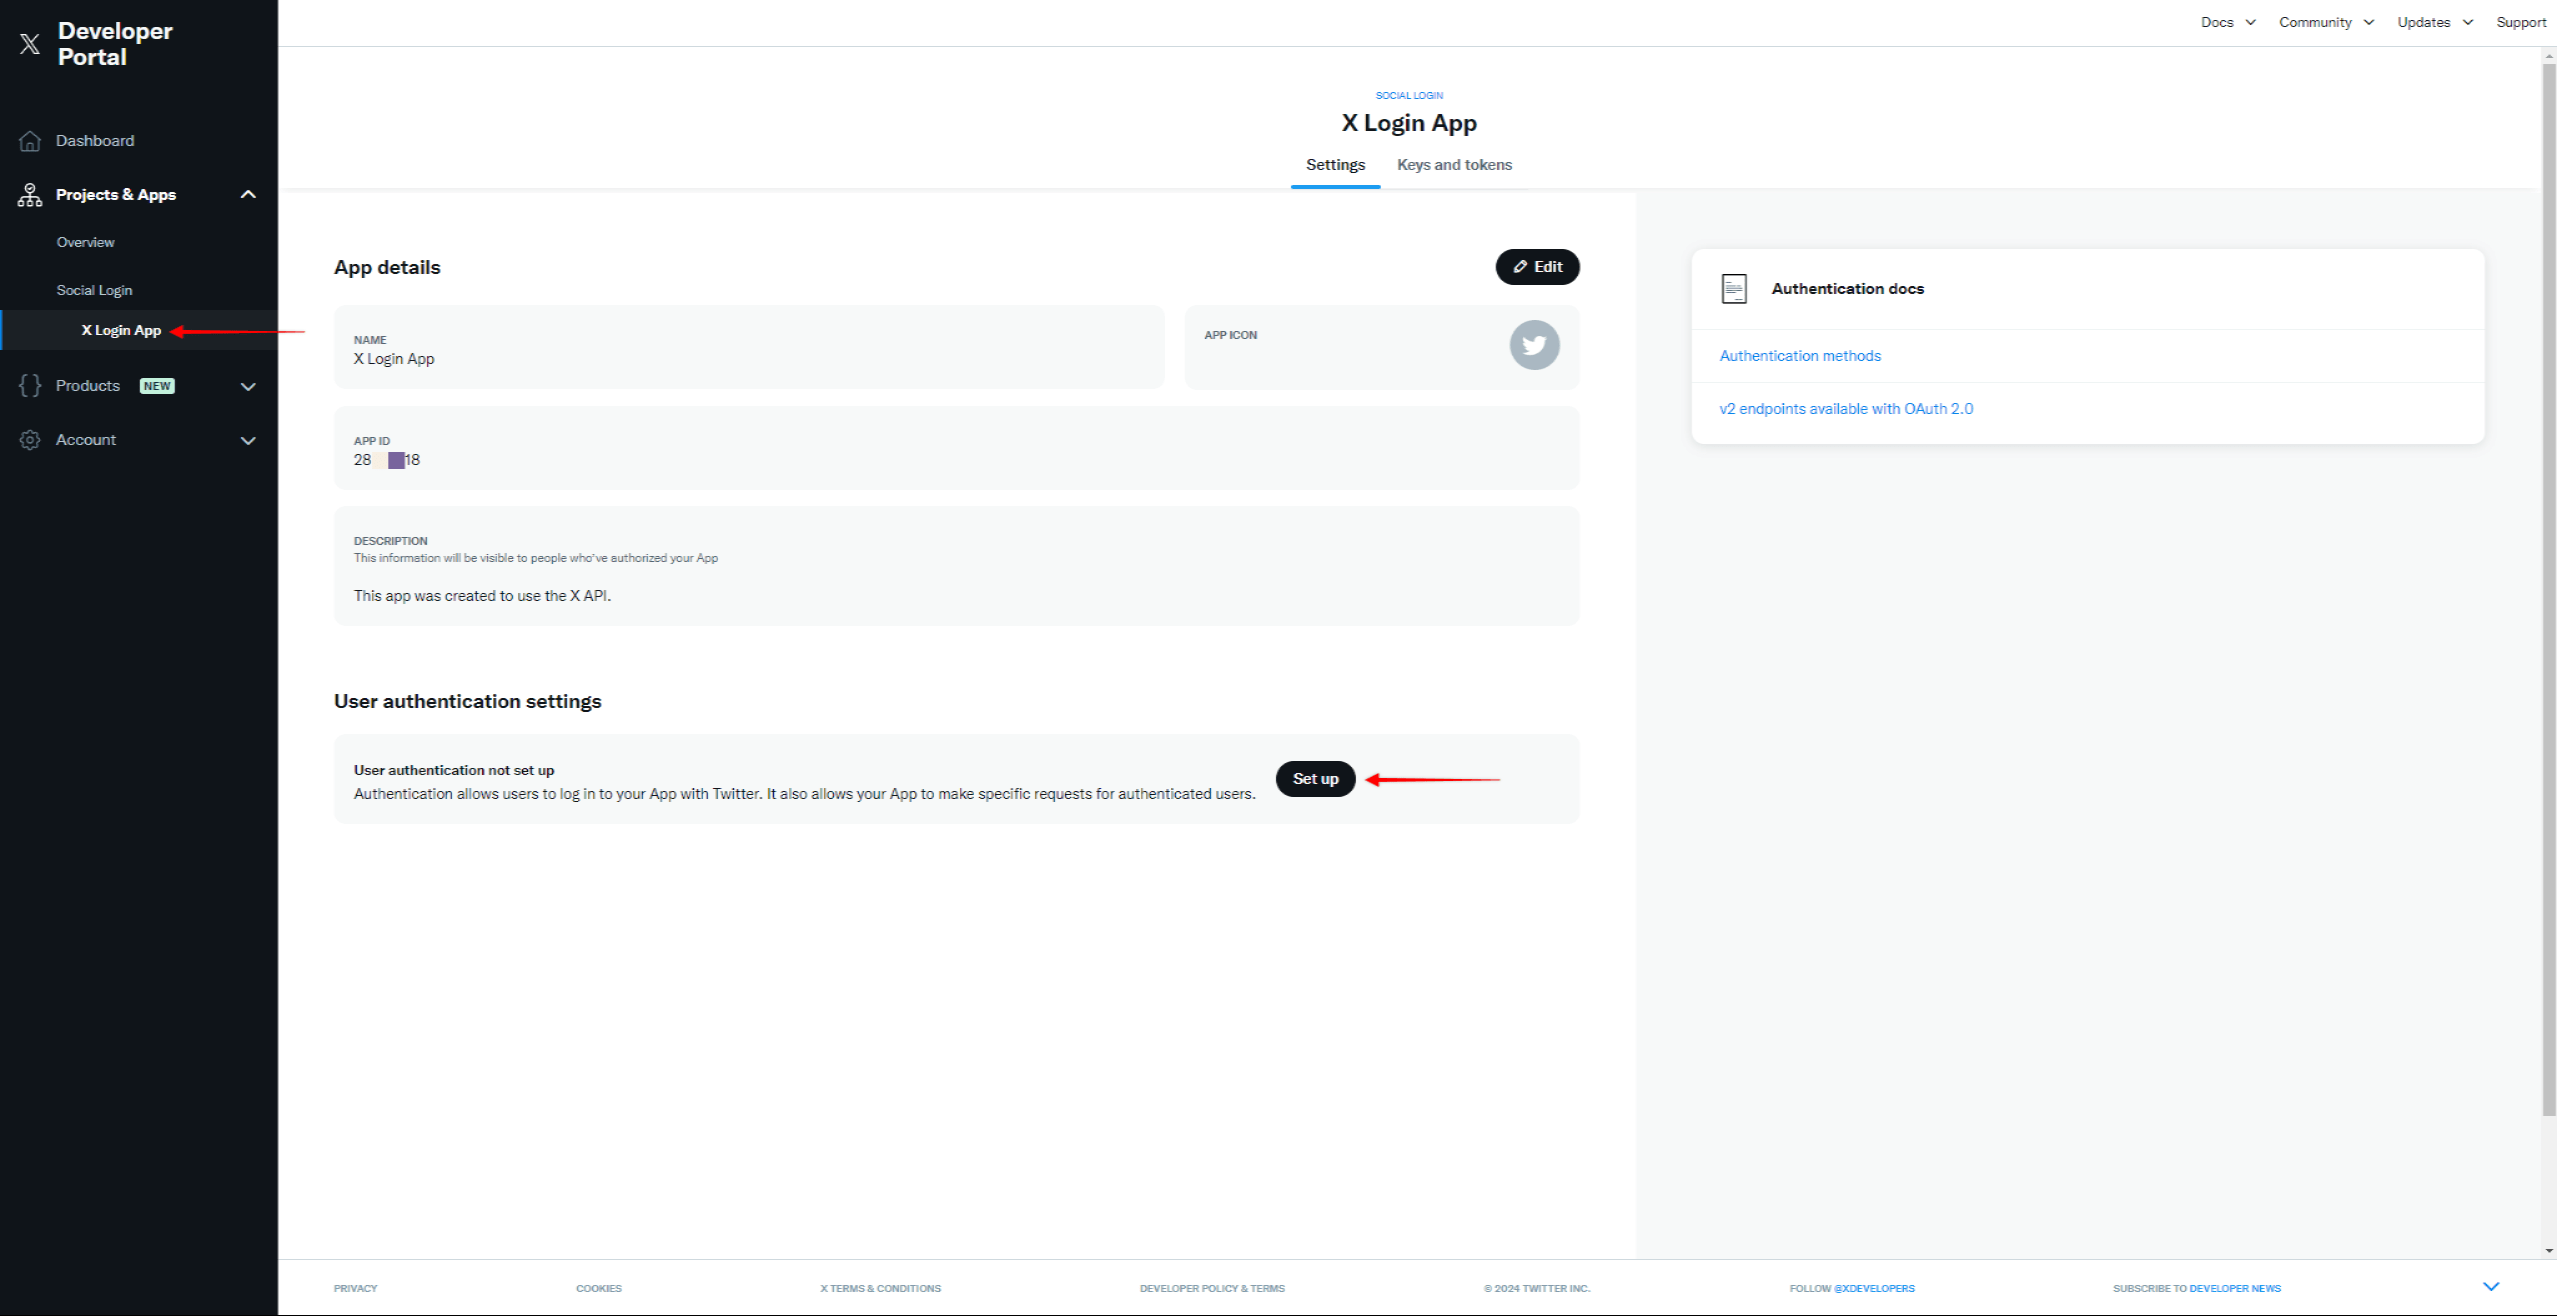
- Navigate to your App Settings page. Under the User authentication settings section, click the Set up button.
- On the User authentication settings page, apply the following settings:
- App permissions: set this option to Read;
- Type of App: set this to Web App, Automated App or Bot;
- Callback URI / Redirect URL: You need to add the callback / redirect URL for your website. You can create the callback URL by adding the /?memberpress-sl-callback=twitter to the URL of your website (e.g., https://yourdomain.com/?memberpress-sl-callback=twitter). This should be the URL of the website on which you want to enable social login;
- Website URL: add the URL of your website (e.g. https://yourdomain.com)
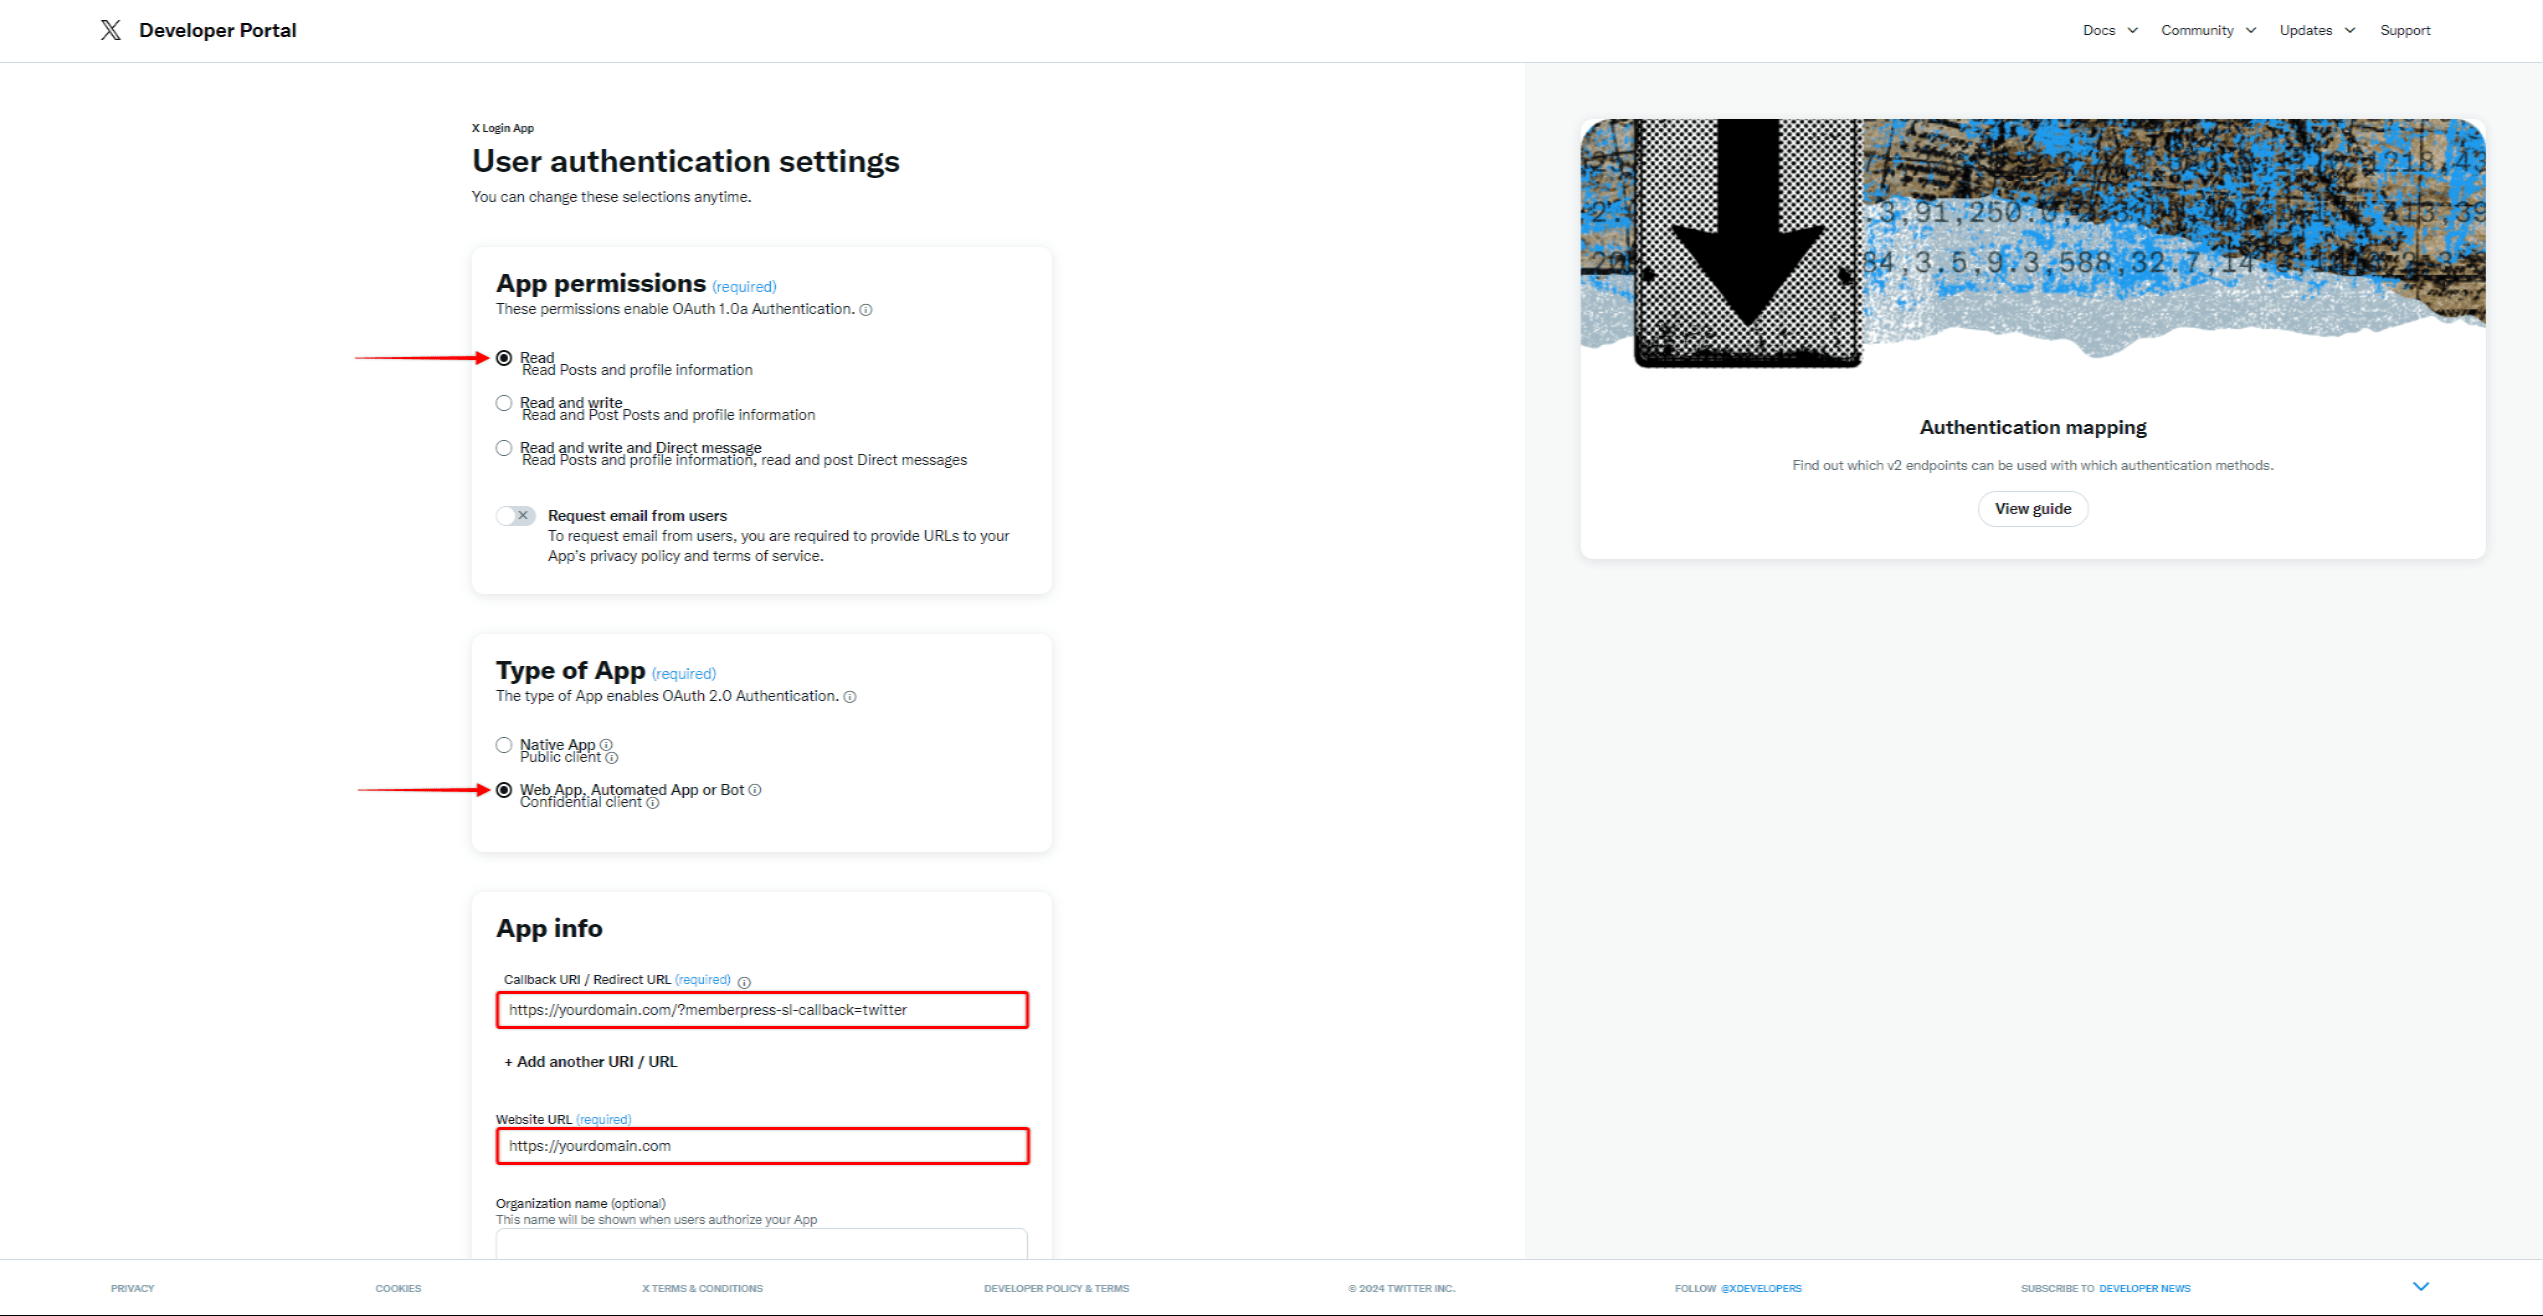
- Scroll down to the bottom of the page and click the Save button.
- Your app credentials will be automatically generated on the next page. You’ll need to add these credentials to MemberPress to connect your X App to your website.
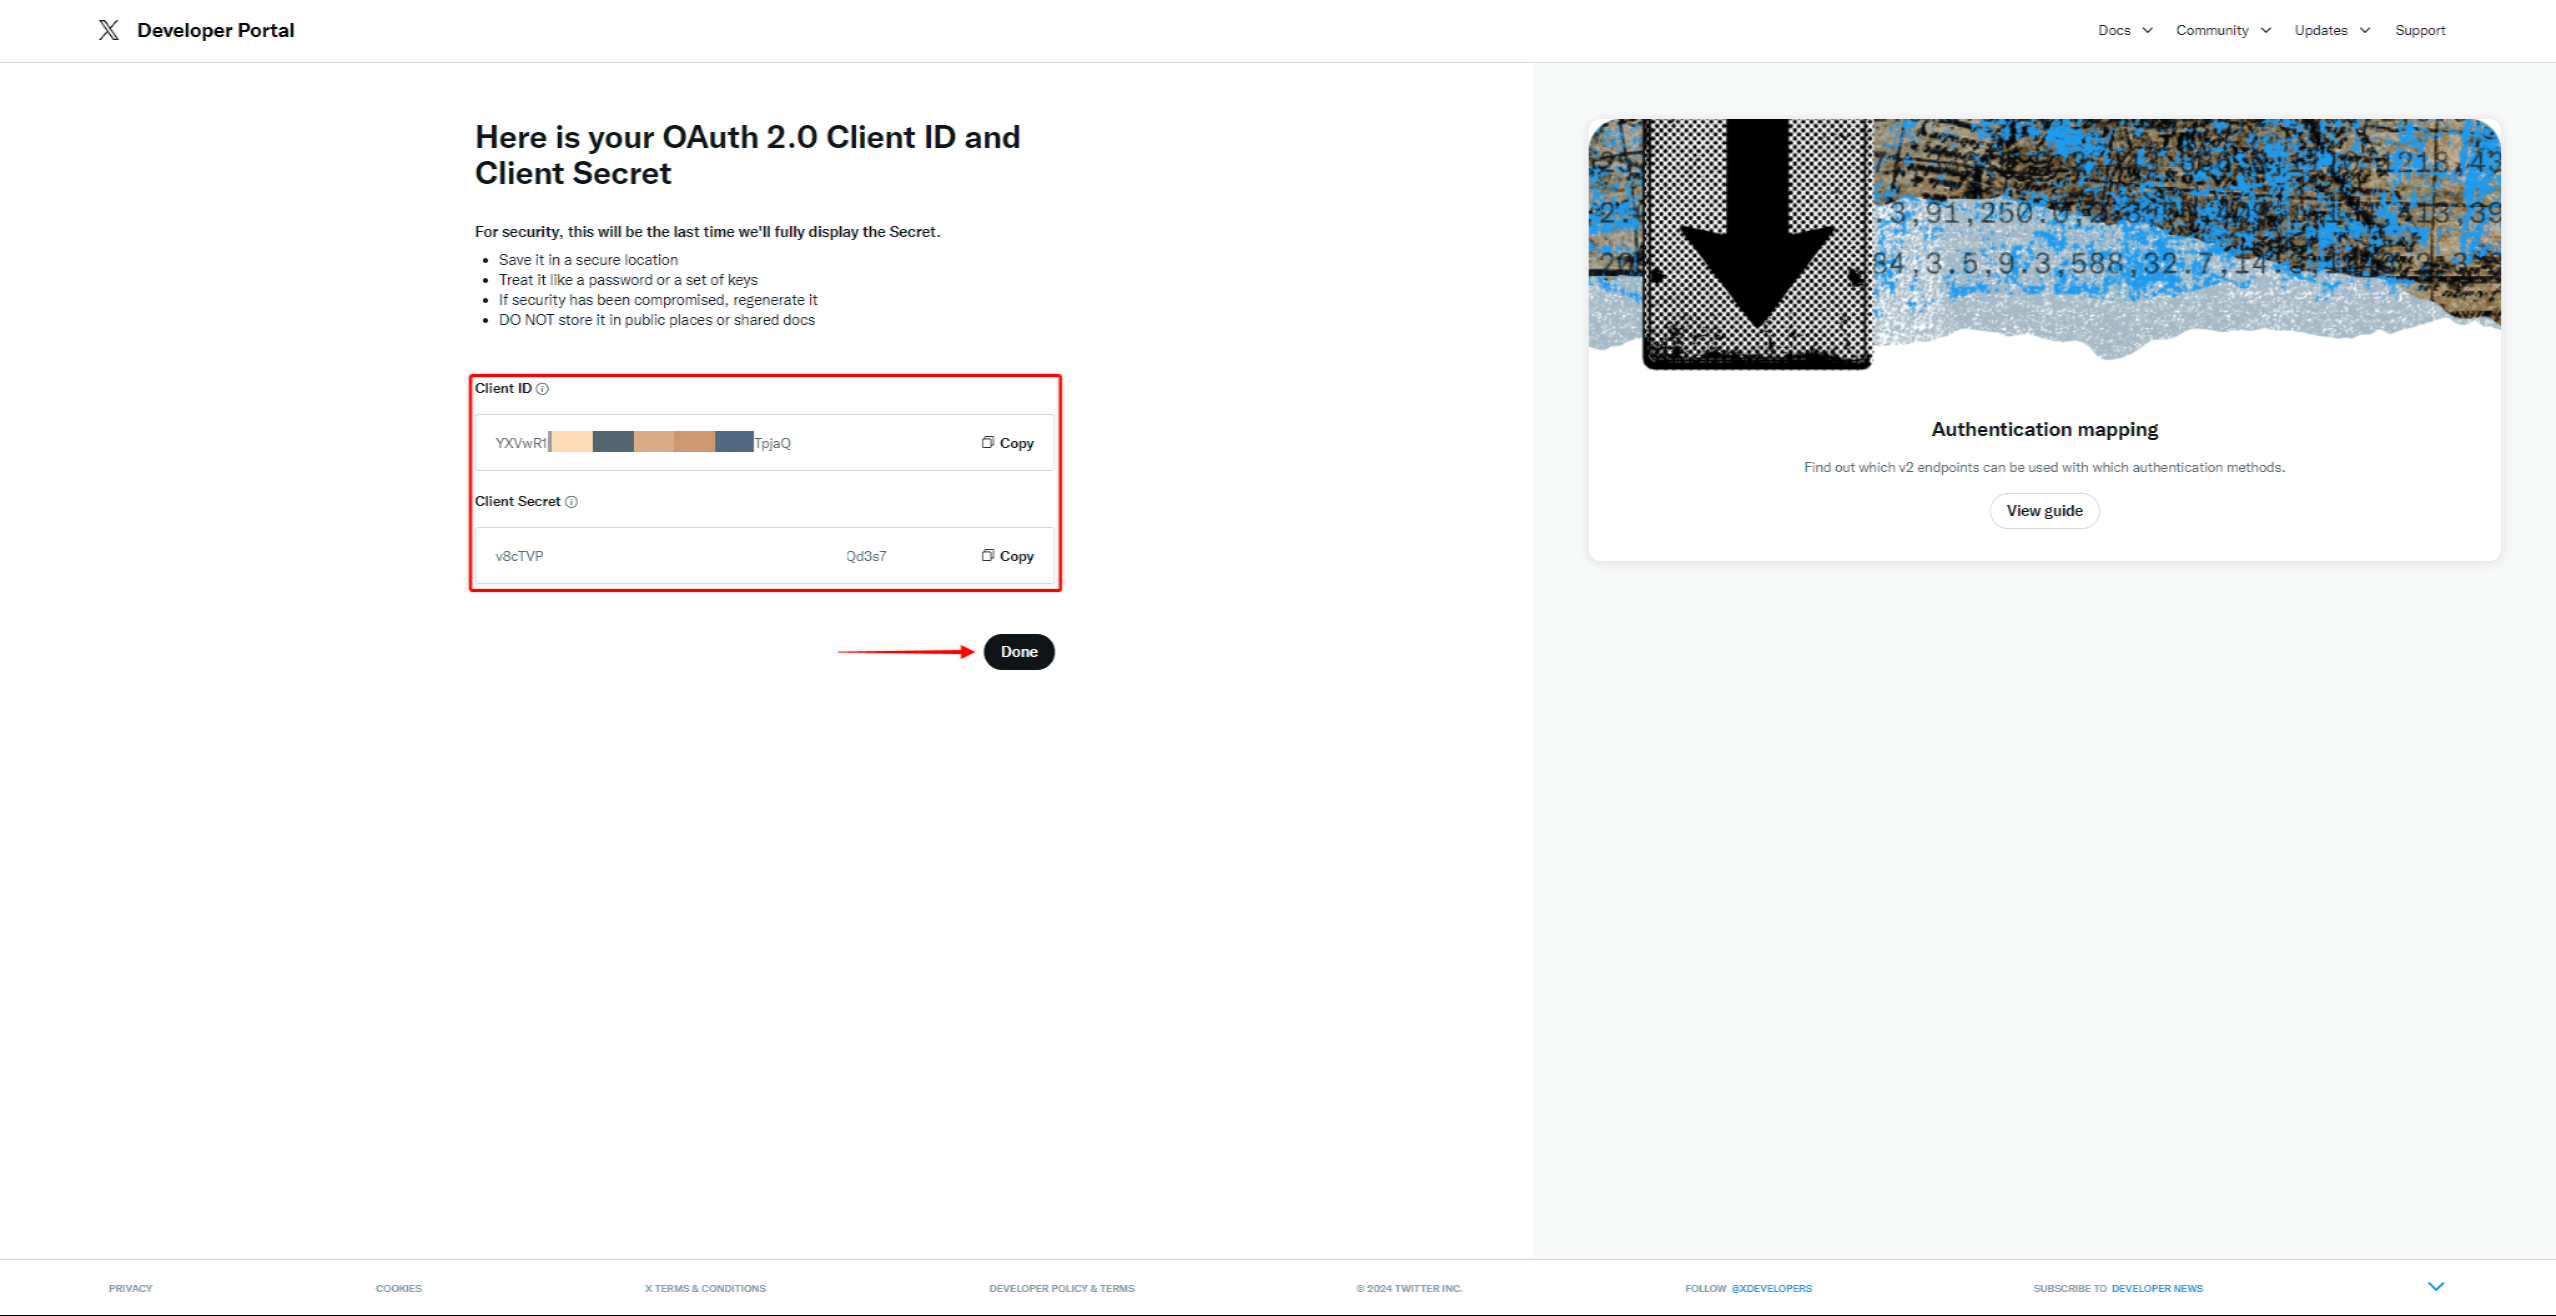
- Save Client ID and Client Secret in the safe place, and click Done.
Connecting the X Application To MemberPress
Before connecting your X App to MemberPress, you need to activate and set up the Social Login add-on on your website.
Once the Social Login add-on is set and your X App created, you’re ready to connect the app with MemberPress:
- Navigate to Dashboard > MemberPress > Social Login.
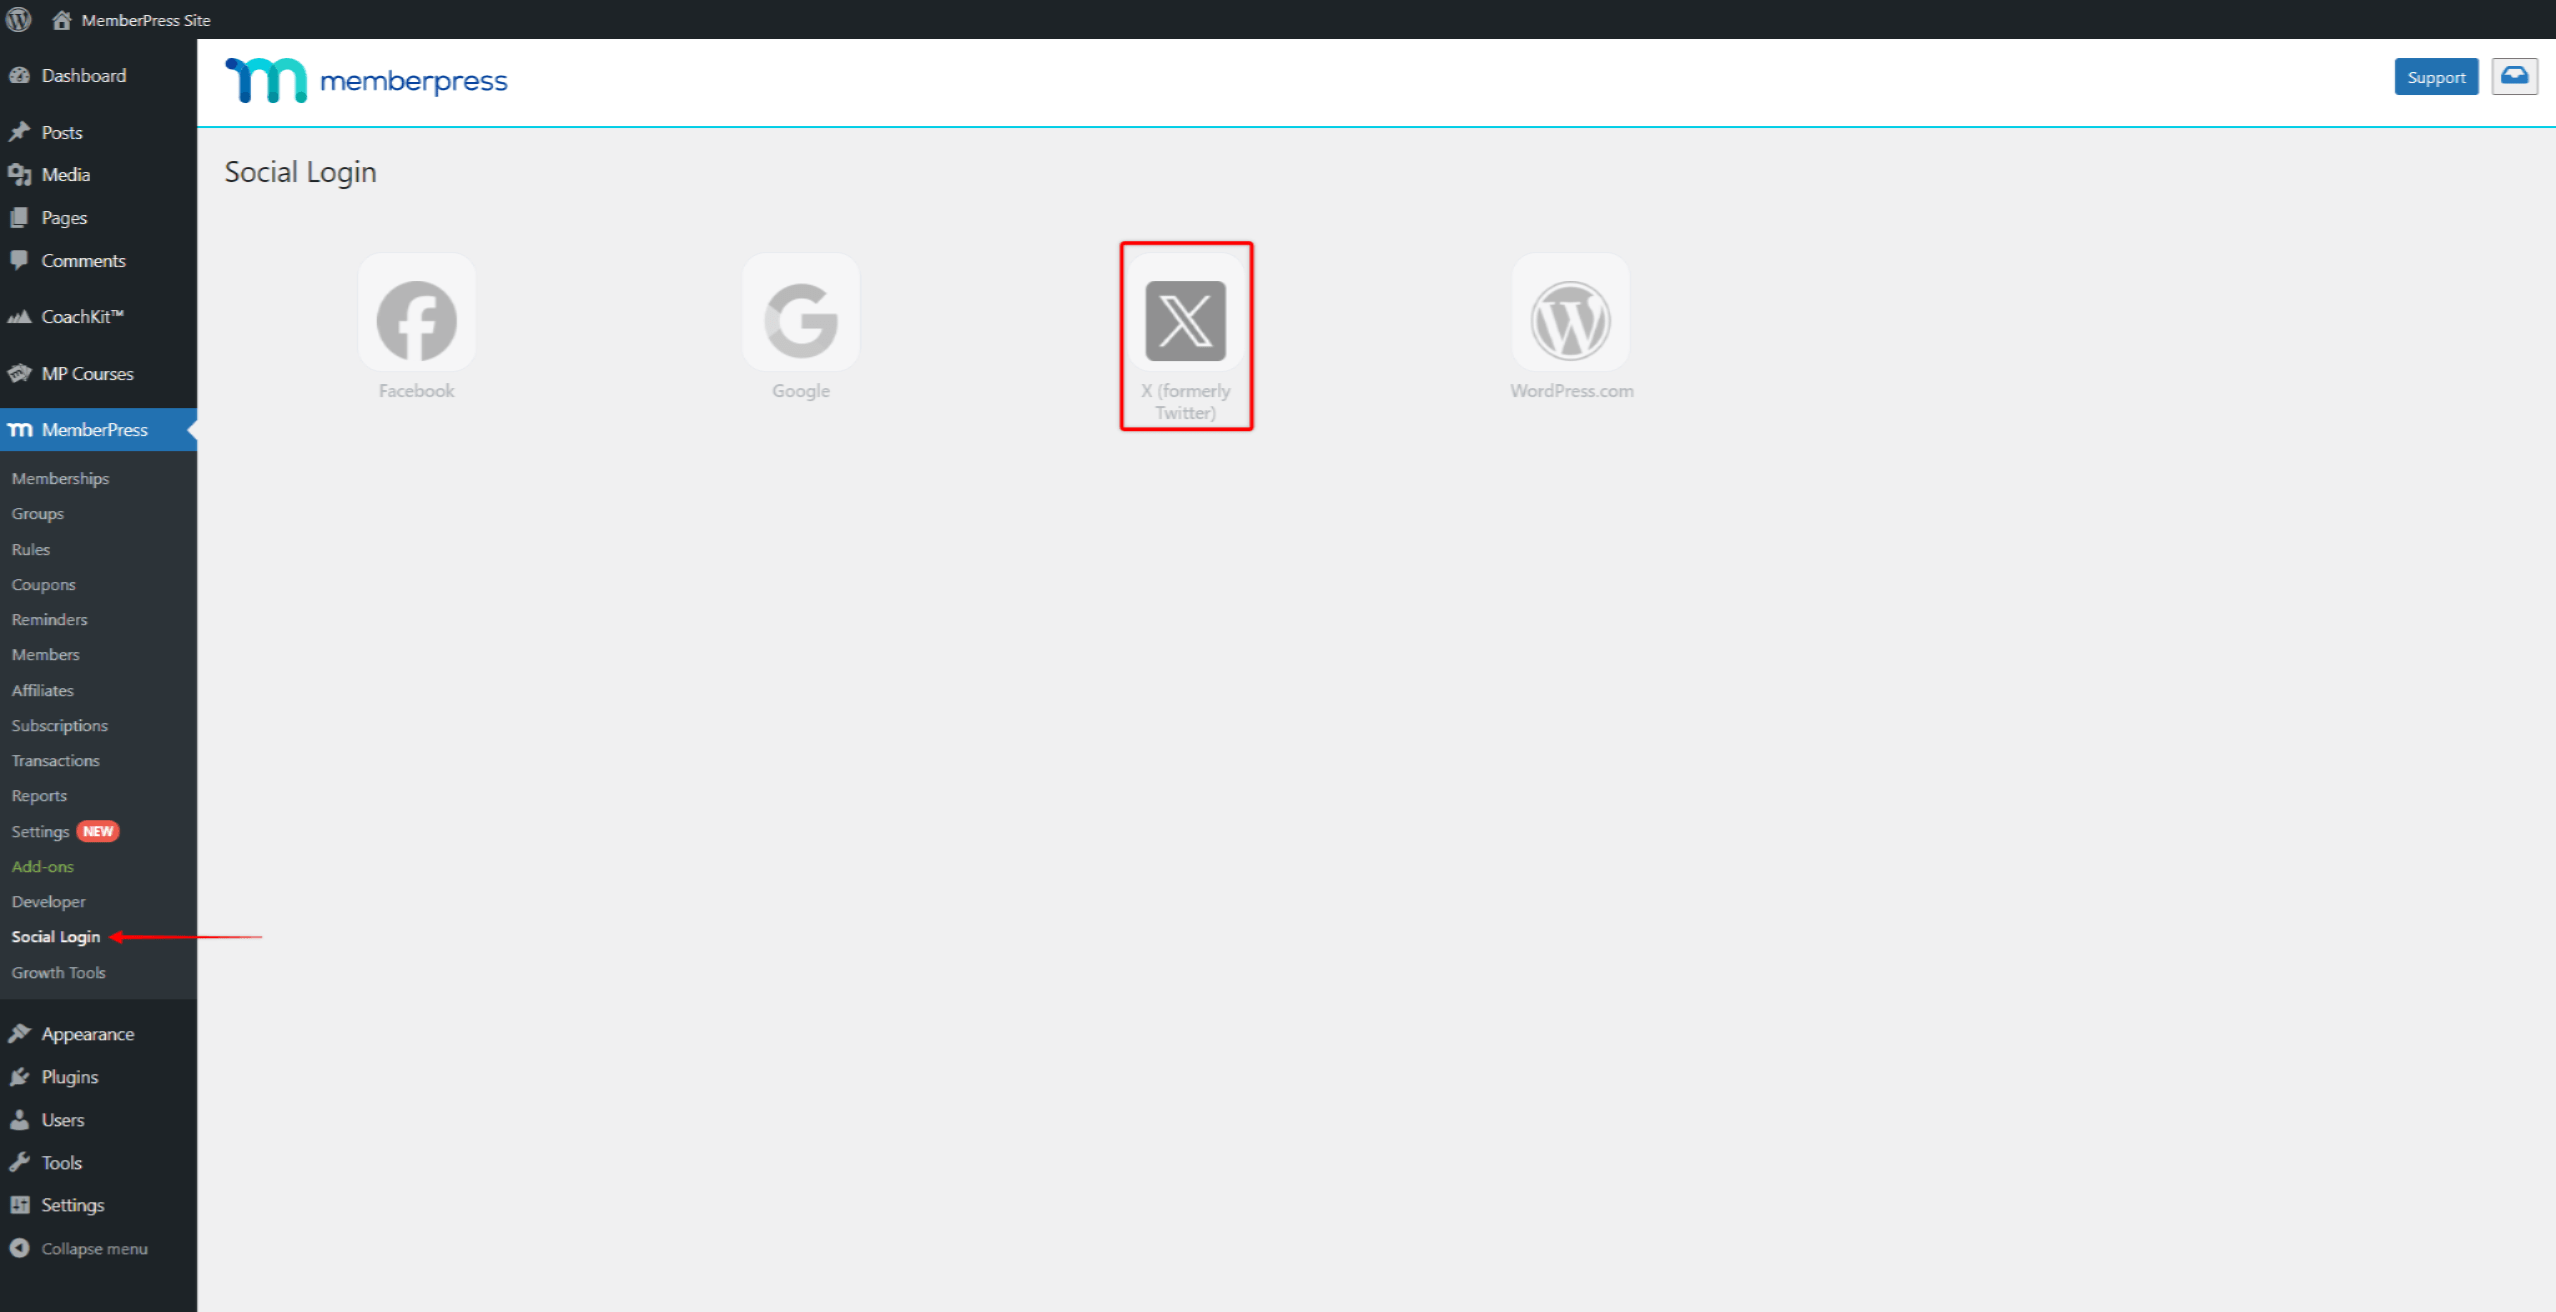
- Click on the X (formerly Twitter) option.
- Check the Enable the X (formerly Twitter) Provider option, and add the Client ID and Client Secret you previously saved.
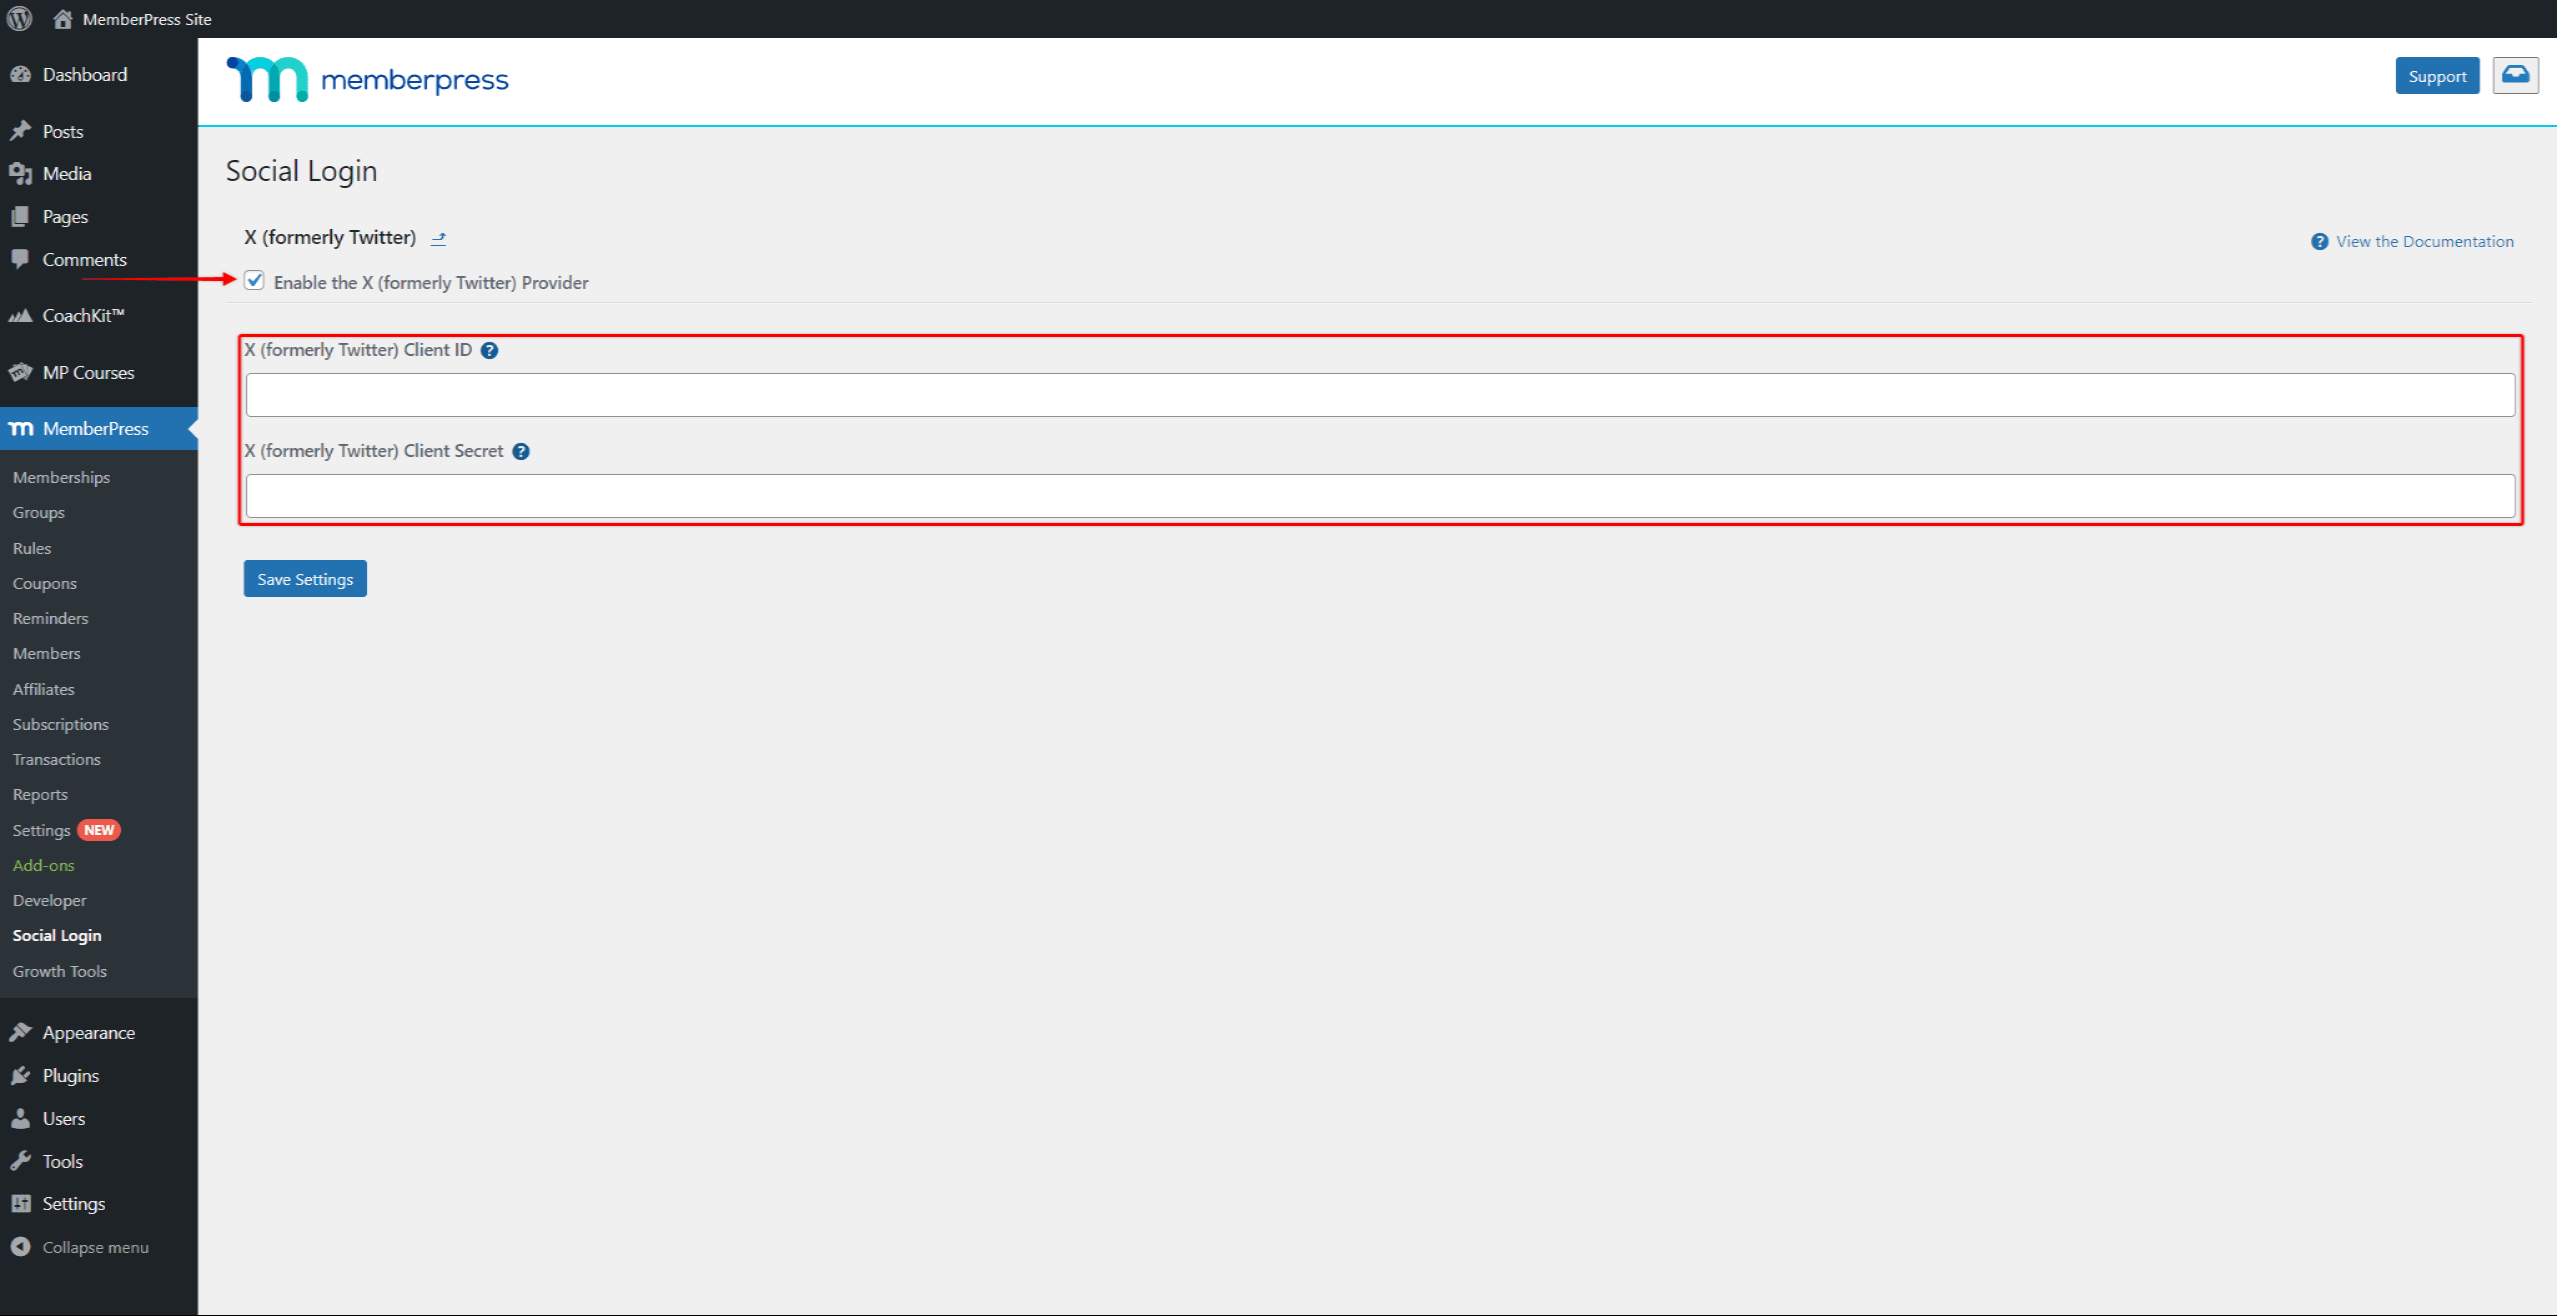
- Click on the Save Settings button to save credentials.
- Next, you will see a new banner to verify your X credentials. Click on the Verify Settings button. This will take you to the X login page.
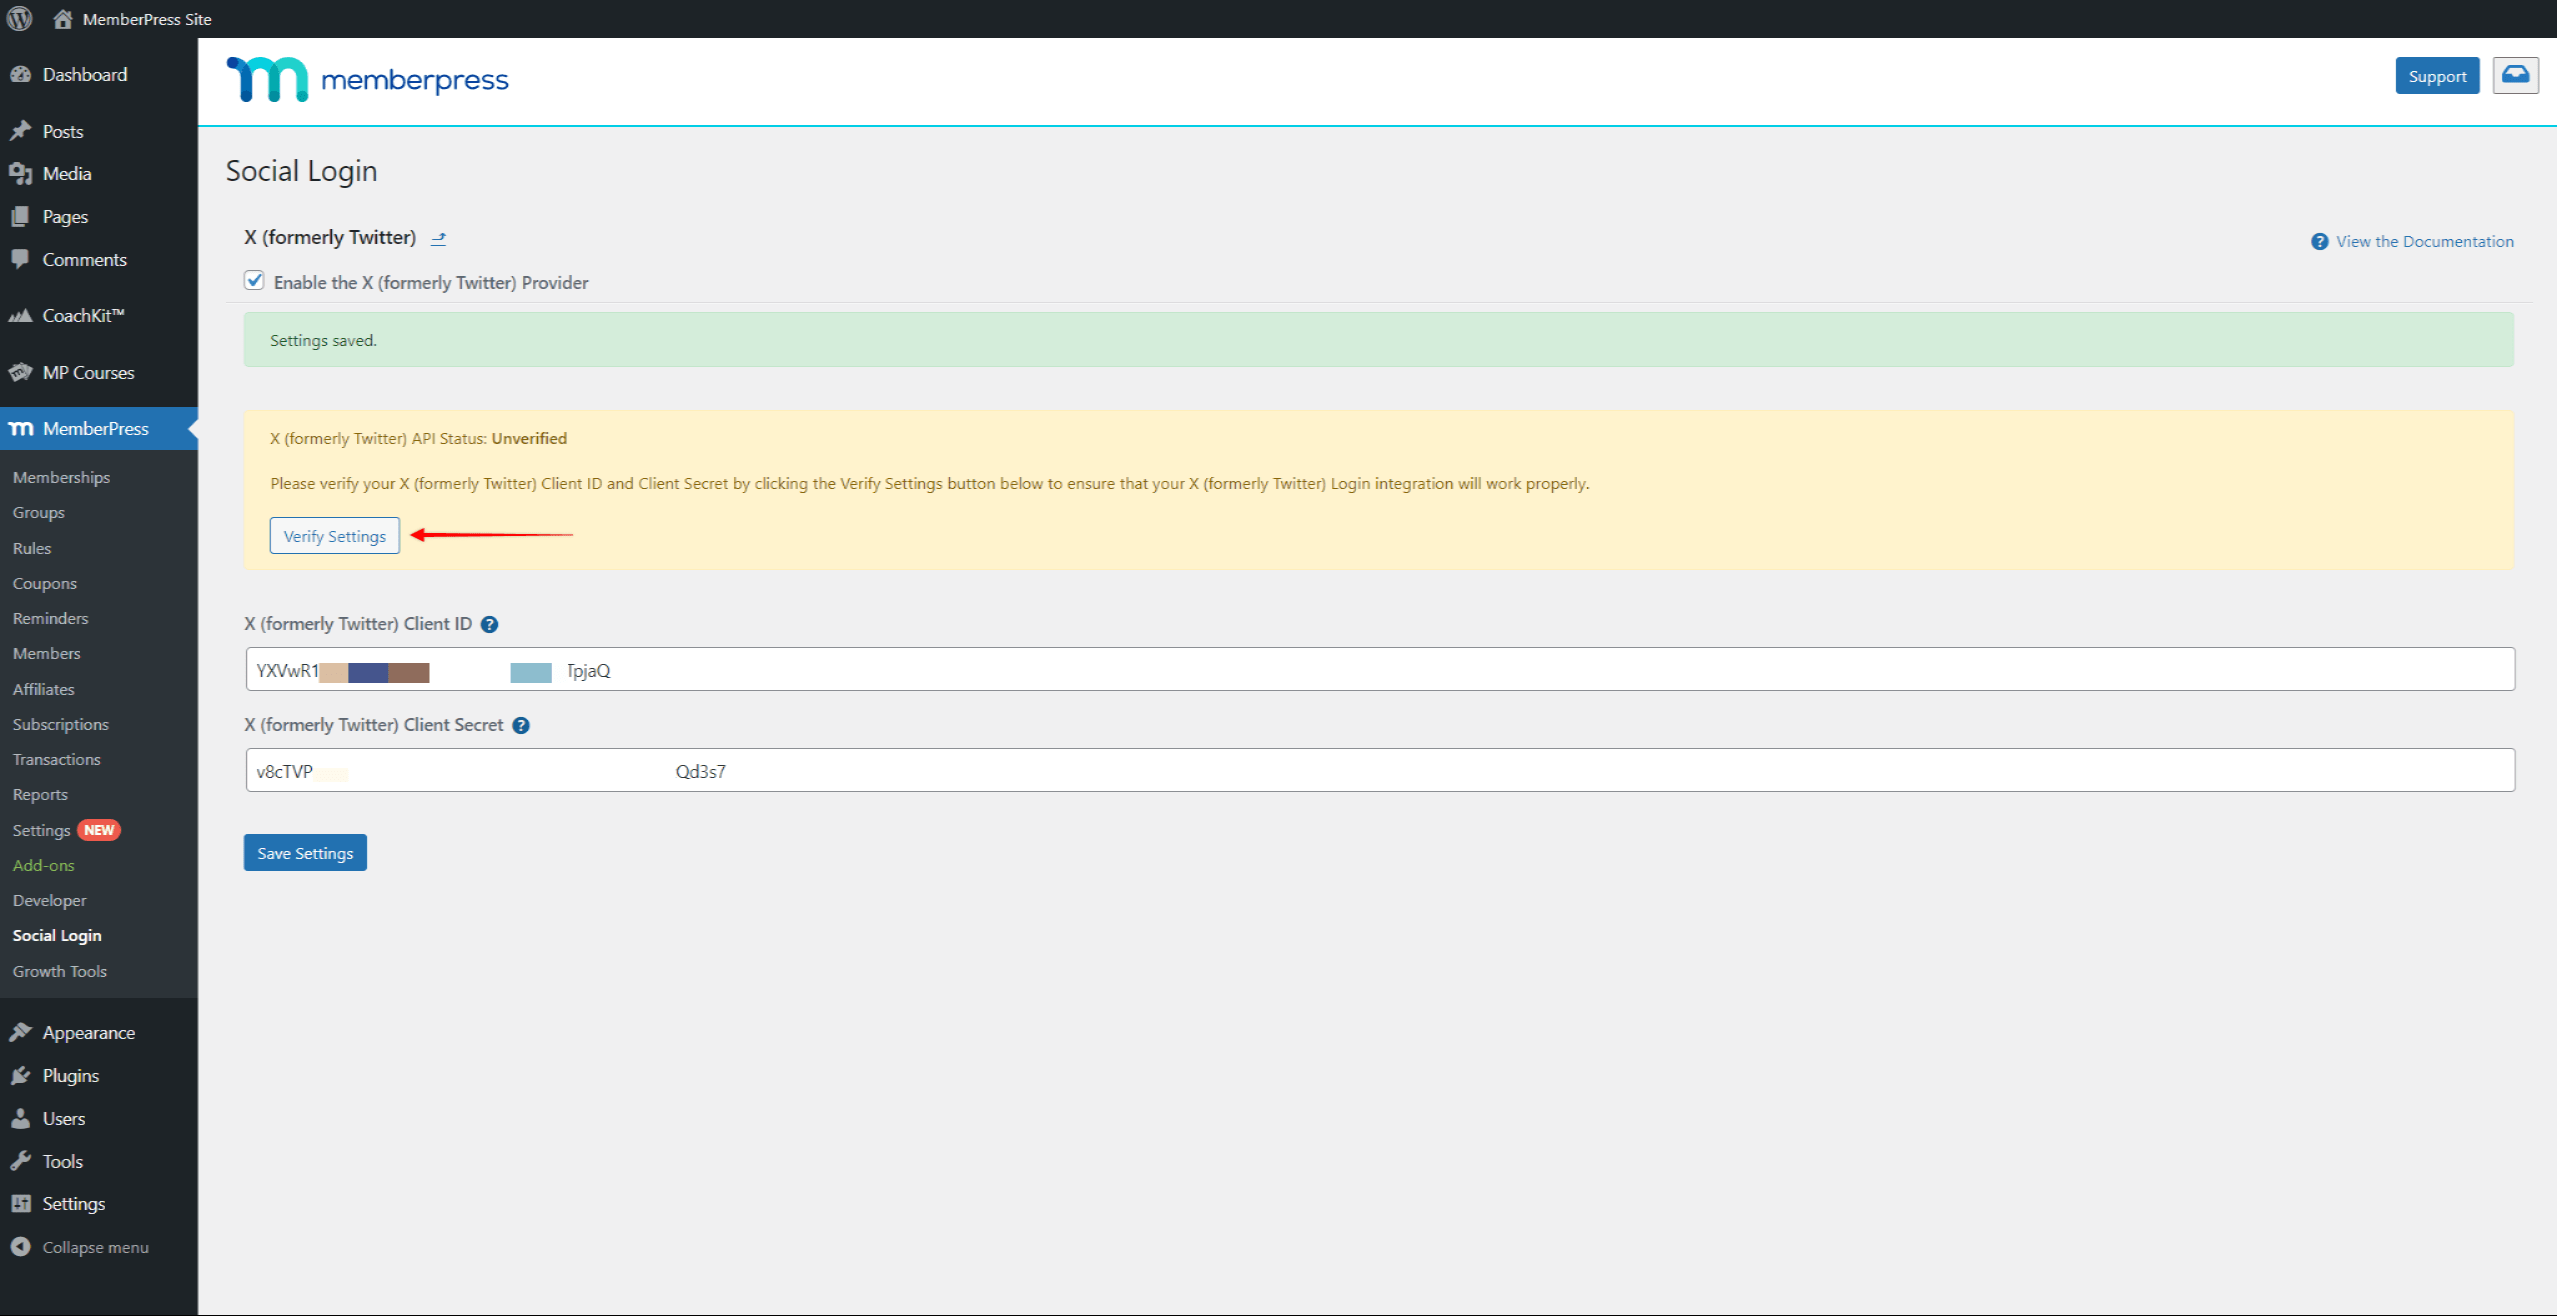
- Log in to your X account (which you used to create the X app).
- Next, click the Authorize app button on the authorization page.
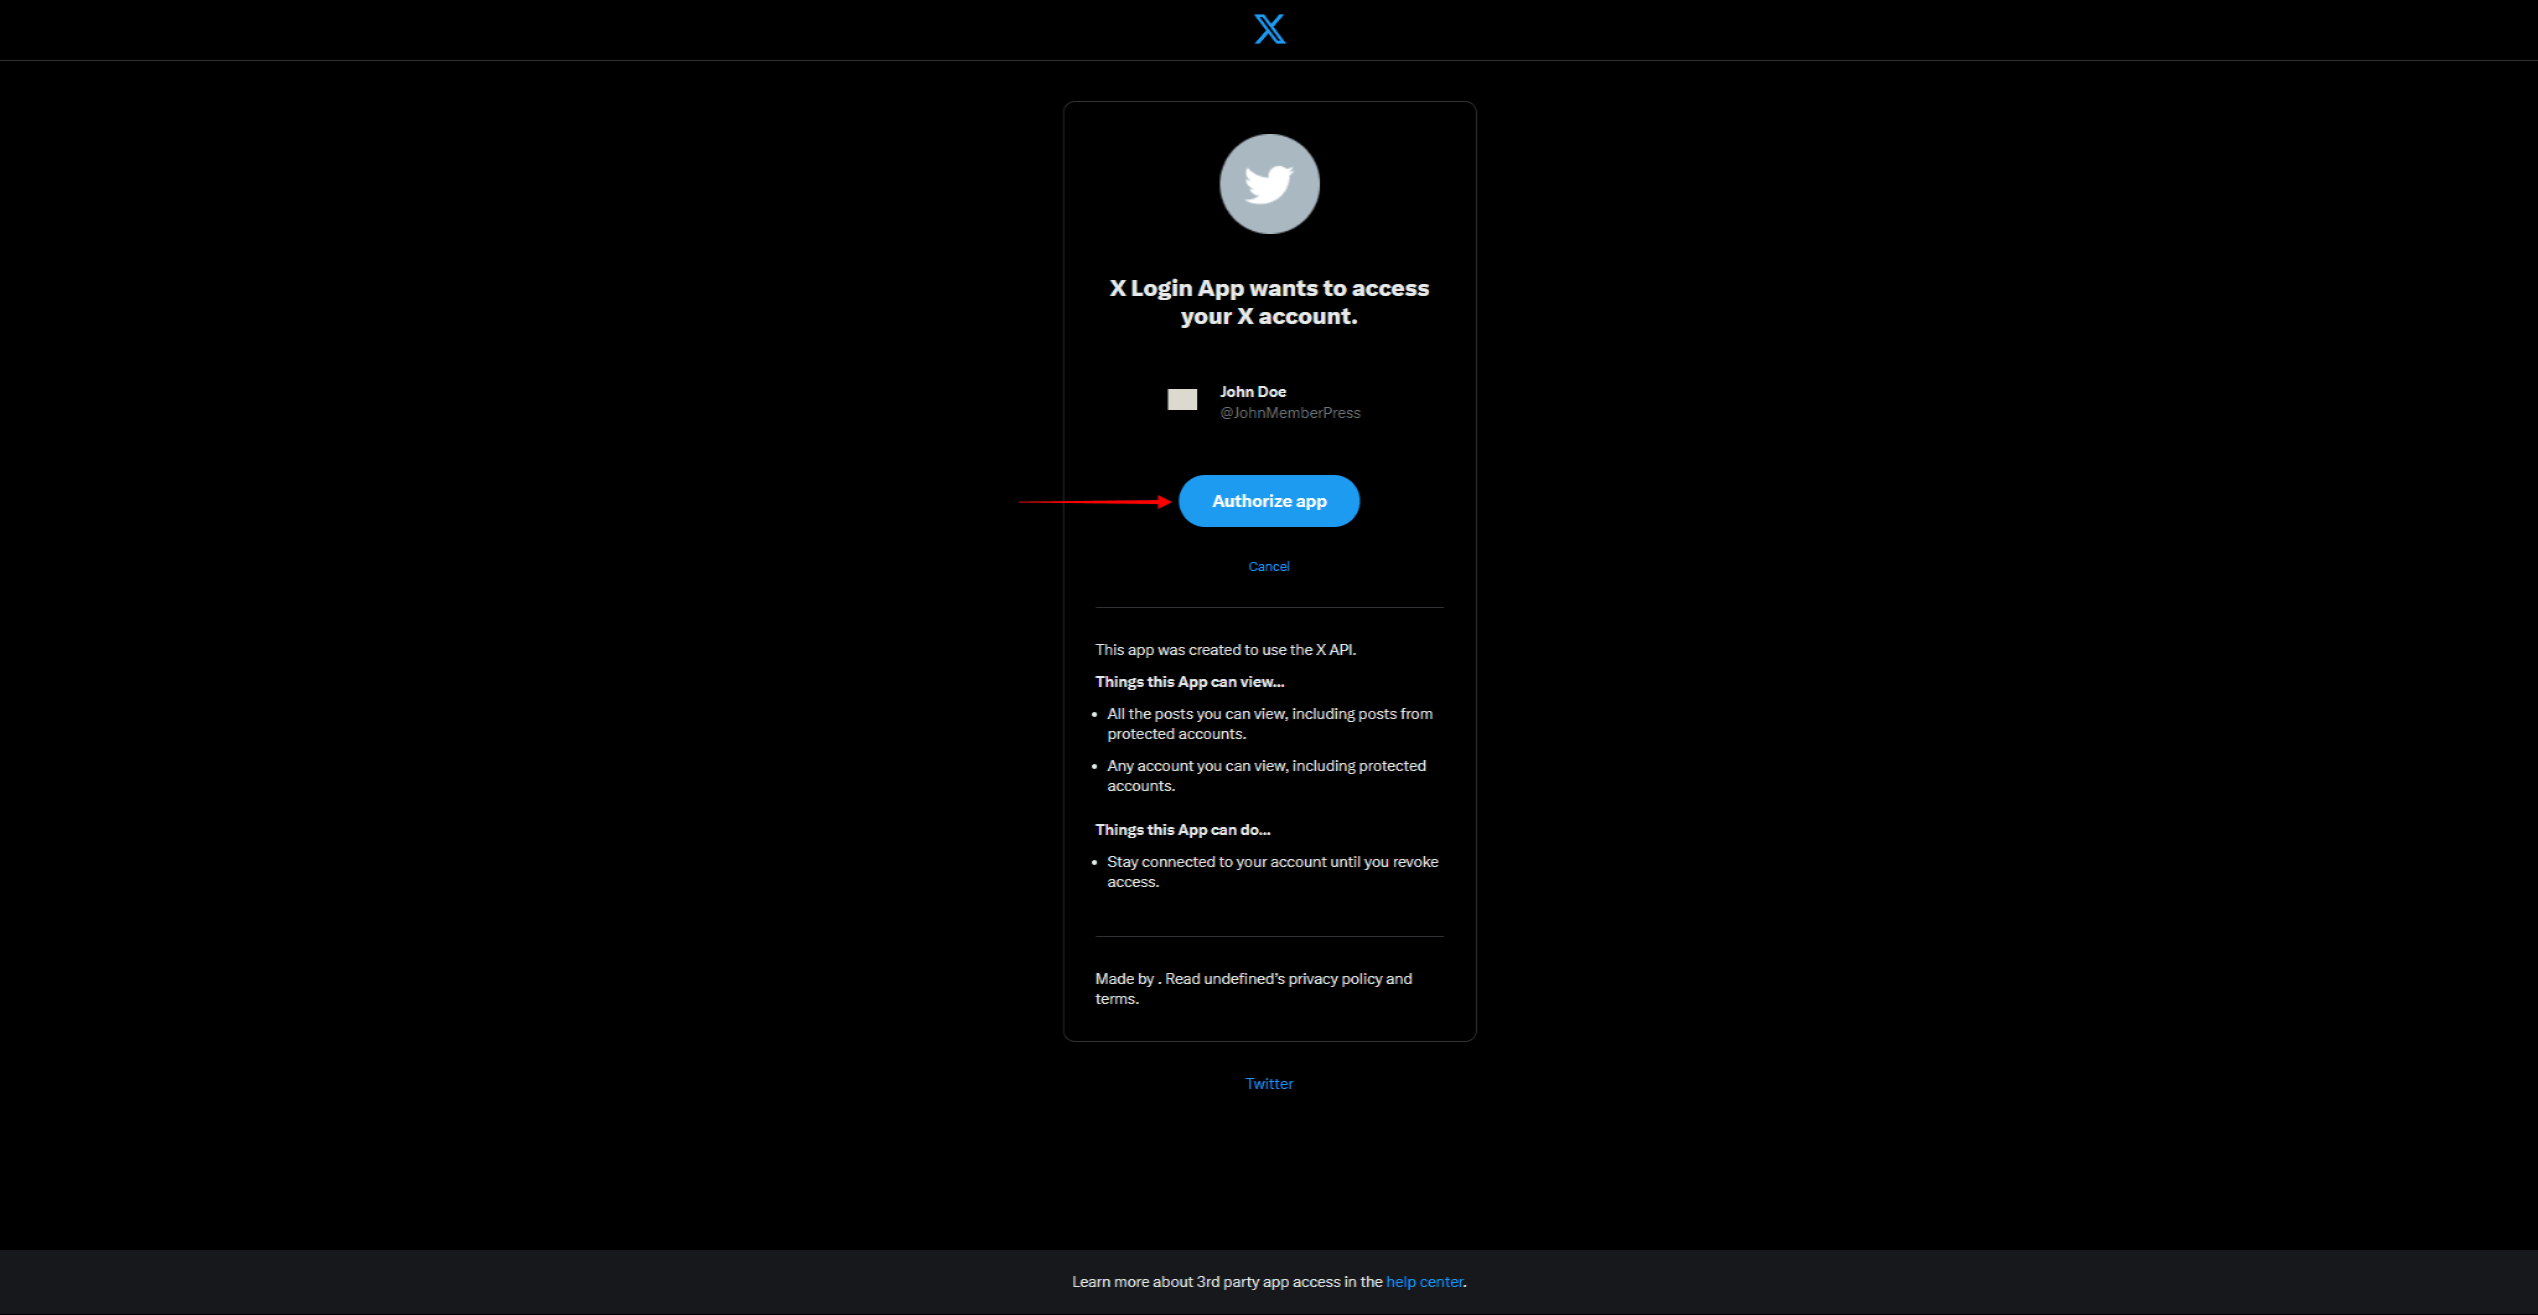
- After successful authorization, you will be returned to the provider settings page on your website backend. Now, you should see the banner with the “X (formerly Twitter) API Status: Verified” text.
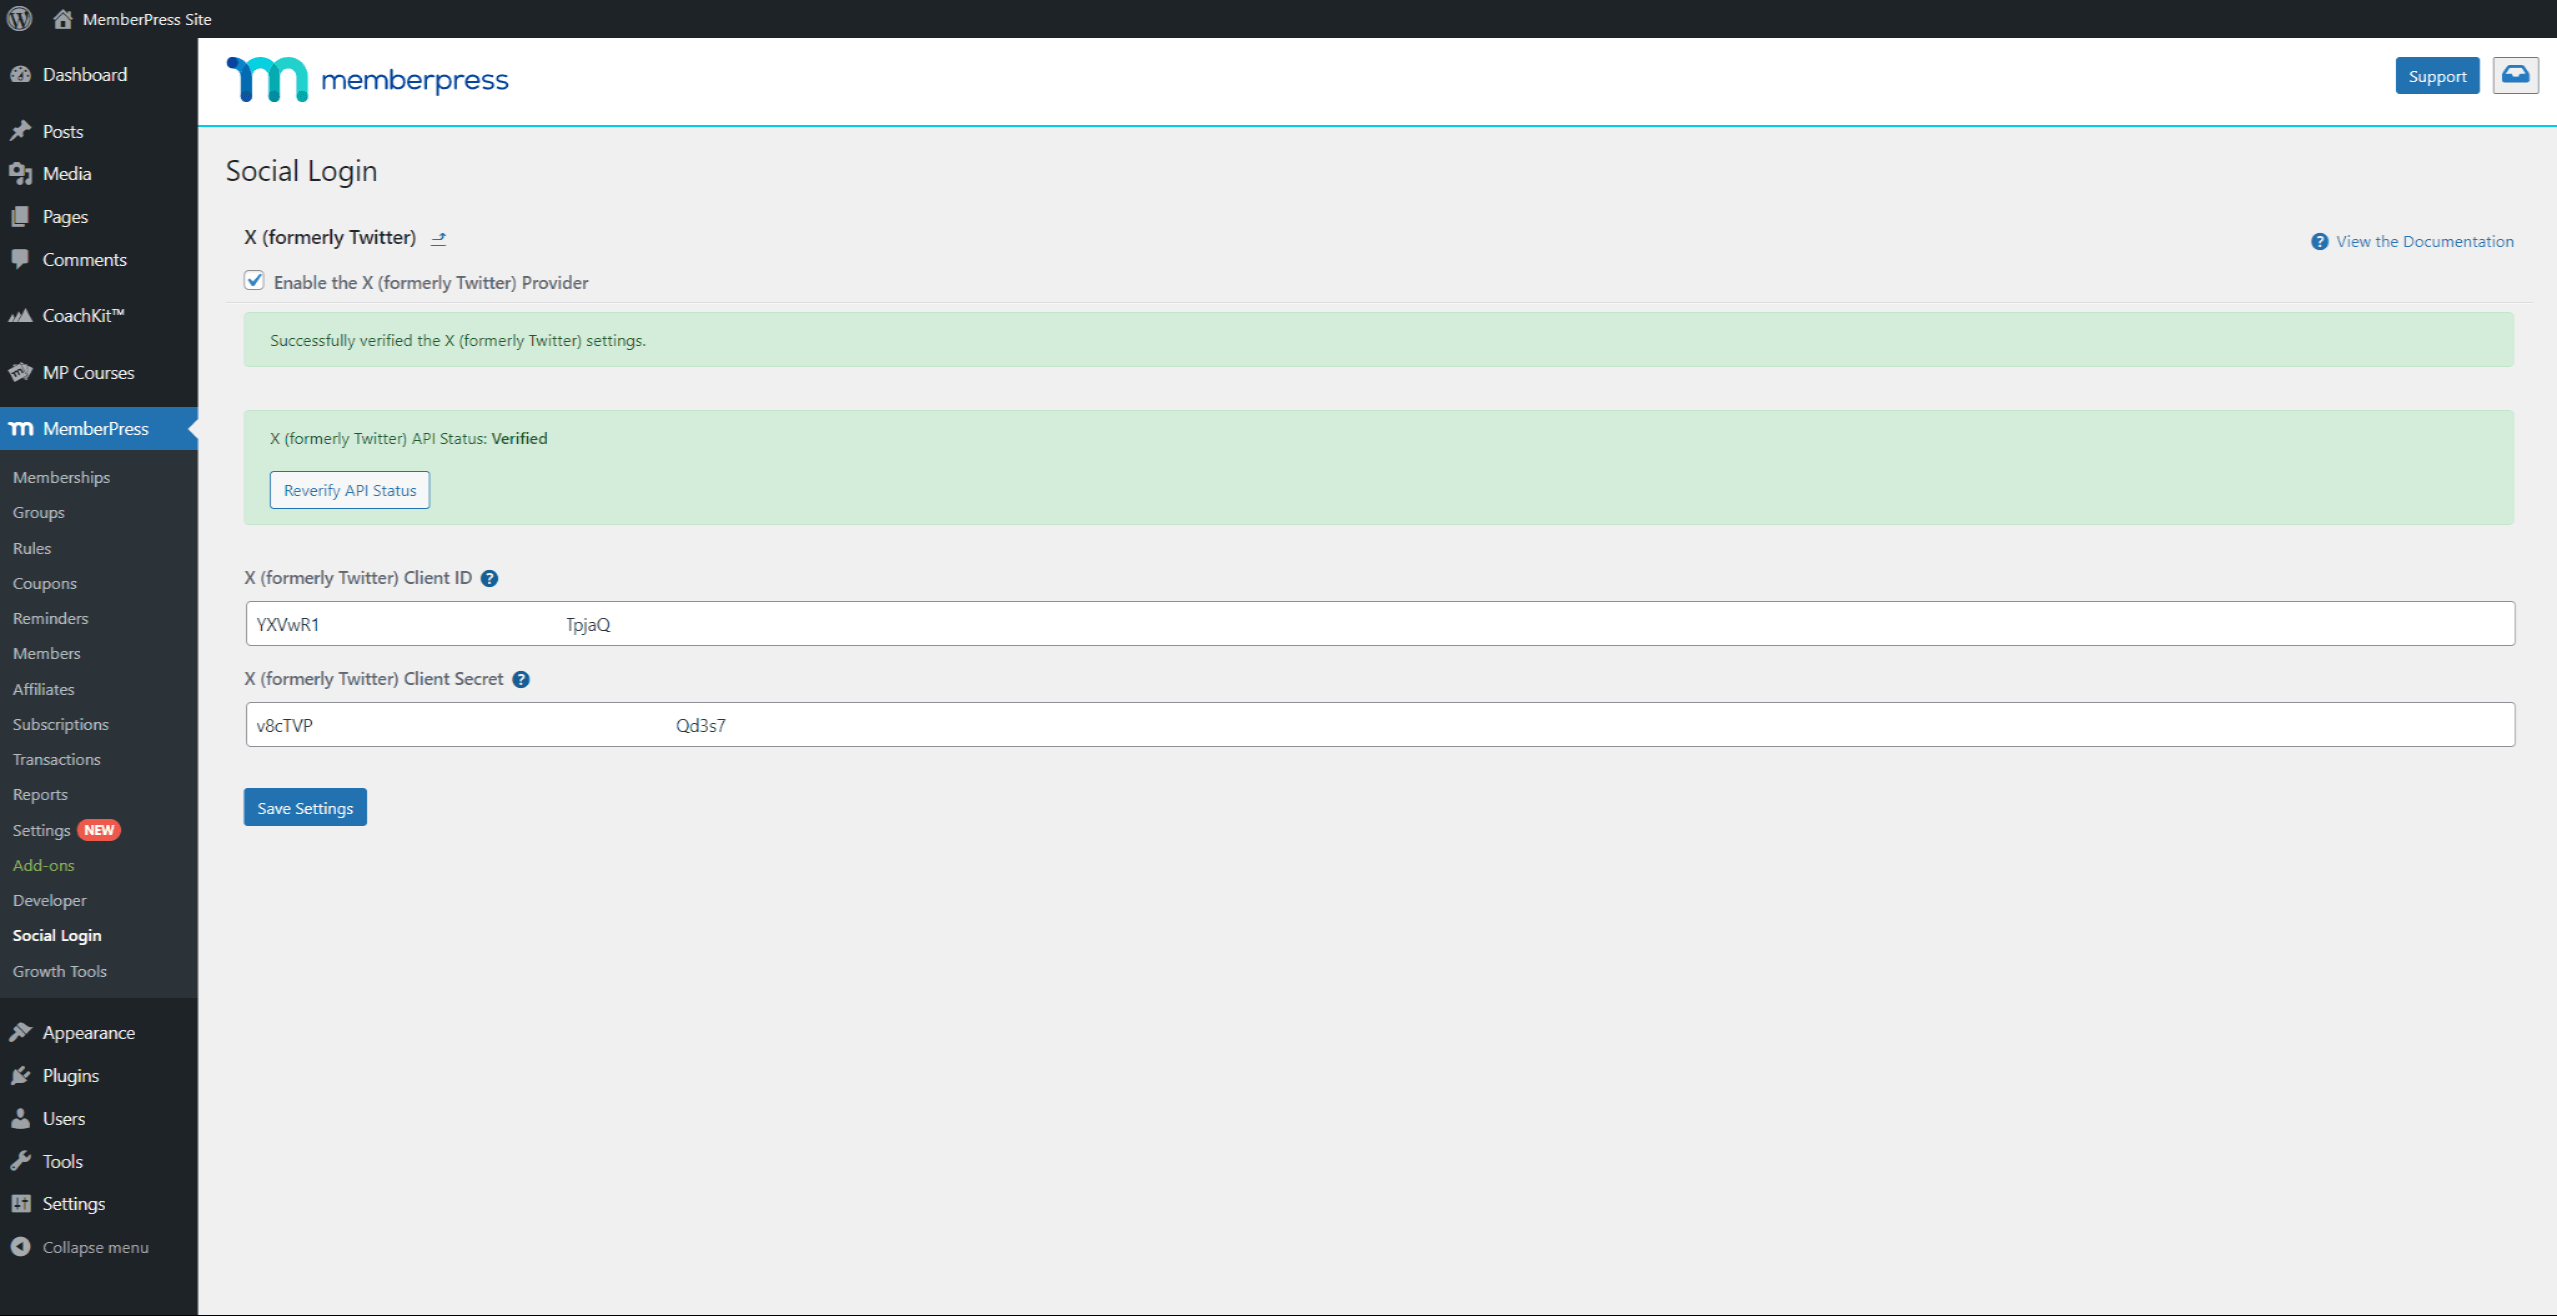
This means that your X App is properly connected and working.


