Are you the go-to person when friends or family need information on a complex topic?
Do you have a knack for analyzing complex data or information and turning it into something regular people can understand?
Did you know you could be making a living doing what you love – that you could be turning all the info in that brain of yours into passive income?
Yep, with WordPress and MemberPress, you can build an awesome online business around your research skills. And in this post, we’ll show you how!
If you’re ready to learn how to create an online research business all your own, keep reading…
The Tools You’ll Need
Making money from research is easier than you might think. In fact, you’ll only need 2 tools – one that’s free and one that’s super affordable:
- WordPress – a free content management system (CMS) you can use to create a high-quality website. You’ll just need to pay for a domain name and web hosting.
- MemberPress – the world’s #1 monetization and membership plugin for WordPress. It basically enables you to turn your WordPress website into a money-making machine.
Using these two simple tools, you’ll have everything you need to start an online research business!
How to Start an Online Research Business (In 5 Steps)
Now that you know what tools you’ll need, it’s time to create your business website. Let’s dive in!
Step 1: Get WordPress and Install MemberPress
First, you’ll need to find a hosting provider for your WordPress website. There are plenty of options available, and the right one will depend on your needs and budget.
Bluehost is a great option for anyone looking to make a profit from their website. It’ll help you run a fast and secure site for your research business at a low price:

Plus, it offers 1-click WordPress installs, so you can start building your site right away. With Bluehost, you’ll also get a free domain for the first year.
Once you have your WordPress site up and running, you can download and install MemberPress:
As mentioned, this premium plugin enables you to monetize your site so people can sign up and access your research reports and services.
Step 2: Add Your Research Content
Now that you have all the necessary tools, you can add your content to your website. This could be things like research reports, white papers, and even video compilations.
For example, this content could be available through memberships that include access to the latest market research.
MemberPress-based research site BiteSize Bio is a perfect example.

This online research library is available to members working in the fields of biochemistry, molecular and cell biology, genomics, gene editing, and microscopy.
Now back to the nuts and bolts of Step 2: Add Your Research Content...
Adding reports to WordPress is simple. You’ll start by creating a new page on your website:
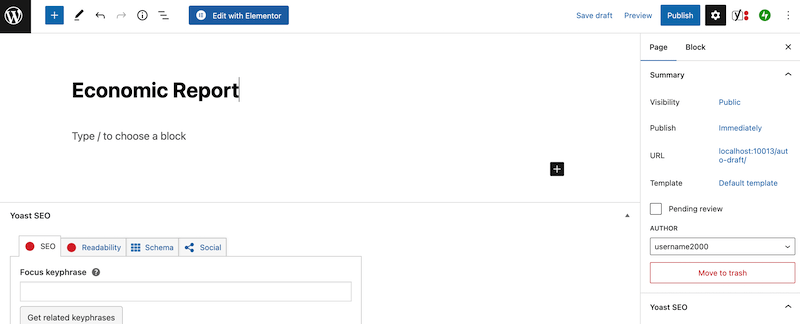
Then, you can add a title and report summary. To upload a document, first add a new block by clicking the plus sign (+).
Then search for “file”:

Then, just upload your complete research report to your page:

You’ll also want to add categories and tags for your page. These taxonomies will make it easier to restrict access to your content (and they’ll help boost your SEO).
When you’re done, hit Publish.
Step 3: Create a Membership
Now it’s time to create your first membership to allow users to access your research reports.
To start, go to your WordPress dashboard > MemberPress > Memberships > Add New:
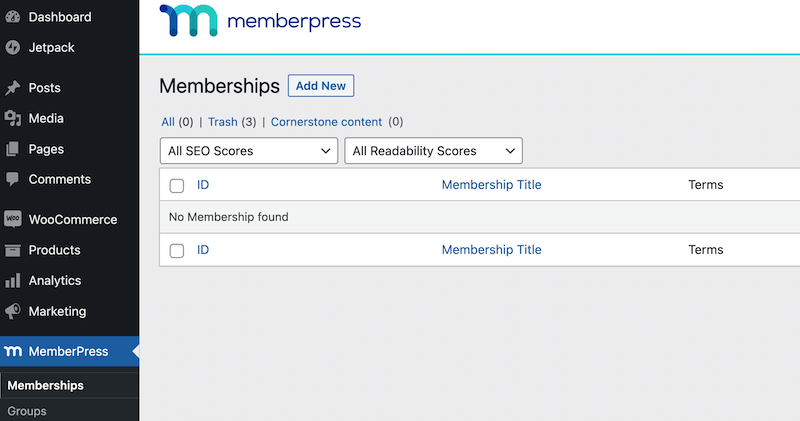
You’ll land on a page where you can create a new membership. Start by adding a title and description.
Then, you can set the pricing, billing type, and payment interval (how often users are charged):
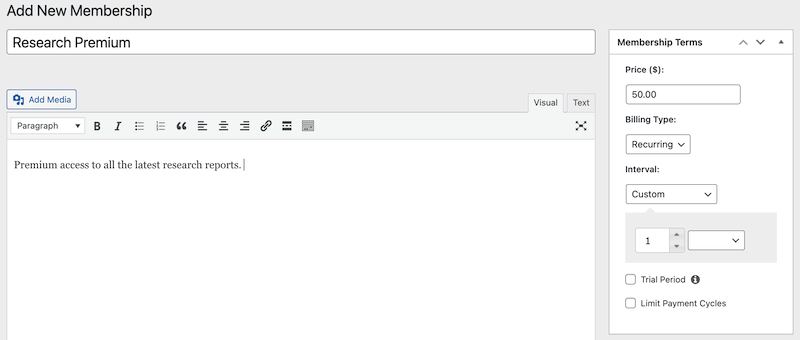
This video tutorial will give you step-by-step instructions on how to create a membership in MemberPress:
Remember, you can (and should!) create multiple memberships. They allow you to expand your potential audience by providing options that meet the needs and budgets of a variety of customers.
Also, MemberPress gives you fine-grained control over membership types to help you maximize your profits.
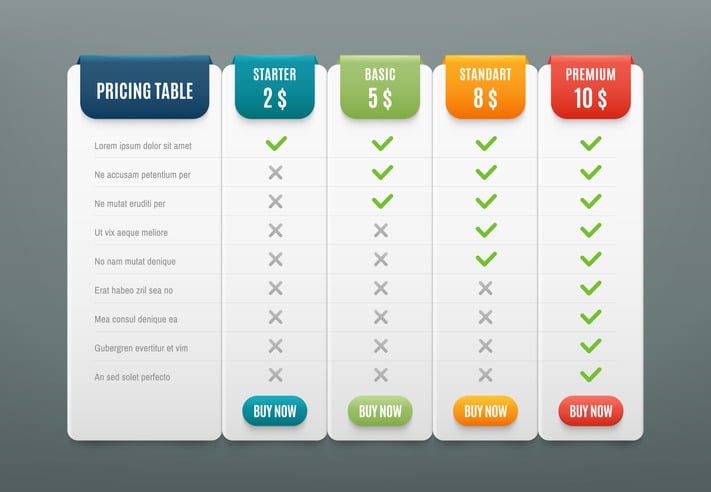
For example, you might create memberships that offer a scaled number of downloads at different prices. Something like this:
- Apprentice – Full library access + 1 download/mo. – $20/mo.
- Journeyman – Full library access + 5 downloads/mo. – $50/mo.
- Master – Full library access + unlimited downloads – $100/mo.
Step 4: Set Up Rules to Control Access
To protect your research materials from non-members, you’ll need to set up rules to restrict access.
Go to your WordPress dashboard and navigate to MemberPress > Rules > Add New:
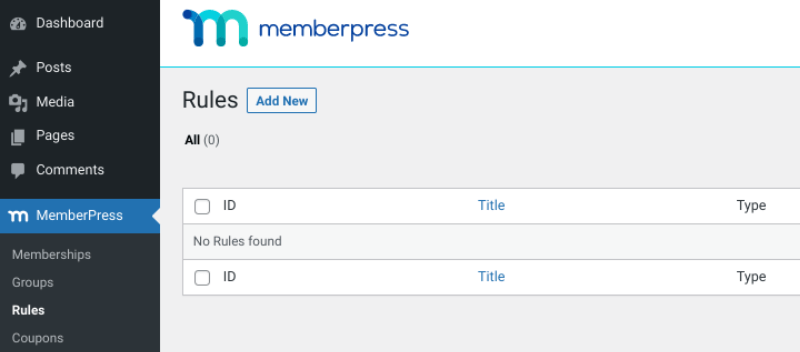
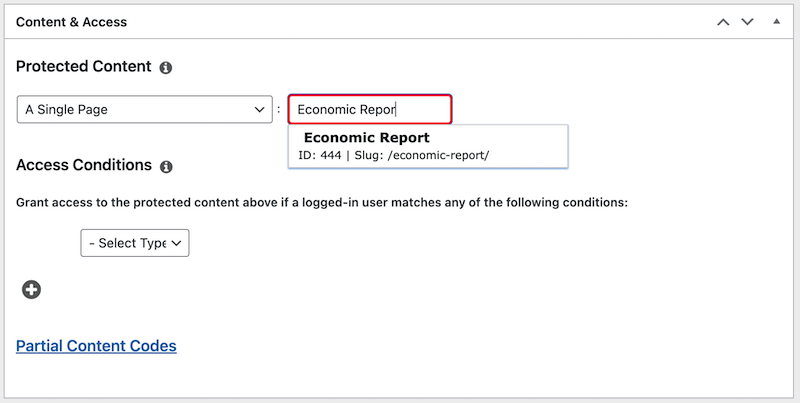
This will take you to a page where you can create new rules for your content. Under the Content & Access section, you’ll find a dropdown menu where you can choose which content to protect.
For example, to protect a specific report, you’d select A Single Page, then enter the name of the page that contains that report:
As an alternative, you might want to protect content with certain tags and categories. For example, you might restrict access to posts with the tag “2022 reports”.
Under Access Conditions, you can select the membership that grants access to this protected content:

Click on Save Rule when you’re done. For further instructions on protecting content, you can watch this video tutorial:
The tutorial will show you how to set up more complex rules and restrict access for different memberships.
Step 5: Set Up Your Login and Registration Pages
Finally, you’ll need to set up your login and registration pages. This way, users will be able to sign up and access your content.
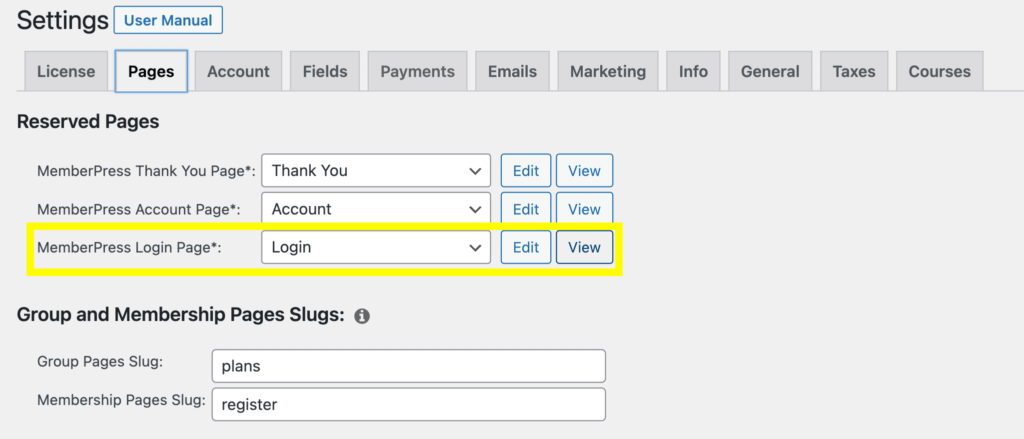
In your WordPress dashboard, go to MemberPress > Settings > Pages. Here, locate MemberPress Login Page and select Edit to configure the page:
This video will show you how to create a unique login page for your site:
Next, you’ll want to create a registration page for users. To do so, go to MemberPress > Settings > Fields:
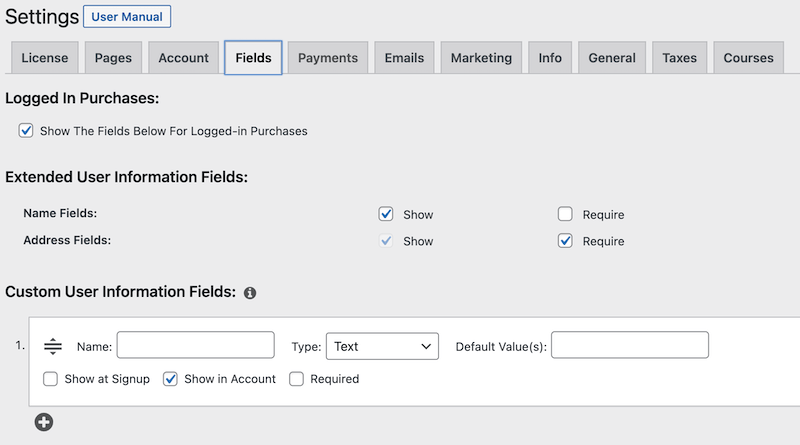
Under Custom User Information Fields, you can create new fields for your registration form:

This video gives you more guidance on how to customize your registration page:
Remember to save your changes when you’re ready. And that’s it! You can now start selling your research services!
So Many Ways to Sell Your Stuff
Service Packages
Webinars

Online Courses

With course materials in the bag, she’s now got an additional passive income stream her business can rely on if and when contracts are down.
More MemberPress-Powered Examples
Here are a few more real-life examples of businesses using MemberPress to sell services and digital products online.
Launchblot
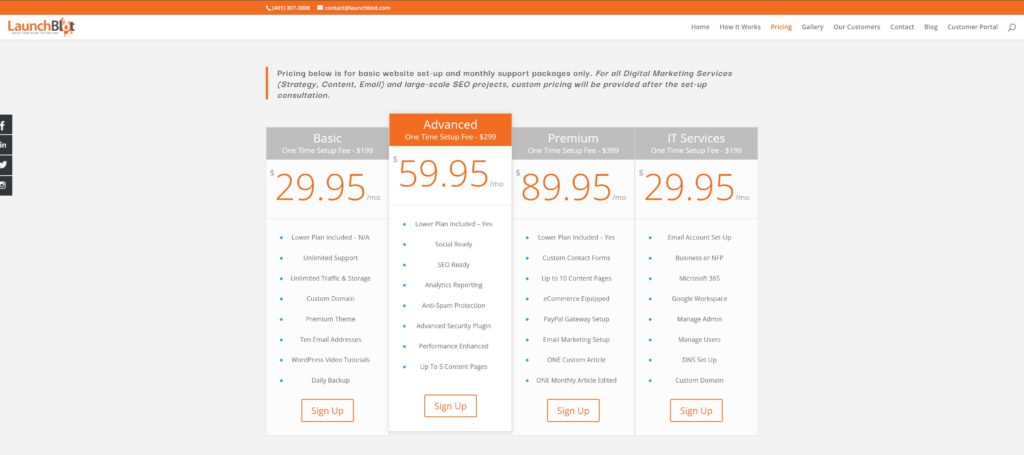
Launchblot is an IT and copywriting business. They’re a perfect example of how you can use MemberPress to power up service packages:
Toolshero
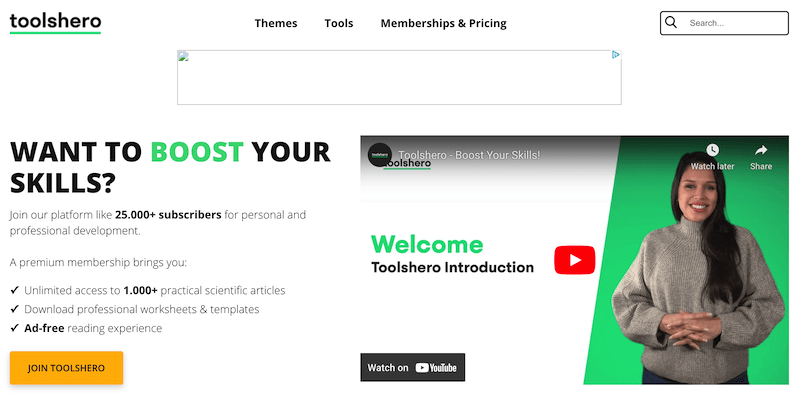
Through MemberPress, Toolshero offers personal and professional development services. They also have memberships granting access to their database of scientific articles, worksheets, and templates.
UPSC Mentor

UPSC Mentor uses MemberPress to offer exam prep services alongside access to its large library of study materials for the civil services exam.
Conclusion
An online research business can be an awesome way to monetize your mind. And WordPress + MemberPress makes it fast and easy to set up and get rolling.
To recap, here’s how you can start your own online research business:
- Set up a WordPress site with a reliable host like Bluehost.
- Install MemberPress.
- Add research content to your site.
- Create your memberships.
- Set up rules so only members can access your material.
- Configure your login and registration pages.
There you’ve got the basics. You can also consider adding service packages, webinars, and courses to the mix to expand your profit-making potential. The sky’s the limit!

Get MemberPress Today!
Start getting paid for your research skills
Do you have questions or thoughts about how to start a research business online? Let us know in the comments!


Add a Comment