We’re super proud of MemberPress Courses and all that it’s done to help our users bring in more revenue and ride the online course wave. So this week, we’re giving our favorite add-on a special highlight!
MemberPress Courses is an online course builder that makes it easy for WordPress users to create and sell courses – and keep them securely protected behind a paywall.
It competes with big names in the learning management system (LMS) space but comes with the added benefit of being powered by the world’s #1 membership and monetization plugin.
That means you get a lot more flexibility in how you manage, market, and protect your premium content.
In this article, we’ll show you just how easy it is to build an online course with MemberPress Courses’ intuitive drag-and-drop customizer.
In the process, we’ll walk you through some of the main features that make it a favorite among WordPress users looking to monetize their expertise, all without touching a line of code!
Why MemberPress Courses Is a Favorite Among WordPress Course Creators
MemberPress Courses is the LMS solution built by – yep, you guessed it – the same team behind the MemberPress plugin.
At MemberPress, we’ve developed a solid reputation over the past 12+ years helping thousands of creators launch and grow successful subscription businesses.
Collectively, those creators have brought in over $2 billion in revenue using MemberPress. So when we say we know a thing or two about monetizing content, we mean it.
With MemberPress Courses, you get everything you’d expect from a solid online course builder:
- Easily map out your curriculum with a visual drag-and-drop builder
- Scale your content with unlimited lessons and course sections
- Reinforce learning with a variety of quiz types
- Build credibility with personalized, on-brand completion certificates
- Support deeper learning and accountability with assignments and instructor feedback (Assignments add-on)
- Stay on top of student performance with the Gradebook add-on for tracking progress
And since it’s powered by MemberPress, you also get access to the features that make it a favorite for membership and subscription sites:
- Increase recurring revenue with flexible subscription options and multiple payment gateways
- Run high-converting promotions with dynamic pricing and custom coupons
- Lock down your premium content with fine-tuned access rules
- Build a loyal audience with integrations that support community features and member interaction
- Launch fast and look pro with ReadyLaunch™ page templates that make your course pages look great right out of the gate
If you’re building online courses on WordPress and want to actually get paid for them, this is the kind of setup that makes it easy to do both. And best of all, there’s no coding required!
A Look Inside the MemberPress Online Course Builder 👀
Let’s take a behind-the-scenes look at what those MemberPress Courses features (mentioned in the list above) actually look like in the backend.
You’ll get an idea about just how easy it is to build and modify online courses exactly the way you want.
1. Setting Up
First, an explanation about “add-ons”.
At MemberPress we’re constantly adding on new features and capabilities to our plugin. But we’re aware that not all our users want every single one of our features.
We want to provide our users with a flexible solution without anyone getting sidetracked or confused by a bunch of features they’ll never use.
So our solution is to give you the option to build your ideal set up – add-ons!
If you want to make the most of all our MemberPress Courses features, these are the add-ons you’ll need to activate in MemberPress > Add-ons once you’ve purchased and installed MemberPress:
- Courses (available on all MemberPress plans)
- Course Quizzes (all plans)
- Course Assignments (Pro plan)
- Course Gradebook (Pro plan)
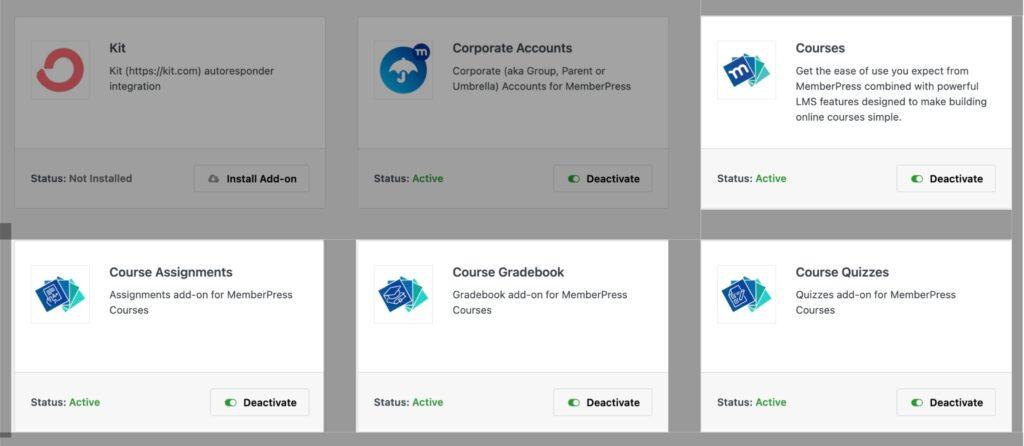
With the Courses add-ons activated, you’ll see a new MP Courses option in the WordPress dashboard.
2. Add Your New Course
Let’s look at how easy it is to add a new course to your WordPress Site with MemberPress Courses.
Go to MP Courses > Courses and click Add New Course.
Then add your course title, description, and, optionally, a feature image for your course.
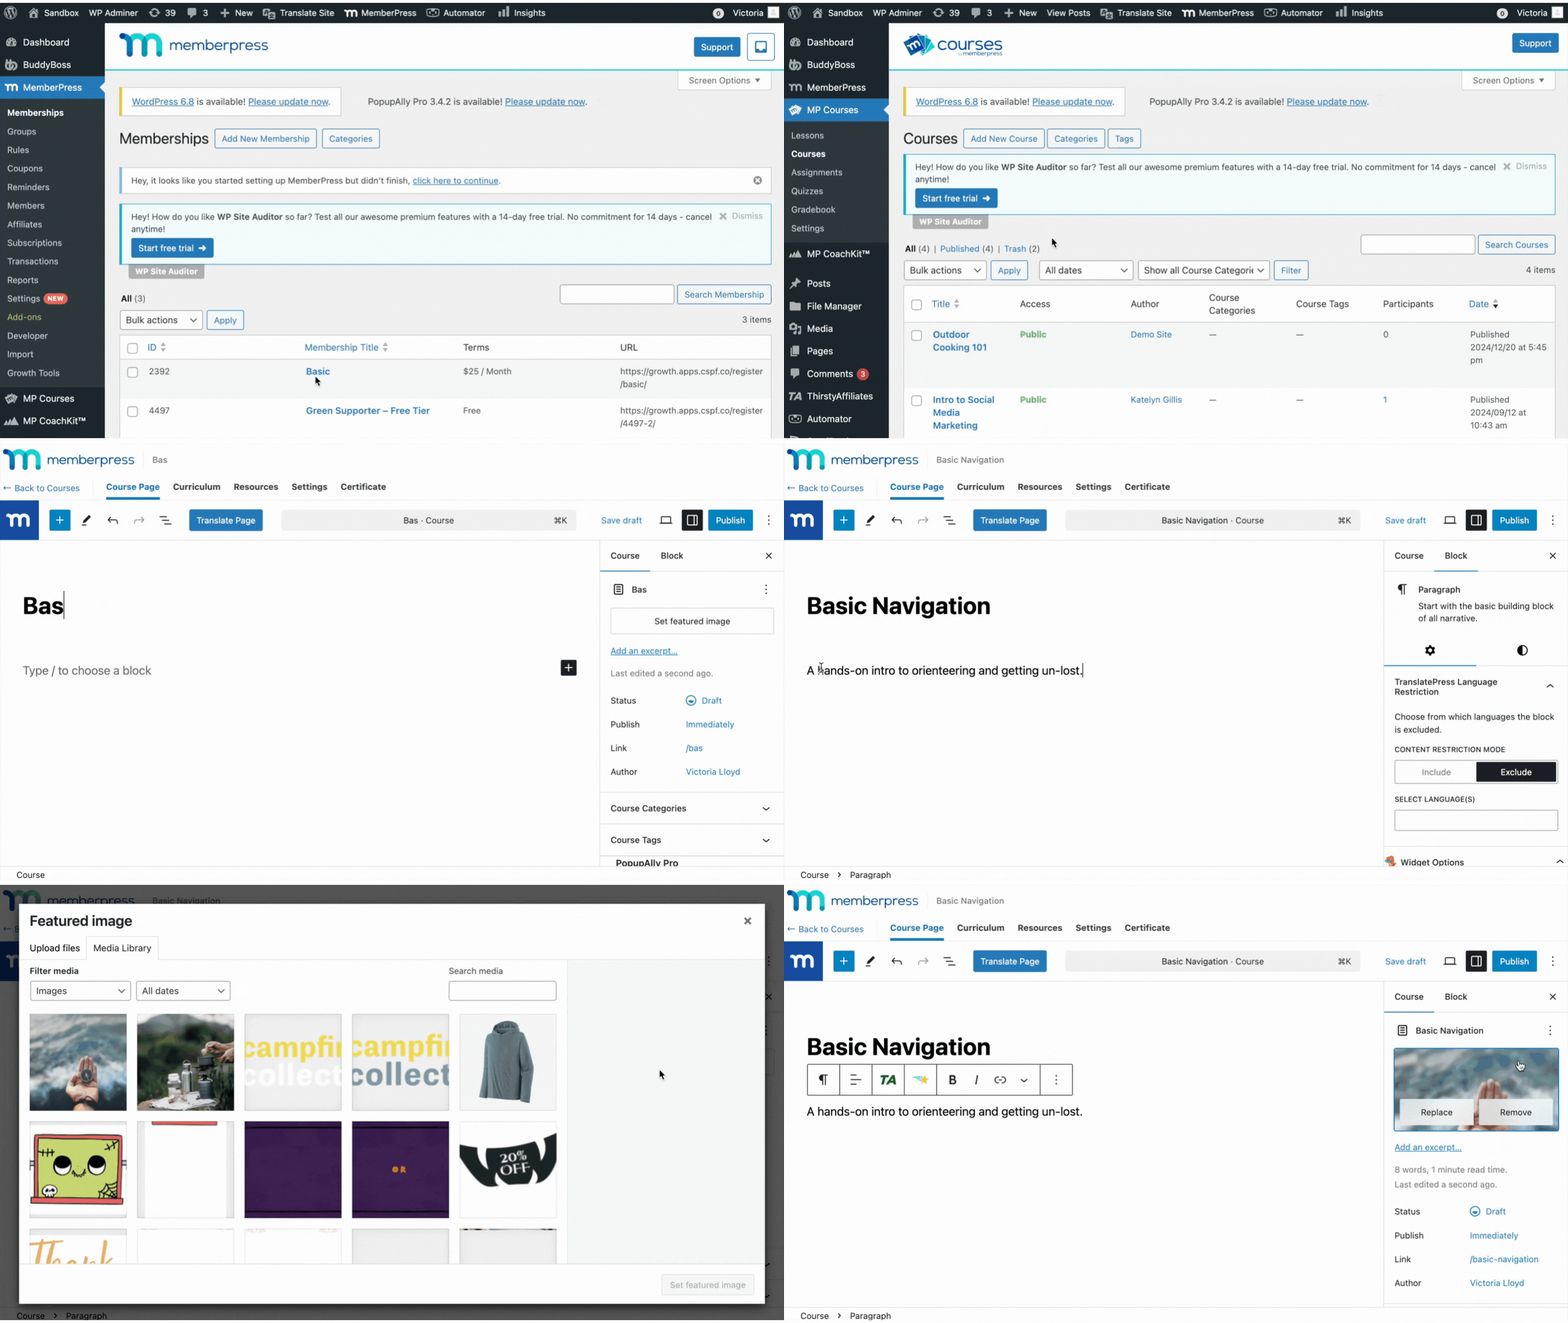
In the Settings menu on the right side of the screen, you’ll see a Course tab, where you can fill in additional details such as tags and categories.
We recommend that you take your time to fill out this information, as it’ll help you keep your classes organized and restrict access more easily later on.
3.a. 🧩 Build Out Your Curriculum with the Online Course Builder
Now it’s time to build out the curriculum for your online course!
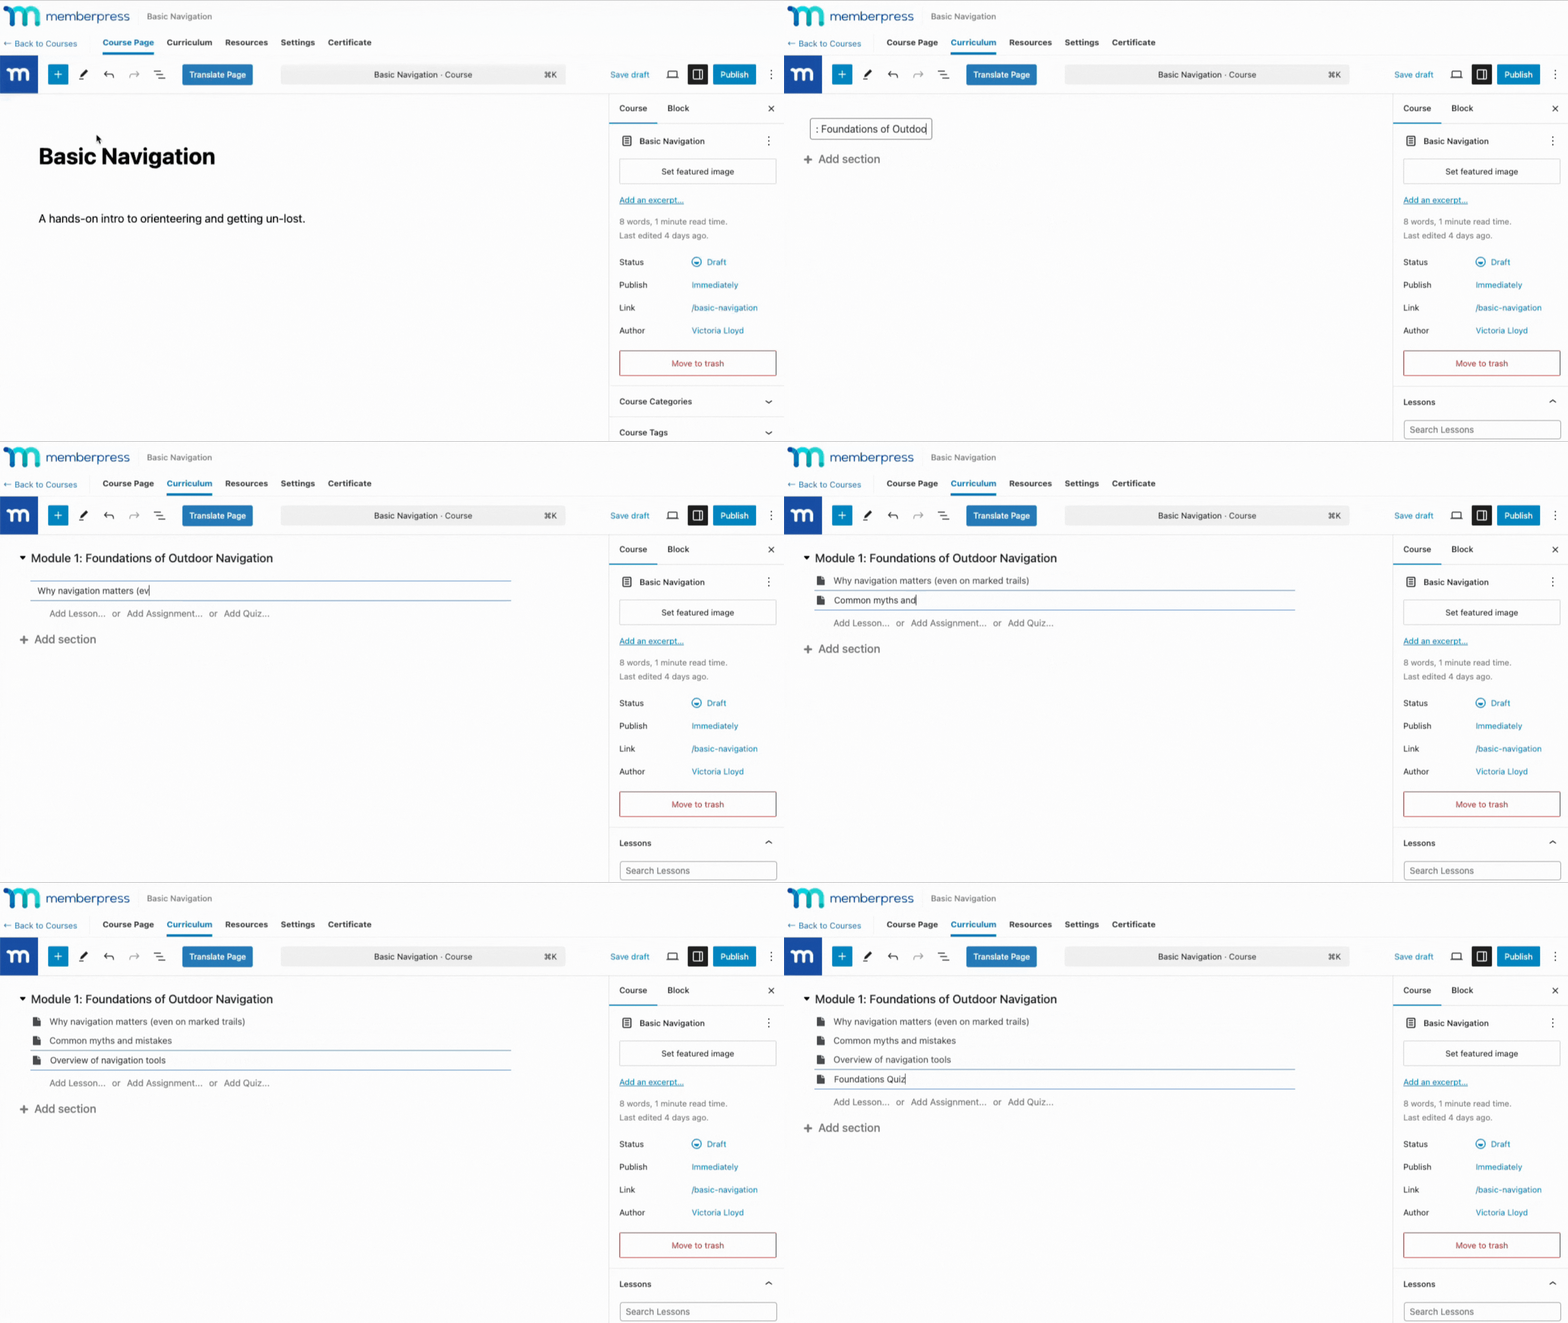
In the Curriculum tab you click Add Section.
Sections work as modules for your course. With MemberPress Courses, there’s no limit to how many sections you can add.
And in each section you can also easily add as many lessons as you like!
That means you can break down your course into “micro modules“, making your content more engaging and easier to digest.
Plus, with the quizzes and assignments add-ons installed you can easily add these here too. The whole thing is intuitive. Take a look for yourself:
And with MemberPress’s drag and drop online course builder. you can easily rearrange the order of modules, lessons, quizzes and assignments in your curriculum, like so:
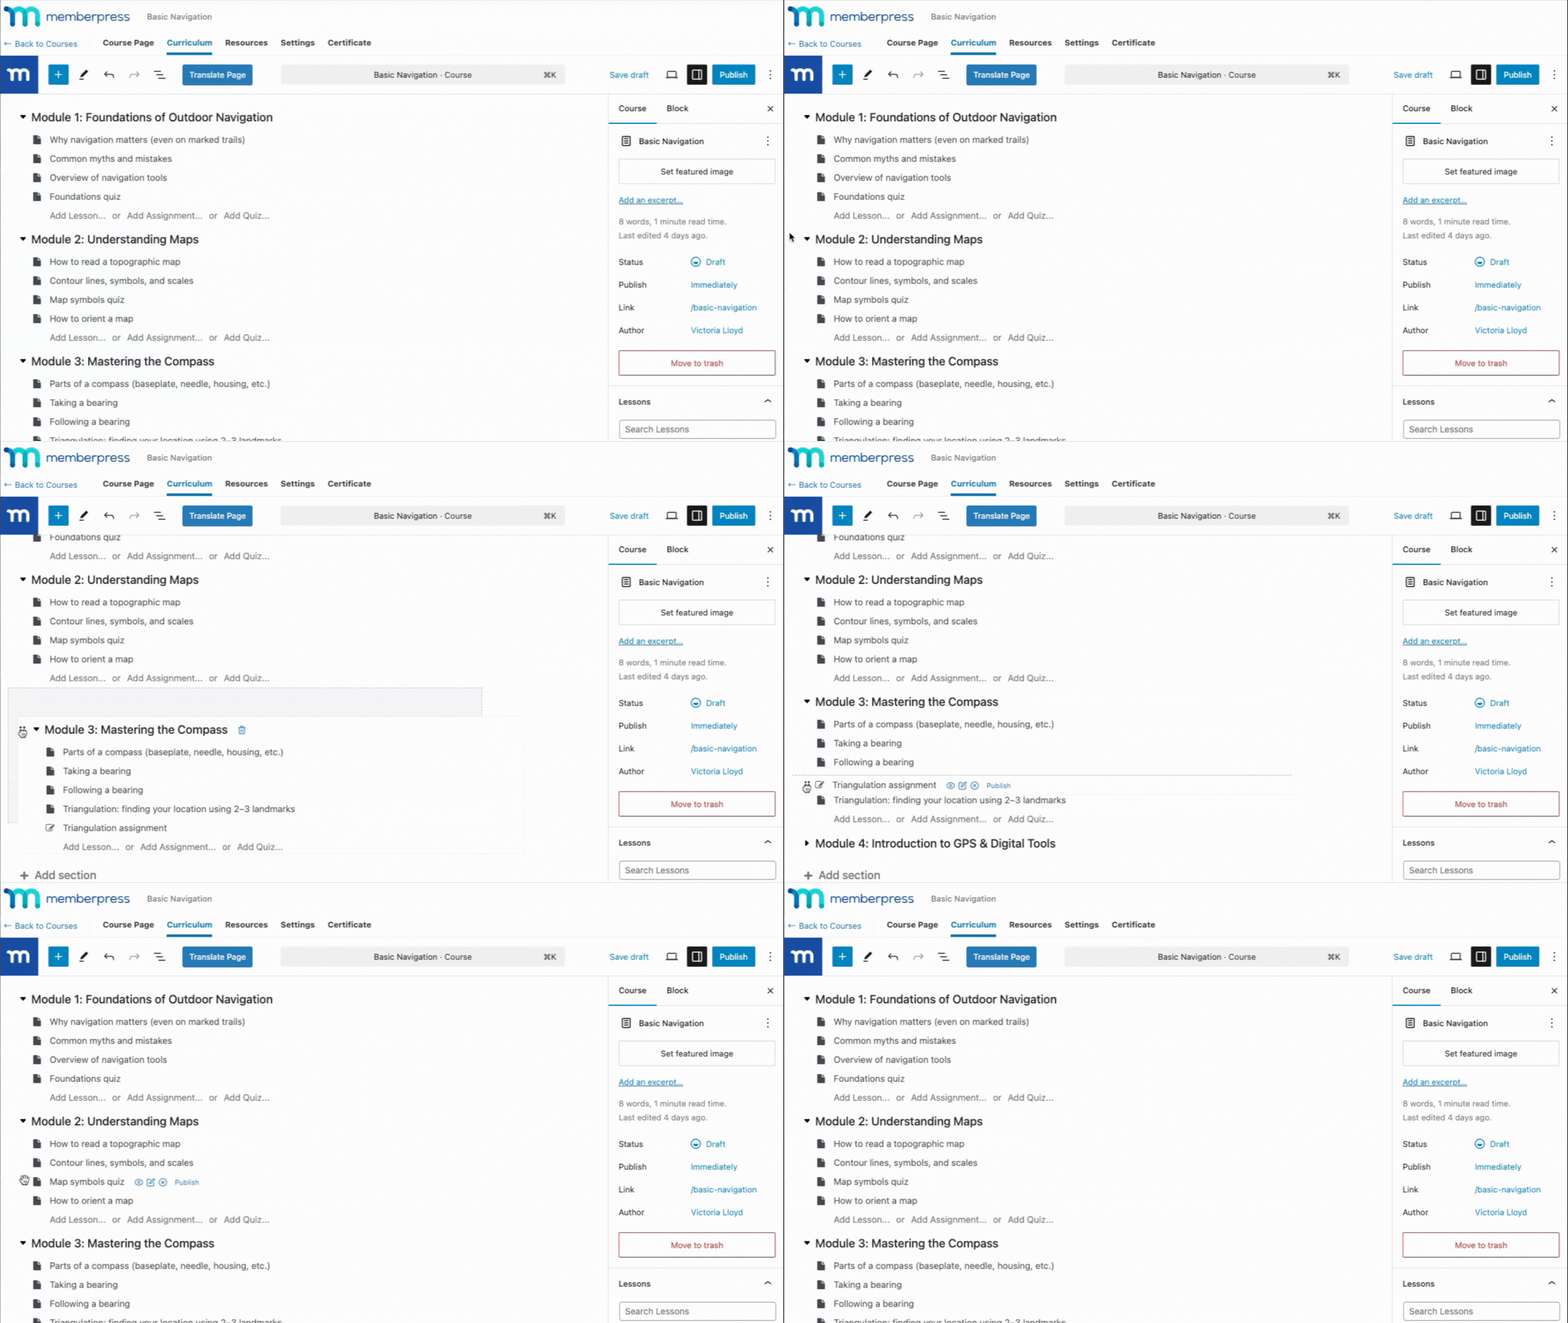
Note: Hover over each lesson, assignment or quiz and hit Publish to save the structure of your course.
3.b. Adding Your Content
As you go, you’ll want to add your course content to your lessons, quizzes and assignments.
MemberPress Courses uses Gutenberg Blocks so you have complete flexibility over what content you want to add and where.
You can include videos, images, text, comment forms, shortcodes, widgets and embeds – the lot!
Here are some ideas:
Lessons
The most popular type of online course uses video to show and explain concepts more easily.
We recommend protecting your video content with VdoCipher to make sure it can’t be downloaded or shared without permission.
You might also want to reinforce your video content with accompanying text, even if it’s just a transcript of your video.
This caters to different learning styles while also providing an easy way for students to reference information or pull key notes for their studies.
You might also consider offering downloads such as workbooks, checklists or guides as part of your lesson. You can do this easily with the MemberPress Downloads add-on.
Quizzes
Quizzes are a great way for learners to check their knowledge and make sure they’re on track. It’s also a great option if you, the course provider, also want to track their progress or the success of your learning materials.
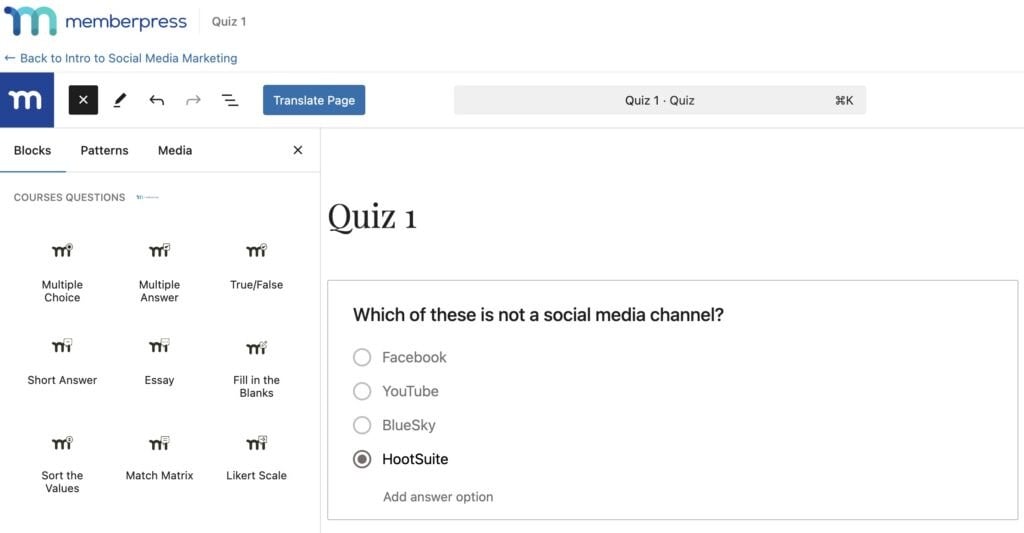
Keep your students on their toes by varying the way you present your questions. Choose from 9 different question types including:
- Multiple Choice
- True / False
- Fill in the Blanks
- Match Matrix
- Likert Scale
The quizzes in the Courses Quizzes add-on in MemberPress are automatically graded so learners get instant feedback.
You can also choose whether you want to offer them the chance to repeat the quiz and improve their score, and whether they need to achieve a certain score before being able to proceed to the next lesson.
Assignments
If you want to take a more active role in assessing your student’s progress, and provide your students with a richer, more interactive learning experience. assignments are a great option!
Assignments in MemberPress Courses let students upload files or add a link from the web to their project, video, document, pretty much whatever you can dream up!
In the assignments settings tab you can select what file types you want to accept and set the number of points your students can earn from their assignment.
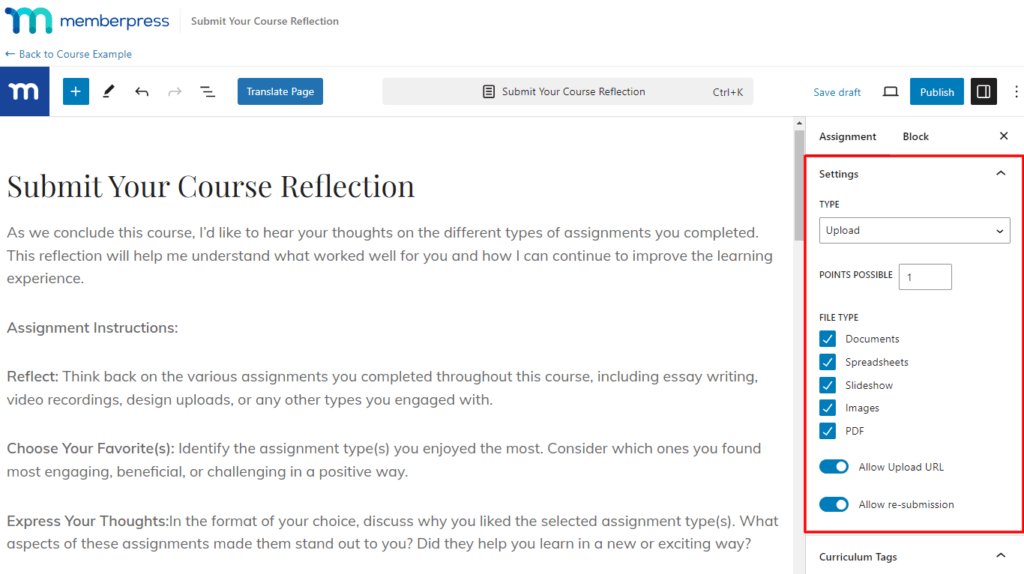
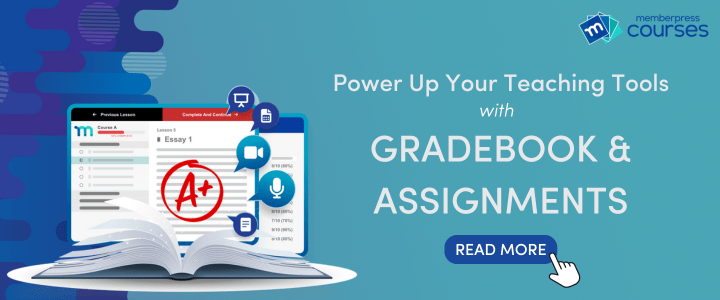
Learn more about assignments and grading with MemberPress Courses by clicking on the image below:
With so many course materials to choose from, you can build any online course you can envision!
Don’t forget to hit Publish as you go to save your progress as you build out your curriculum.
4. Enable Course Certificates
With your course material in place, wrap it all up with a completion certificate. MemberPress Course Certificates allows you to reward your students after they’ve successfully completed a course.
After saving your lesson, go back to the course editor page and click on the Certificates tab. There you’ll see an Enable certification on this course tab. Go ahead and click that tab to reveal the certification customization options:
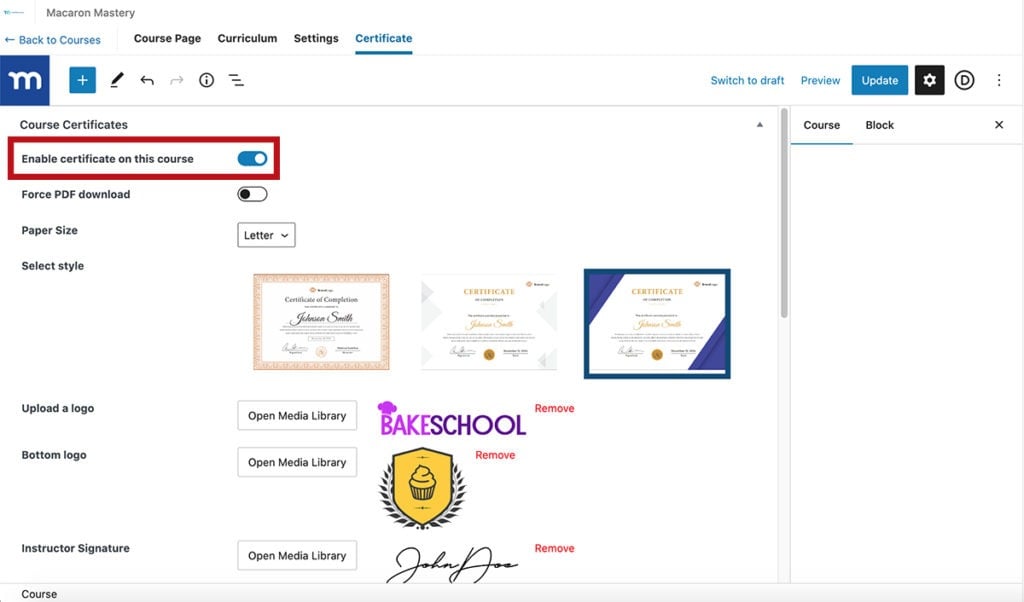
Here, you can choose a certificate style, plus personalize it to include your company logo, your signature as course instructor, and more.
5. Manage Your Settings and Access Rules
Now it’s time to monetize all that hard course-building work!
Go to the Settings tab in the course editor and switch on the Include in Course Listing setting. MemberPress will automatically create a courses URL slug where users can access your educational content:

Note that to make this page visible, you’ll need to add it to your main menu via Appearance > Menus.
If you plan to sell your online course or otherwise want to restrict access to it, there are some additional steps you’ll need to take. This will require students to register and pay before they can view lessons.
Add the URL for your class’ registration page in the Sales Page field. Unauthorized users who try to access your course will be redirected here so they can sign up.
Now, head back to your dashboard and navigate to MemberPress > Rules so that you can restrict your new course. The easiest way to do so is by using tags or categories.
Click on Add New, then go to Protected Content:

From the drop-down menu, select All Content With Course Tag, if you wish to restrict your course based on this taxonomy. You can also choose to protect a single course, all content, or other options if you prefer:

Then, enter the tag for the course you want to protect and proceed to Access Conditions, where you can grant access to selected membership tiers or individuals. Click on Save Rule once you’re done.
Conclusion
As you can see, MemberPress Courses gives you everything you need to build professional, engaging online courses directly inside WordPress – no third-party platform, no clunky integrations, and absolutely no coding.
Standout features include flexible curriculum design, quizzes, assignments, certificates, and powerful access rules. It’s all built to help you create, teach, and earn with confidence.
So if you’ve been thinking about launching your own course, or taking your existing content to the next level, MemberPress Courses has you covered.
Ready to turn your expertise into income? Start building with MemberPress Courses today.

Get MemberPress Today!
Start getting paid for the content you create.
Got any questions about the MemberPress online course builder? Let us know in the comments section below!
If you found this article helpful, follow us on Facebook, Twitter, Instagram, and LinkedIn!
Plus, sign up to our email newsletter at the top right of this post to catch more insider tips on running a monetized site and using MemberPress to the max.



We’re giving serious thought to creating some video training courses on our website. Does this module allow you to create video courses?
Yes, you can embed videos within your lessons just like you would any other WordPress Page or Post. Hope that helps!
I have training presentations I’d like to use to create a course. Can PowerPoint presentations be used in the Course builder?
Hi Kristen,
You can export a Powerpoint as a PDF file and embed it onto Course pages. You can also embed slideshare presentations. 🙂 Hope that helps!
I have enabled the Elementor Add-on in Memberpress. But it seems that the course builder doesn’t implement it. Is there something I have to do to be able to edit my courses using Elementor?
thanks!