The Course Assignments add-on expands MemberPress Courses capabilities, allowing you to use assignments to deliver or test students’ knowledge.
This document provides details on enabling Assignments for MemberPress Courses and using them to improve the quality of your courses.
Installing MemberPress Assignments Add-on
To add assignments to your courses, you need to install and activate the Assignments add-on.
Next, follow these steps to install and activate the MemberPress Assignments add-on:
- Navigate to Dashboard > MemberPress > Add-ons.
- Browse add-ons for Course Assignments add-on or search for “assignments“ using the search tool.
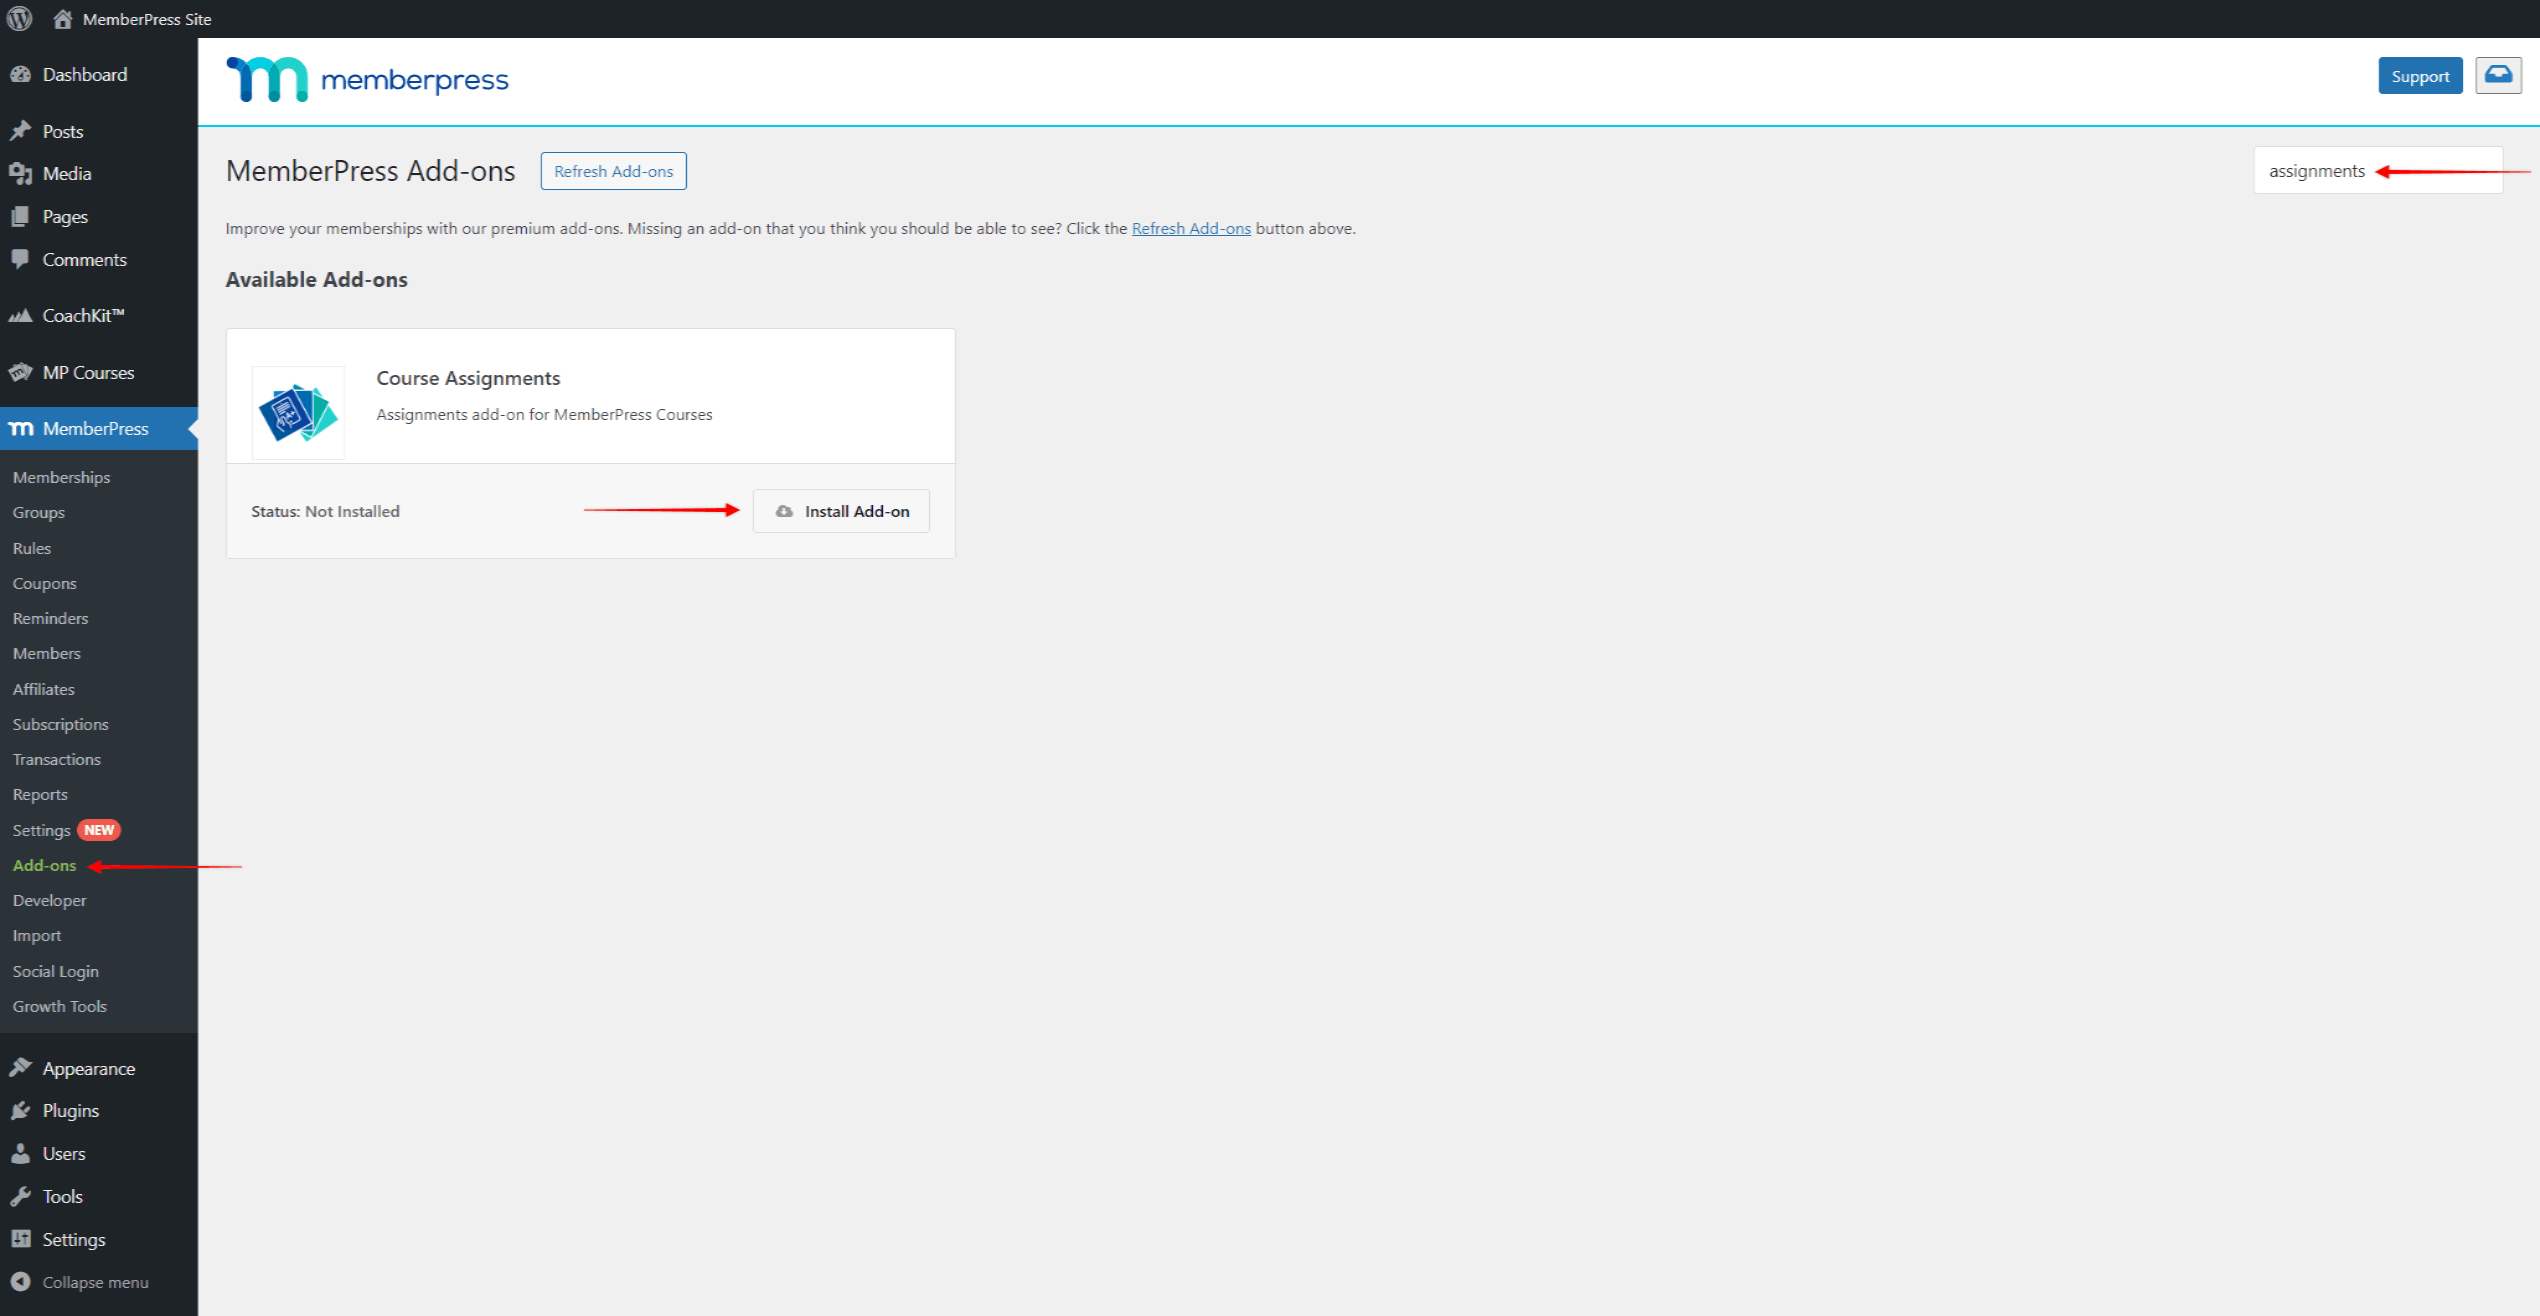
- Once you find the add-on, click the Install Add-on button. This will automatically install and activate the add-on.
Creating and Managing Assignments
As with lessons or quizzes, assignments must be added to course Sections. Thus, you first need to create a course and add at least one section to be able to add assignments.
While in the Course Editor, follow these steps to add assignments to your course sections:
- Click on the Curriculum tab.
- Expand the section to which you want to add the assignment.
- Click the Add Assignment link to create and add a new assignment to this section.
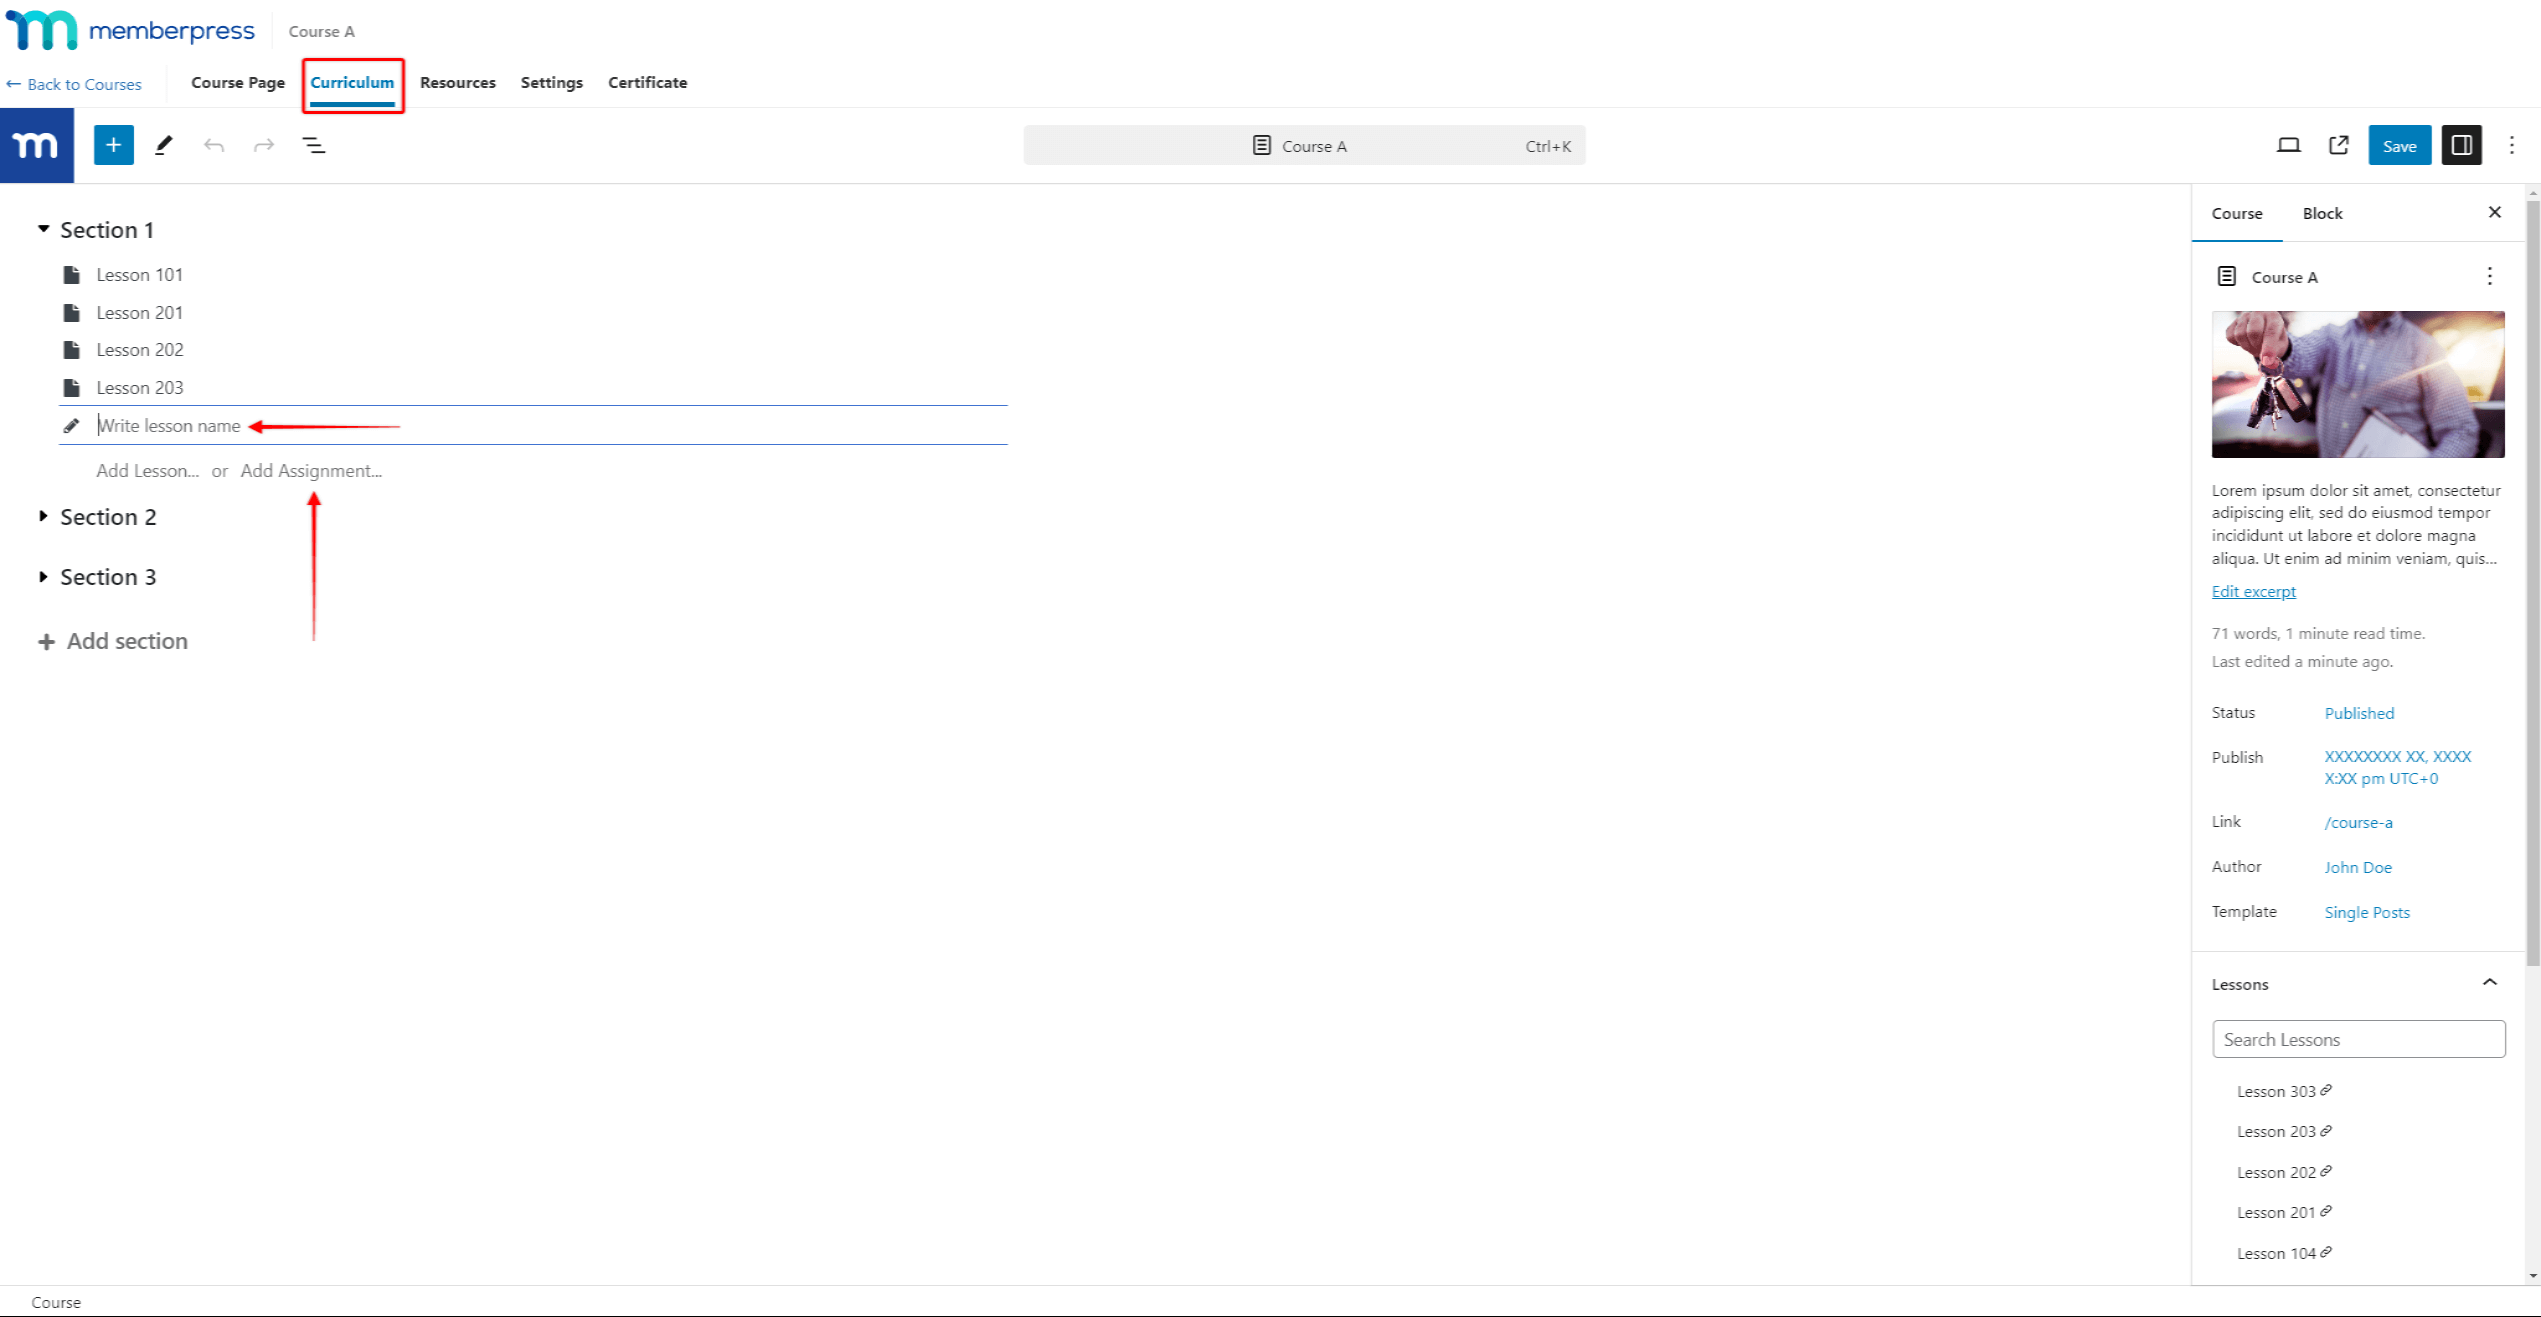
- Name the assignment.
- Click Update to save changes to the Curriculum. If the course has not been published yet, you can save changes by clicking Publish or Save draft.
All assignments will be initially saved as drafts. Assignments will be visible on the course front end only when published.
All drafted assignments will show the additional Publish option when you hover over them. You can publish each assignment by clicking this option.
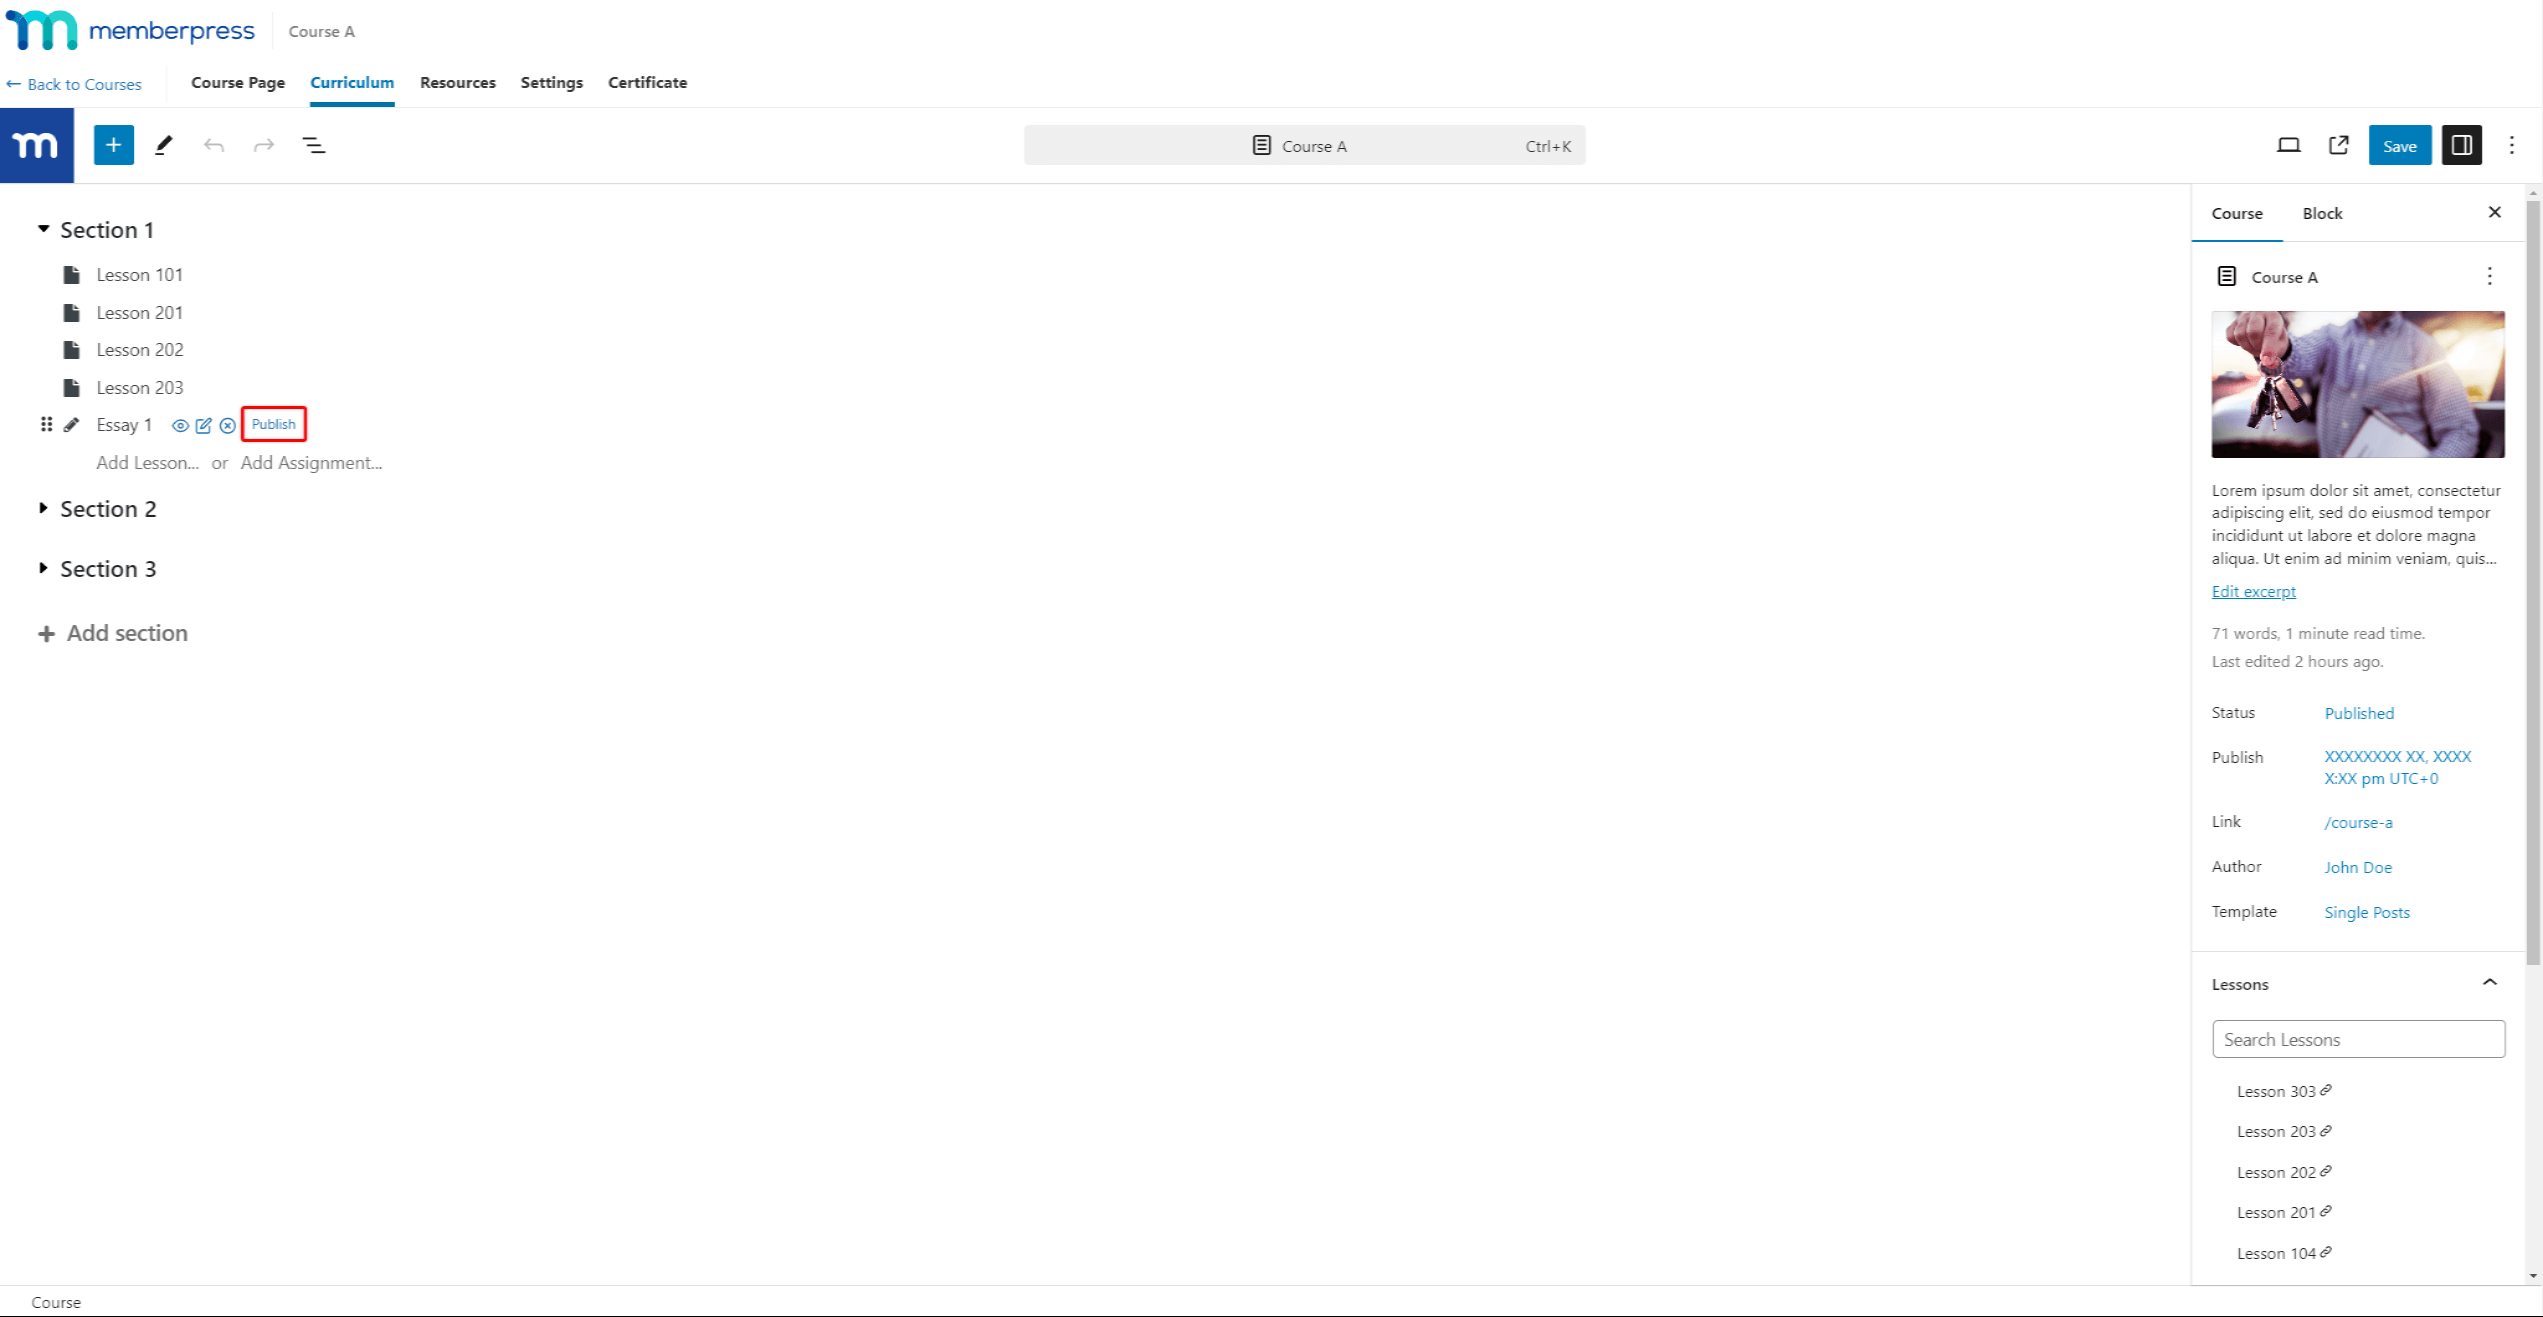
Before publishing an assignment, you should add your content and apply the assignment settings.
Adding Content to Assignments
Next, you need to add content to your new assignment:
- Hover over the assignment to show additional options.
- Click the Edit option (pencil icon) to start the Assignment Editor.
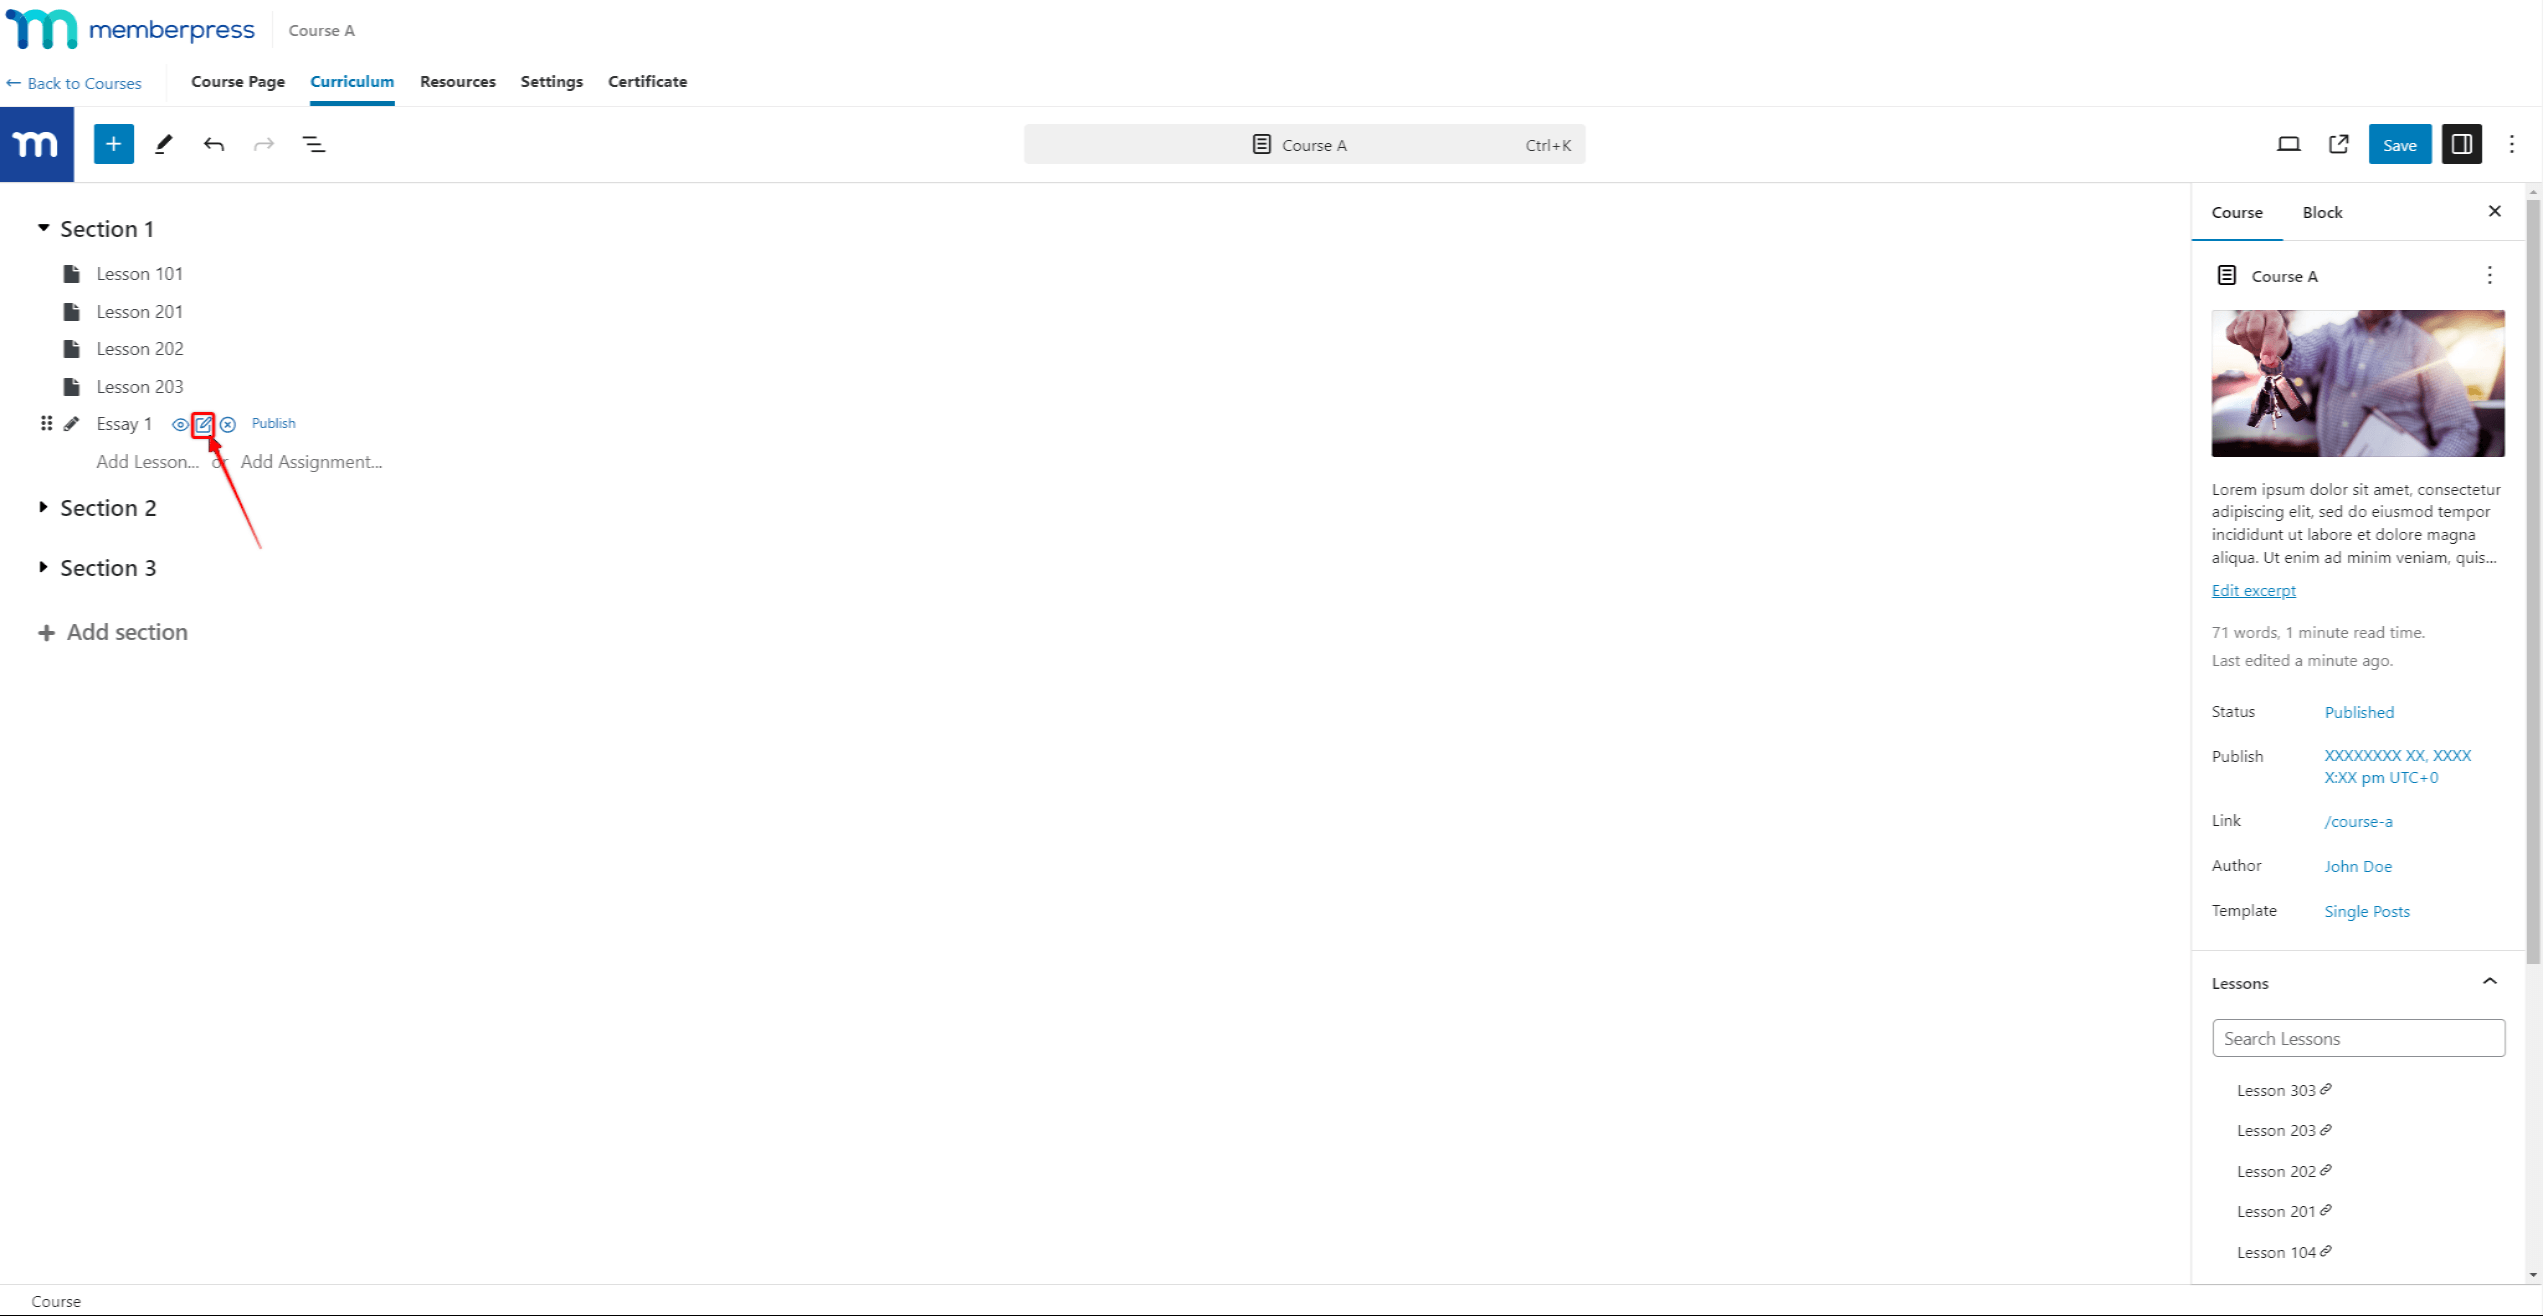
- When you start the Assignment Editor, you will notice that the Submission block has already been added to your assignment. This block is mandatory and can’t be deleted, as it is used for your students to submit their assignments.
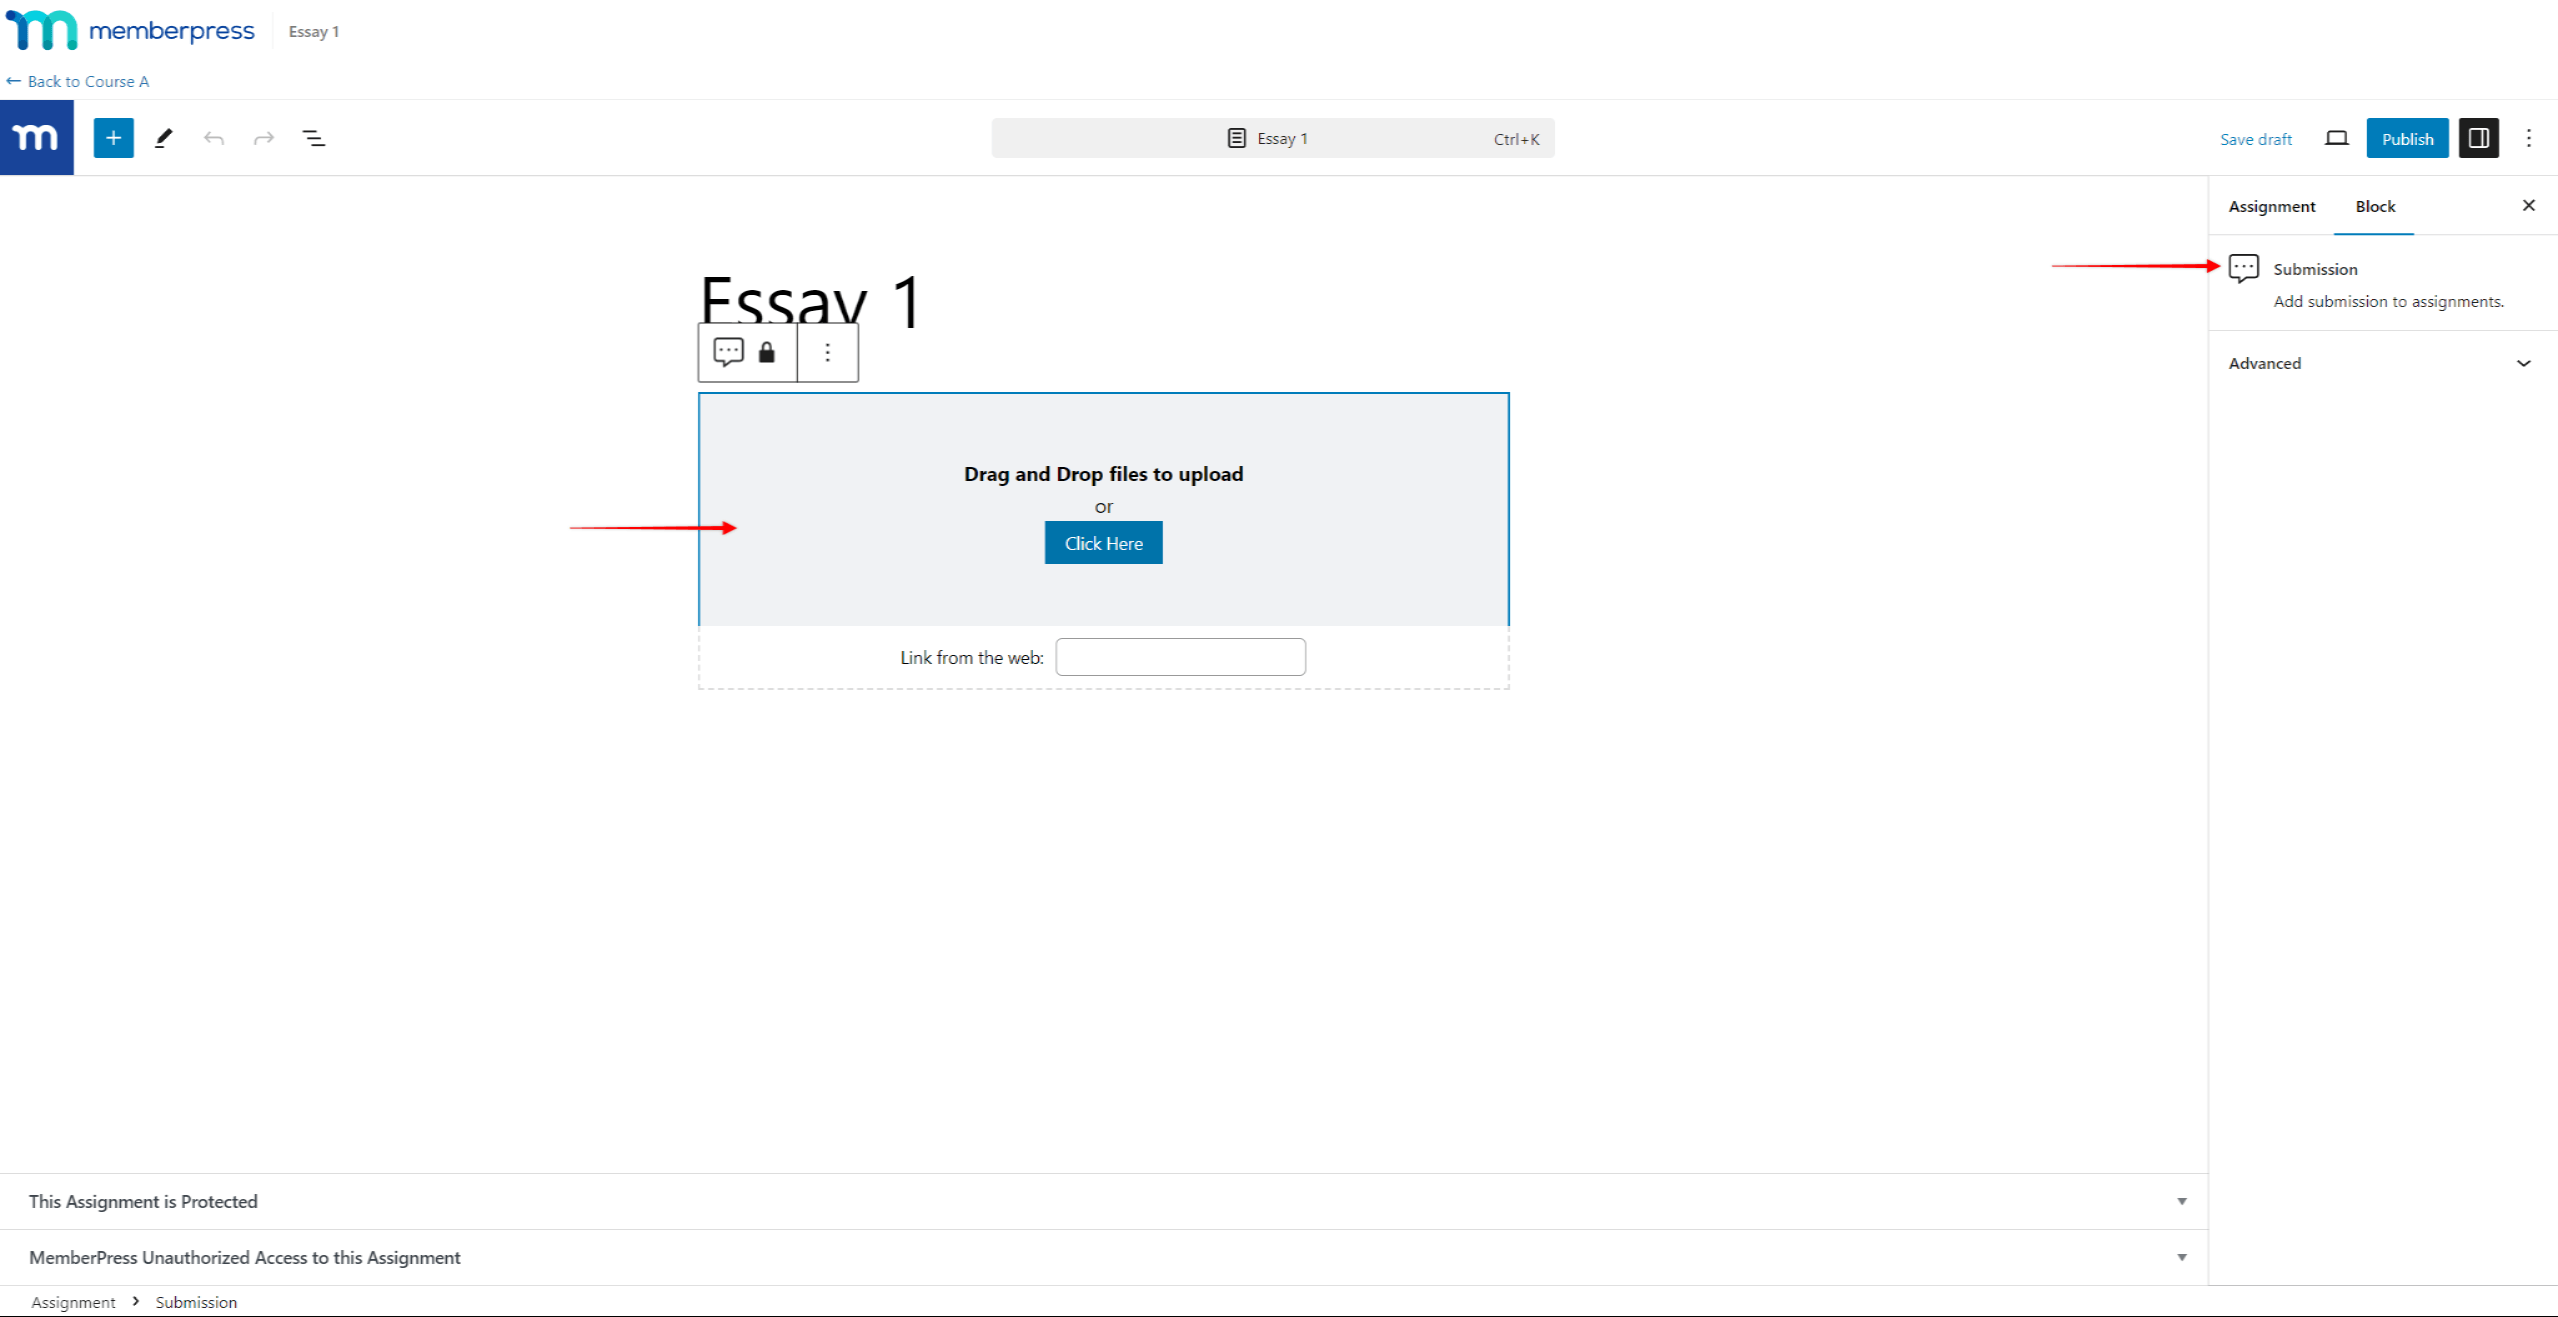
- Above the Submission block, you can add the assignment content using Gutenberg blocks. Click the + icon or the block inserter to access blocks and add the ones you need.
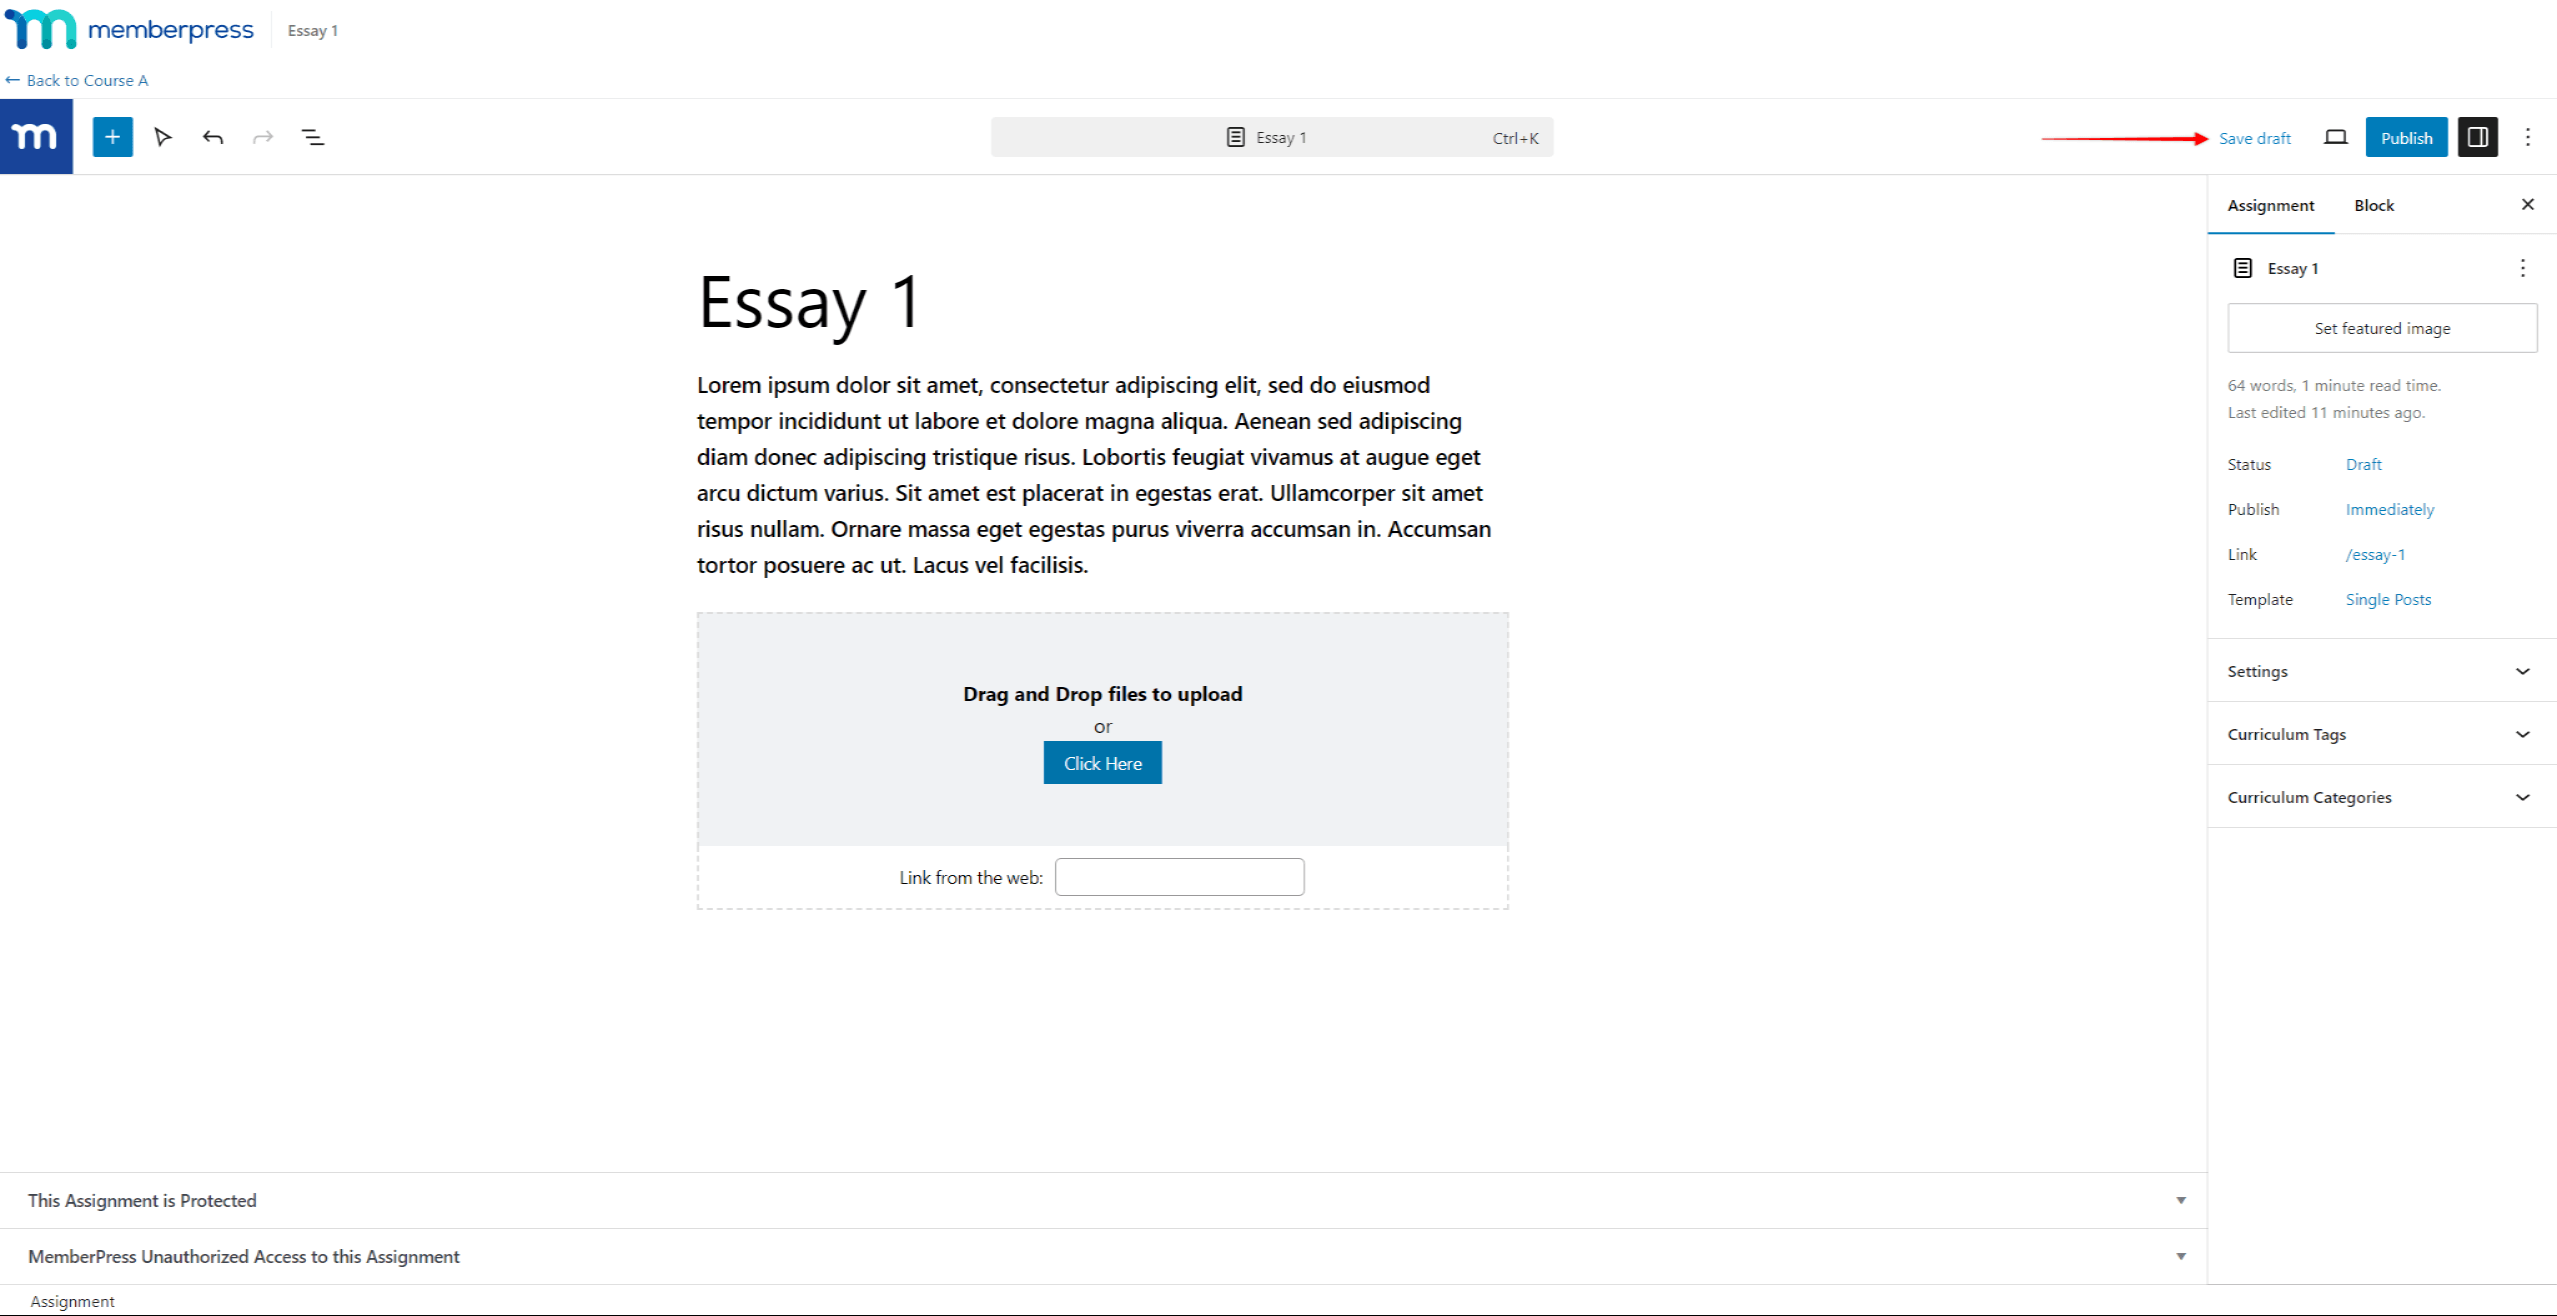
- When you finish editing the assignment, you can save changes without publishing it by clicking Save draft.
Assignments Settings
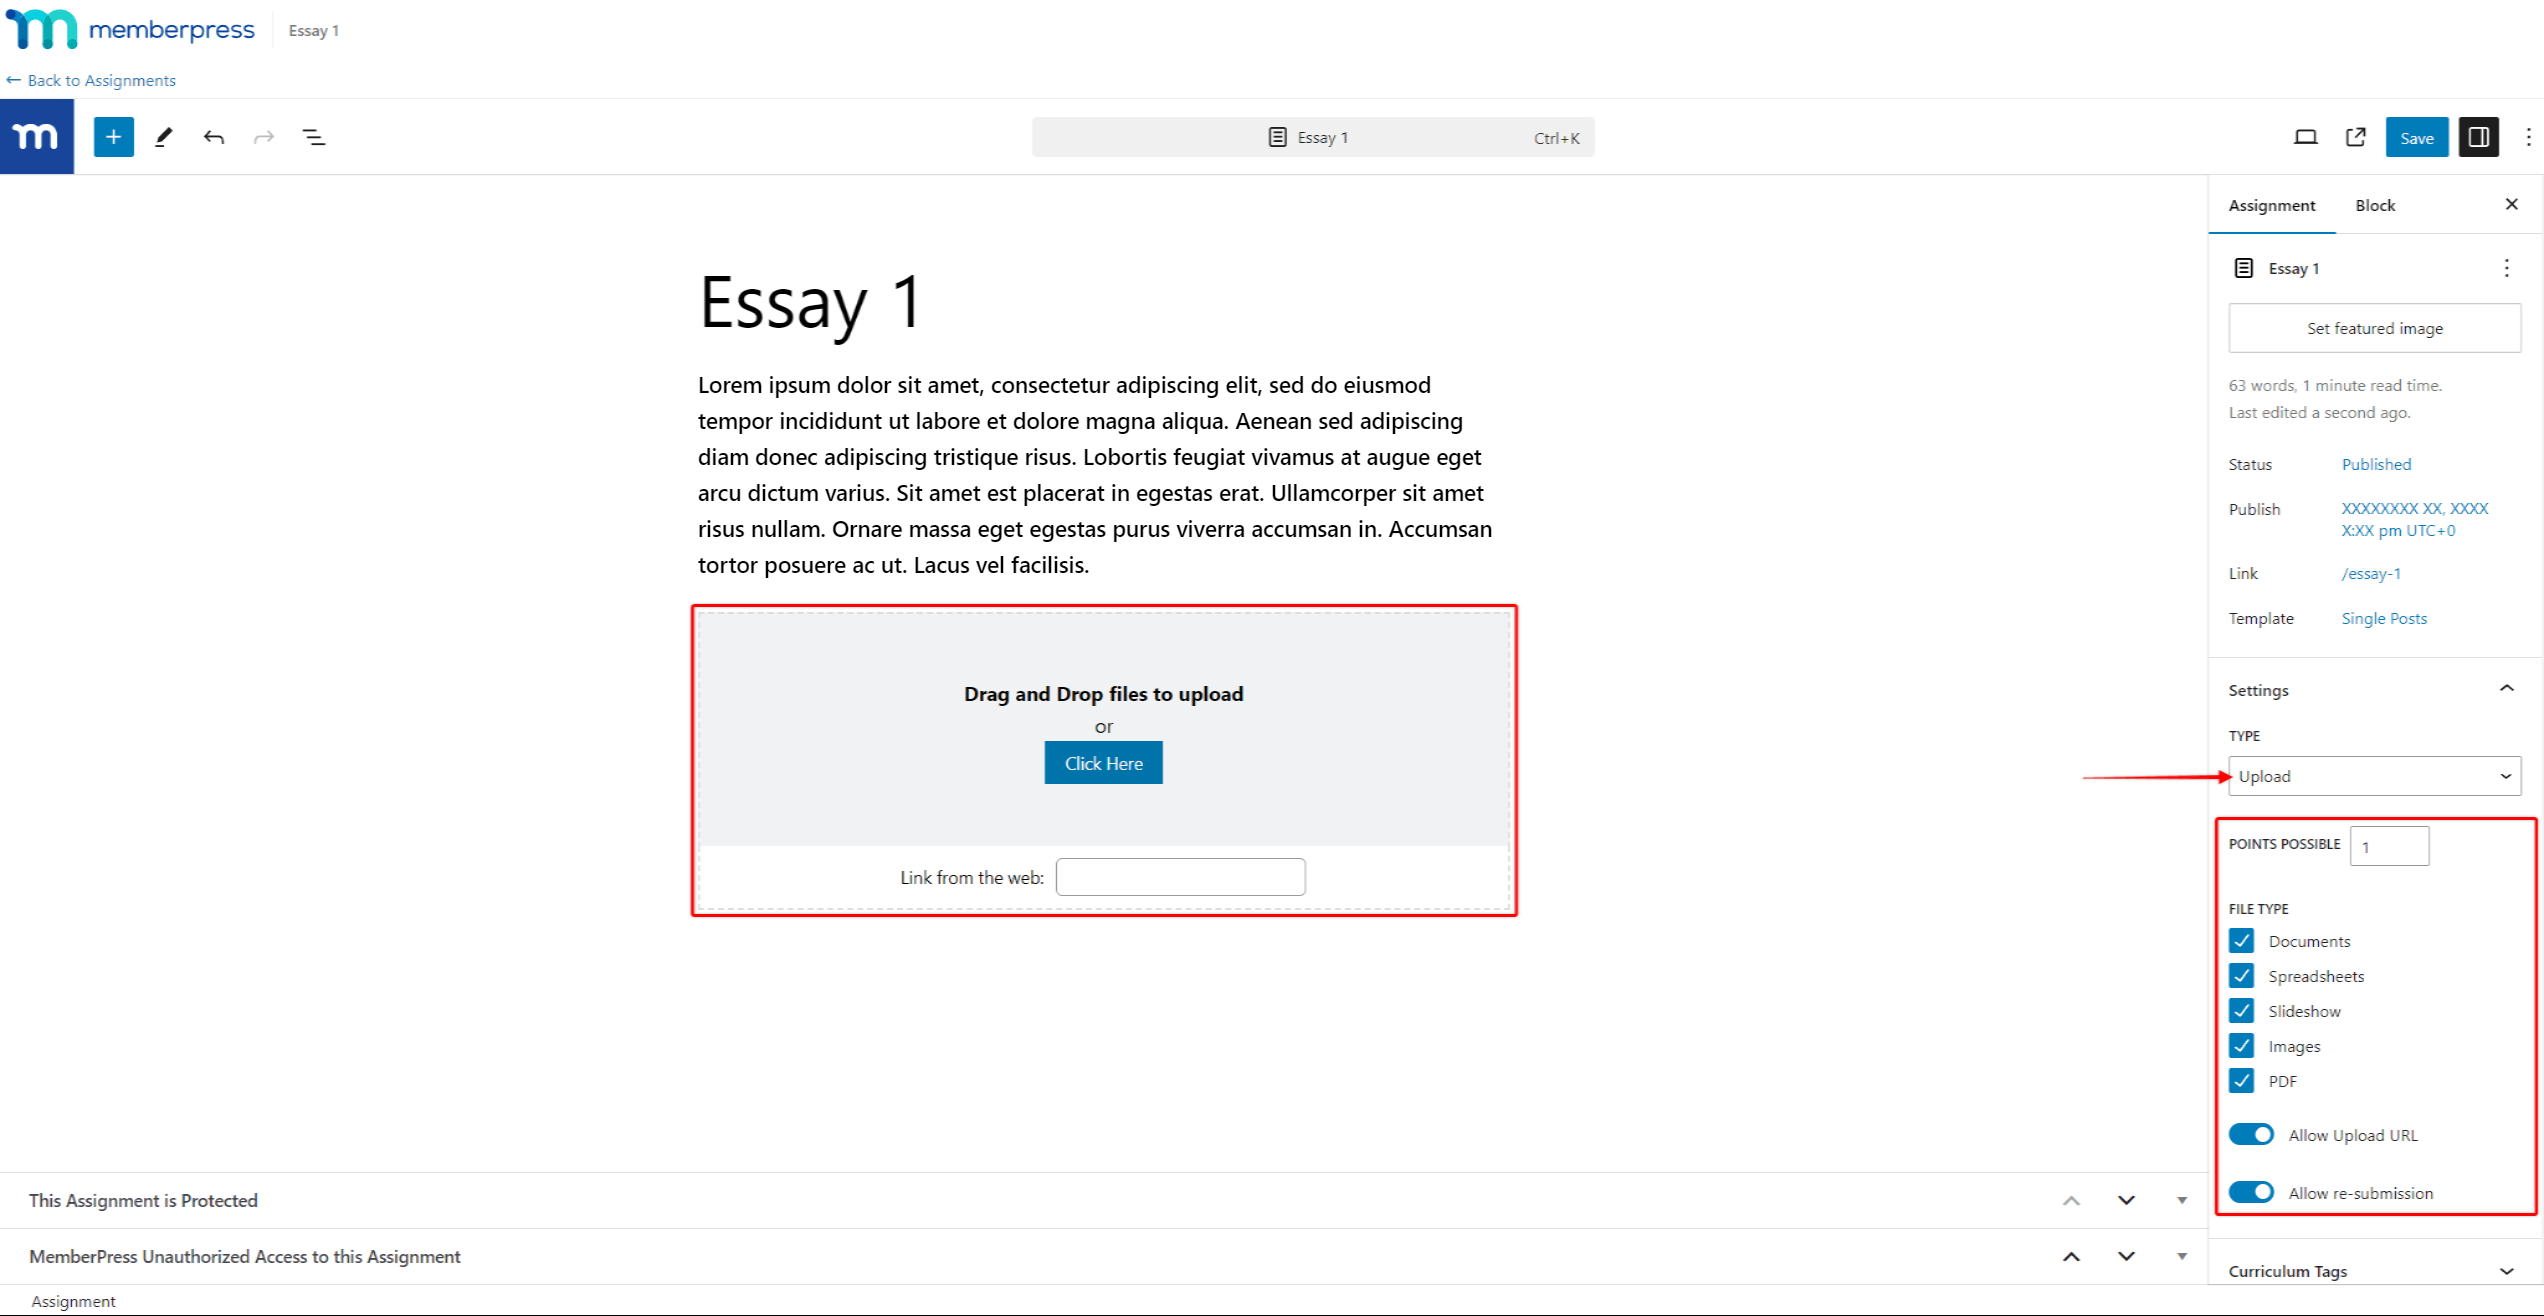
There are two types of assignments: Essay and Upload. You can select the assignment type within the Assignment Editor:
- In the Setting sidebar on the right, choose the Assignments tab.
- Scroll down and expand the Settings panel.
- Under the Type dropdown, select the desired option.
Depending on the type of assignment, you will be able to apply different settings to it. Also, the Submission block options will adjust to the chosen type.
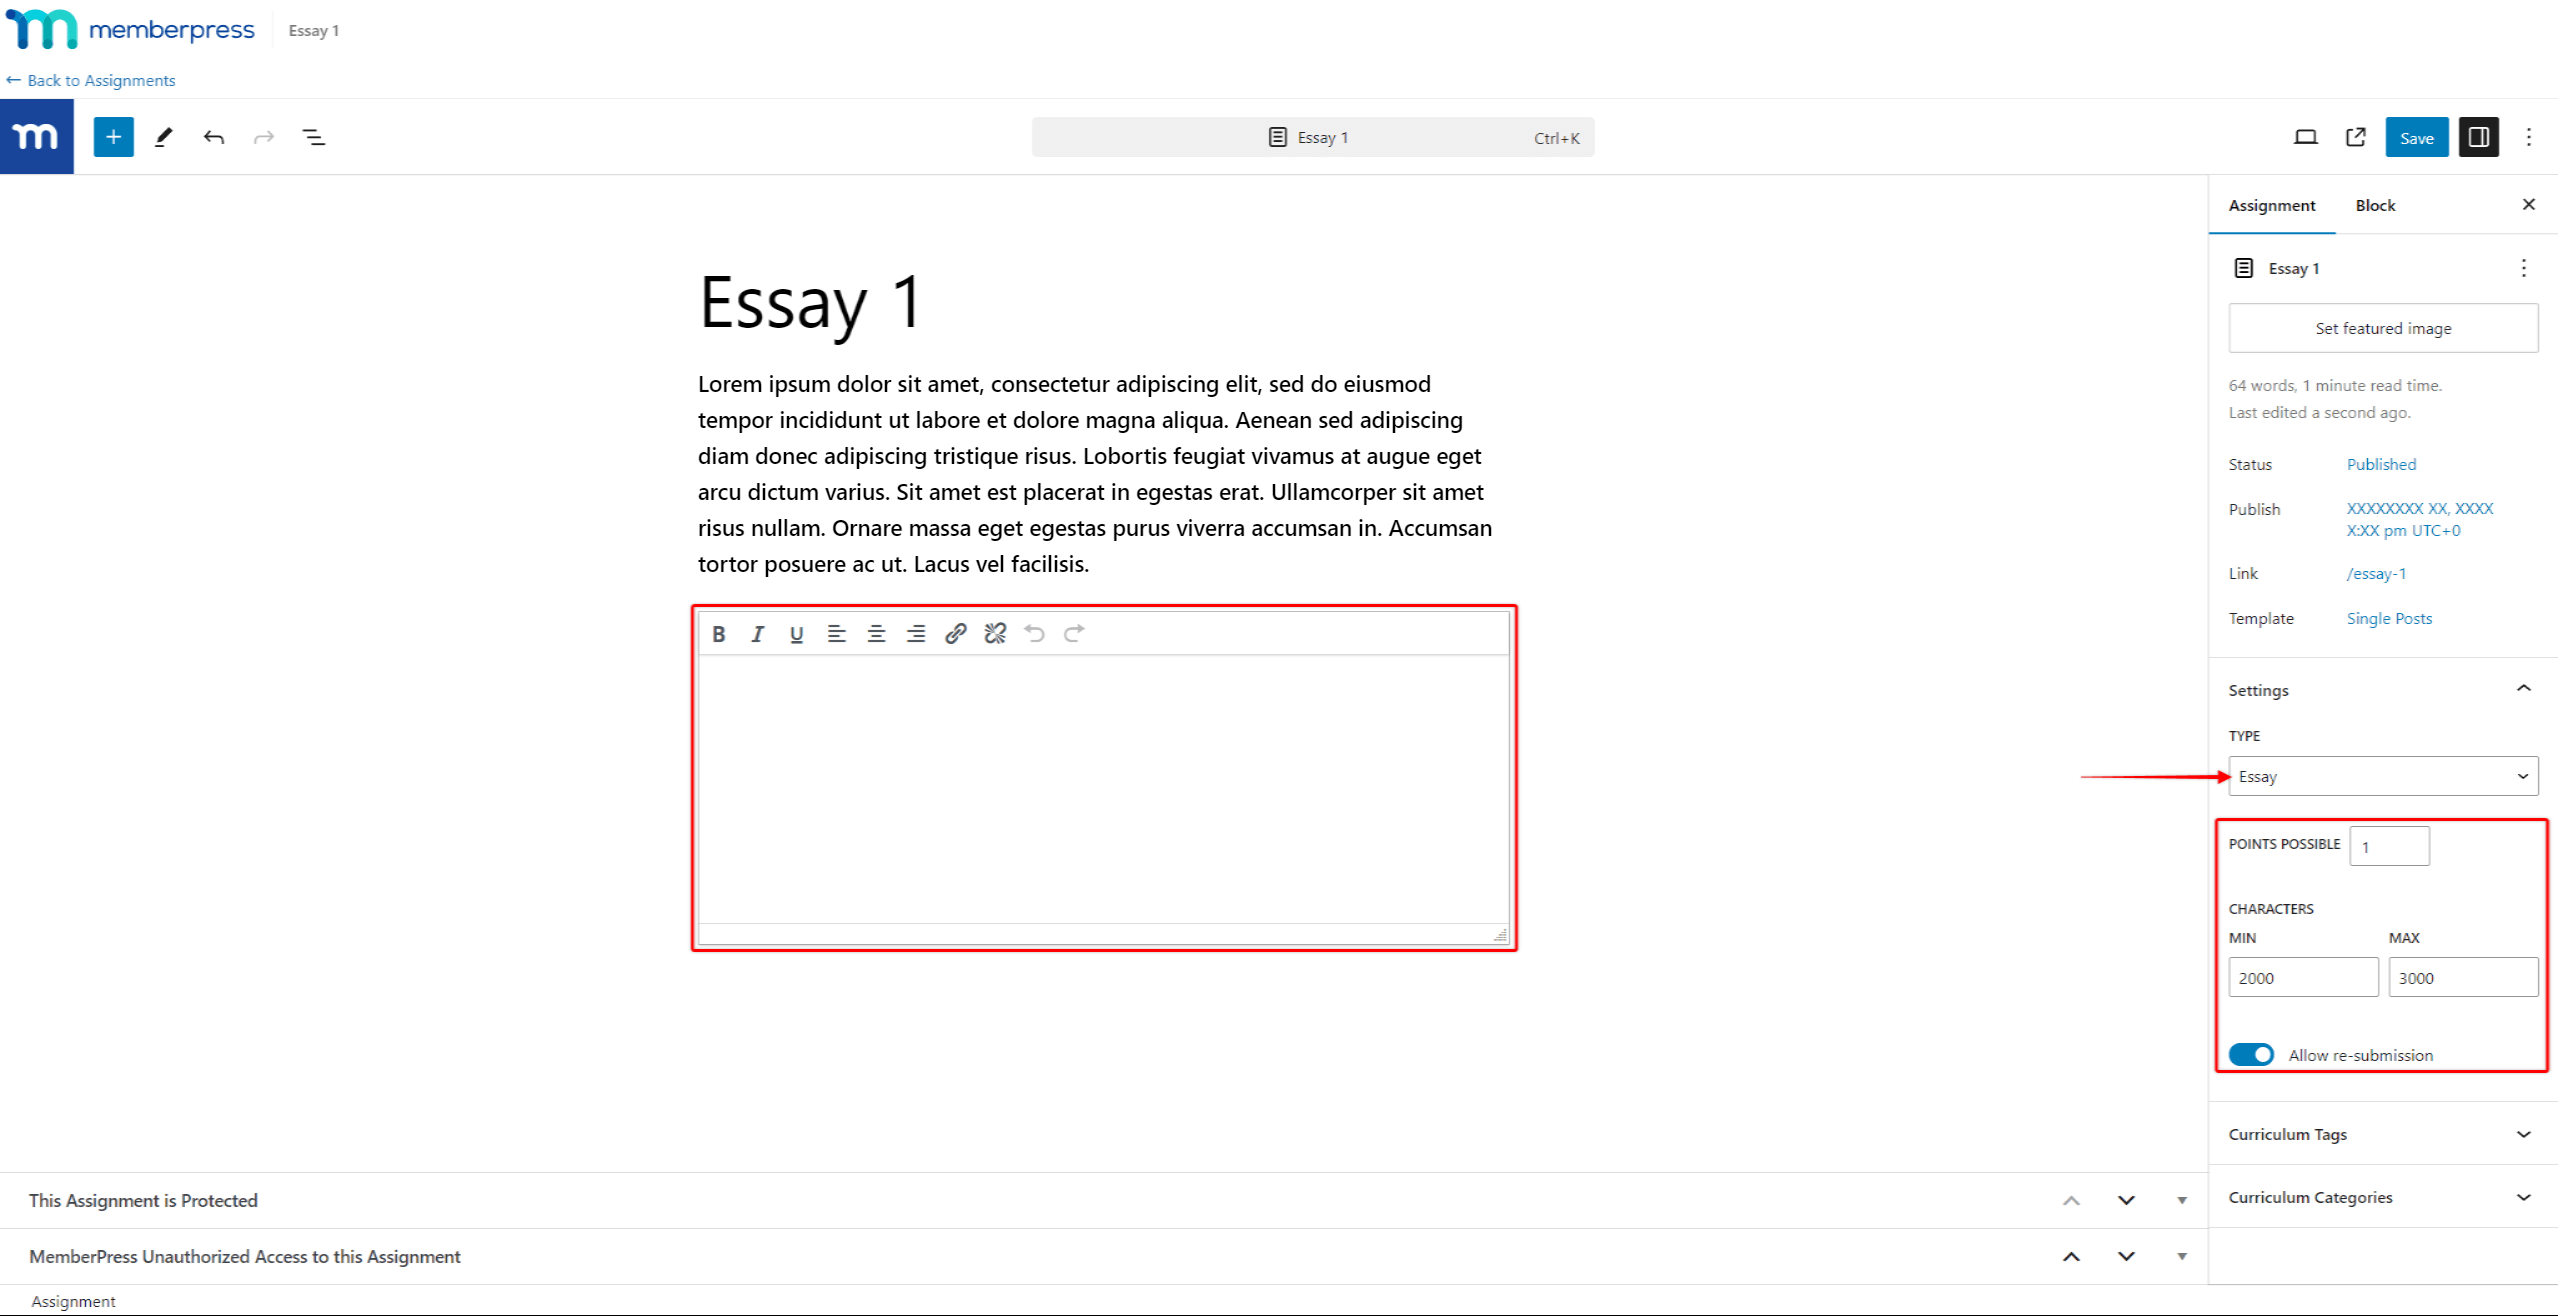
The Essay assignment type facilitates user submission within the assignment page itself. Thus, the submission block appears as a text area with the Submit button.

The Essay assignment type will provide the following settings:
- Points Possible: the number of points a student receives for completing the assignment;
- Characters: Minimum (MIN) and Maximum (MAX) number of characters the essay must have.
- Allow re-submission: toggling-on this option will allow users to re-submit their essay after clicking the Submit button for the first time.
The Upload assignment type allows more flexibility, allowing students to turn in their assignments in multiple formats. This type of assignment should be used for more complex tasks that require more than adding simple text.
Students can submit assignments by uploading a file or sharing the assignment link when available online.
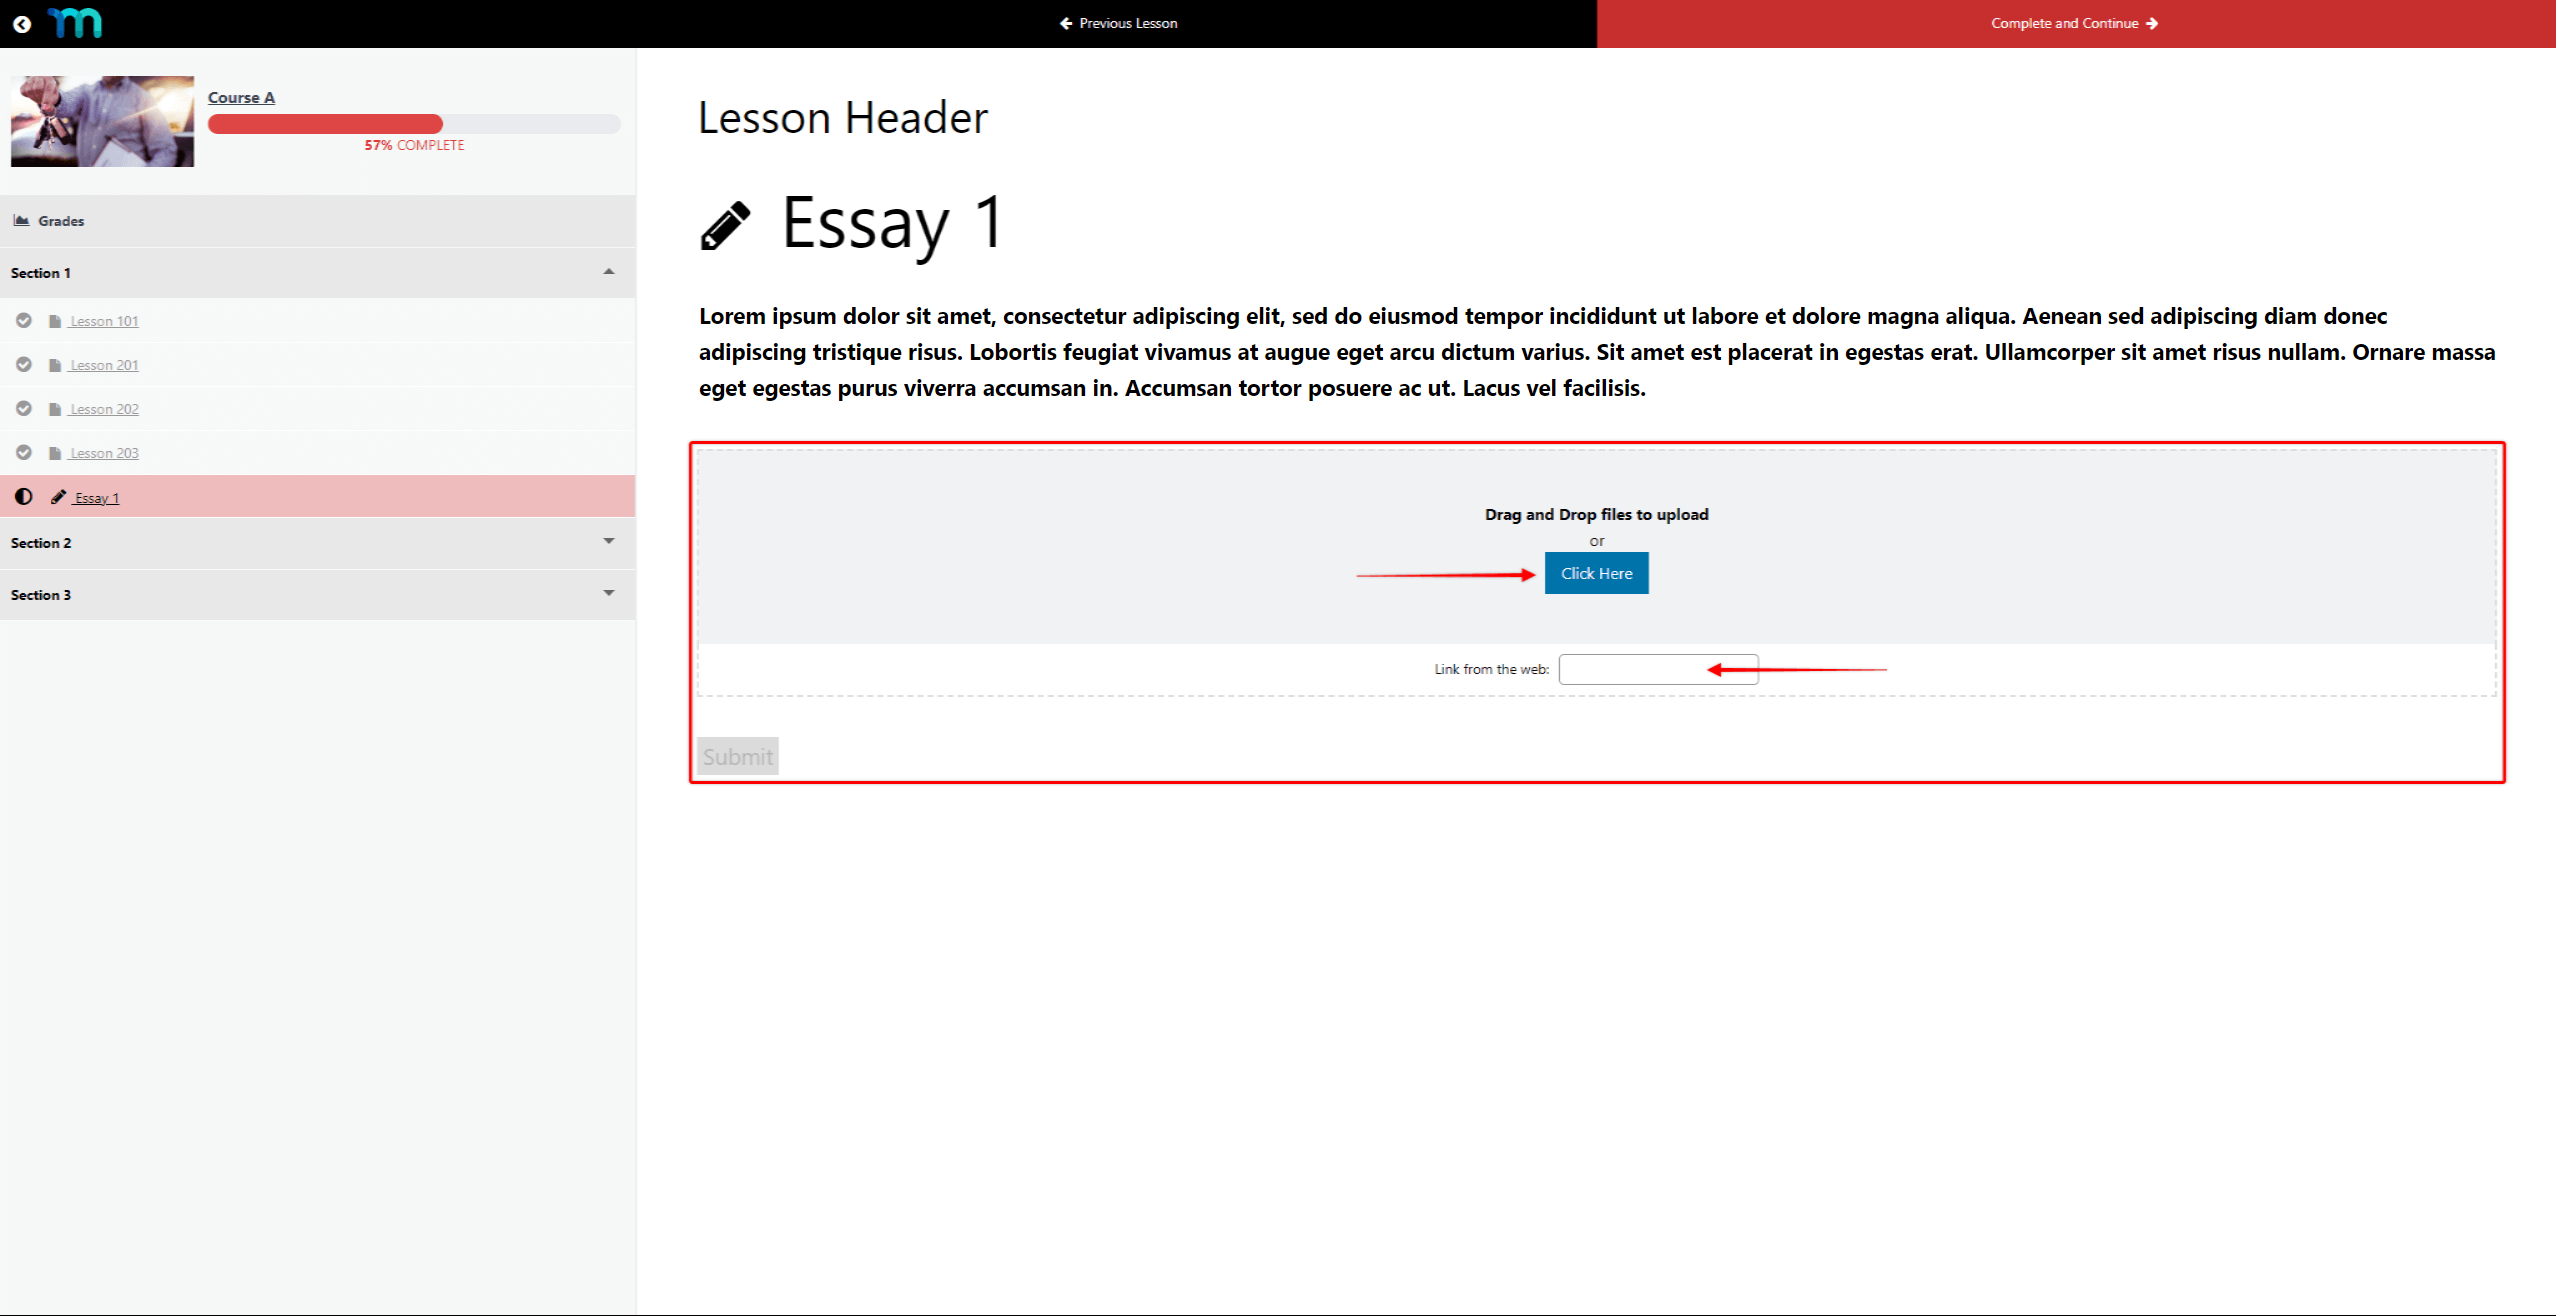
Accordingly, the Upload assignment type will provide the following settings:
- Points Possible: the number of points a student receives for completing the assignment;
- File type: check the file formats you wish to allow. You can enable uploading Documents, Spreadsheets, Slideshow, Images, and PDF files.
- Allow Upload URL: toggling-on this option will add the field for the URL submission. When enabled, students can submit the assignment via a valid URL instead of uploading a file.
- Allow re-submission: toggling-on this option will allow users to re-submit their essay after clicking the Submit button for the first time.
Publishing Assignments
Before publishing an assignment, there are additional settings to consider:
- Set featured image
- Curriculum Tags
- Curriculum Categories
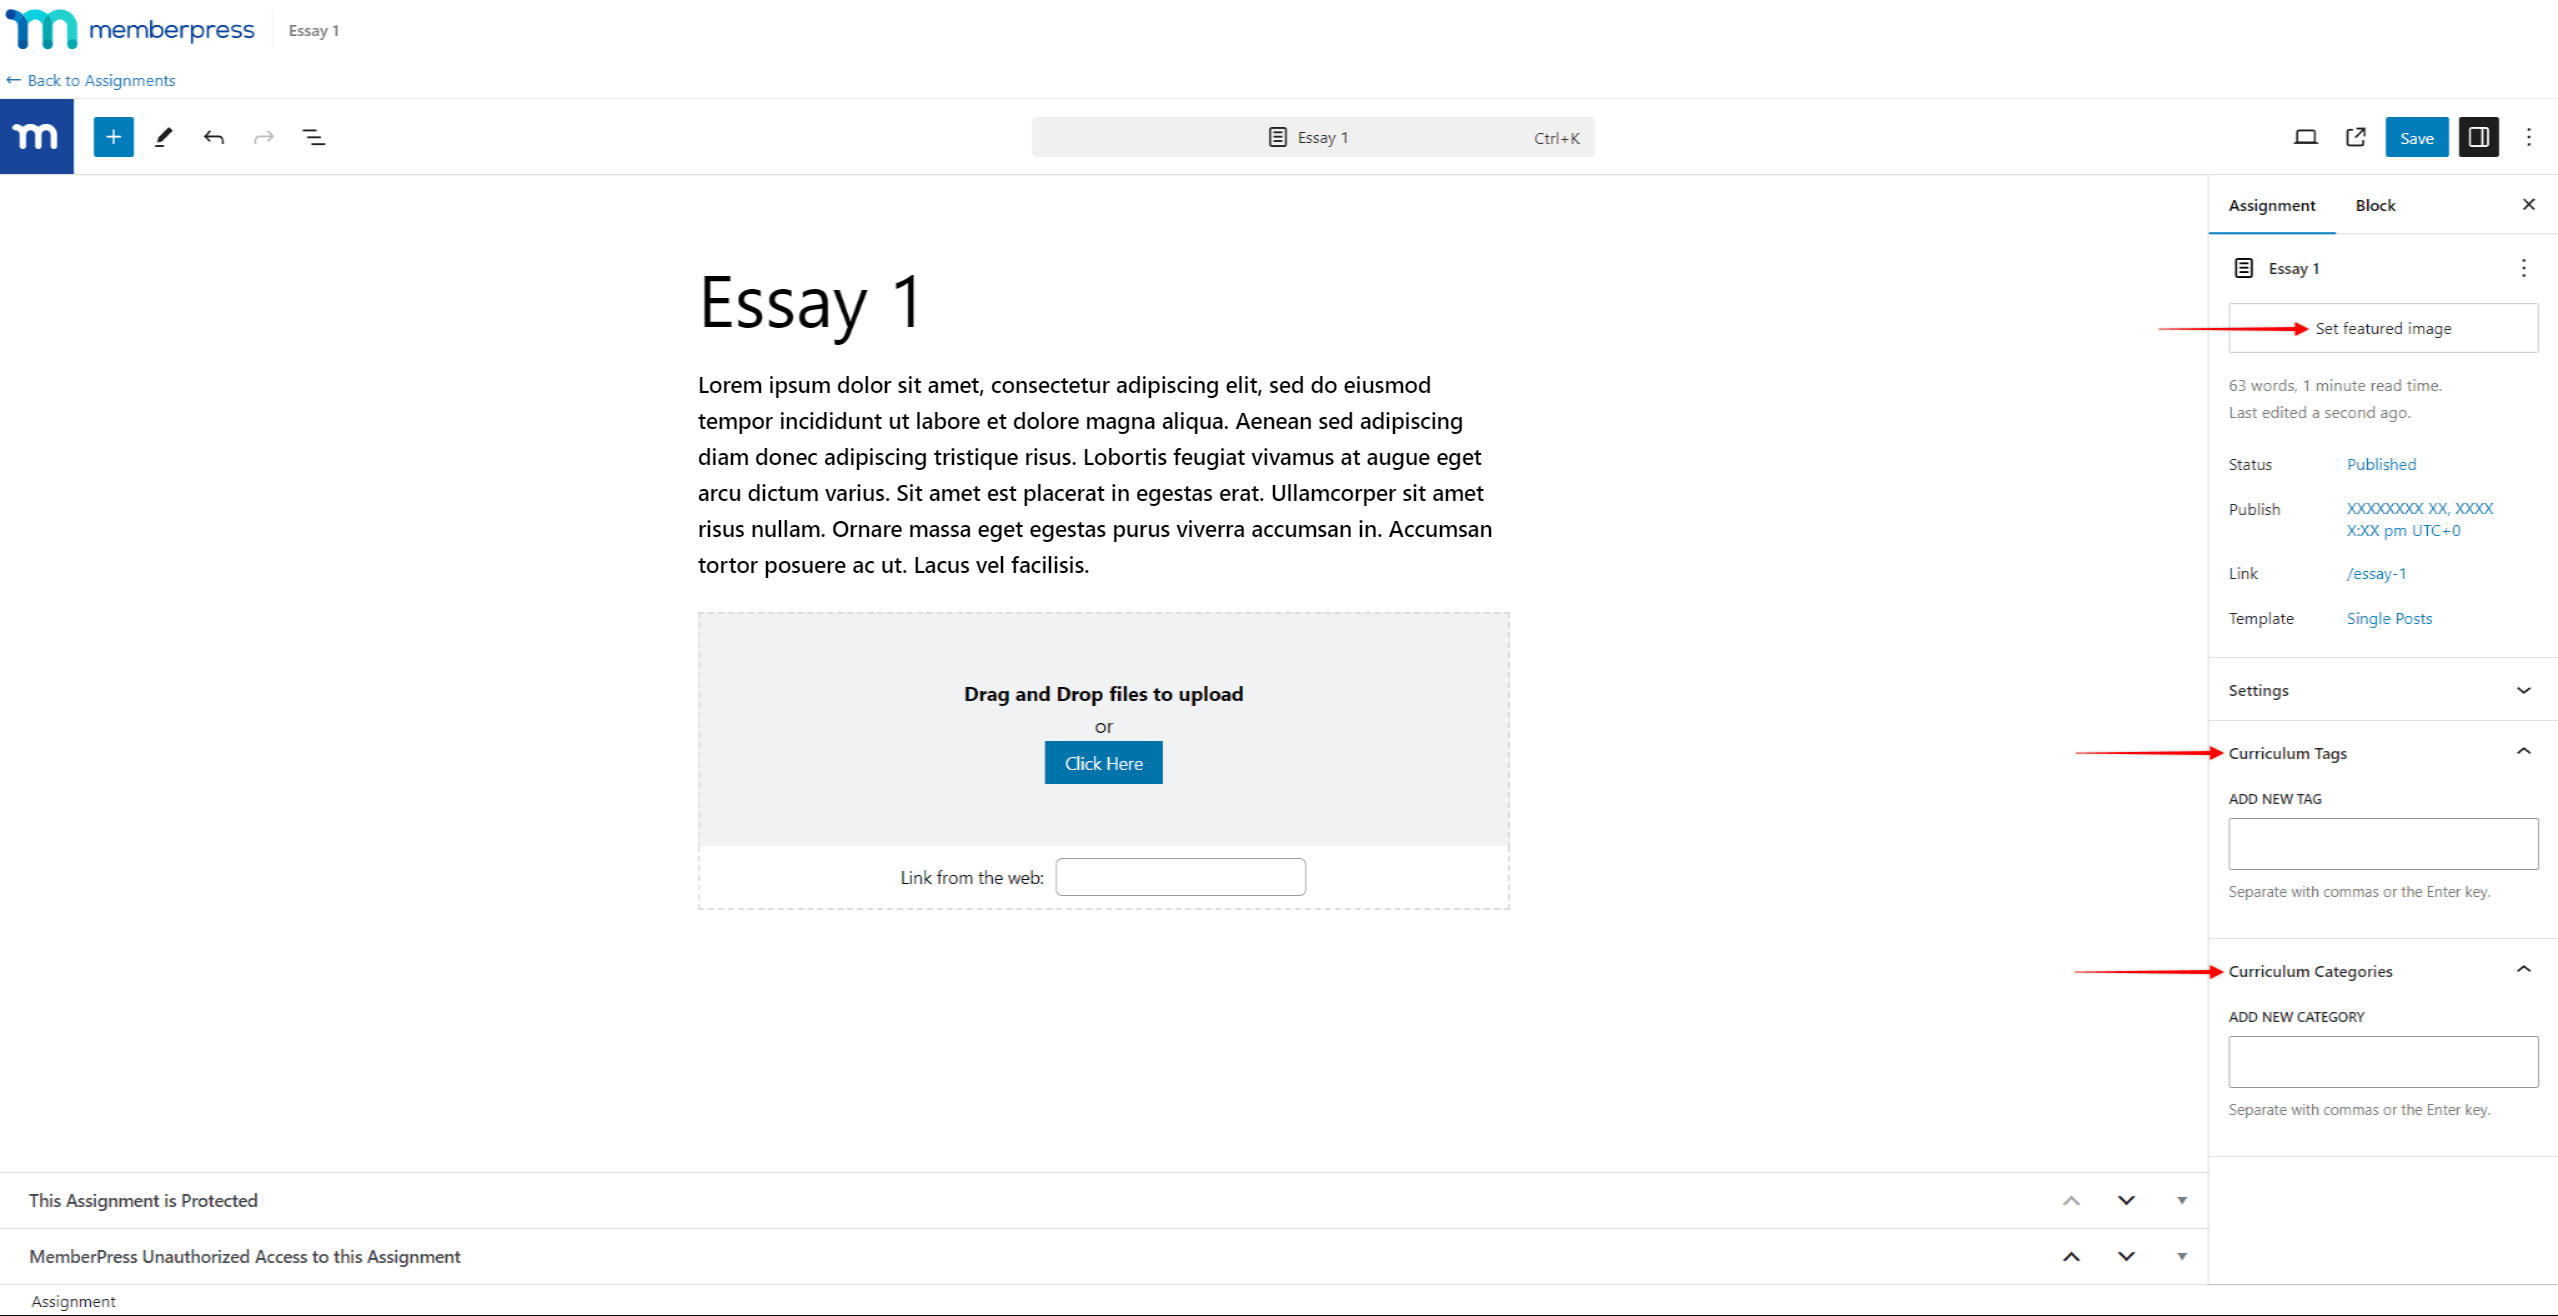
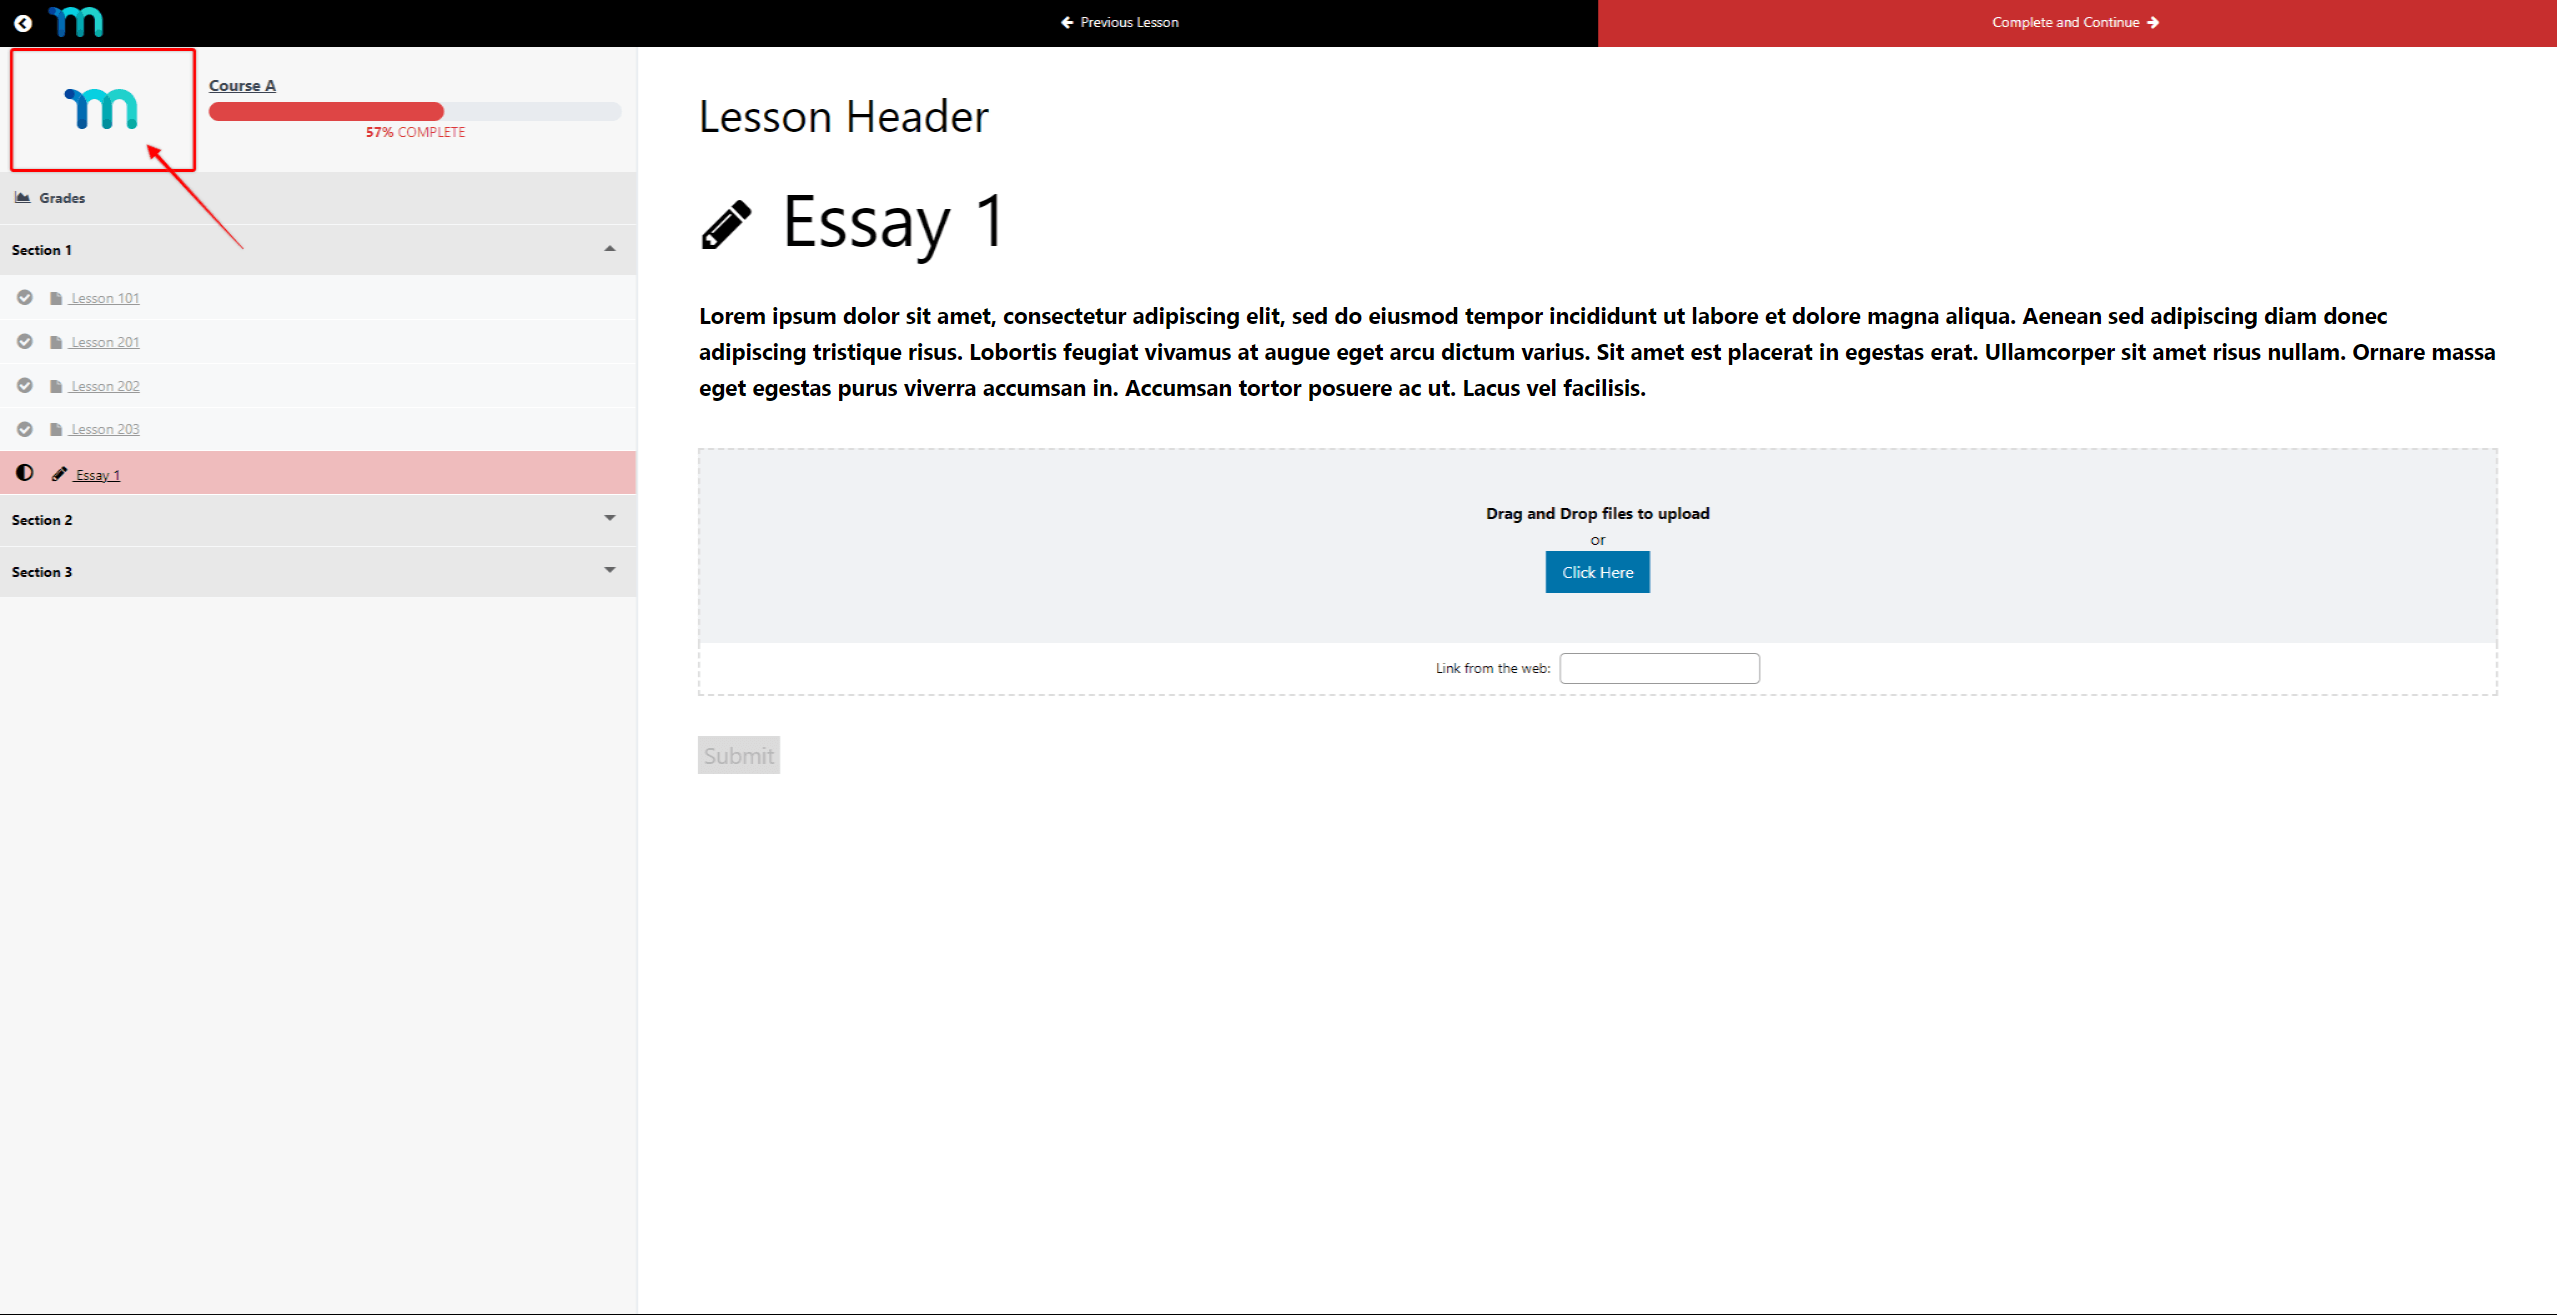
When set, the assignment-specific featured image will replace the default course featured image when students access the assignment.
In addition, you can add Curriculum Tags and Categories to assignments to group them with lessons and quizzes.
Once your assignment is fully set, you can publish it. You can do this by clicking the Publish link next to the assignment name in the Curriculum Editor. Also, you can click the Publish button within the Assignment Editor.
Managing Assignments
Assignments added to courses can be edited or removed within the course curriculum.
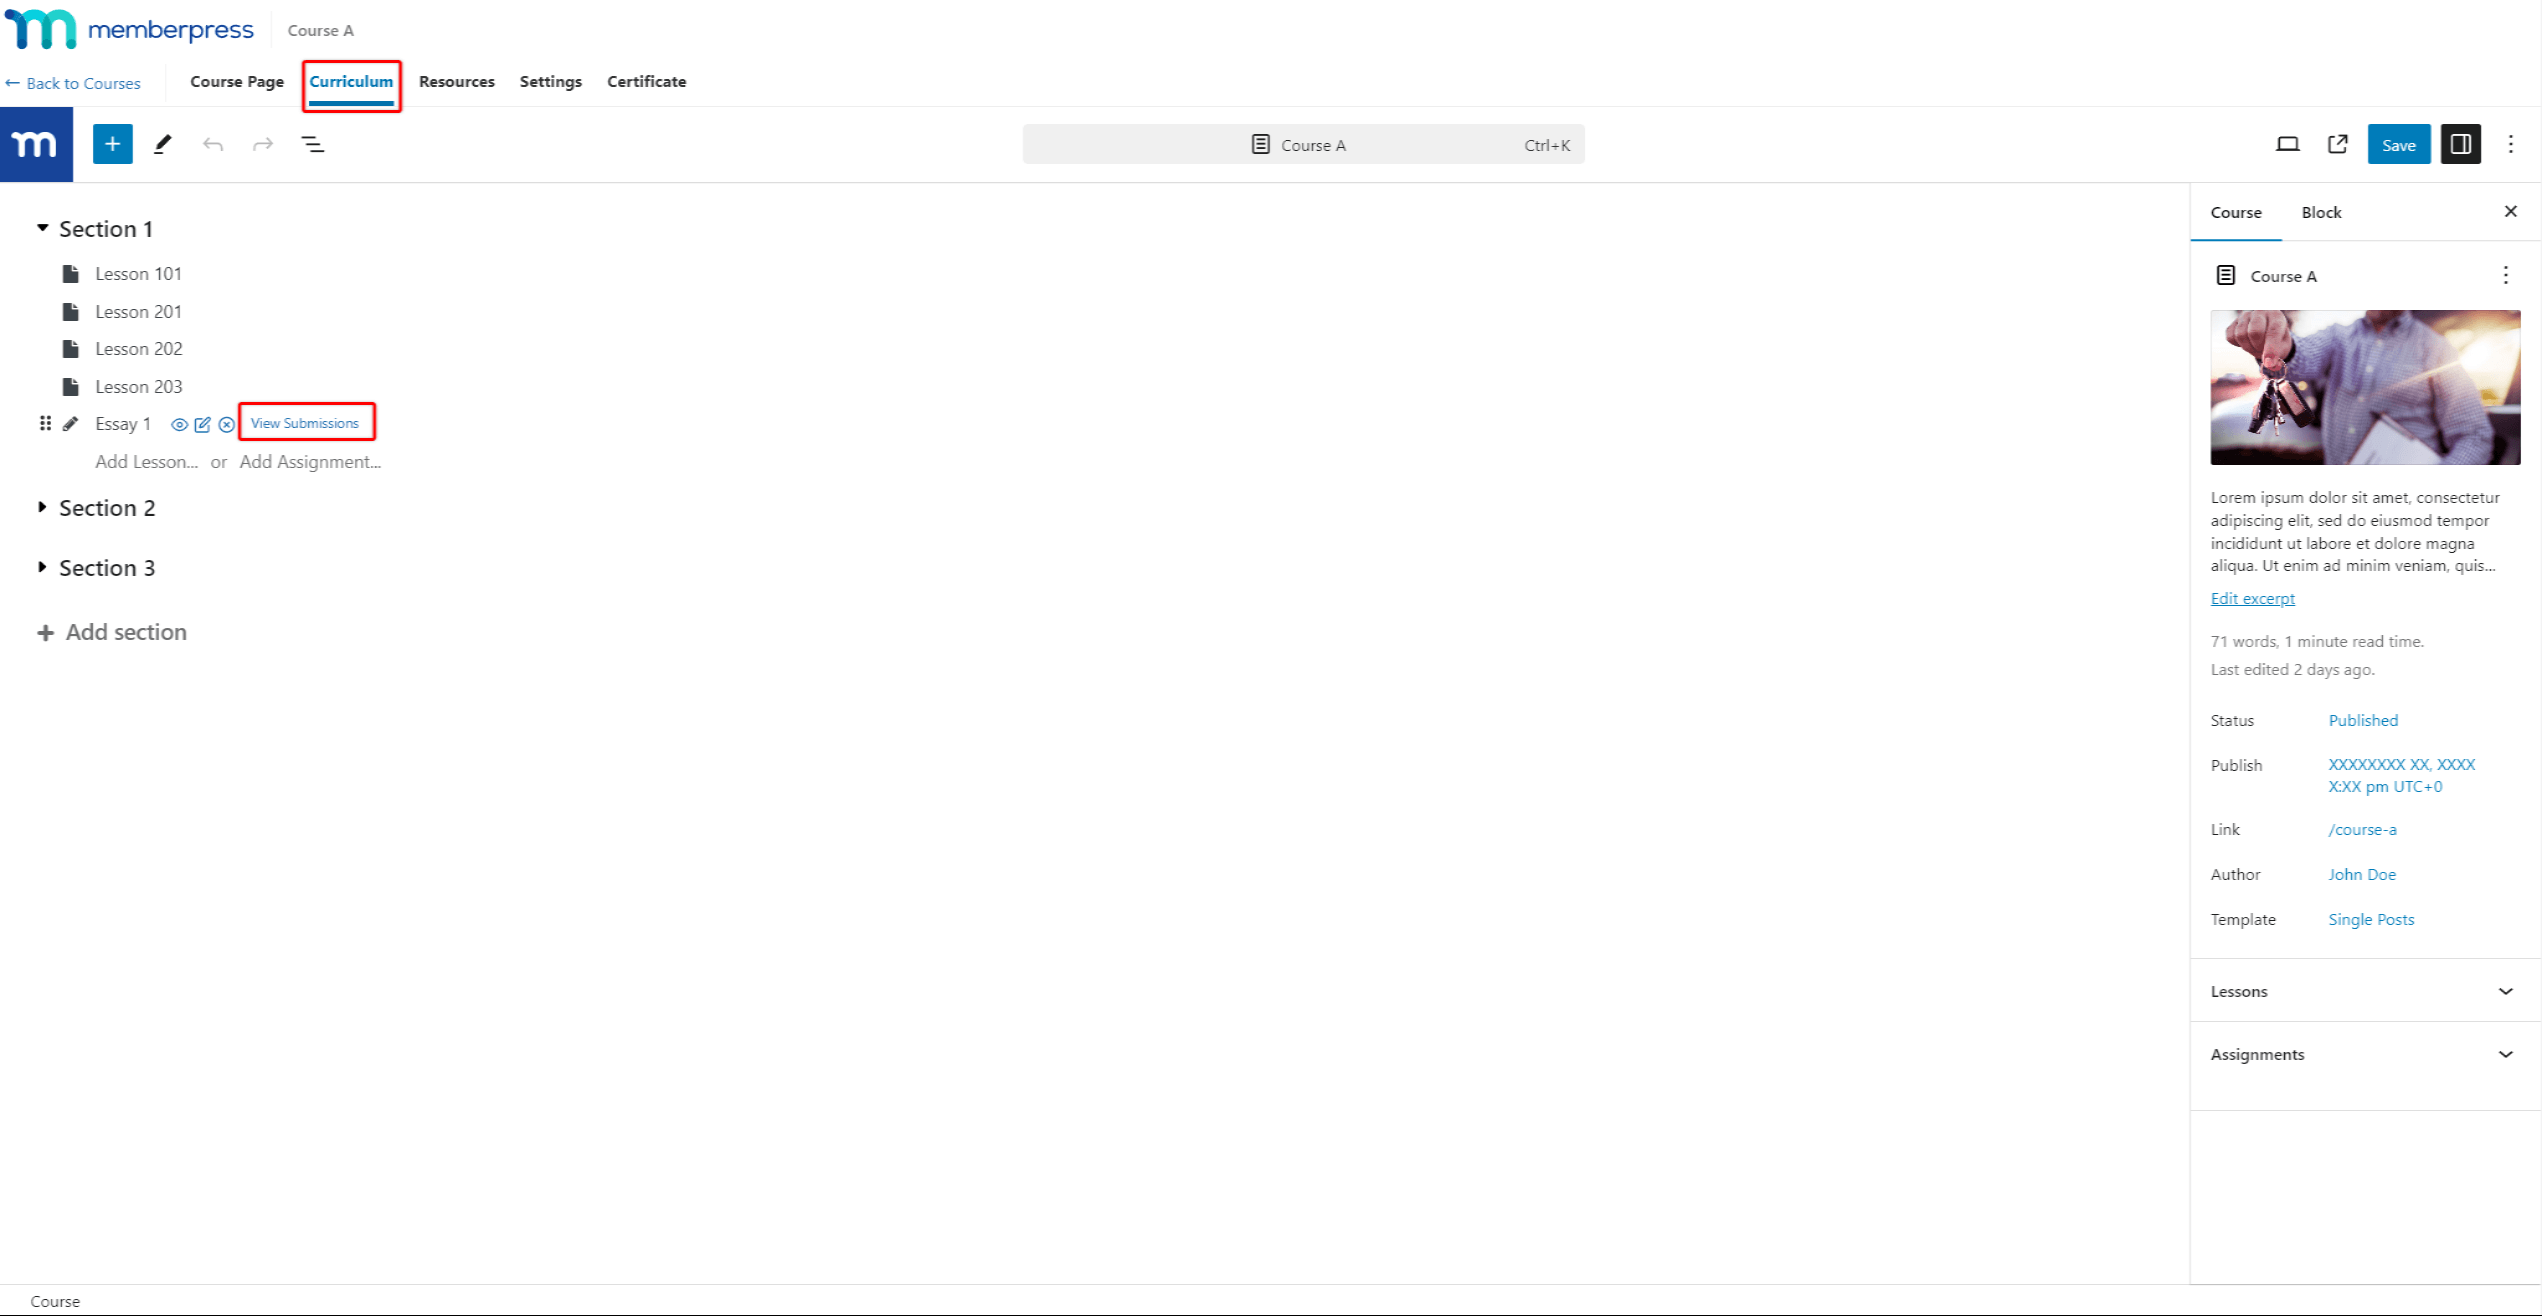
Also, when students submit their assignments, you can access their replies through the course curriculum:
- While at the course curriculum, hover over the assignment name to show additional options.
- Next to each assignment, you will see the View Submissions option if at least one student submitted the assignment. Click on that link to access the page with all submissions for that specific assignment.
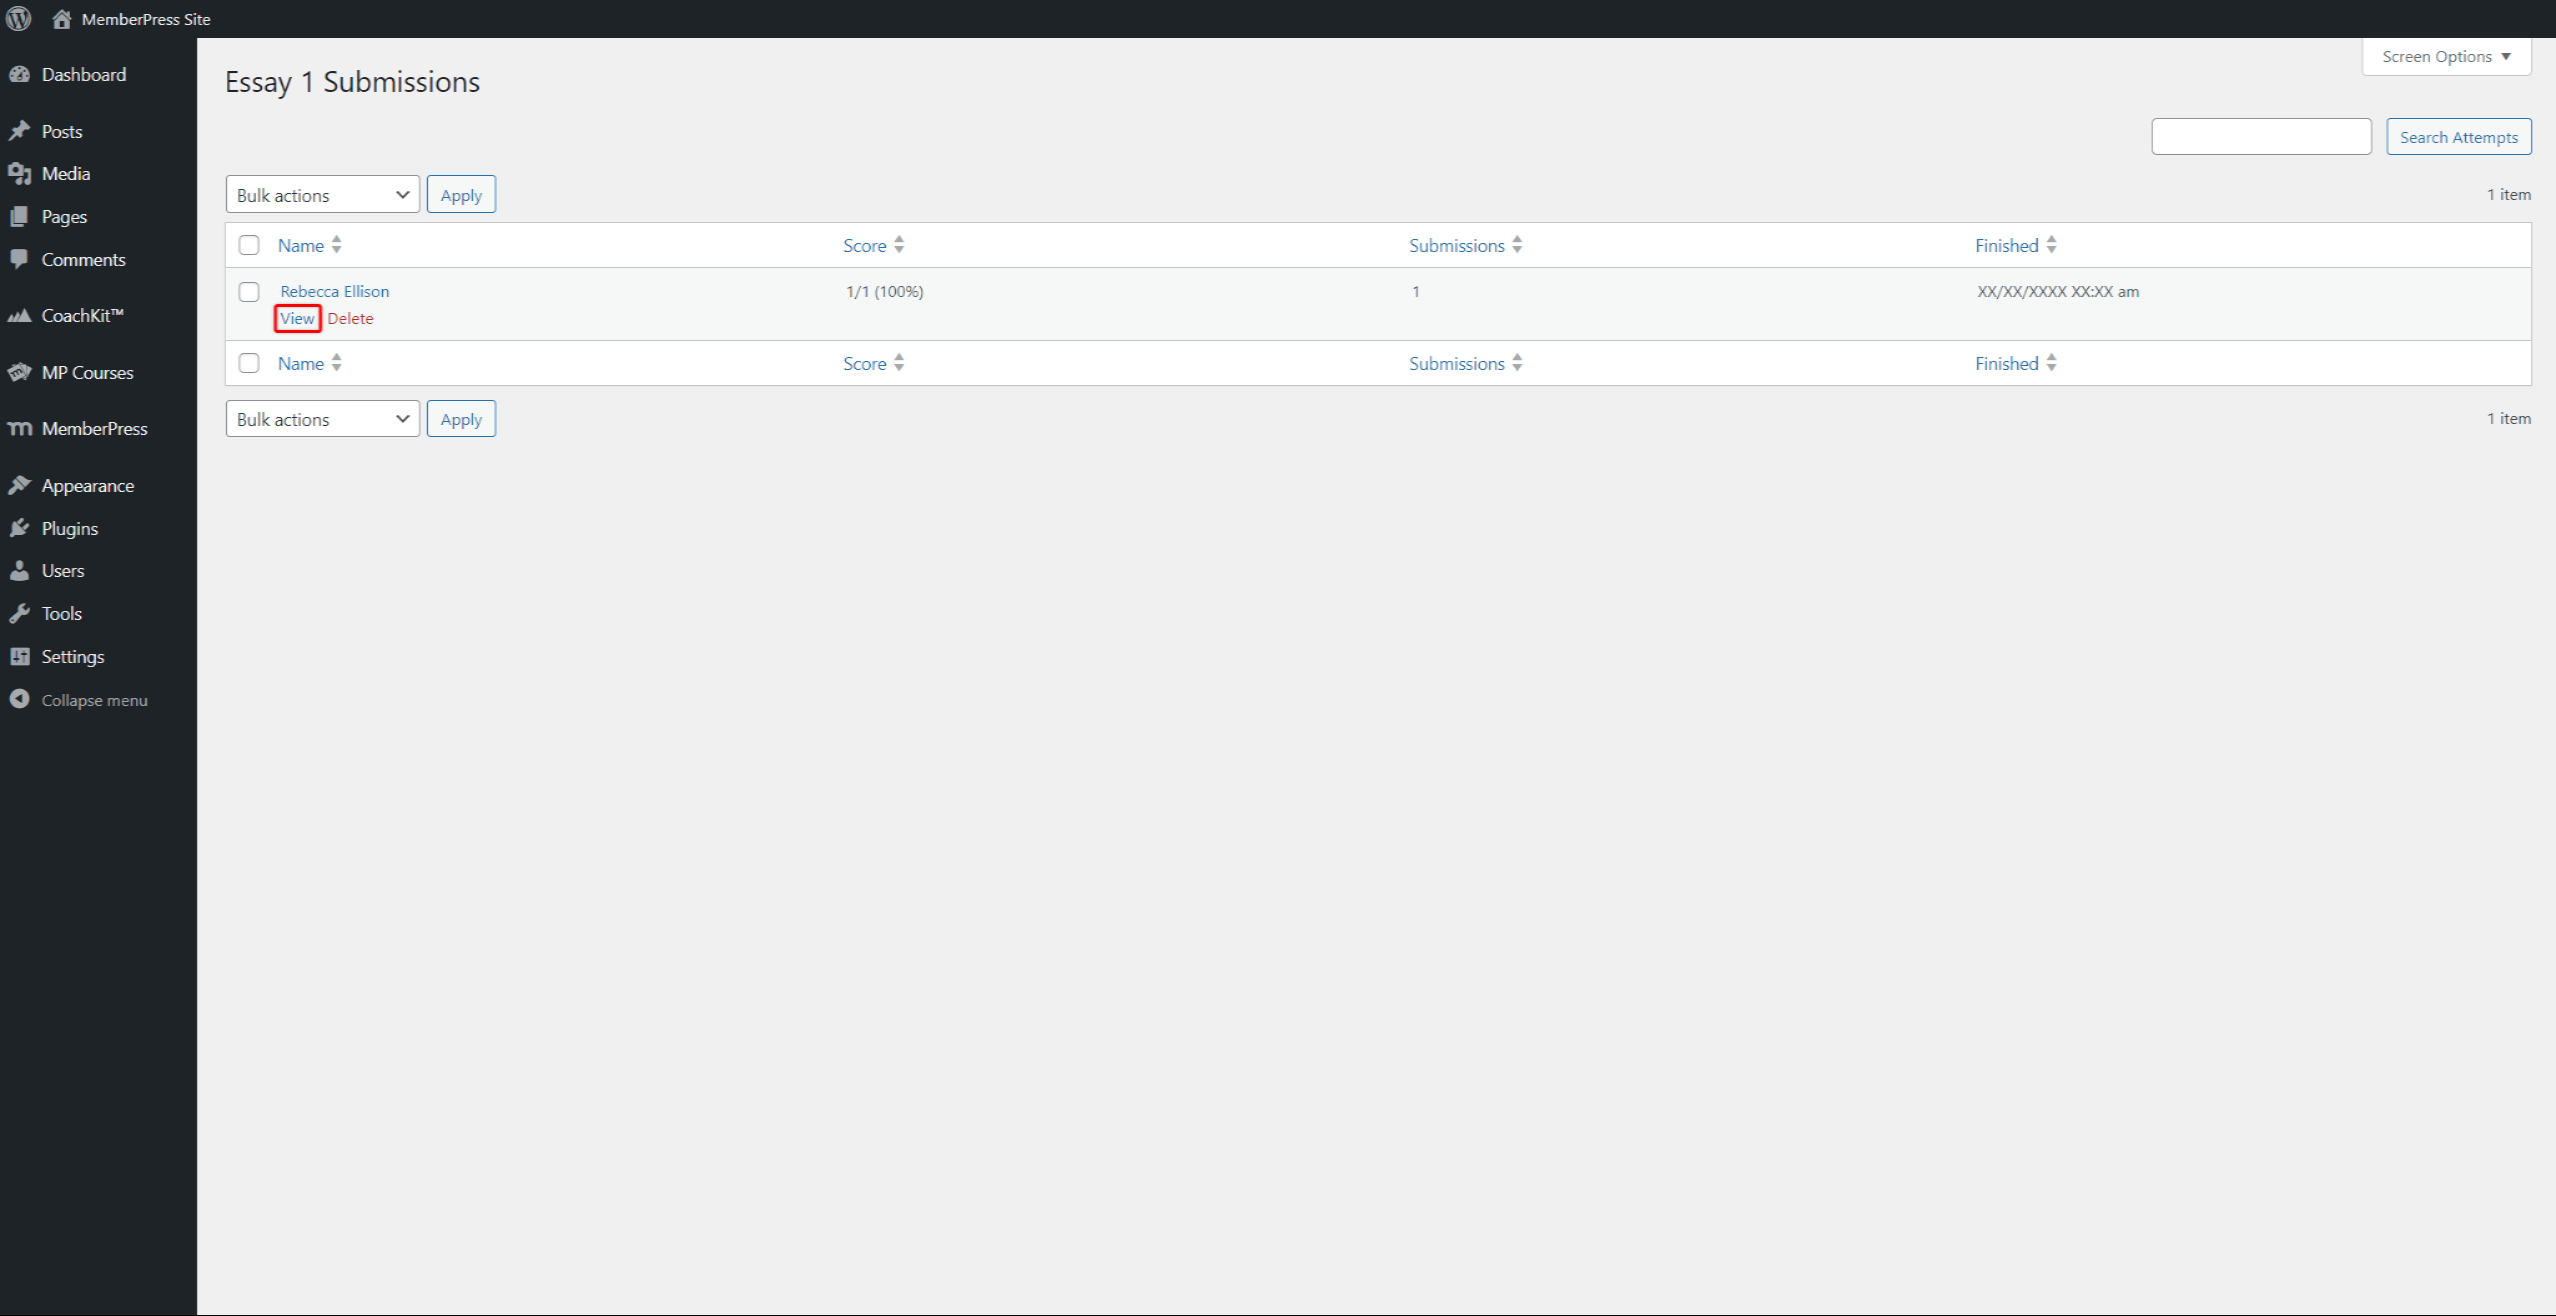
- Next, you will see the list of all students who made submissions. Hover over the student's name for additional options, and click the View link to open the submitted assignment.
Furthermore, you can find all your assignments on the Assignments page (Dashboard > MP Courses > Assignments). Here, you can also Add New assignments and edit or permanently delete existing ones.
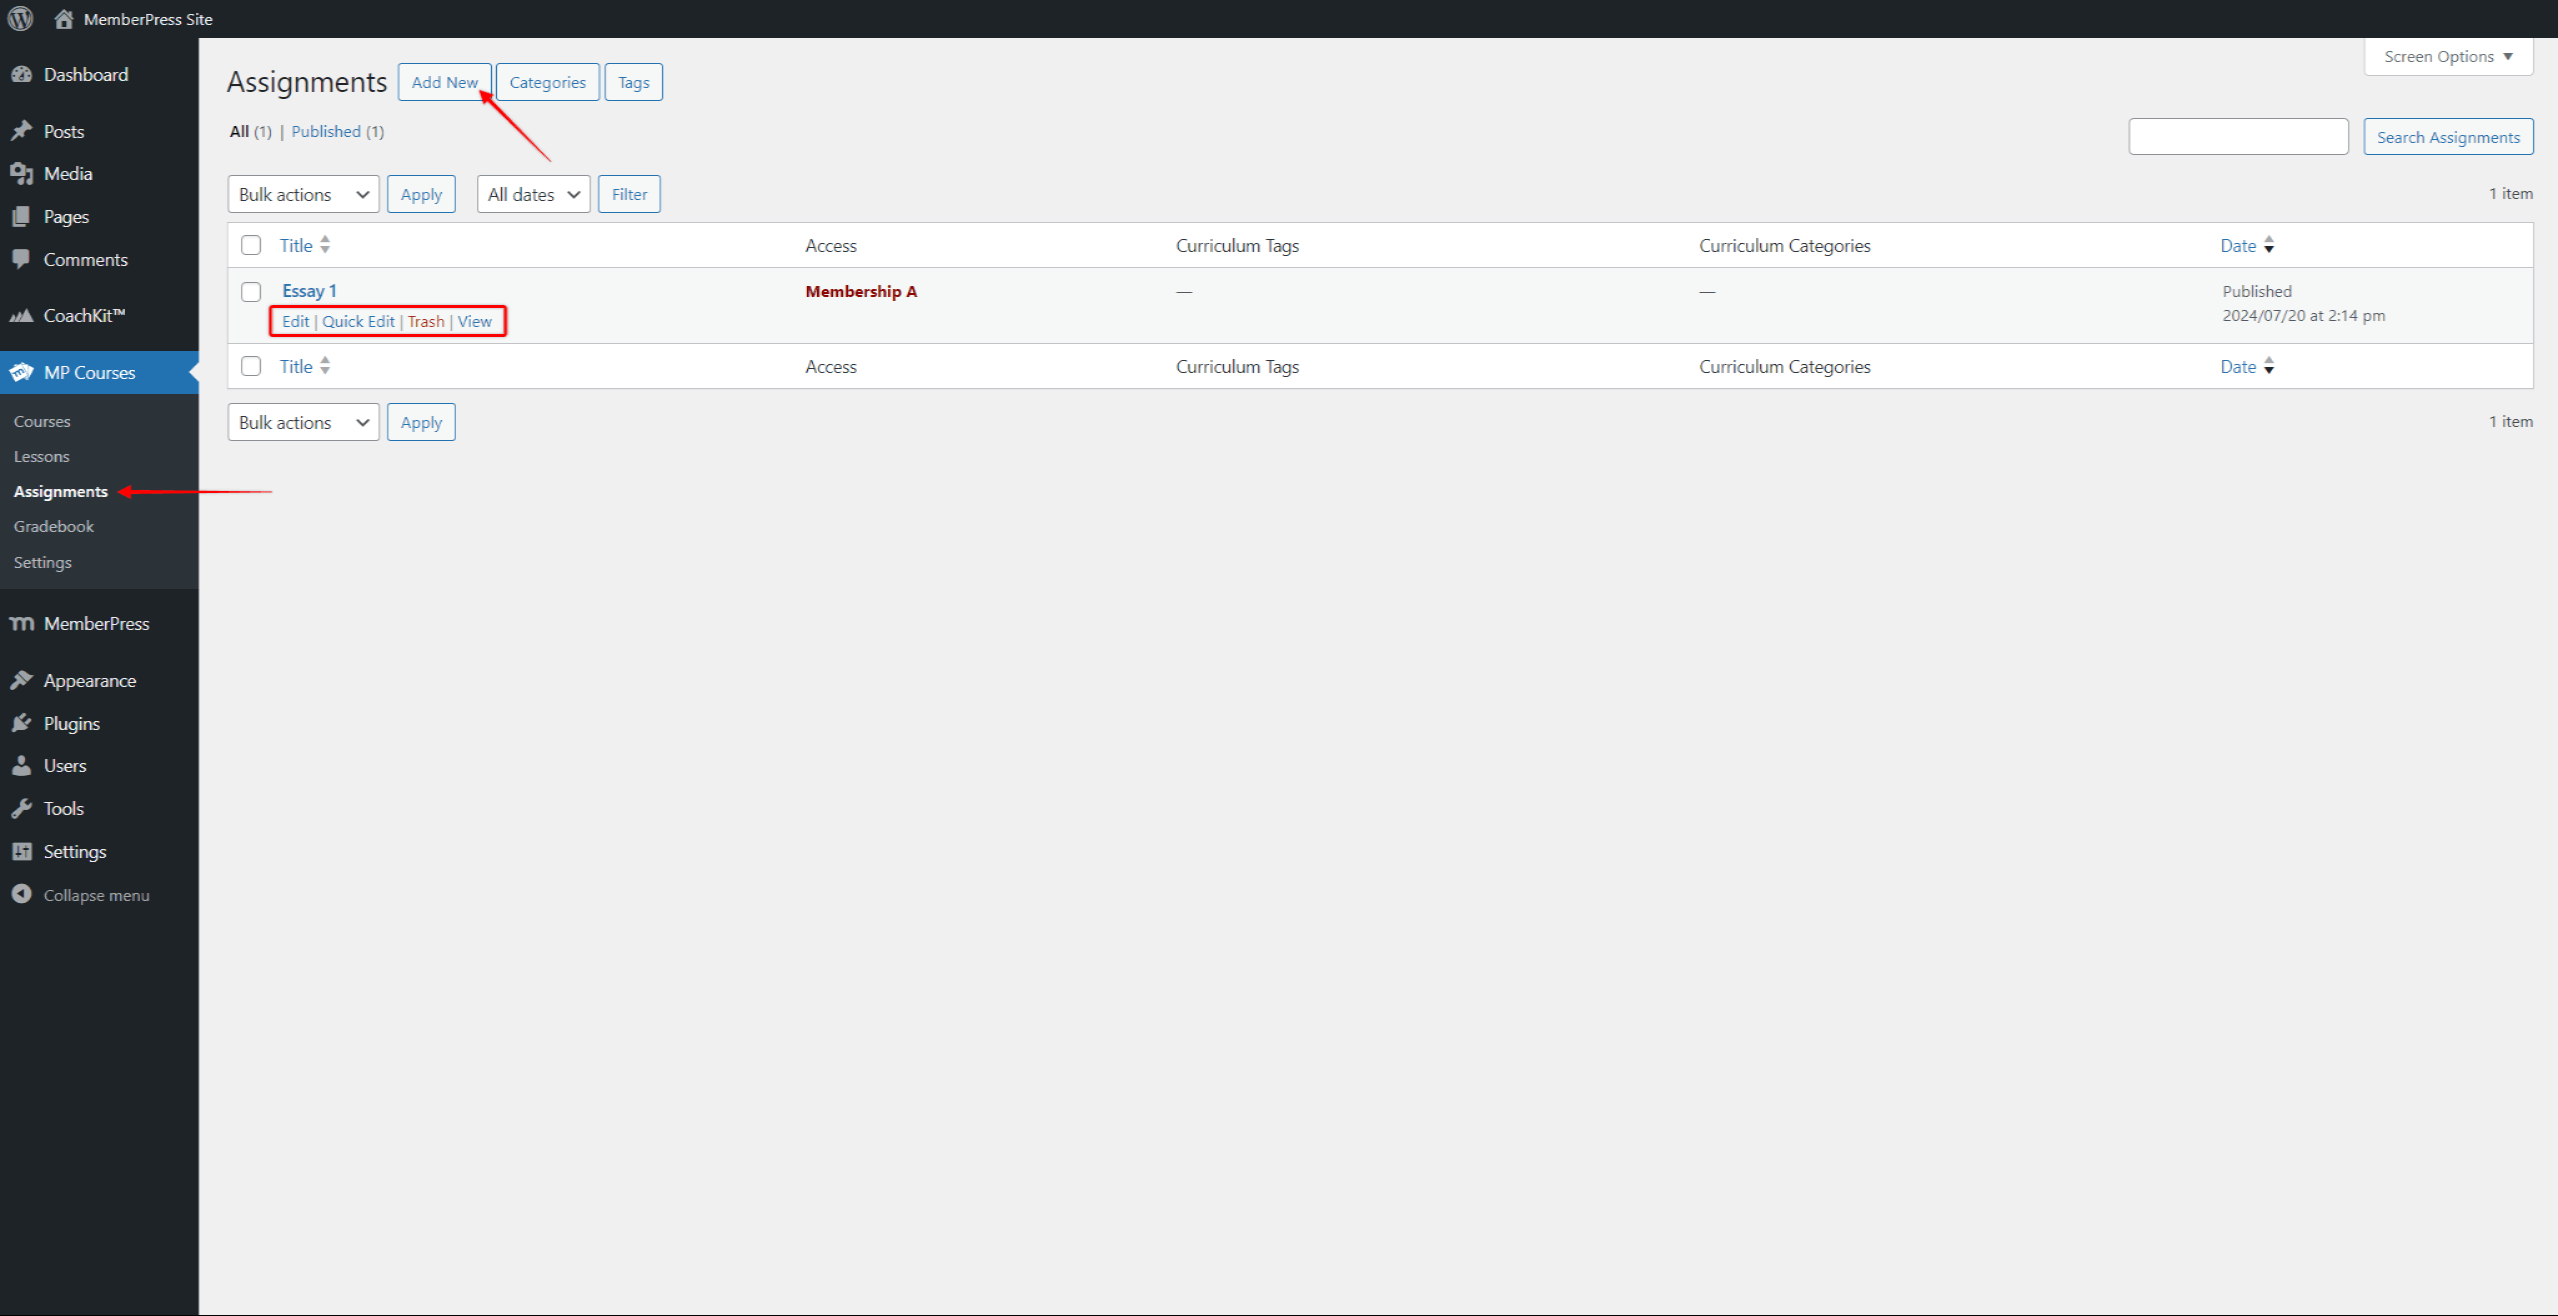
Hover over the assignment's name to find the options to edit, delete, or view an assignment.
If you added the Gradebook add-on to your website, you could also grade assignments your students submitted.
Protecting Assignments
Like other course content, assignments can be protected with MemberPress Rules to limit access to members only. You can protect assignments using the following MemberPress Rule types:
- All Assignments;
- A Single Assignment;
- Assignments with Curriculum Categories;
- Assignments with Course Curriculum Tag.
To protect assignments based on Curriculum Categories or Tags, assignments must have at least one category or tag added.


