Online paid video platforms have become increasingly popular. In fact, revenue in the video-on-demand (VoD) segment is expected to reach over $98 billion in 2022. However, monetizing video content online can be a tricky process.
Fortunately, you can quickly launch a video paywall to monetize your clips with our user-friendly MemberPress plugin. Doing this will require viewers to purchase or subscribe before accessing your digital content.
In this article, we'll discuss what a paywall is and how it can shield your paid video content. We'll then explain how to create a video content paywall using the MemberPress WordPress plugin. Let's get started!
What a Paywall Is (And Why You Should Consider Using One)
A paywall can monetize your online content by restricting access to certain people. With a paywall, users are required to pay upfront or subscribe to a recurring plan before they can view your content:
Since videos behind paywalls are typically free of advertising, you can place a greater focus on production quality instead of the number of clicks. This setup can improve the user experience and foster a better relationship with your audience.
Furthermore, people are more likely to pay for content they can't find anywhere else for free. Therefore, paywalls are ideal for premium videos with unique content or specialist knowledge.
There are several different types of paywalls, but the two main models for video content are subscription-based and pay-per-view.
With a subscription-based paywall, you charge users a recurring fee to access your content. This model could be great if you offer multi-video courses or series:
In contrast, a pay-per-view paywall charges users to access any individual video on your site. Viewers can choose to buy specific pieces of content that appeal to them. This model could be ideal if you produce standalone videos or broadcast events.
How to Create a Video Content Paywall (In 5 Steps)
We recommend using MemberPress to create your video paywall. Our tool is user-friendly and lets you handle everything right from your WordPress dashboard.
Here are the five easy steps to creating a video content paywall!
Step 1: Install and Activate the MemberPress Plugin
The first step is to set up and activate the MemberPress plugin. You'll first need to sign up for a MemberPress plan and download the plugin from your account page. Here you'll also see the license key for your subscription.
Next, navigate to your WordPress dashboard and upload the plugin by navigating to Plugins > Add New > Upload Plugin > Choose File. Once you've submitted the file, click on Activate Now.
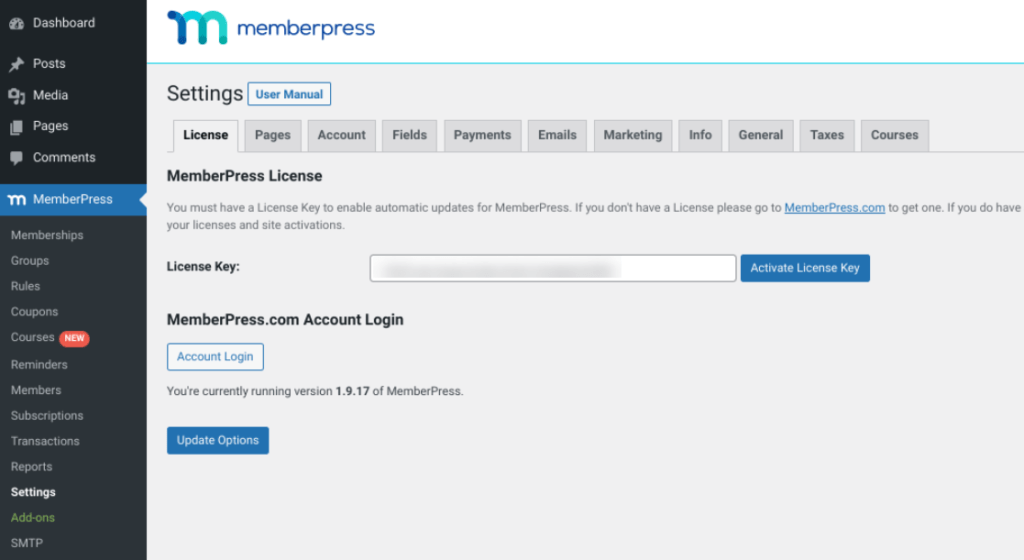
You'll now need to activate your subscription. To do this, navigate to Settings > License, enter your license key, and click on the Activate License Key button:
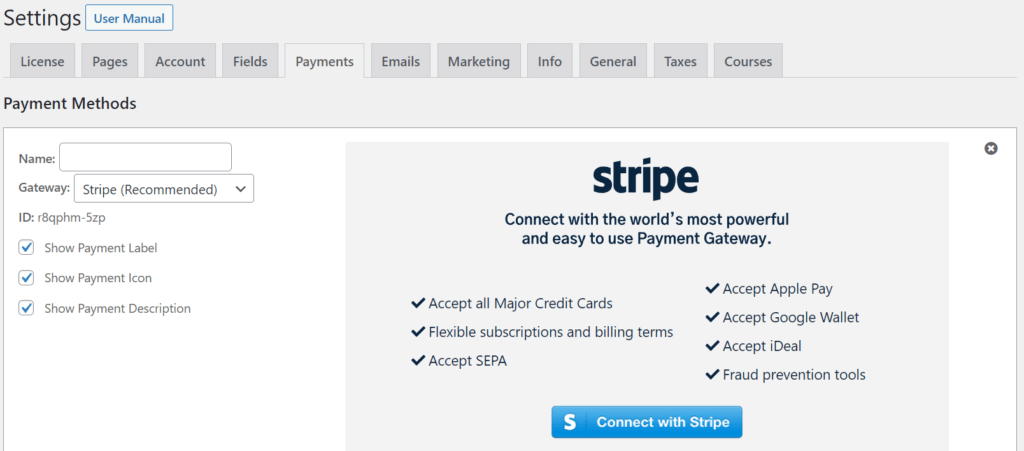
After you activate the plugin, you can set up payment methods. They're under the Payments tab on the Settings page:
Depending on the Gateway you choose from the drop-down menu, you'll be prompted to complete payment method details. Once you enter your payment information, click on Update Options to save them.
WATCH >> HOW TO USE STRIPE WITH MEMBERPRESS
Step 2: Add and Customize Your Paywall Memberships
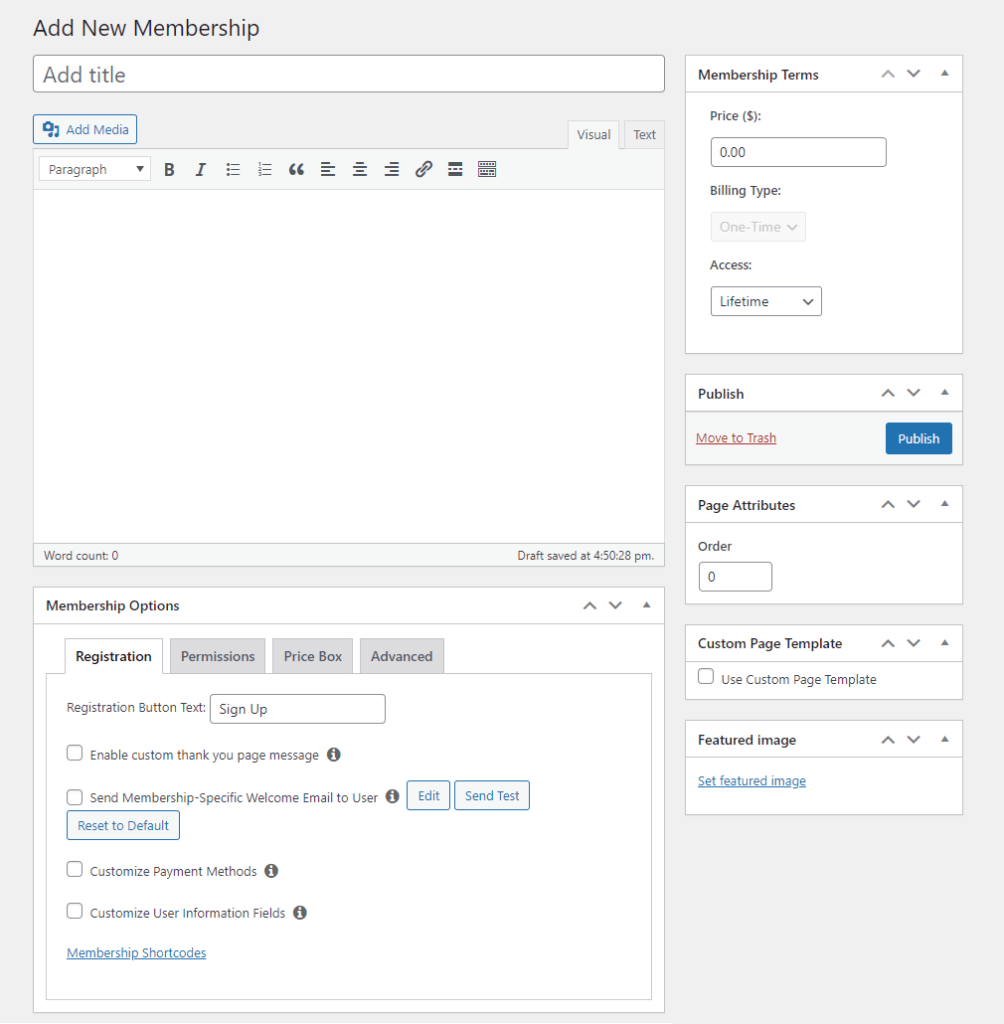
Next, navigate to the Memberships page to create your video content paywall. Click on the Add New button at the top of the page, and then set the title and price for your membership plan:
Under Membership Terms, you can determine whether your paywall will be a pay-per-view (one-time billing) or a recurring subscription model.
Then, in the Membership Options section, you will see additional ways to customize your plan. Here, you can create custom user fields and membership-specific welcome emails.
You might want to create different payment levels for your members. For instance, you could make entry-level plans that let users watch some of your content and more expensive packages for the entire video catalog.
If you need a more visual guide, our video walks you through creating memberships:
Keep in mind that you can always come back to edit or add more memberships as your site evolves.
Step 3: Create Rules for Your Video Paywall
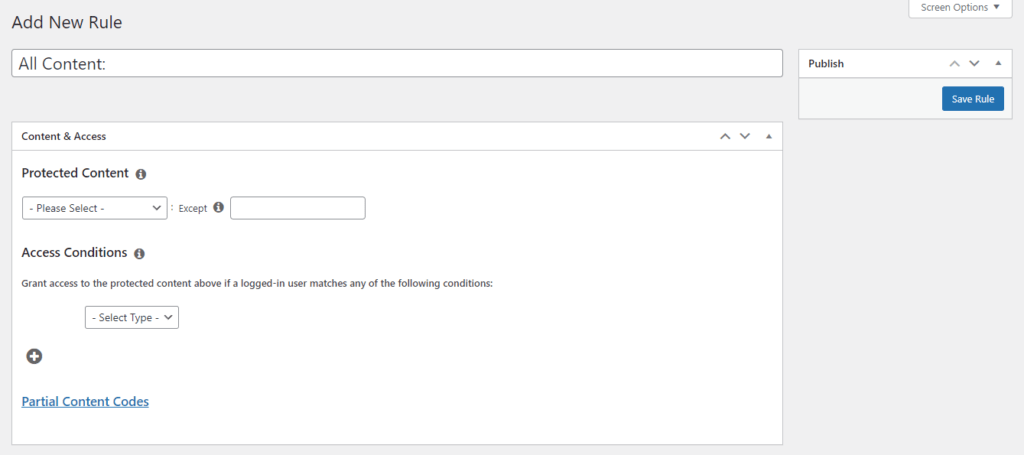
Next, navigate to the Rules page and click on Add New to create the rules for your video paywall. In this section, make a selection from the Protected Content drop-down menu to choose the videos the paywall will protect:
Next, determine the Access Conditions. From this drop-down menu, choose Membership. You will see a new field appear, and you can select the type of membership plan required to access the paywalled content.
Finally, click on Save Rule when you're finished. You can set up multiple rules on this page to restrict your videos to different members.
If you'd like a more visual guide, check out the following video:
The clip walks you through the process of setting up rules with our MemberPress plugin.
Step 4: Set Up a Login Page for Your Paywall
After creating your rules, you will need to set up a login page for your video paywall. Here, paying members will enter their details to access paywalled clips.
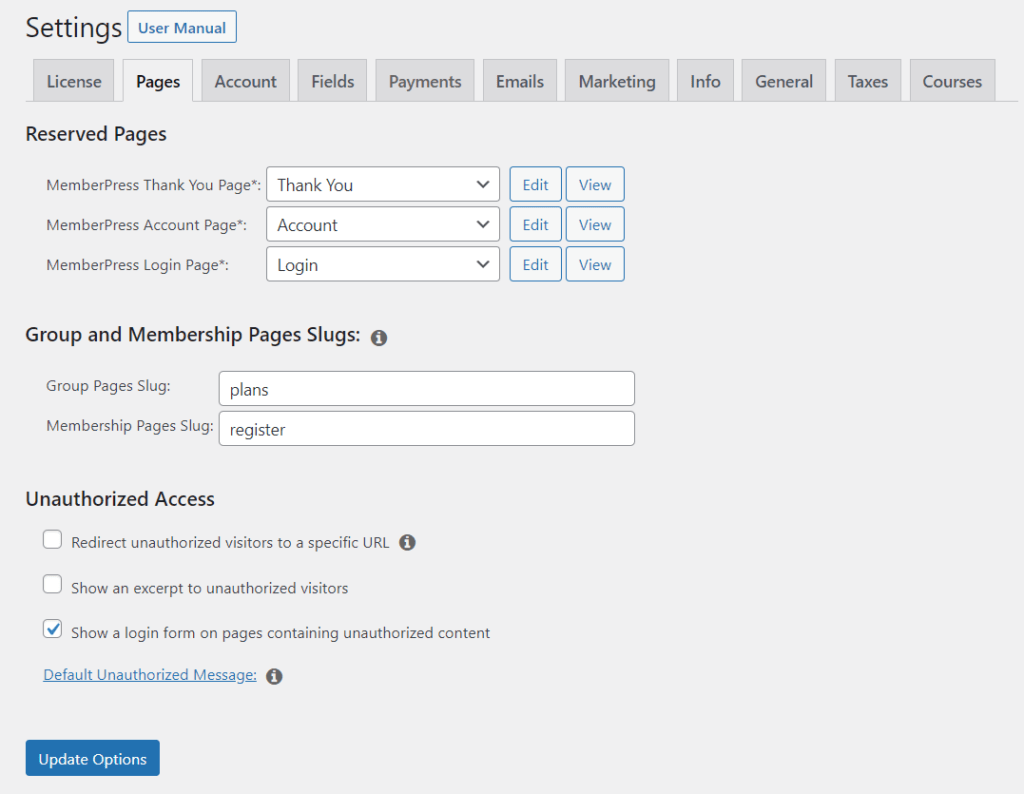
To do this, navigate to Settings > Pages. Then, select Show a login form on pages containing unauthorized content in the Unauthorized Access section:
This setting ensures users must log in to watch videos behind the paywall. You can also choose to show an excerpt to unauthorized visitors or redirect them to a different URL, such as your signup landing page.
Step 5: Consider Adding Limited Content Access to Your Video Paywall
You can also choose to offer limited content access to viewers who are not yet members. This setup can give visitors a trial of your offerings and incentivize them to subscribe.
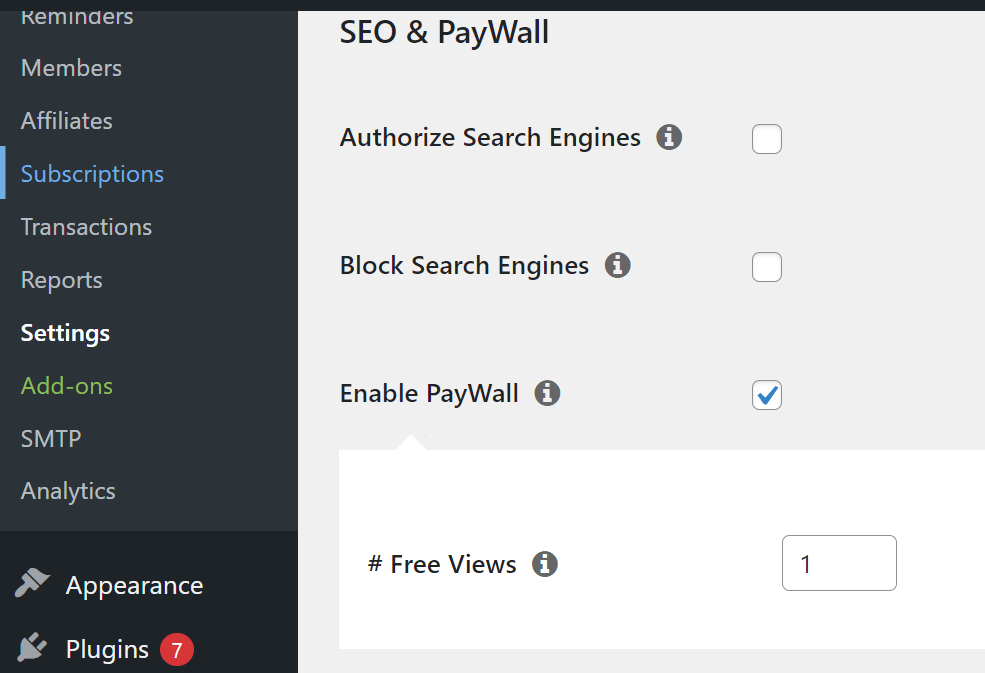
You can do this in the Settings > General section. Click on Enable Paywall and choose the number of free views a user will be allowed:
You can also authorize search engines to access and index your paywalled content here. This setting can boost your search engine optimization (SEO) and drive traffic to your site.
Conclusion
Creating a video content paywall can monetize your content. Furthermore, MemberPress makes it super easy to make this paywall.
Once it's in place, you can grow your business and build a better relationship with your viewers through ad-free content.
To recap, you can make a video content paywall in these five easy steps:
- Install and activate our MemberPress plugin.
- Add and customize your paywall memberships.
- Create rules for your video paywall.
- Set up a login page for your paywall.
- Consider adding limited content access to your video paywall.
Do you have any questions about creating a video hub with paywalled content? Let us know in the comments section below!
If you liked this article, be sure to subscribe to our newsletter in the box up to your right!





This is an amazing opportunity for online video course creators. I’ll keep this in mind.
Thanks John for this valuable blog post!