Online classes have a wide variety of uses. You can sell them as part of your business, use them for internal training purposes, or use them for academic purposes.
However, regardless of what your goals are, you need a learning management system (LMS) to make your courses available to students.
Fortunately, WordPress is an extremely flexible platform. And with a high quality LMS plugin, including MemberPress Courses, you can easily transform WordPress into a powerful LMS all on your own.
Below, we'll give you an overview of MemberPress' LMS extension. We'll explain why it's a quality solution for turning your WordPress site into a hub of online learning. Then we'll walk you through how to set it up in just five steps. Let's dive in!
Why You Should Use WordPress and MemberPress Courses
As we mentioned, there are many platforms you could use to launch your online class. However, there are many benefits to using MemberPress Courses.
First, if you already have a WordPress site, MemberPress gives you an easy way to extend your existing platform with minimal effort.
Second, when you use a WordPress plugin rather than a hosted third-party platform you'll save a ton money (no third-party fees), and you'll own your data.
In additions to fees, hosted solutions like Teachable and Kajabi come with terms and conditions. If you (even unknowingly) break the rules, you can get deplatformed. When that happens, your data is lost.
Here are several other reasons to consider using a WordPress plugin for your LMS:
- WordPress is a highly flexible, scalable, and stable platform that gives you complete ownership and control over your content.
- MemberPress Courses comes with a visual curriculum builder to help you easily craft a series of lessons that will keep students engaged.
- You can restrict access to your courses to limit enrollment to registered students (or those who have paid).
- Progress tracking enables instructors and students to stay up to date on how many lessons they've completed.
- The Quizzes feature helps to keep students motivated and track their own learning.
- There are multiple payment gateways available to process students' tuition.
These features make MemberPress a great solution for any kind of online learning platform you're looking to create. Fortunately, it's also easy to use.
How to Turn WordPress Into an LMS in 5 Easy Steps
Once you've determined if MemberPress Courses is the right solution for you, it takes just five steps to get it up and running. Here's how to get started.
Step 1: Install and Activate MemberPress Courses
The first thing you'll need to do is install and activate the MemberPress plugin. Once you've purchased it, you should receive a .zip file.
Navigate to Plugins > Add New in your WordPress dashboard and click on Upload Plugin:
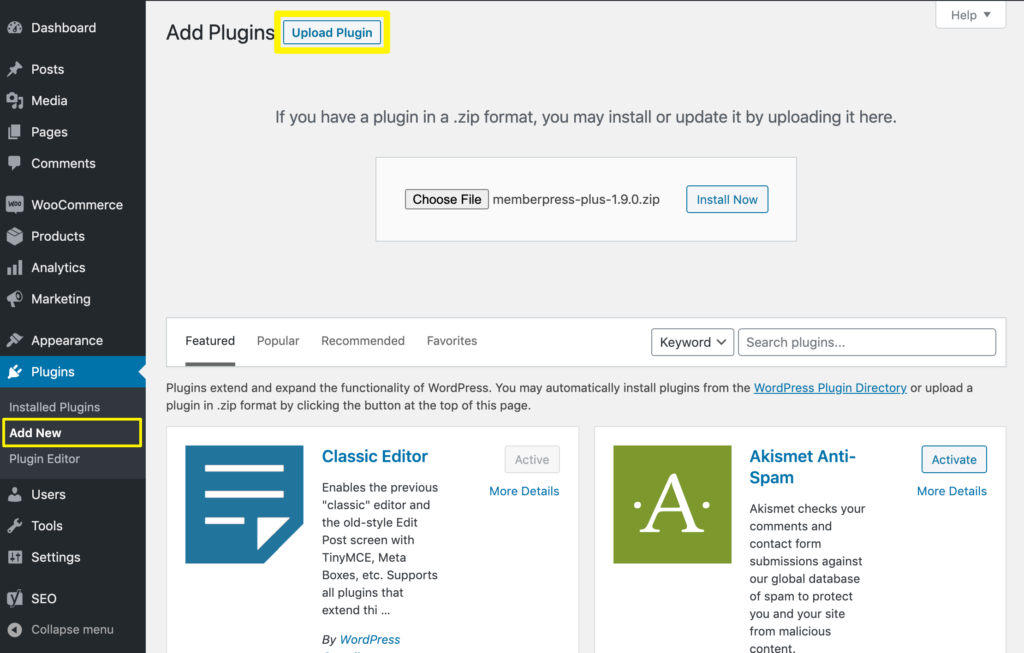
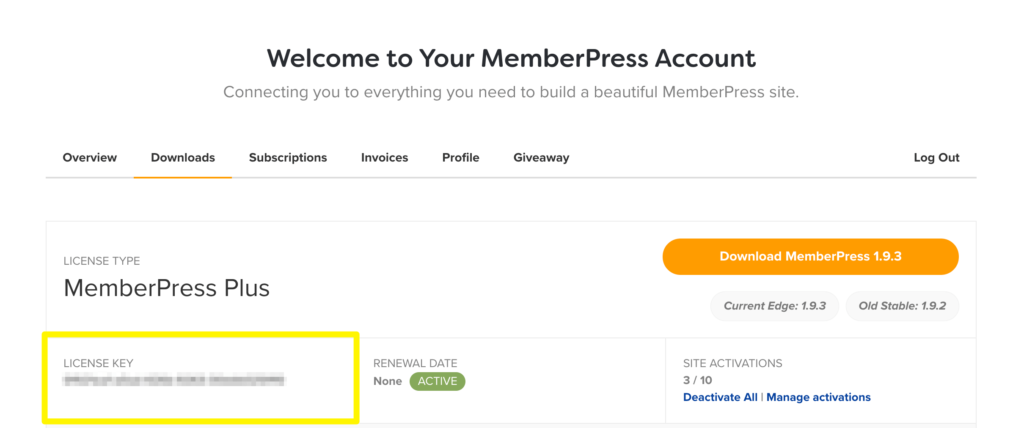
Choose the MemberPress .zip file, then click on Install Now followed by Activate Plugin. Next, you'll need to enter your license key, which you can find by logging into your MemberPress account:
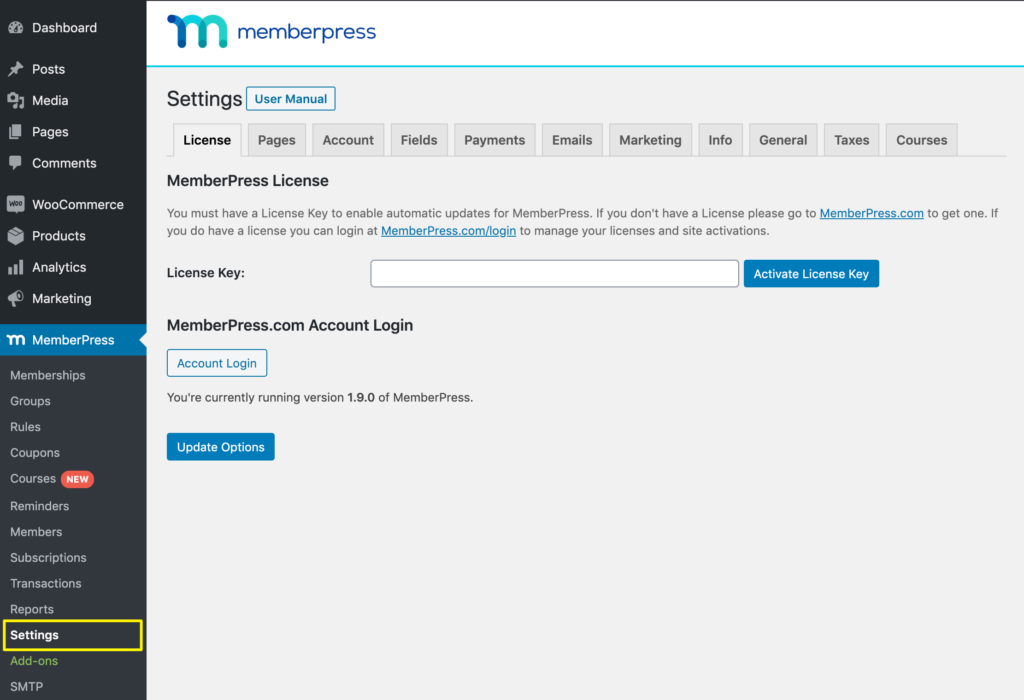
You can then enter the license key in the plugin's settings:
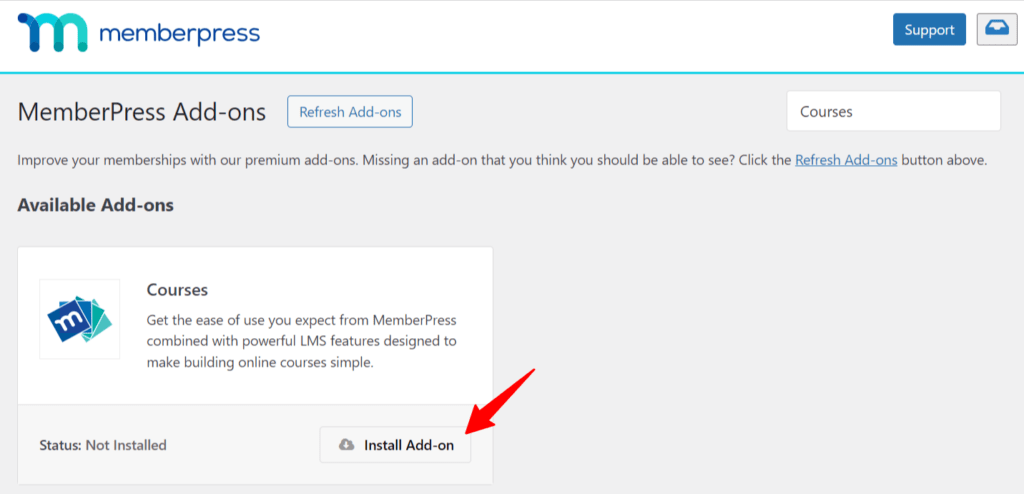
The Courses platform comes with your MemberPress license, but you'll still need to activate it separately. Navigate to MemberPress > Add-ons, search for the Courses add-on and click to install and activate it.
Once installed, a new MP Courses menu will appear in your WordPress dashboard.
Step 2: Create Your First Course
To get started, navigate to MP Courses > Courses. Here, you can jump right into creating your first course. Click on Add New to get started:
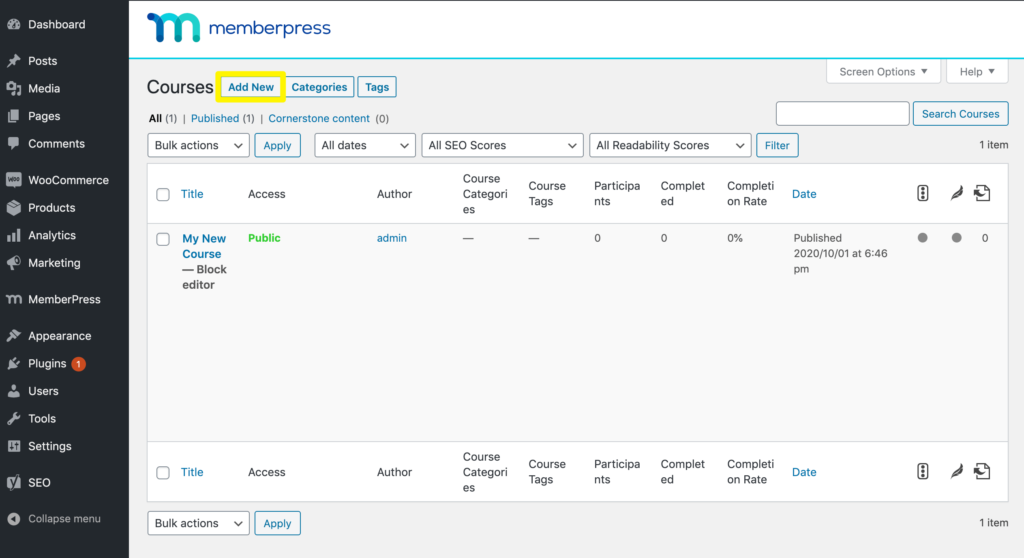
This will open the Course editor, which is very similar to (and just as easy to use as) the default WordPress editor. In the Course Page tab, you can add a title and description of what students will learn throughout the lessons:
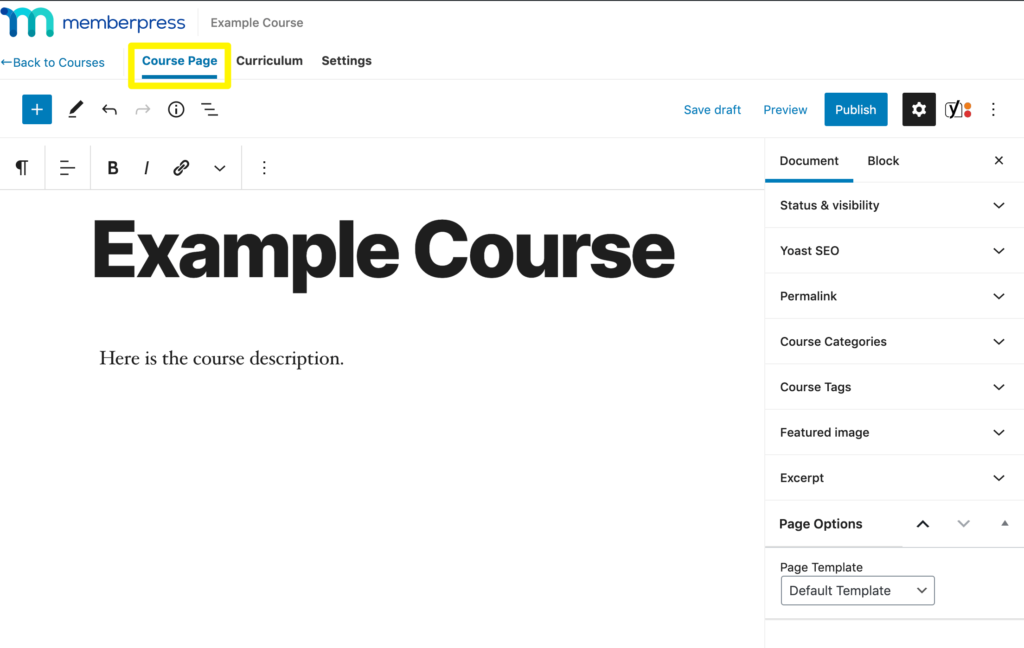
There are also several details to add in the Document sidebar to the right, including:
- Permalink: This is your course's URL.
- Categories and tags: If you're going to offer multiple classes, you may want to organize them with taxonomies.
- Featured images: You can add an image to represent your course here.
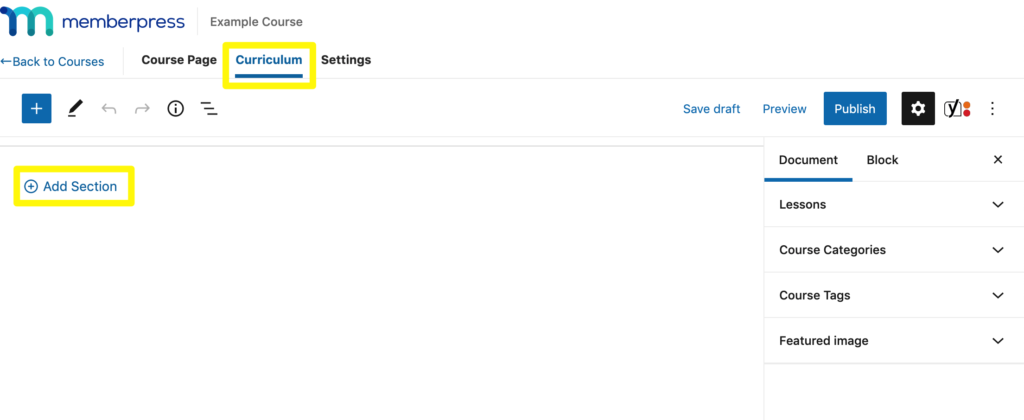
Then click on the Curriculum tab. MemberPress structures courses in “sections” and “lessons”, which you can add by clicking on the plus (+) icon:
To add your lesson content, hover over the relevant lesson and click on the edit icon:
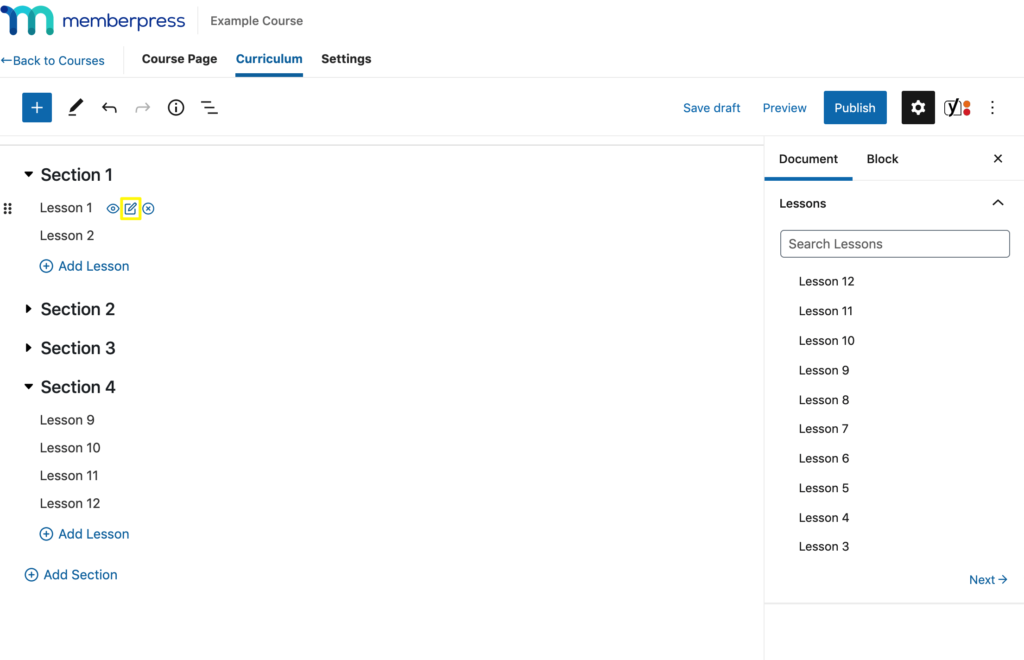
Using the familiar WordPress Block Editor, you can add any text, video, or other content relevant to this particular lesson.
Repeat the process until you've included everything your course needs, making sure to save your changes along the way.
Step 3: Publish Your Course
Once your curriculum is complete, navigate to the Settings tab in the editor and make sure the Include in Course Listing option is toggled on:

If you have a landing or sales page for this course, you can also add its URL here. Then click on the Publish button:
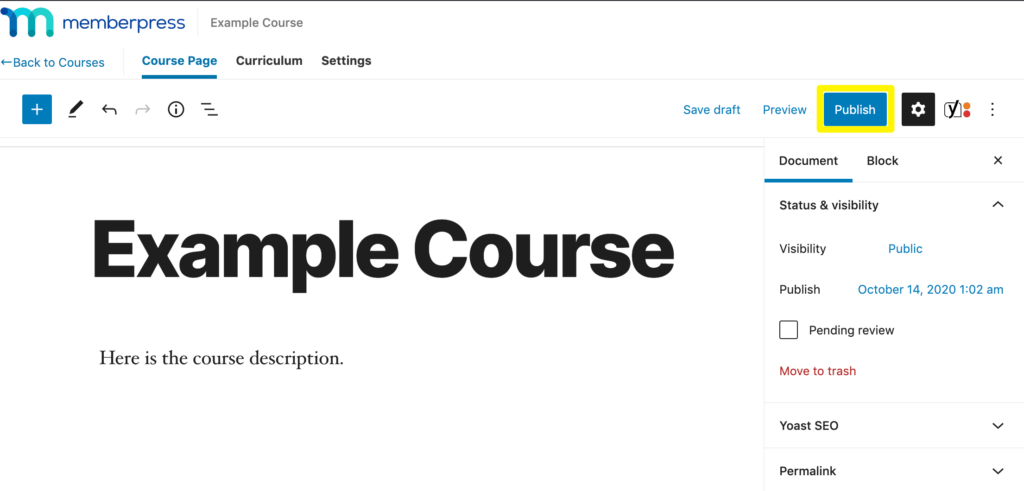
Your course will now be live and accessible to students.
Step 4: Protect Your Courses
In the event that you want to restrict access to your courses, you can do so using MemberPress Rules.
First, navigate to MemberPress > Rules and click on Add New:
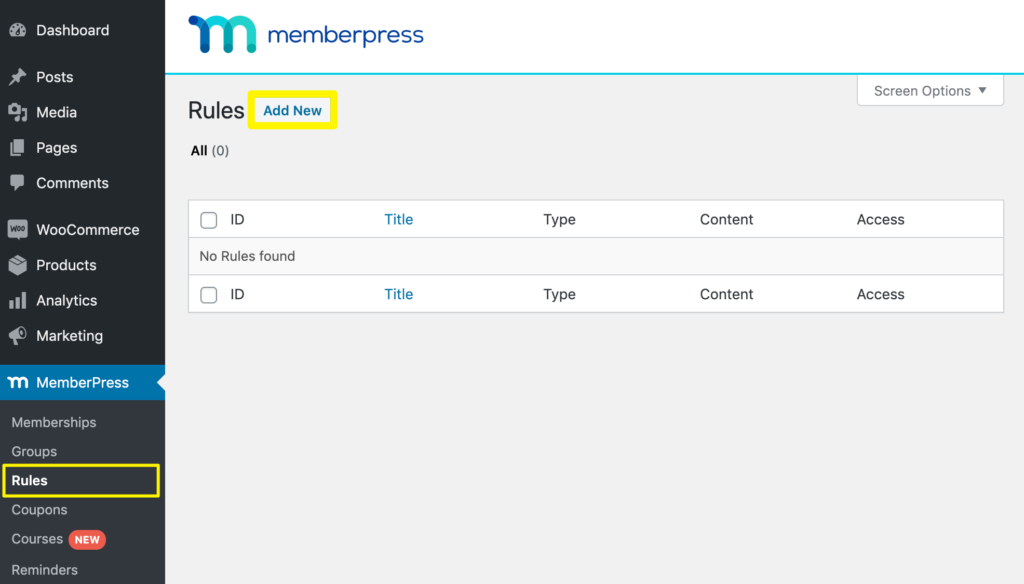
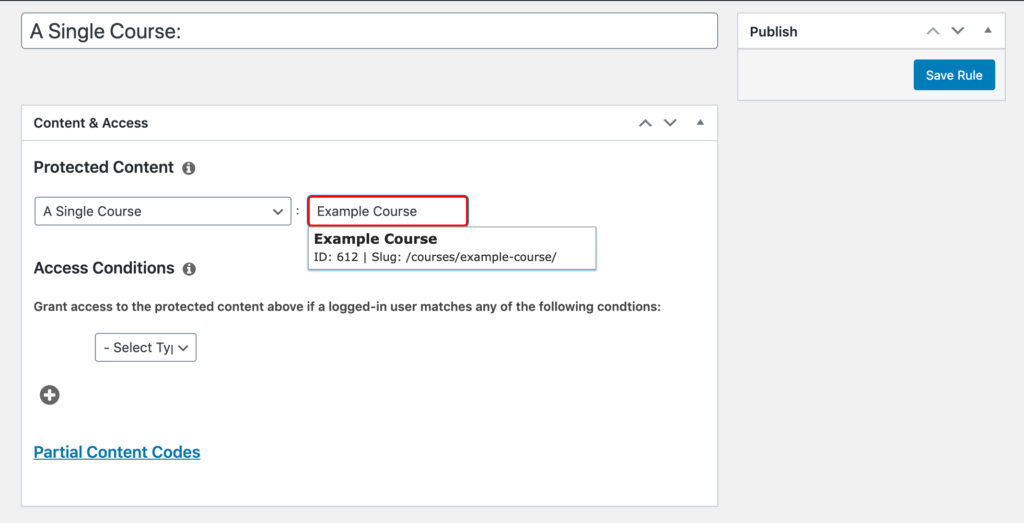
Note that you'll need to have at least one membership already set up to create rules. Under Content & Access, select the content type (in this case, we'll use Single Course) and enter the title of your new course:
You can then select the specific membership that will grant access to this course:
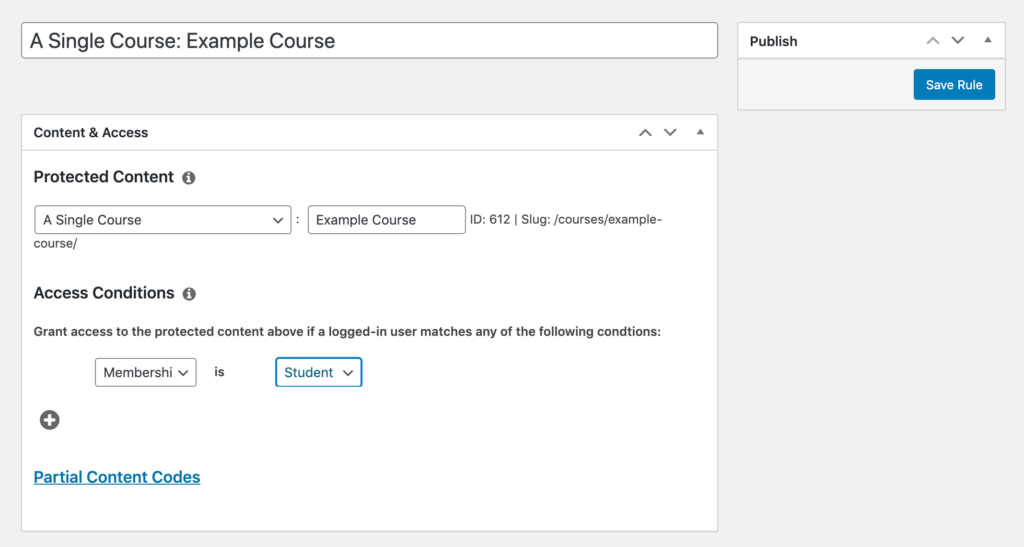
Then click on Save Rule to protect your course.
Step 5: Make Sure ReadyLaunch™ is Enabled
With built-in ReadyLaunch™ by MemberPress you can create pages (including courses, certificates, and quizzes) that are…
- Mobile-responsive
- Optimized to sell
- Branded
…and gorgeous. All with a few clicks of the mouse.
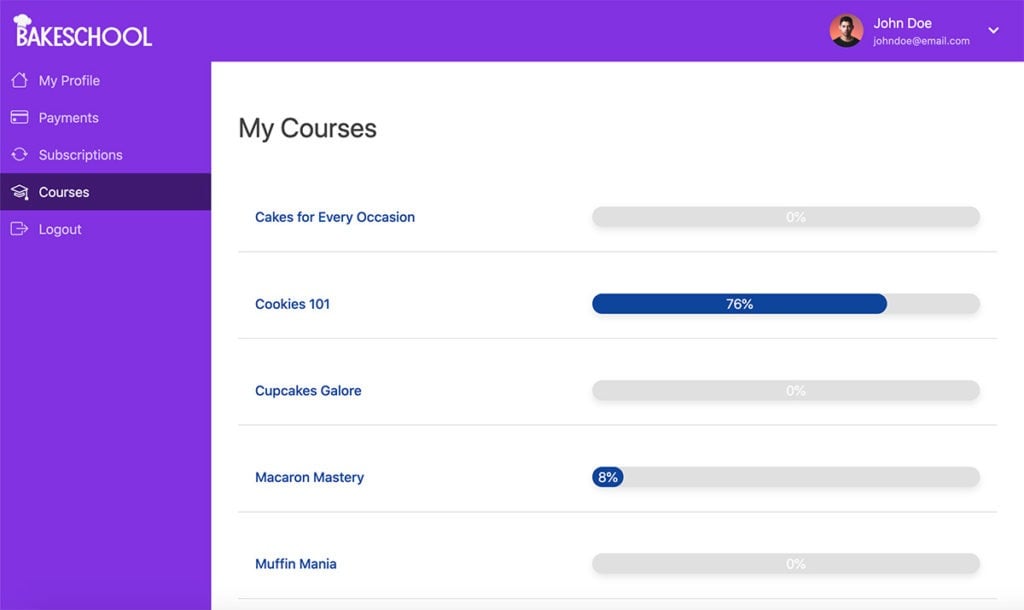
ReadyLaunch™ is enabled by default when you install MemberPress (even easier!). To learn more about it, click the button below.
That's it! Your WordPress LMS is now ready for students to sign up and start taking classes.
If you'd like to charge for access to lessons, make sure to also configure your membership payment gateways. This tutorial video shows you how to get set up with Stripe, our favorite gateway.
Conclusion
Whether you're planning to sell premium online courses or just need to train your team, launching an LMS can be a big task. And we didn't touch on all the prep and planning that goes into creating your course content.
But once you've got everything ready to roll, there are tons of advantages to creating and hosting your classes on WordPress. Independence, affordability, and customization are just a few.
In this post, we walked you through how to create an LMS site using MemberPress Courses in just five steps:
- Install and activate MemberPress Courses.
- Create your first course.
- Publish your course.
- Protect your course with MemberPress rules.
- Make sure ReadyLaunch™ is enabled.

Get MemberPress Today!
Start getting paid for the content you create.
Do you have any questions about getting started with MemberPress Courses? Leave them for us in the comments section below!


Adding the Quizzes to the Memberpress courses is a great addition and will lead to increased Student retention. It can be in itself a type of gamification. I appreciate the automatic integration into Memberpress Courses, without the need to upload yet another separate plugin and/or licencing key. Thank you