Online corporate training is an exploding industry. More and more corporations are buying training services and distributing them to employees for onboarding and ongoing instruction.
If you have a professional background in any relevant field, you can monetize your knowledge by offering online coaching.
However, you may not know how to set up this type of membership business.
Fortunately, you can start a corporate training business fast and easy using MemberPress and WordPress.
With these tools, you can…
- Create training courses and materials
- Set up memberships to these services for companies via corporate accounts
- Allow sub-account members under each corporate account
In this post, we’ll show you how!
If you want to learn how to start a corporate training business with WordPress and MemberPress keep reading!
The Tools You’ll Need

Before you launch any business, you’ve got to have the right tools. Here’s what you’ll need to start offering corporate training:
- WordPress: A beginner-friendly content management system (CMS) that enables you to build any type of site
- MemberPress: The #1 monetization, membership, and LMS plugin for WordPress
- MemberPress Corporate Accounts add-on: This add-on enables you to create corporate memberships
- MemberPress Courses add-on: This tool is included with MemberPress; you can use it to create courses that include quizzes and certificates for your corporate training services
If you’re a beginner, this list may seem a little daunting. But don’t worry! We’ll show you how to set up each tool step by step.
How to Start a Corporate Training Business with WordPress (In 6 Steps)
Now, let’s look at how to start a corporate training business with WordPress. Here are the nuts and bolts.
Step 1: Get WordPress and Install MemberPress
Before you start offering corporate training packages, you’ll need a website.
Although there are many site-building platforms available, we wholeheartedly recommend WordPress:
WordPress is incredibly easy to use, and it’s free. You’ll just need to purchase web hosting and a domain name.
Bluehost offers beginner-friendly plans for WordPress users:

For just $2.95 per month, you’ll also get a free domain name (for the first year), a secure sockets layer (SSL) certificate, and a content delivery network (CDN).
Better yet, Bluehost will automatically install WordPress for you!
Once your site is up and running, you can go ahead and install MemberPress:
With MemberPress you can:
- Build a password-protected community
- Configure user access rules
- Create coupons for promotions or giveaways
- Accept online payments through Apple Pay, Google Wallet, and credit cards, and even accept cash payments
- Customize pricing pages
Plus, the Corporate Accounts add-on makes it easy to create corporate membership packages.
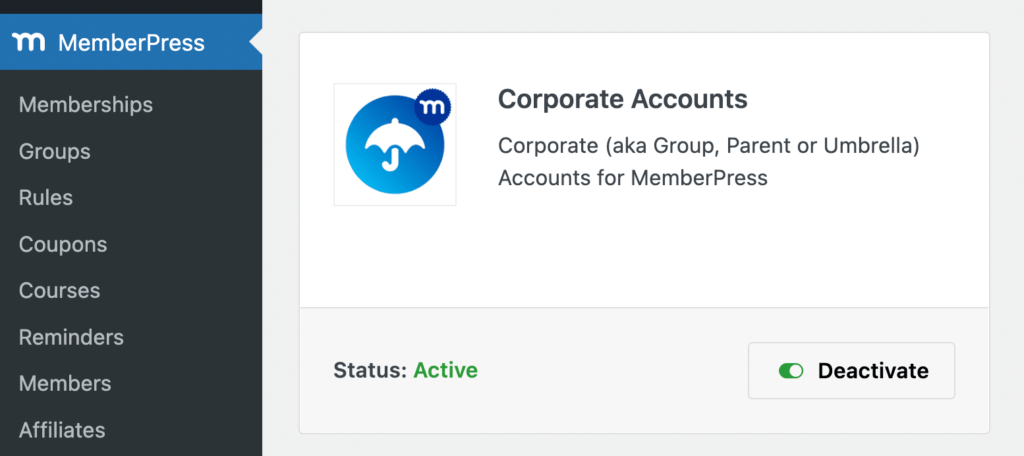
Although we’ll walk you through configuring corporate memberships, here’s a video tutorial to help you get started:
Once you have all these tools set up, you can start creating your memberships!
Step 2: Add Corporate Memberships
To create your first membership, navigate to MemberPress > Memberships > Add New. Here, you’ll need to enter a title and description:
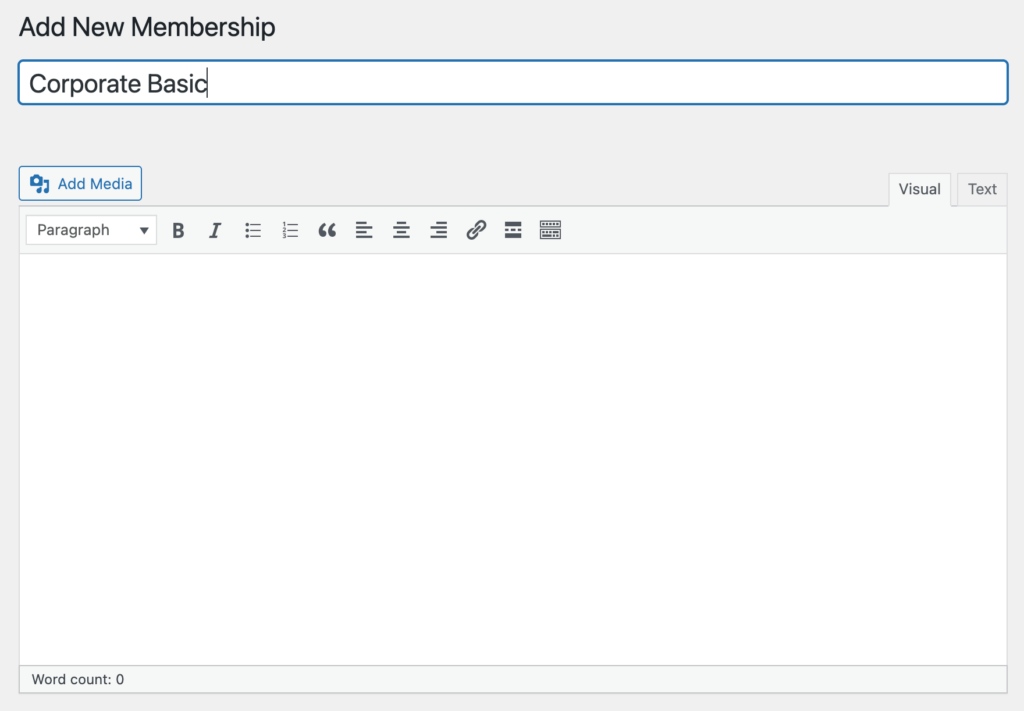
Next, scroll down to the Membership Options section. In the Advanced tab, check the box next to Subscribers to this Membership are Corporate Accounts:
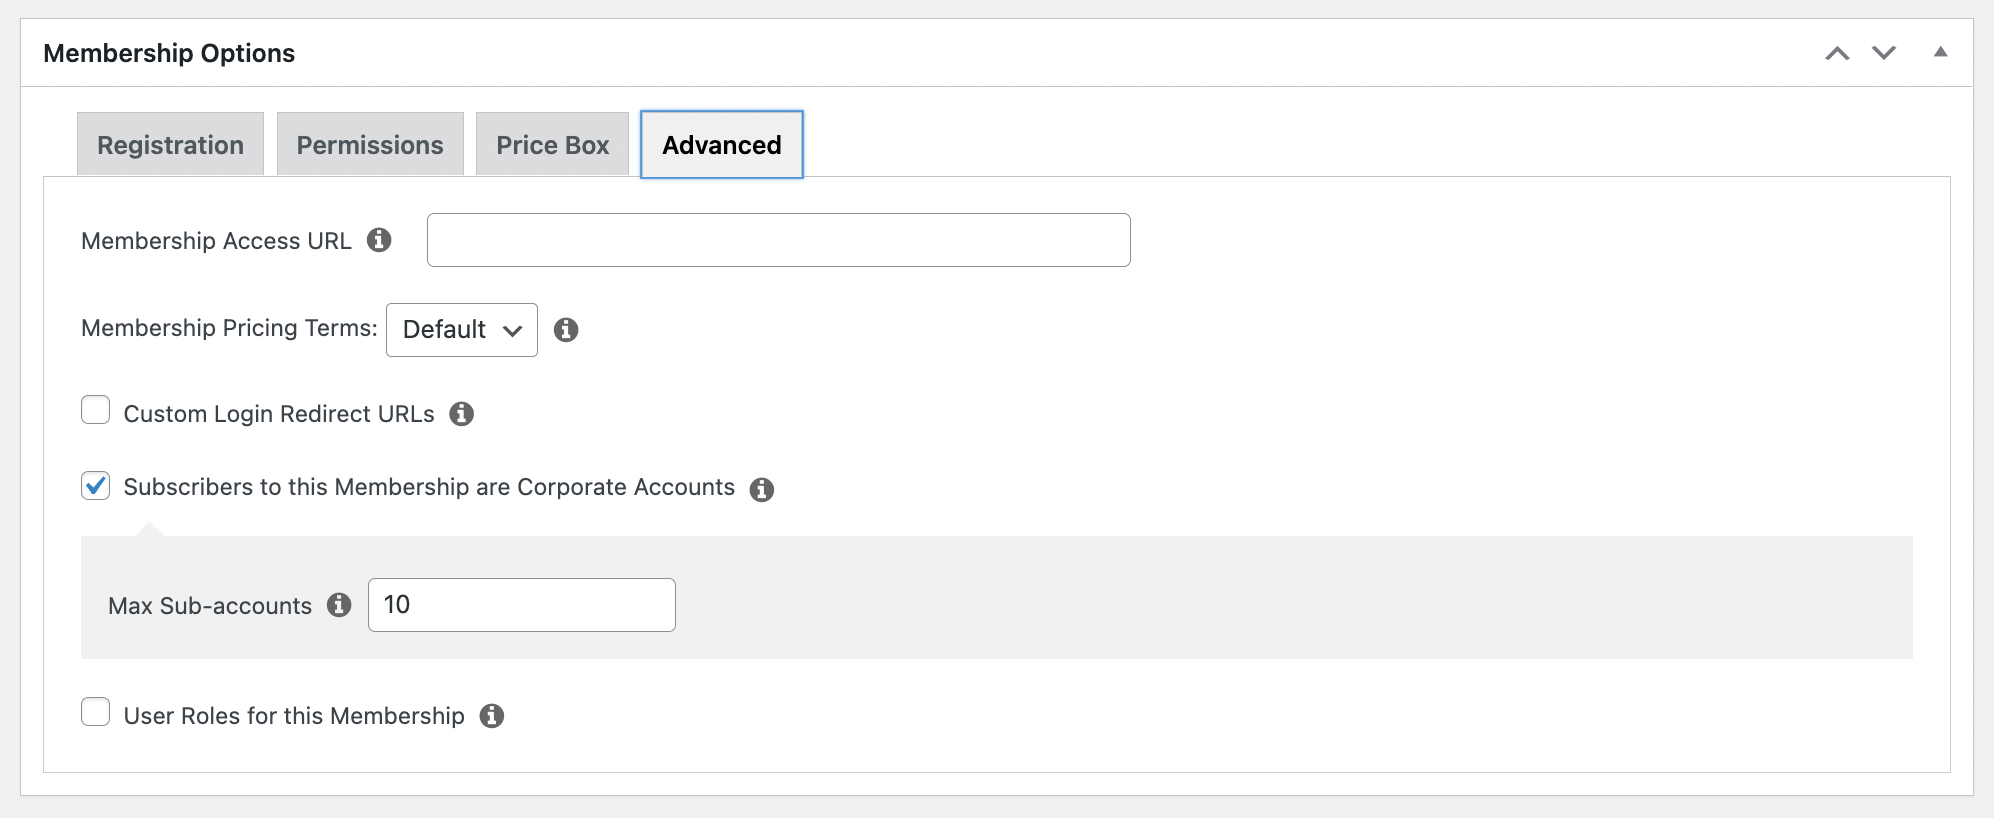
You can also add a maximum number of allowed sub-accounts. This will limit how many employees can sign up for one corporate membership.
Step 3: Price Your Corporate Training Packages
Before you publish your new corporate membership, it’s important to set a price. You can do this under Membership Terms:
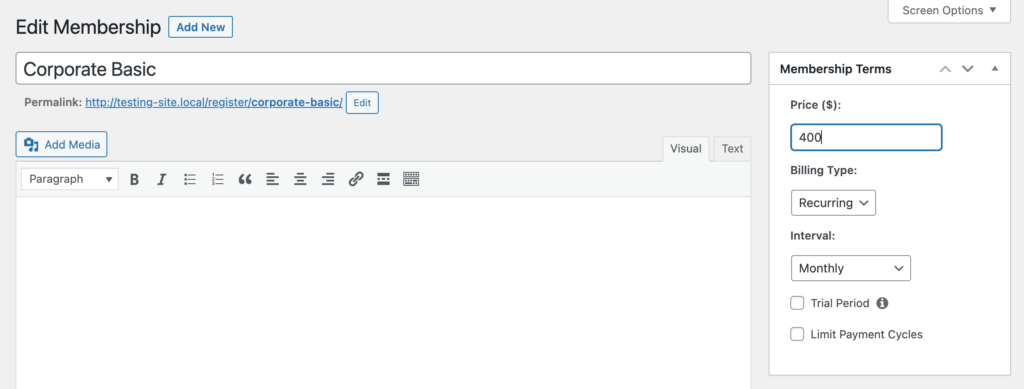
We recommend you consider the cost of your normal memberships. For example, let’s say your Basic membership is $40. If your Corporate Basic membership supports 10 sub-accounts, you can price it at $400.
Although this price may seem high, remember that these packages are for corporations, not individuals.
Often, businesses will have a high return on investment (ROI) if you’re helping them improve their team’s efficiency.
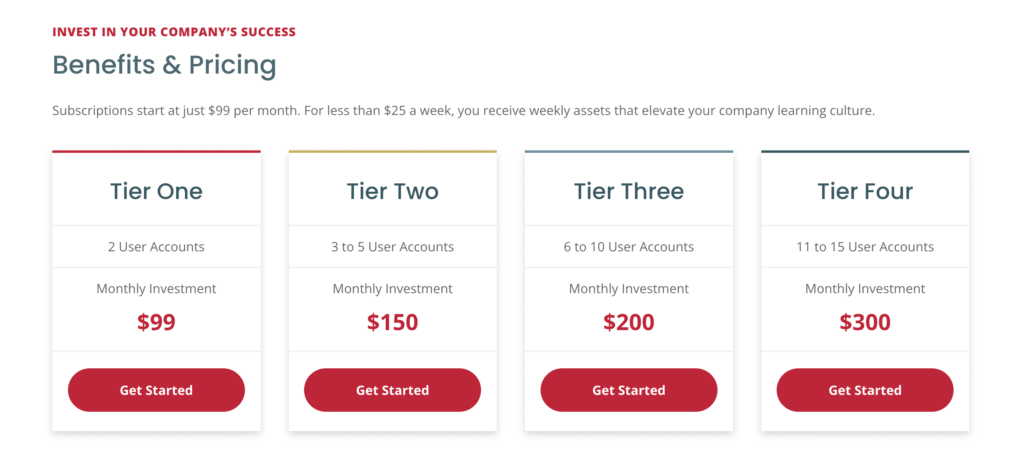
Once you configure your membership levels, you can build a pricing table. This will enable users to see the differences between the basic and corporate tiers:
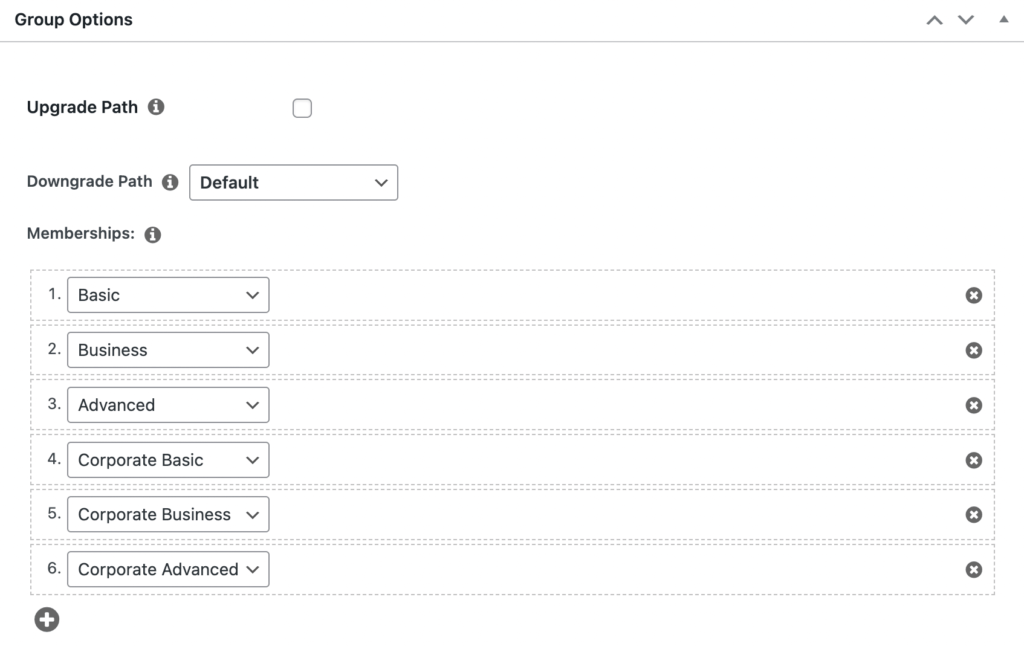
To do this, create a new group and find the Group Options. Under Memberships, add all the available options, priced lowest to highest:
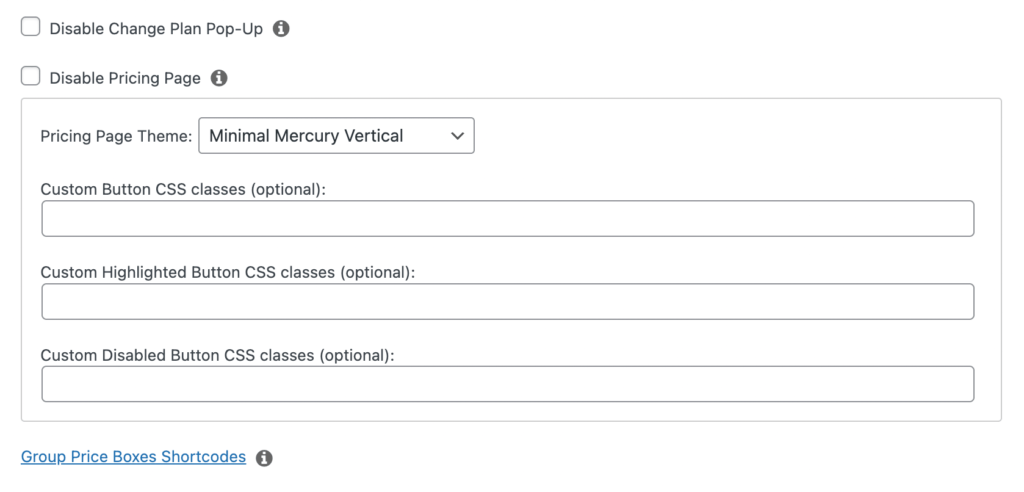
Then, choose a theme for the pricing page. You can also use custom CSS to style the sign-up buttons:
After you hit Publish, users can purchase your different membership packages.
Step 4: Create Corporate Training Courses
For the next step, you’ll need to upload the content for your corporate training program. To do this, you’ll need to enable the MemberPress Courses add-on.
This tool adds a fully-functional learning management system (LMS) to your website:
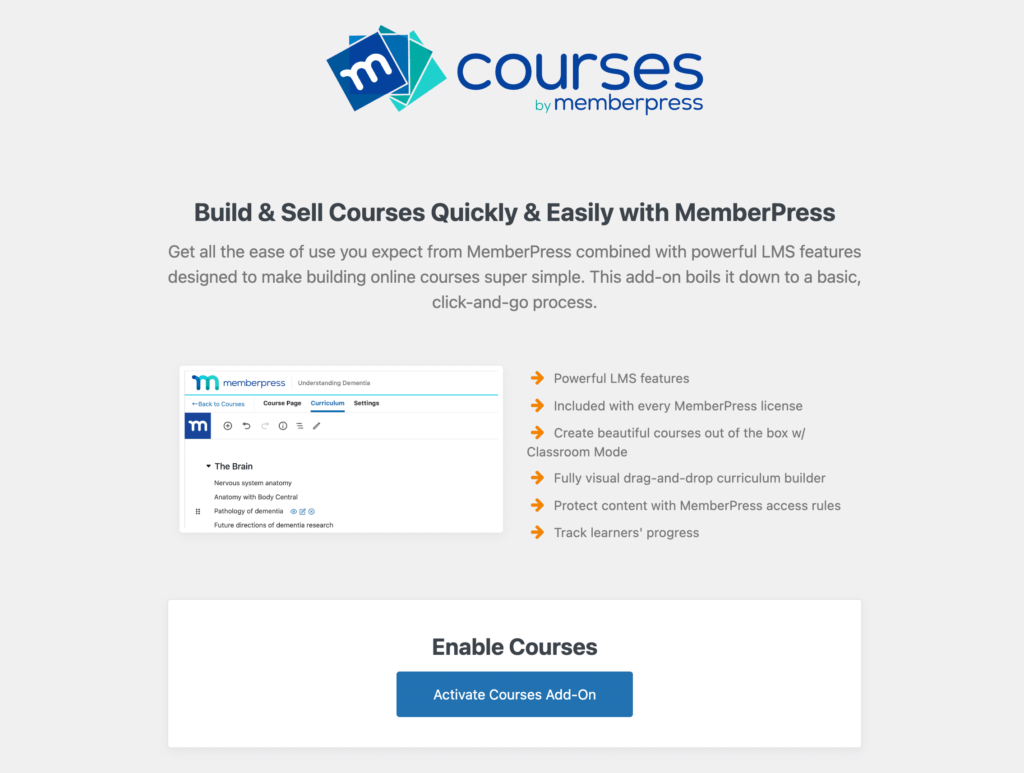
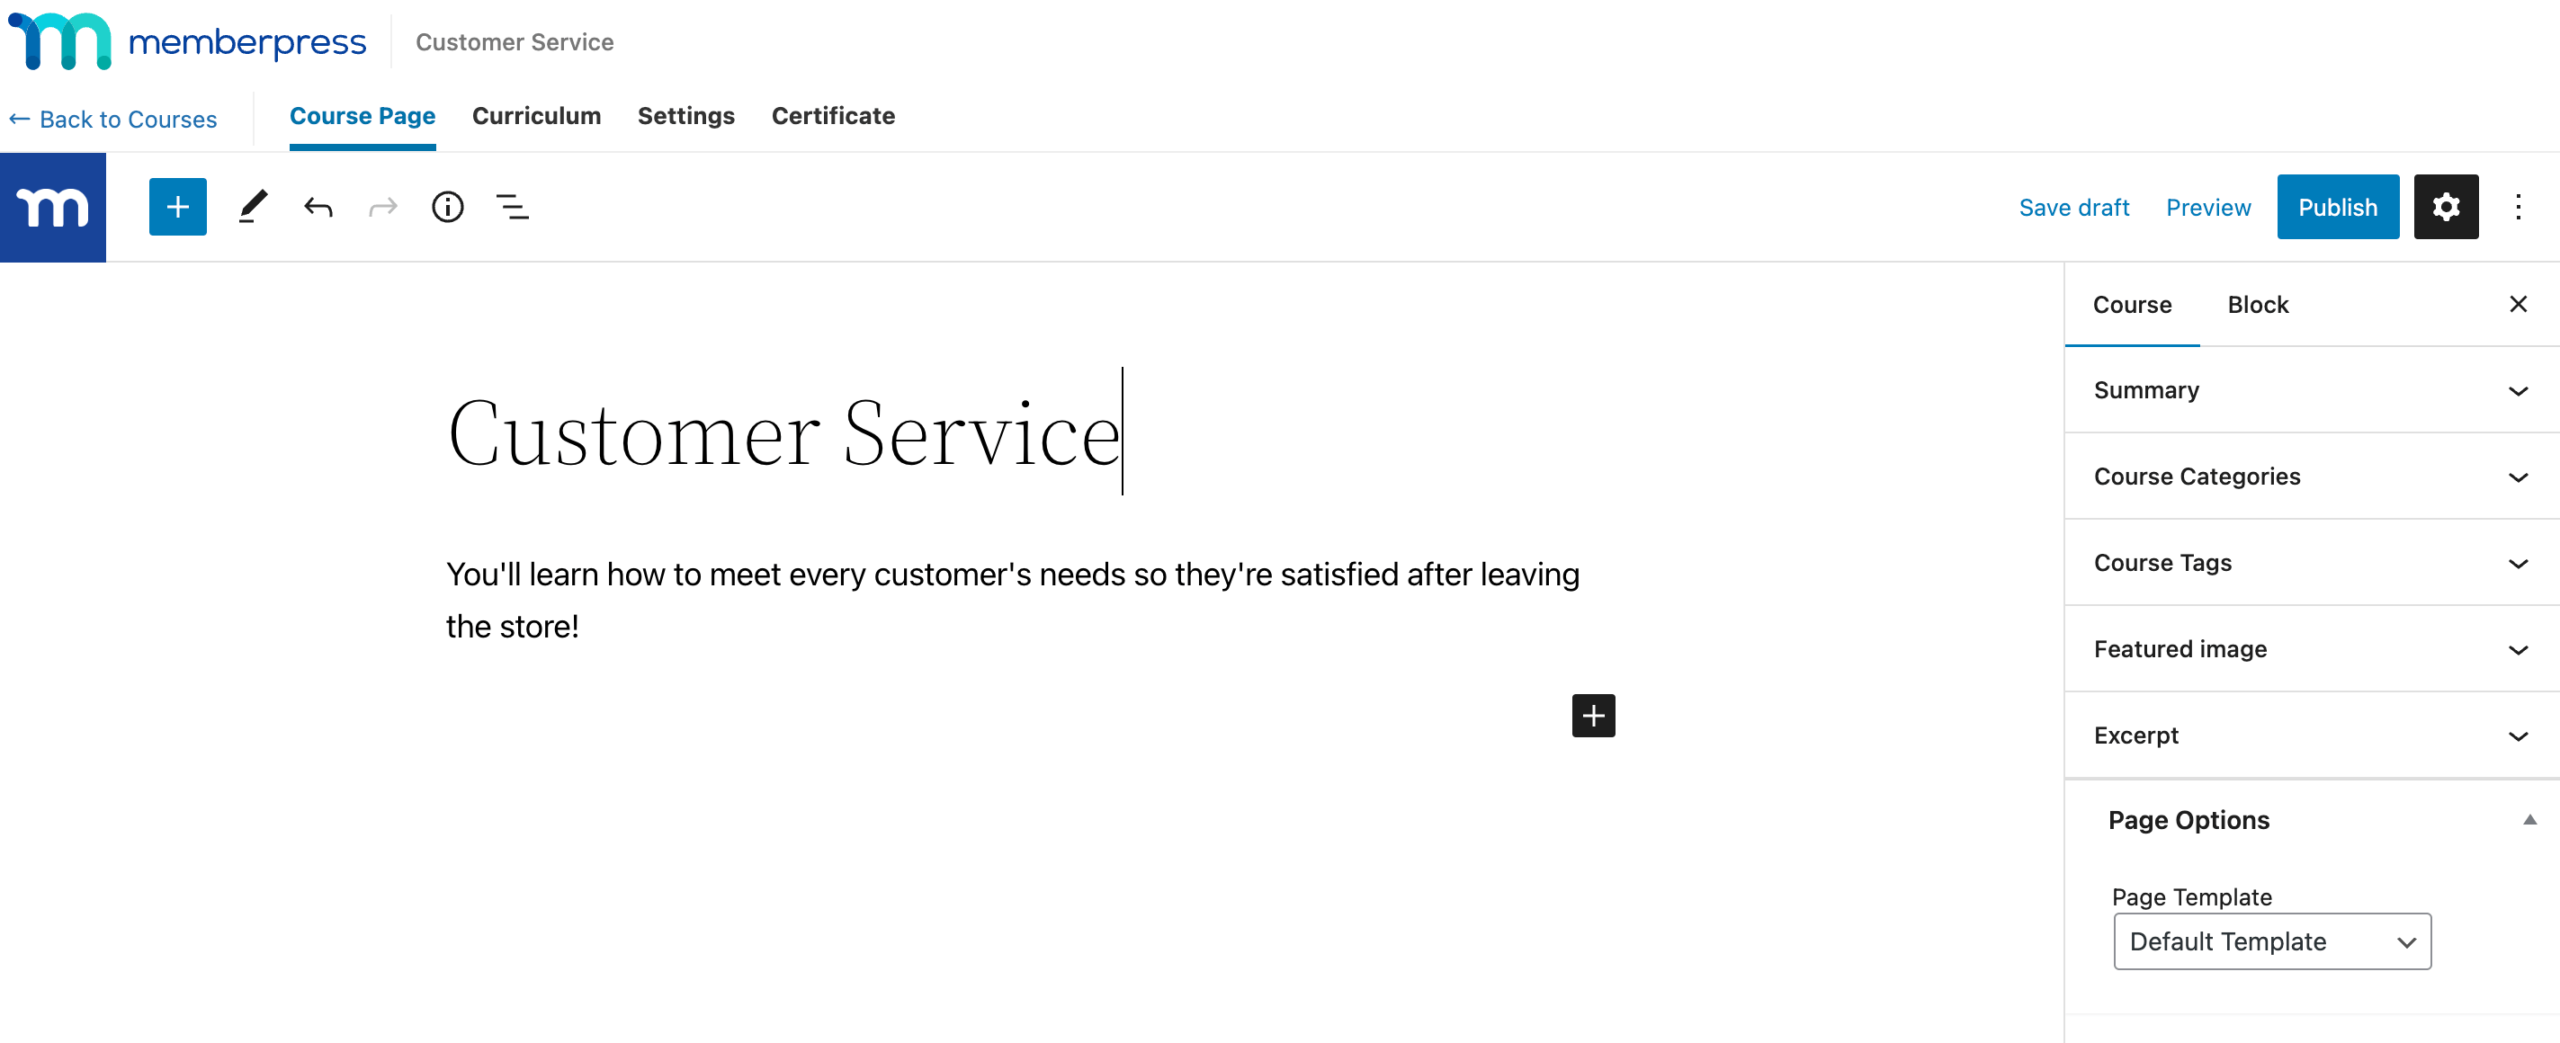
After you activate the add-on, go to MemberPress > Courses > Add New. Here, you’ll see an editing page similar to the Block Editor.
On the Course Page, add a title and brief description of the course:
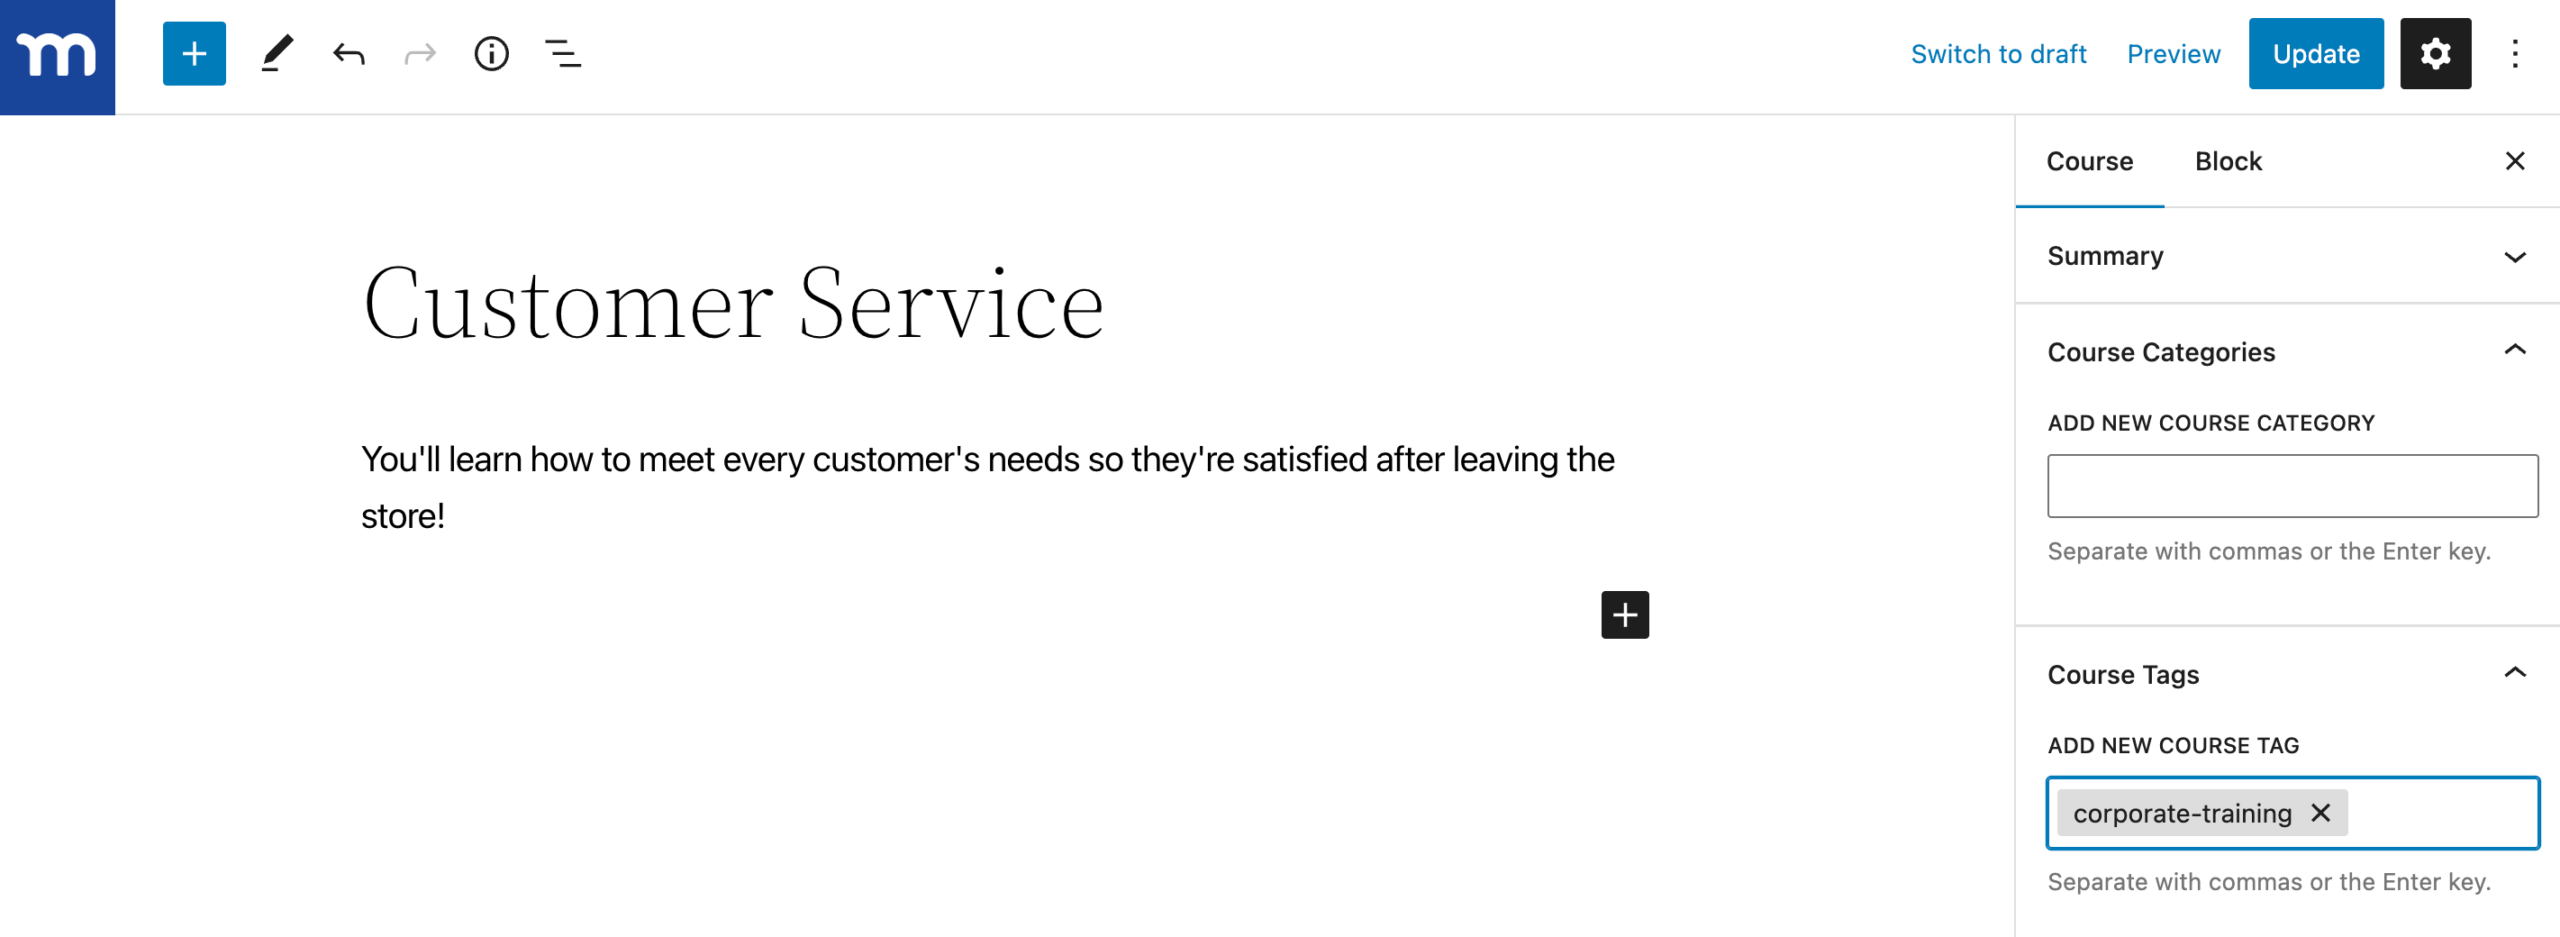
In the sidebar, you can add categories and tags to the course. This will help you assign courses to different memberships.
Since this is a corporate course, we’ll create a “corporate-training” tag:
Then, you can start building your curriculum! In the Curriculum tab, hit Add section to create different course modules:
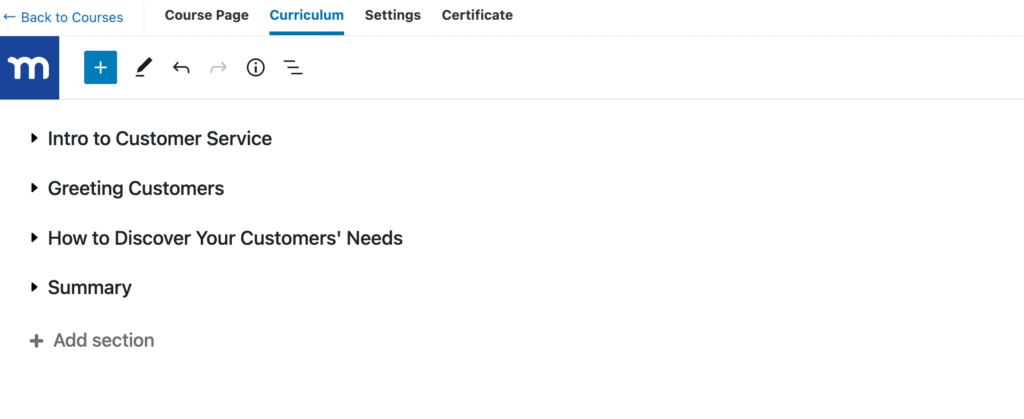
You’ll also see options for adding lessons and quizzes:
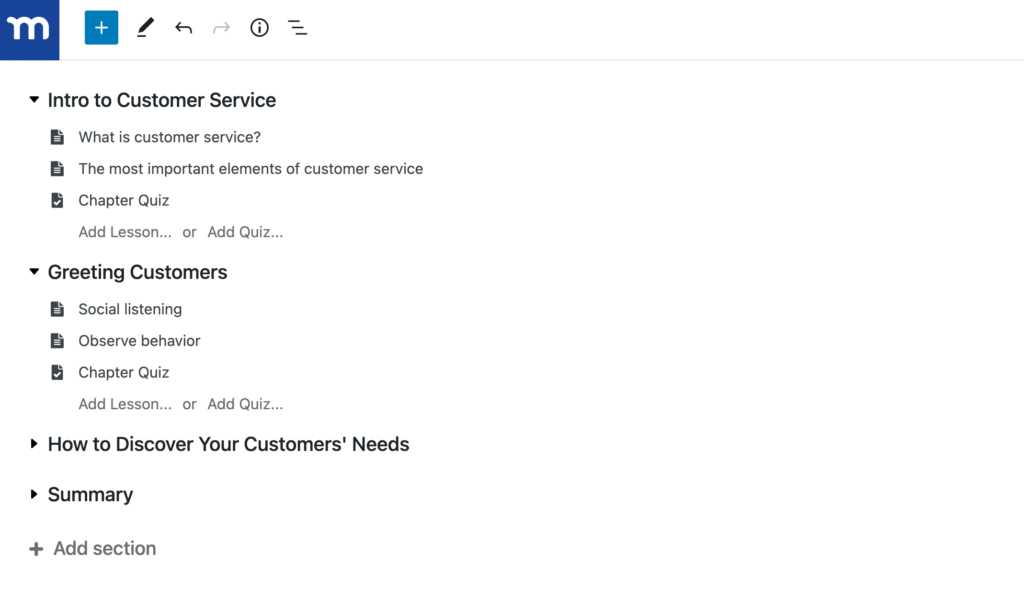
Next to each course, there is an edit icon. Click on this to open the visual course builder, where you can build your training content using blocks:
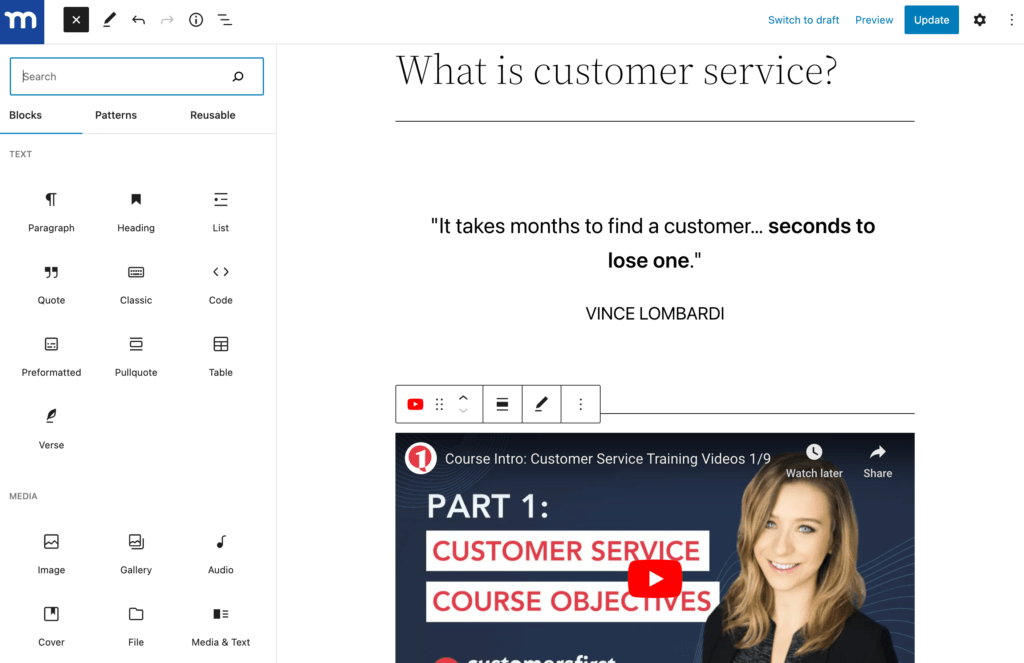
Continue to do this for every lesson and quiz in your corporate training course.
The video tutorial below gives you step-by-step visual instructions to help you set up your course.
MemberPress Courses also lets you add certificates with start dates and expiry dates.
You can set your members’ course progress to automatically reset after a set period of time.
This is particularly useful for training programs that require periodic recertification.
For example, if you offer a workplace safety course and regulations require employees to be retrained annually, you can set the progress to reset every year.
Follow our handy tutorial video below to help set up certificates for your course.
And with CoachKit™ you can incorporate your course into a coach-guided program.
- Add milestones for goal-oriented training
- Create regular habits for students to check off (daily, weekly, or specific days of the week)
- Create automated emails to remind students of incomplete milestones or habits and harness the power of accountability for learning.
- Organize your students into cohorts (or classes) and assign them a coach (you or another qualified mentor in your team) to guide them to their objectives.
All this and more is possible the MemberPress CoachKit™ add-on.
Step 5: Add Access Rules
To restrict your course to paying members, you’ll need to add a new rule. First, go to MemberPress > Rules > Add New.
Under Protected Content, choose All Content with Course Tag. Then, enter the course tag:

Next, navigate to Access Conditions. Select Membership as the type and choose your corporate memberships:
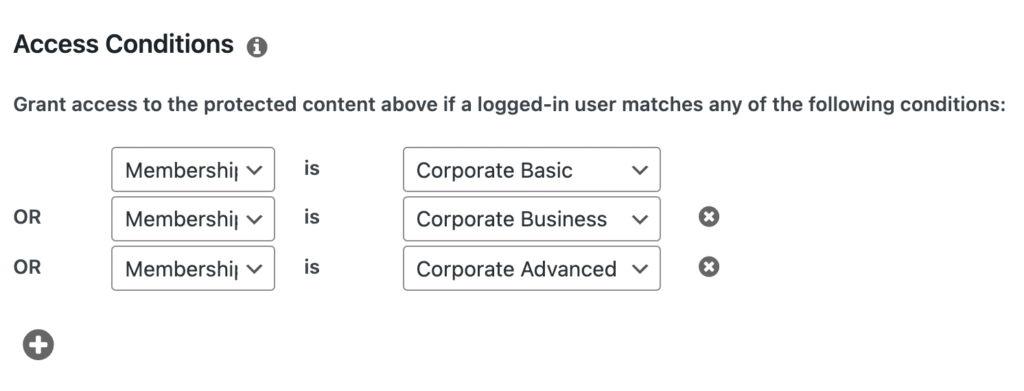
Once you hit Publish, only users who purchase corporate memberships will be able to complete the course.
To make it easy for users to sign up for your corporate courses, you can create registration pages. Fortunately, we made a how-to video to walk you through the process:
After this, viola! You’ve got a membership website with protected corporate training courses.
Step 6: Manage Sub-Accounts
When someone purchases your corporate membership, they can start creating new sub-accounts.
MemberPress lets them add users manually from their account page or send employees a sign-up URL:
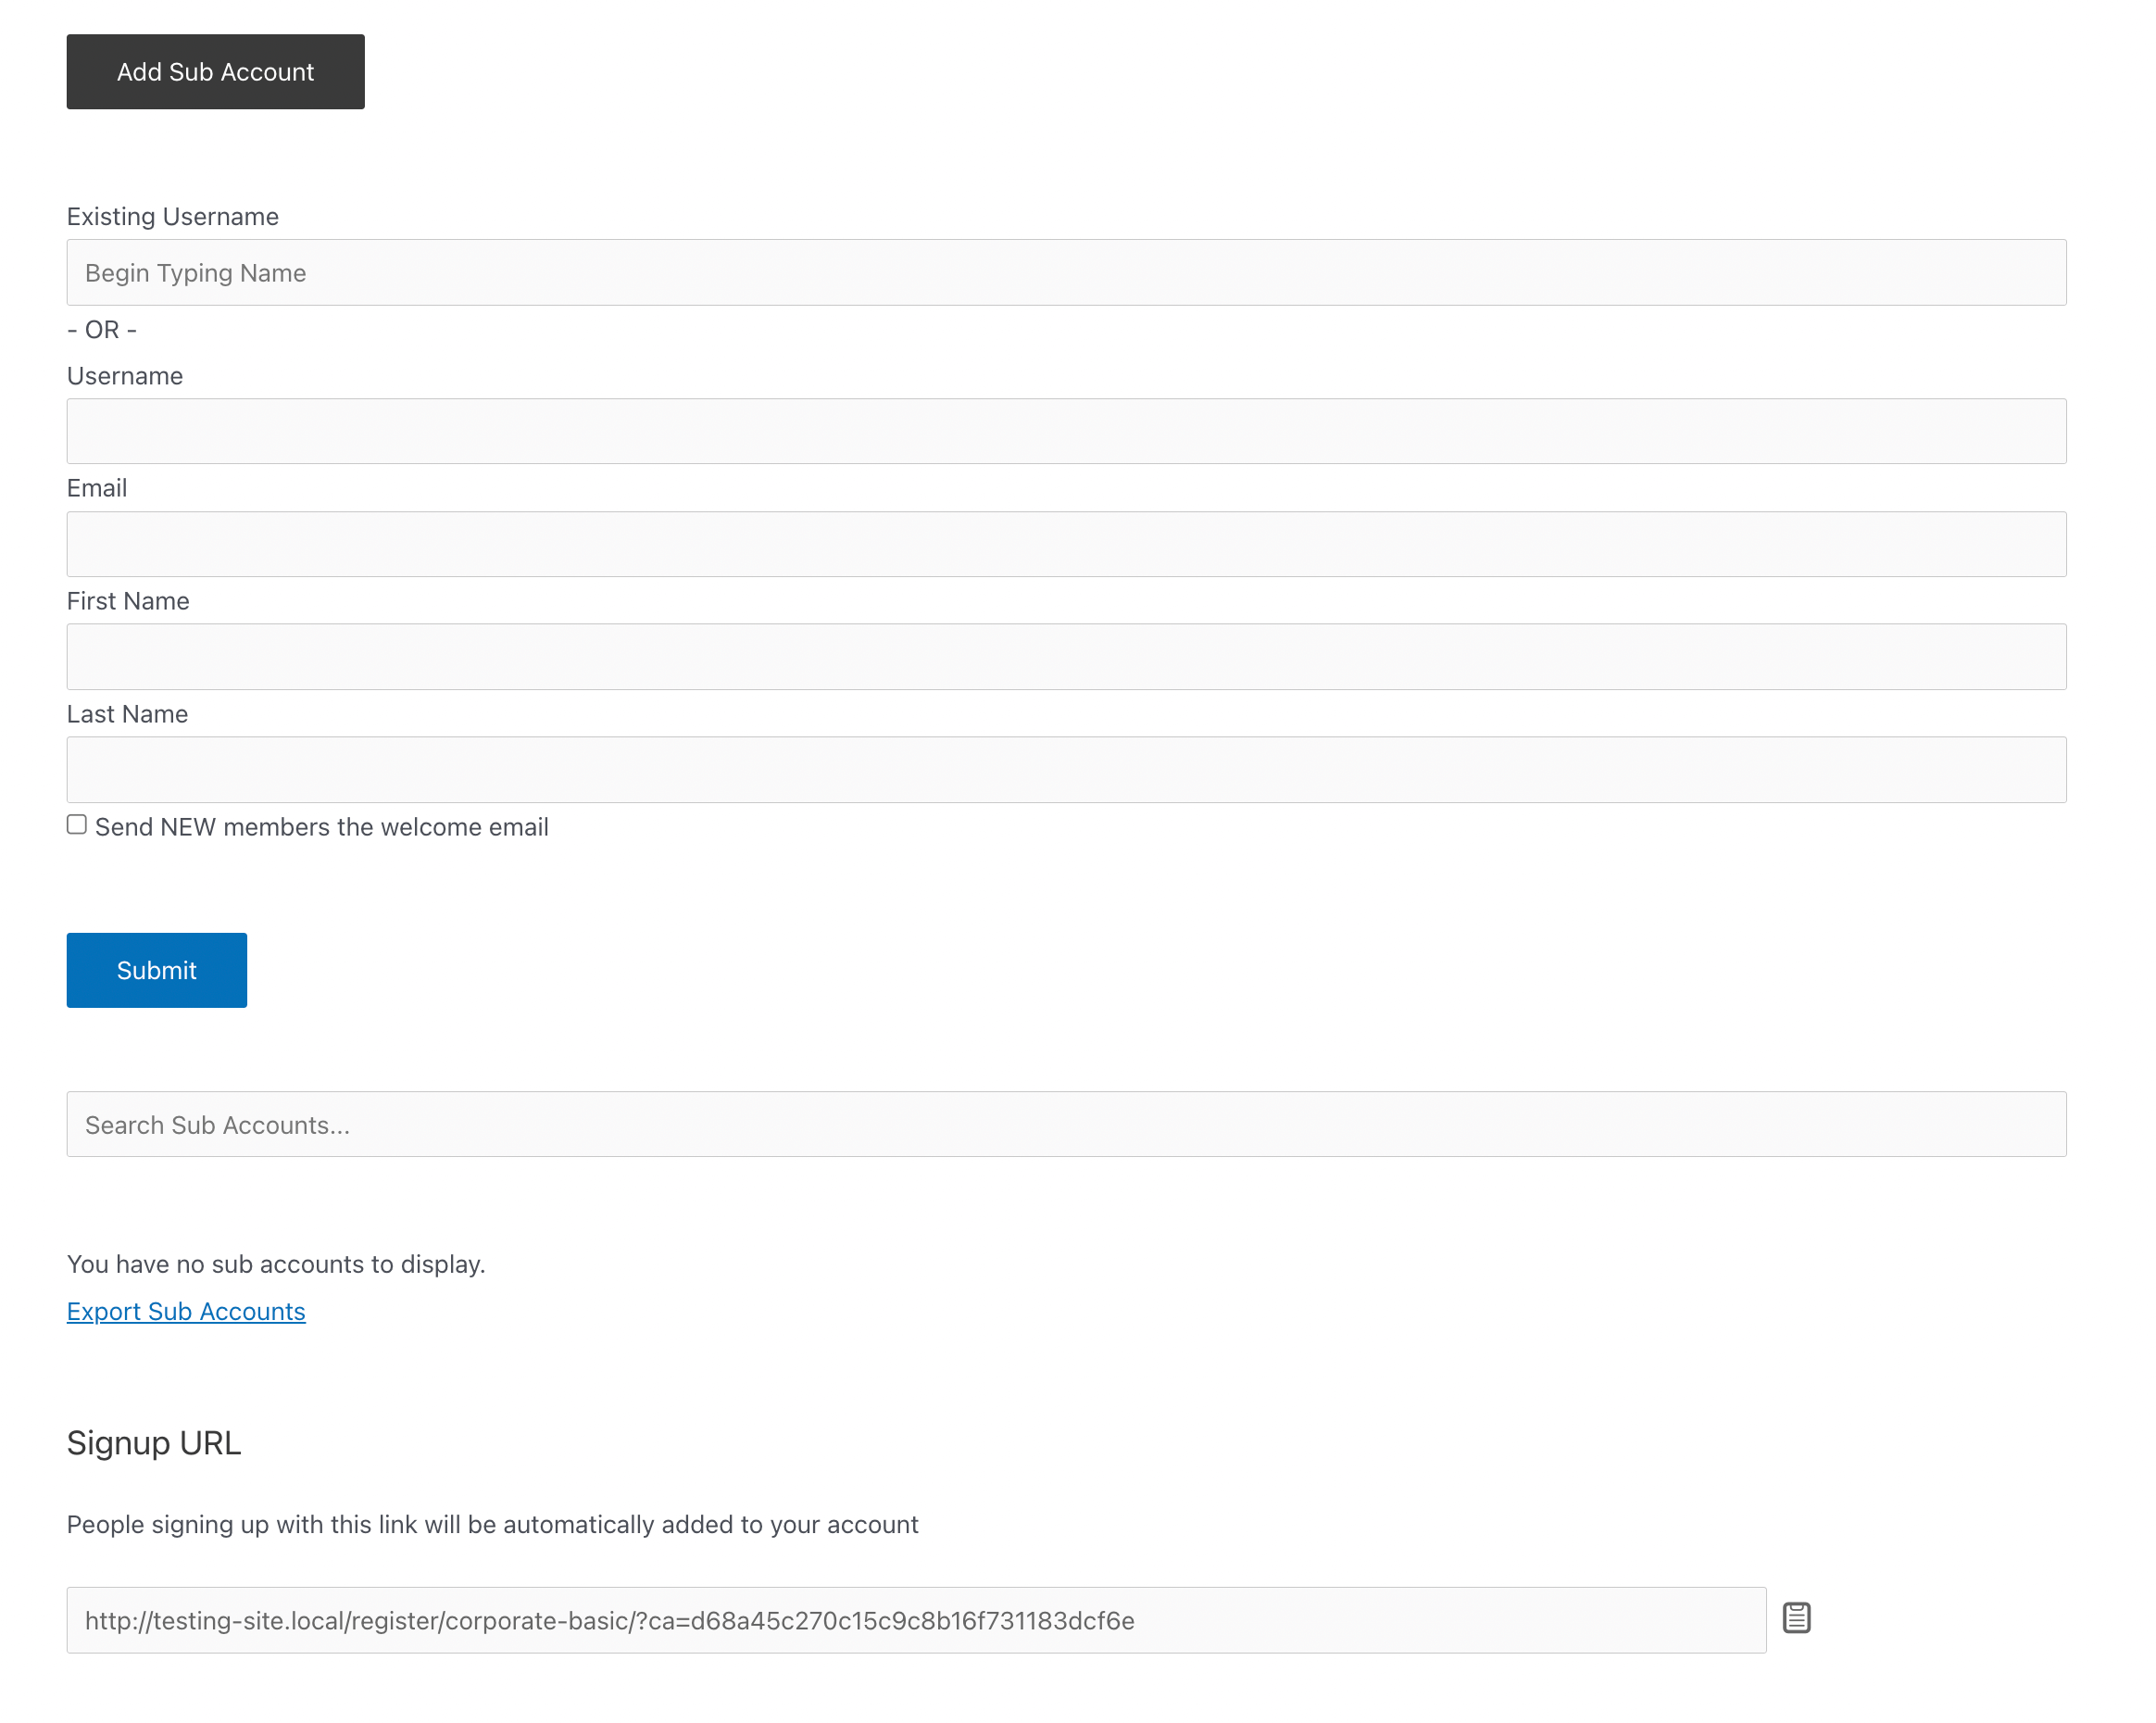
As the site owner, you’ll be able to track these sub-accounts. To get started, click on Subscriptions and find the parent user for the corporate membership:

Then, select the user. At the bottom of their Profile page, you’ll see how many sub-accounts they’re using:
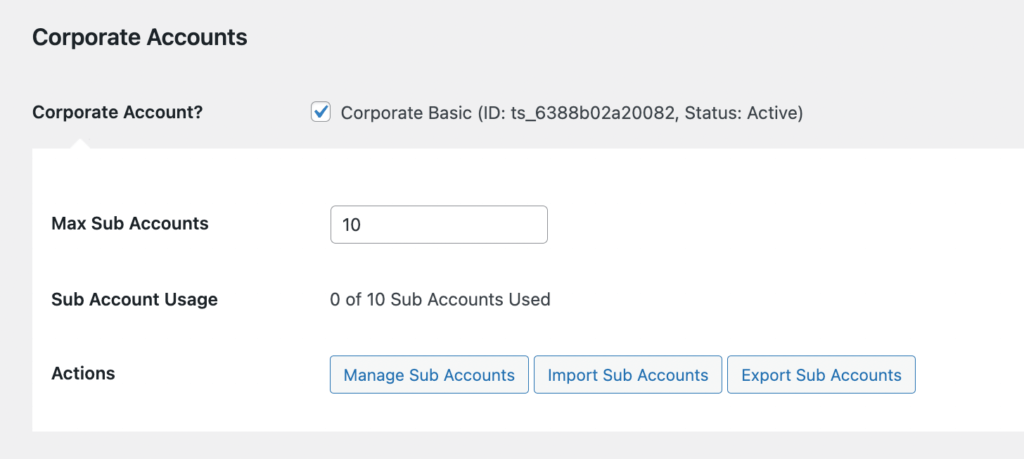
Here, you can remove, import, or export any sub-accounts as needed. As you can see, you’ll have full control over your registered members.
Conclusion
By starting a corporate training business, your registered users will be able to add sub-accounts to their memberships.
This can help you expand your audience and increase your revenue.
To recap, here’s how you can start a corporate training business:
- Get a WordPress site and install MemberPress.
- Add corporate memberships with MemberPress Corporate Accounts.
- Price your corporate training packages.
- Create corporate training content with MemberPress Courses.
- Add access rules.
- Manage sub-accounts.

Get MemberPress Today!
Do you have any questions about how to start a corporate training business? Let us know in the comments section below!


Add a Comment