Looking for a WordPress church membership plugin?
A disengaged congregation can mean trouble for even the best churches. If you’re writing a fantastic sermon for Sunday, but no one is attending or acting on that message, your words might fall on deaf ears.
With all the distractions of this day and age, it can be tough to keep your community tuned in. Fortunately, a membership site can help you connect with your members – even when they’re not physically present.
In this post, we’ll explain how creating a membership site, or adding membership functionality to your existing WordPress site, can benefit your church. Then we’ll walk you through how MemberPress works as a WordPress church membership plugin. Let’s get started!
How MemberPress Can Benefit Your Congregation
There are many different ways a membership site can benefit your church. Primarily, it can strengthen your community by giving members the ability to connect online outside of traditional hours.
Here are a few specific ways a WordPress church membership plugin like MemberPress can benefit your church:
- Increase commitment by making it easy for people to volunteer and contribute to church ideas. A website is also an ideal place to share opportunities for stewardship and teaching, which may in turn boost engagement.
- Accept online donations with a payment gateway integration.
- Keep church members informed and updated on important information.
- Predict attendance so you can be prepared for events – whether that’s for a significant celebration such as Easter or something smaller like a Bible study class.
- Better organize and manage community happenings. For example, manage performances, schedule musicians, and determine availability.
- Allow members to book and engage in online counseling sessions.
The above are just a handful of the many, many ways churches can benefit from having a place to connect online. Do a bit of brainstorming, and you’re certain to come up with all kinds of additional ways you could use a church membership site.
How to Start a Membership Site for Your Church – or Add Memberships to Your Existing Site (In 5 Steps)
If you’ve decided that a dedicated site is a smart move for your congregation, the next step is figuring out how to go about creating one. Fortunately, we’re here to make doing so as simple as possible.
Your first order of business is WordPress. To offer memberships using MemberPress, you’ll need to:
- Have an existing WordPress website OR
- Set up a basic WordPress site to get started
If you don’t have a WordPress site, no worries! It’s incredibly simple to set one up. First, check out this link on WordPress.org to get rolling. Once you’ve got our site, you’ll want to pick out a theme for it.
One of the coolest things about WordPress is that there are hundreds of thousands of themes designed for any type of site you can imagine, including churches.
And one of the coolest things about MemberPress is that it works with just about any WordPress theme!
Once you’ve got your WordPress site in hand, you can sign up for a MemberPress plan on our website. The Launch plan is a great choice and has everything you’ll need to get things off the ground.
Now let’s get your memberships set up in 5 steps!
Step 1: Install MemberPress
MemberPress is a tool that lets you create and protect members-only content on your site. Once you’ve purchased a plan, you can install MemberPress by downloading the .zip file from your account dashboard.
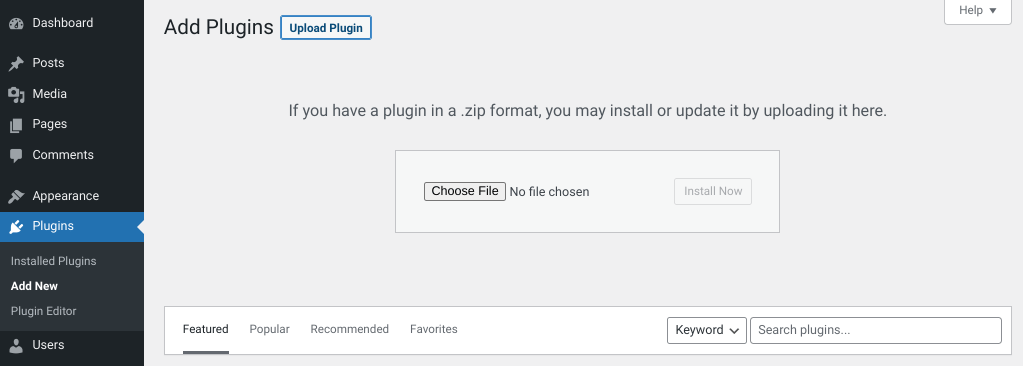
To upload it to your WordPress site, navigate to Plugins > Add New > Upload Plugin > Choose File:
Once you open the plugin file that’s saved on your computer, click on Install Now , followed by Activate Plugin. MemberPress will now appear as a menu item in your WordPress admin dashboard.
After it’s done installing and activating, the plugin will prompt you to enter your license key. You can find this in your MemberPress account dashboard.
Chances are you won’t be charging for your memberships. But you still may want to create separate plans for your website. For example, you might have separate membership groups like:
- Members of the congregation
- Worship team volunteers
- Children’s ministry volunteers
- Teens
- Church staff
- You name it
By setting up different membership groups, you can create a unique experience and offer varied access to certain areas of your site, depending on a individual’s role.
The information you provide when setting up your memberships will give site visitors a breakdown of the features and benefits associated with of each membership level.
When someone goes to sign up, they’ll be able to choose their membership type from one central page.
Step 2: Set up your membership plans
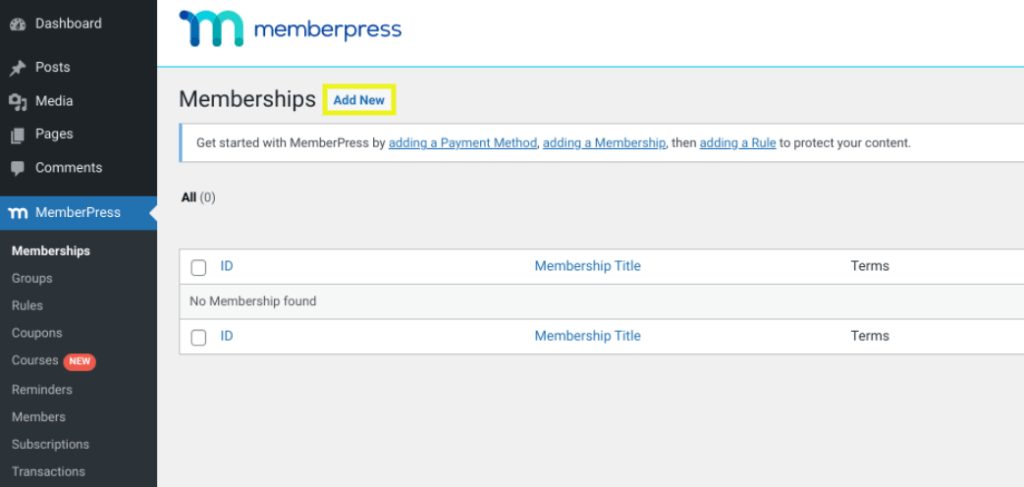
To get started, browse to MemberPress > Memberships from your dashboard, then click on Add New at the top:
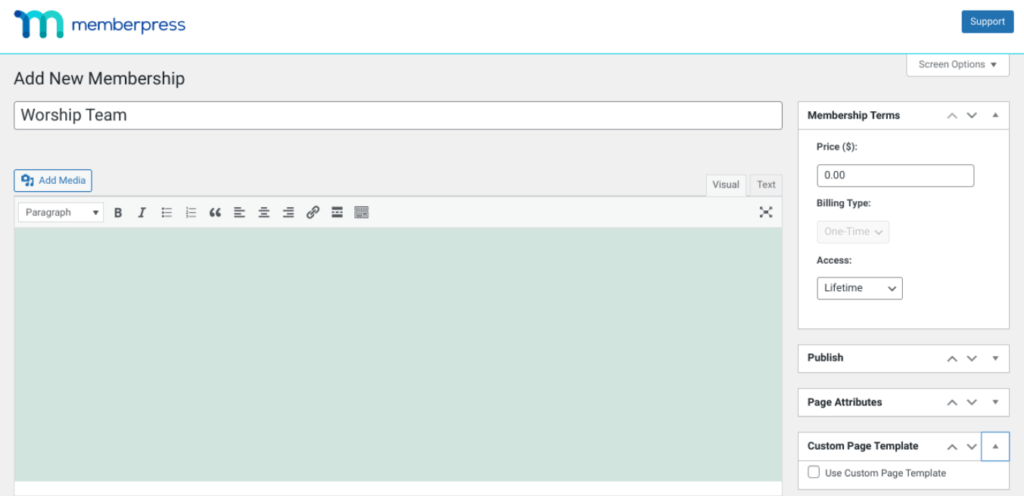
On this screen, you can enter a name for your membership plan:
To the right, under the Membership Terms section, there are field where you can enter pricing information and billing type. However, since you probably won’t be using these, you simply leave them blank.
You can also determine the level of access (Lifetime, Expire, or Fixed Expire). If you’re unsure how to complete these details, consider exploring some examples.
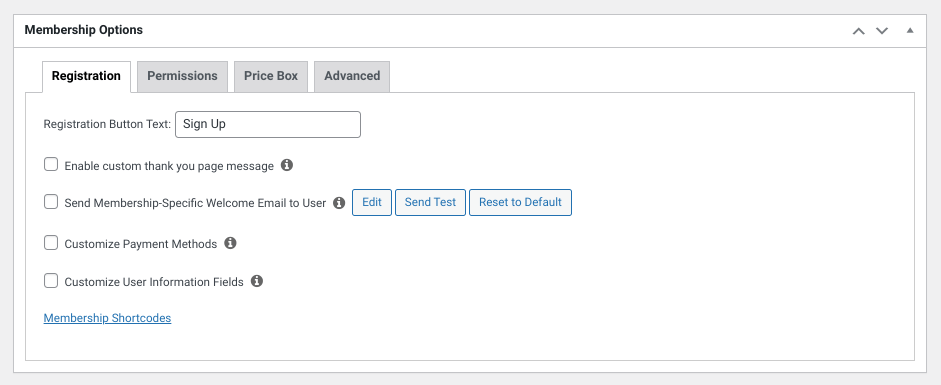
On this same page, below the text editor, you can find the Membership Options section:
In this panel, you can configure the membership permissions and registration options. You can also set up the membership access URLs. When you’re done, click on the Publish button to save your changes. Also, note that you can repeat this step for as many plans as you wish to create.
Step 3: Edit access for your membership plans
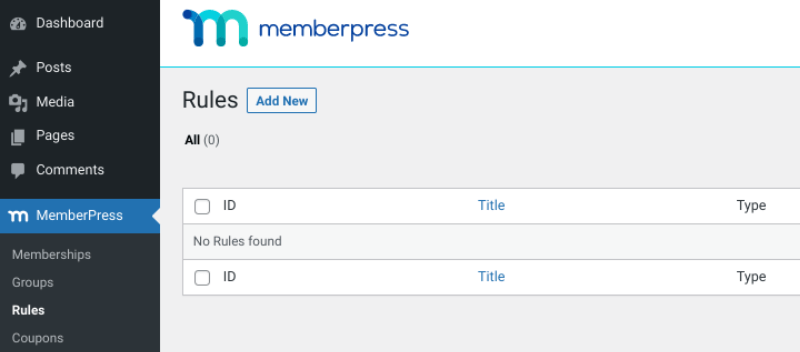
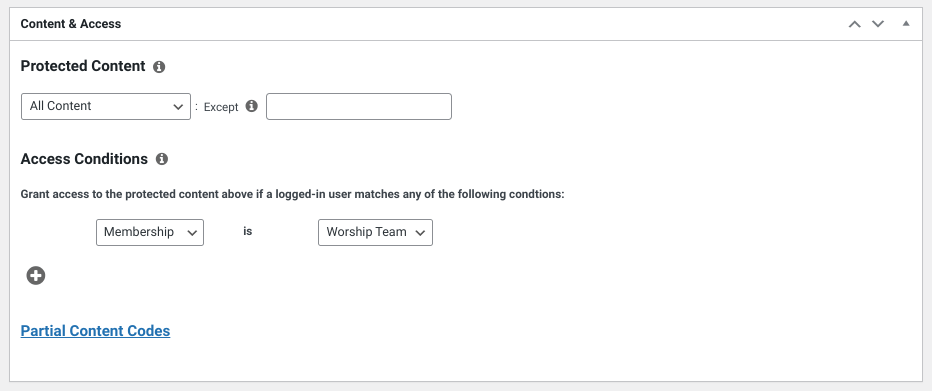
Once you’re done creating your plans, the next step is to establish some membership rules. To do that, you can navigate to MemberPress > Rules, and then select Add New:
On the Add New Rule screen, under Protected Content, you can choose which content to exclude from members in certain groups or roles:
You can hide posts, pages, tags, or categories. You can also change the user access permissions at any time.
When you’re finished editing your rule, make sure to click on the Save Rule button before exiting. Remember that you can make as many rules as necessary to ensure that your church membership site runs seamlessly.
Step 4: Add a registration link
When you’re finished setting up your membership plans, the next step is to add a registration link. This gives your visitors the ability to become members.
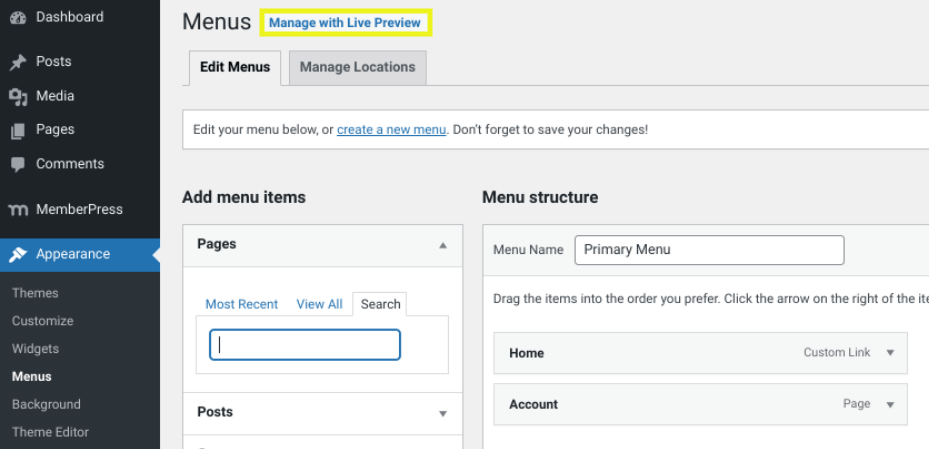
To get started, you can navigate to Appearance > Menus from your WordPress dashboard. Then, click on Manage with Live Preview:
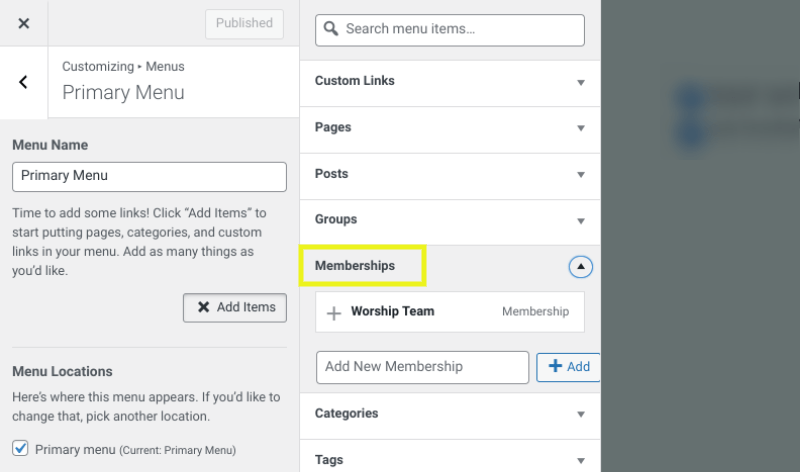
This will take you to the Customizer. On this screen, click on Primary Menu > Add Items > Memberships:
Next, click on the (+) icon next to the membership you want to add. You should now see it under your Primary Menu. Select Publish to save your changes.
Now, when users visit the membership link on your website, they’ll be able to register for an account. On this screen, your plan’s price will appear, as well as fields for any details you require for signups, such as their first name, last name, and email.
Step 5: Add a login link
Your members can’t access your membership site without a login page. Therefore, the final step is to create a login URL for your church website.
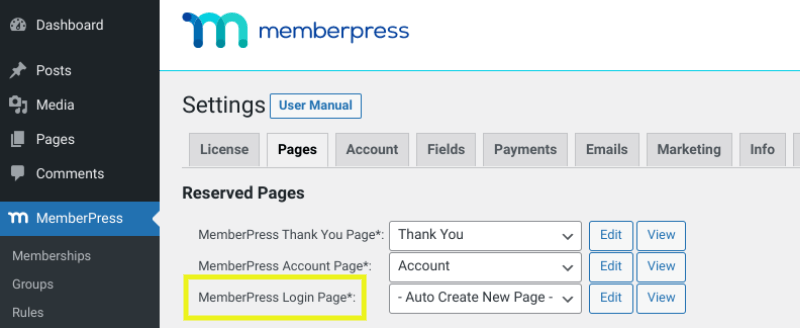
You can configure this using our MemberPress login page. To do so, navigate to MemberPress > Settings > Pages, then use the drop-down menu under MemberPress Login Page to select Auto Create New Page:
To edit the login page, you can click on the Edit button next to this drop-down menu. Then you can customize it to your liking. Next, click on Update Options at the bottom.
That’s it. You’ve successfully created your membership site!
Once you’re up and running, you’ll want to explore all the incredible MemberPress integrations you can use to expand your site’s functions. Here are a few that could be perfect for a church membership site:
The sky’s the limit!
Want Us to Take the Reins? Get Expert Setup with Zero Stress
Building a WordPress membership site with MemberPress is simple and powerful.
But if time is tight or tech isn’t your thing, we’ve got you covered.
Our affordable Done For You services let you skip the setup hassle.
Let our MemberPress Pros build your site, so you can focus on growing your business with the world’s top membership platform.
Conclusion
Connecting with your congregation can be challenging, especially in this modern era. Fortunately, innovative technological tools make it easier than ever to communicate and collaborate with your church community, even on the go. This is why we recommend considering building a dedicated website.
In this post, we discussed how you can use MemberPress as a WordPress church membership plugin in 5 simple steps:
- Install the MemberPress WordPress plugin
- Set up your membership plans
- Edit access for the plans
- Create a registration link
- Add a login URL
And don’t forget, you always have the option to leave set up and maintenance to our MemberPress pros with MemberPress DFY services.
How do you plan to use your membership site to connect with your congregation more effectively? Let us know in the comments section below!
If you liked this article, be sure to subscribe to the MemberPress blog!



Add a Comment