You can turn your membership-based website into a learning platform by activating the MemberPress Courses add-on on your MemberPress website. This document will show you how to install the MemberPress Courses Add-on on your website and configure course-related settings.
Install the MemberPress Courses Add-on
To start, you’ll need to install and activate the MemberPress Courses add-on:
- Navigate to Dashboard > MemberPress > Add-ons.
- Browse add-ons or search for “Courses“ using the search tool.
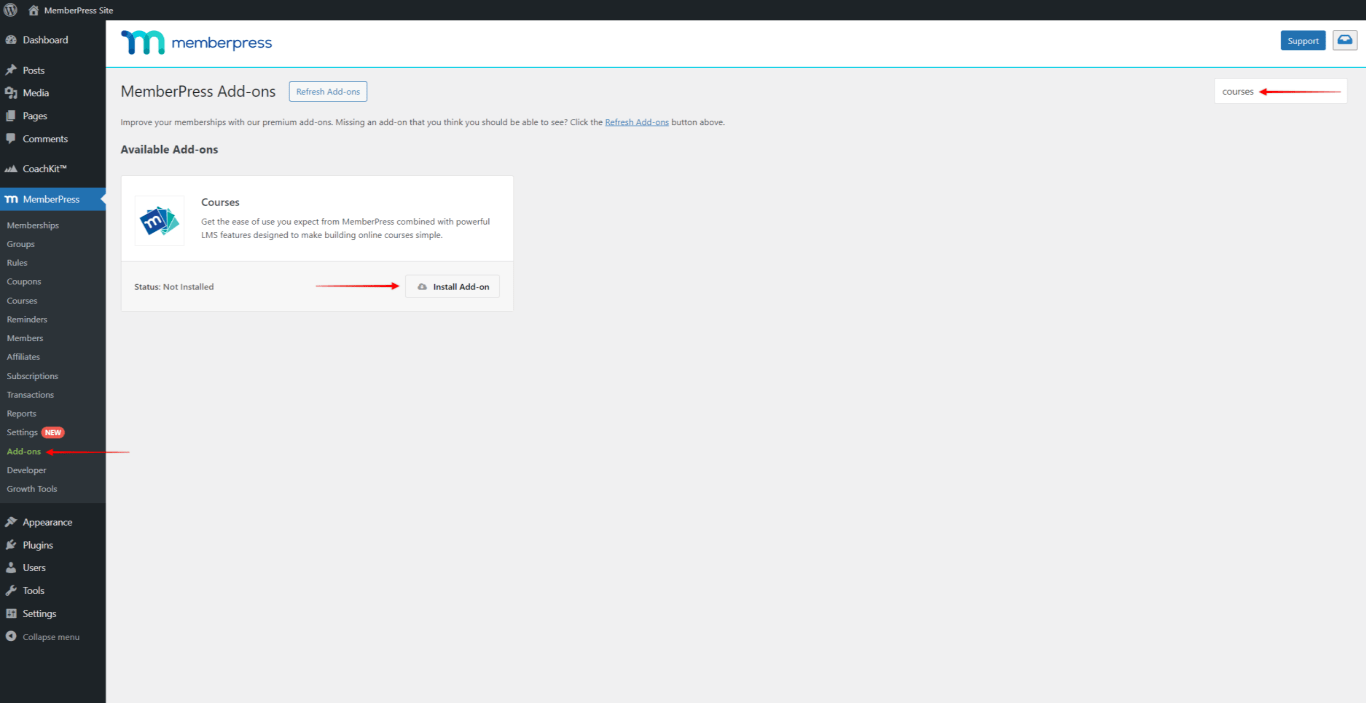
- Once you find the add-on, click the Install Add-on button. This will automatically install and activate the add-on.
Once activated, you can navigate to Dashboard > MP Courses and start creating your MemberPress courses.
In addition, you can add quizzes, assignments or gradebooks to your courses by installing and activating course add-ons. Course add-ons can be installed and activated in the same manner as the MemberPress Courses add-on.
Global Course Settings
MemberPress Courses has several global settings that will be applied to all courses on your website. The Global Course Settings are available at Dashboard > MP Courses > Settings.
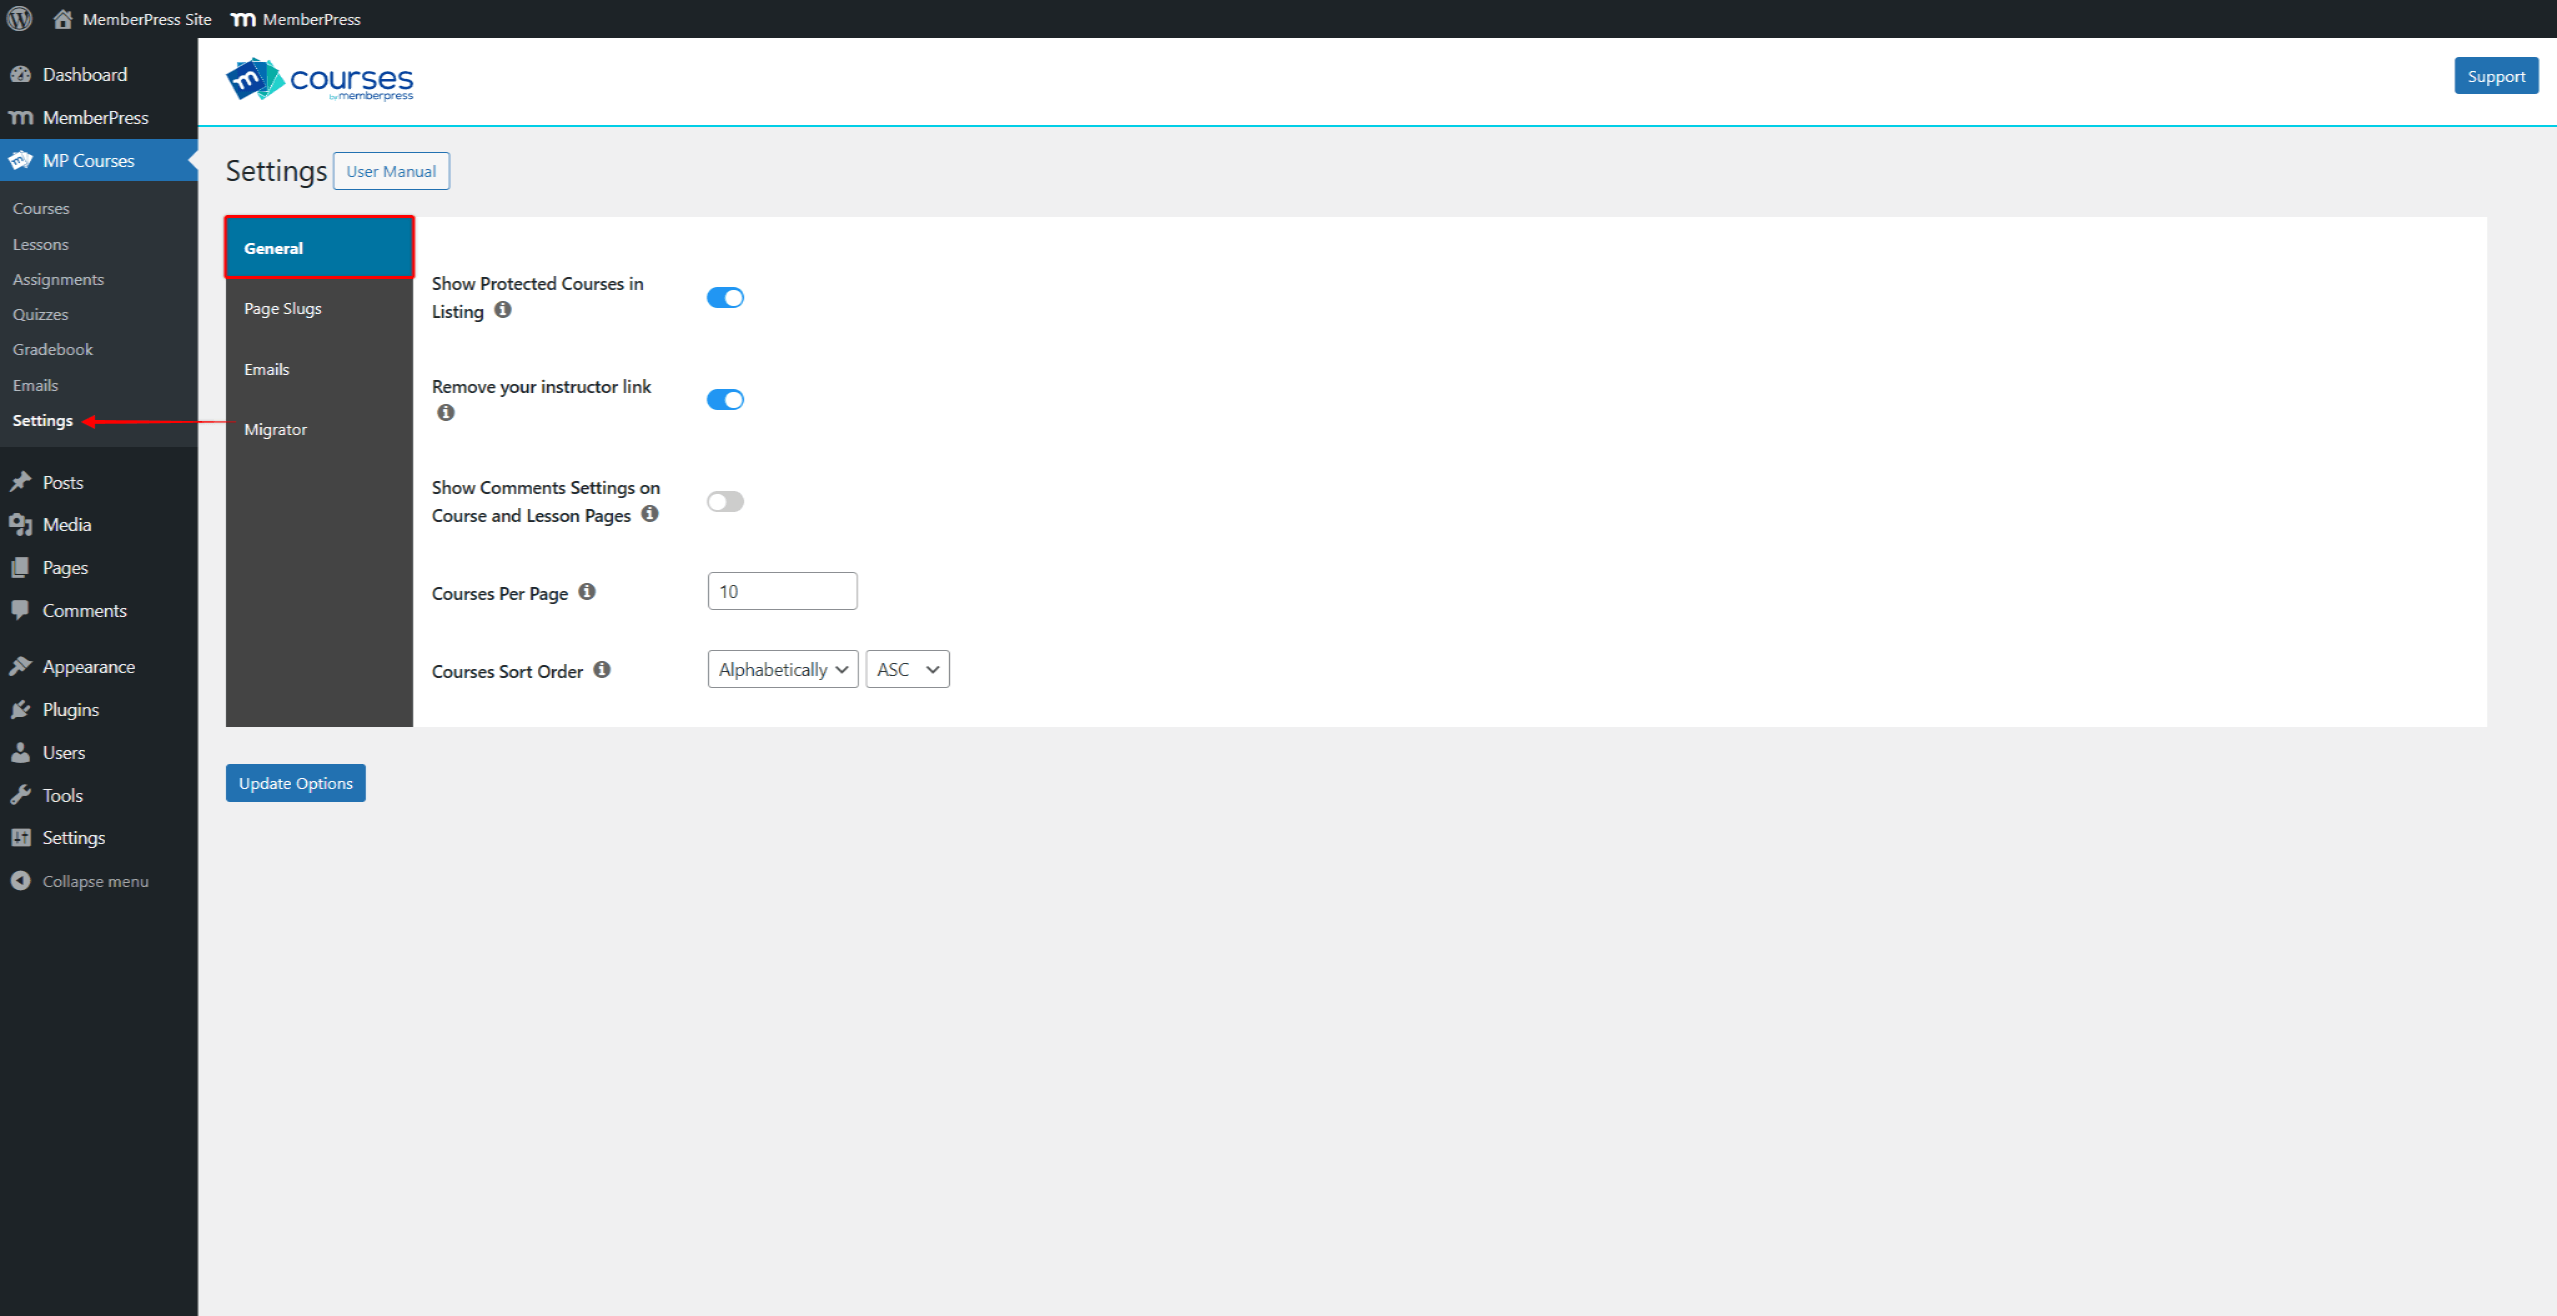
Here, under the General menu item, you will find the following settings:
- Show Protected Courses in Listing: all your courses, protected or public, are displayed in the Course Listing. Thus, toggle on this option if you want to exclude protected courses from the Course Listing;
- Remove your instructor link: a course instructor/author name will be displayed on every course, linking the course to the author’s page. Enable this option to hide the course instructor/author on all of your courses;
- Show Comments Settings on Course and Lesson Pages: if you wish to manage comments for each of your lessons and courses, you need to enable this option;
- Courses Per Page: here, you can specify how many courses should be displayed on each page of your Course Listing
- Courses Sort Order: you can set the order in which the courses will be sorted in your Course Listing. You can choose Alphabetically, Last Updated, and Publish Date. Also, you can set the order as ascending (ASC) or descending (DESC).
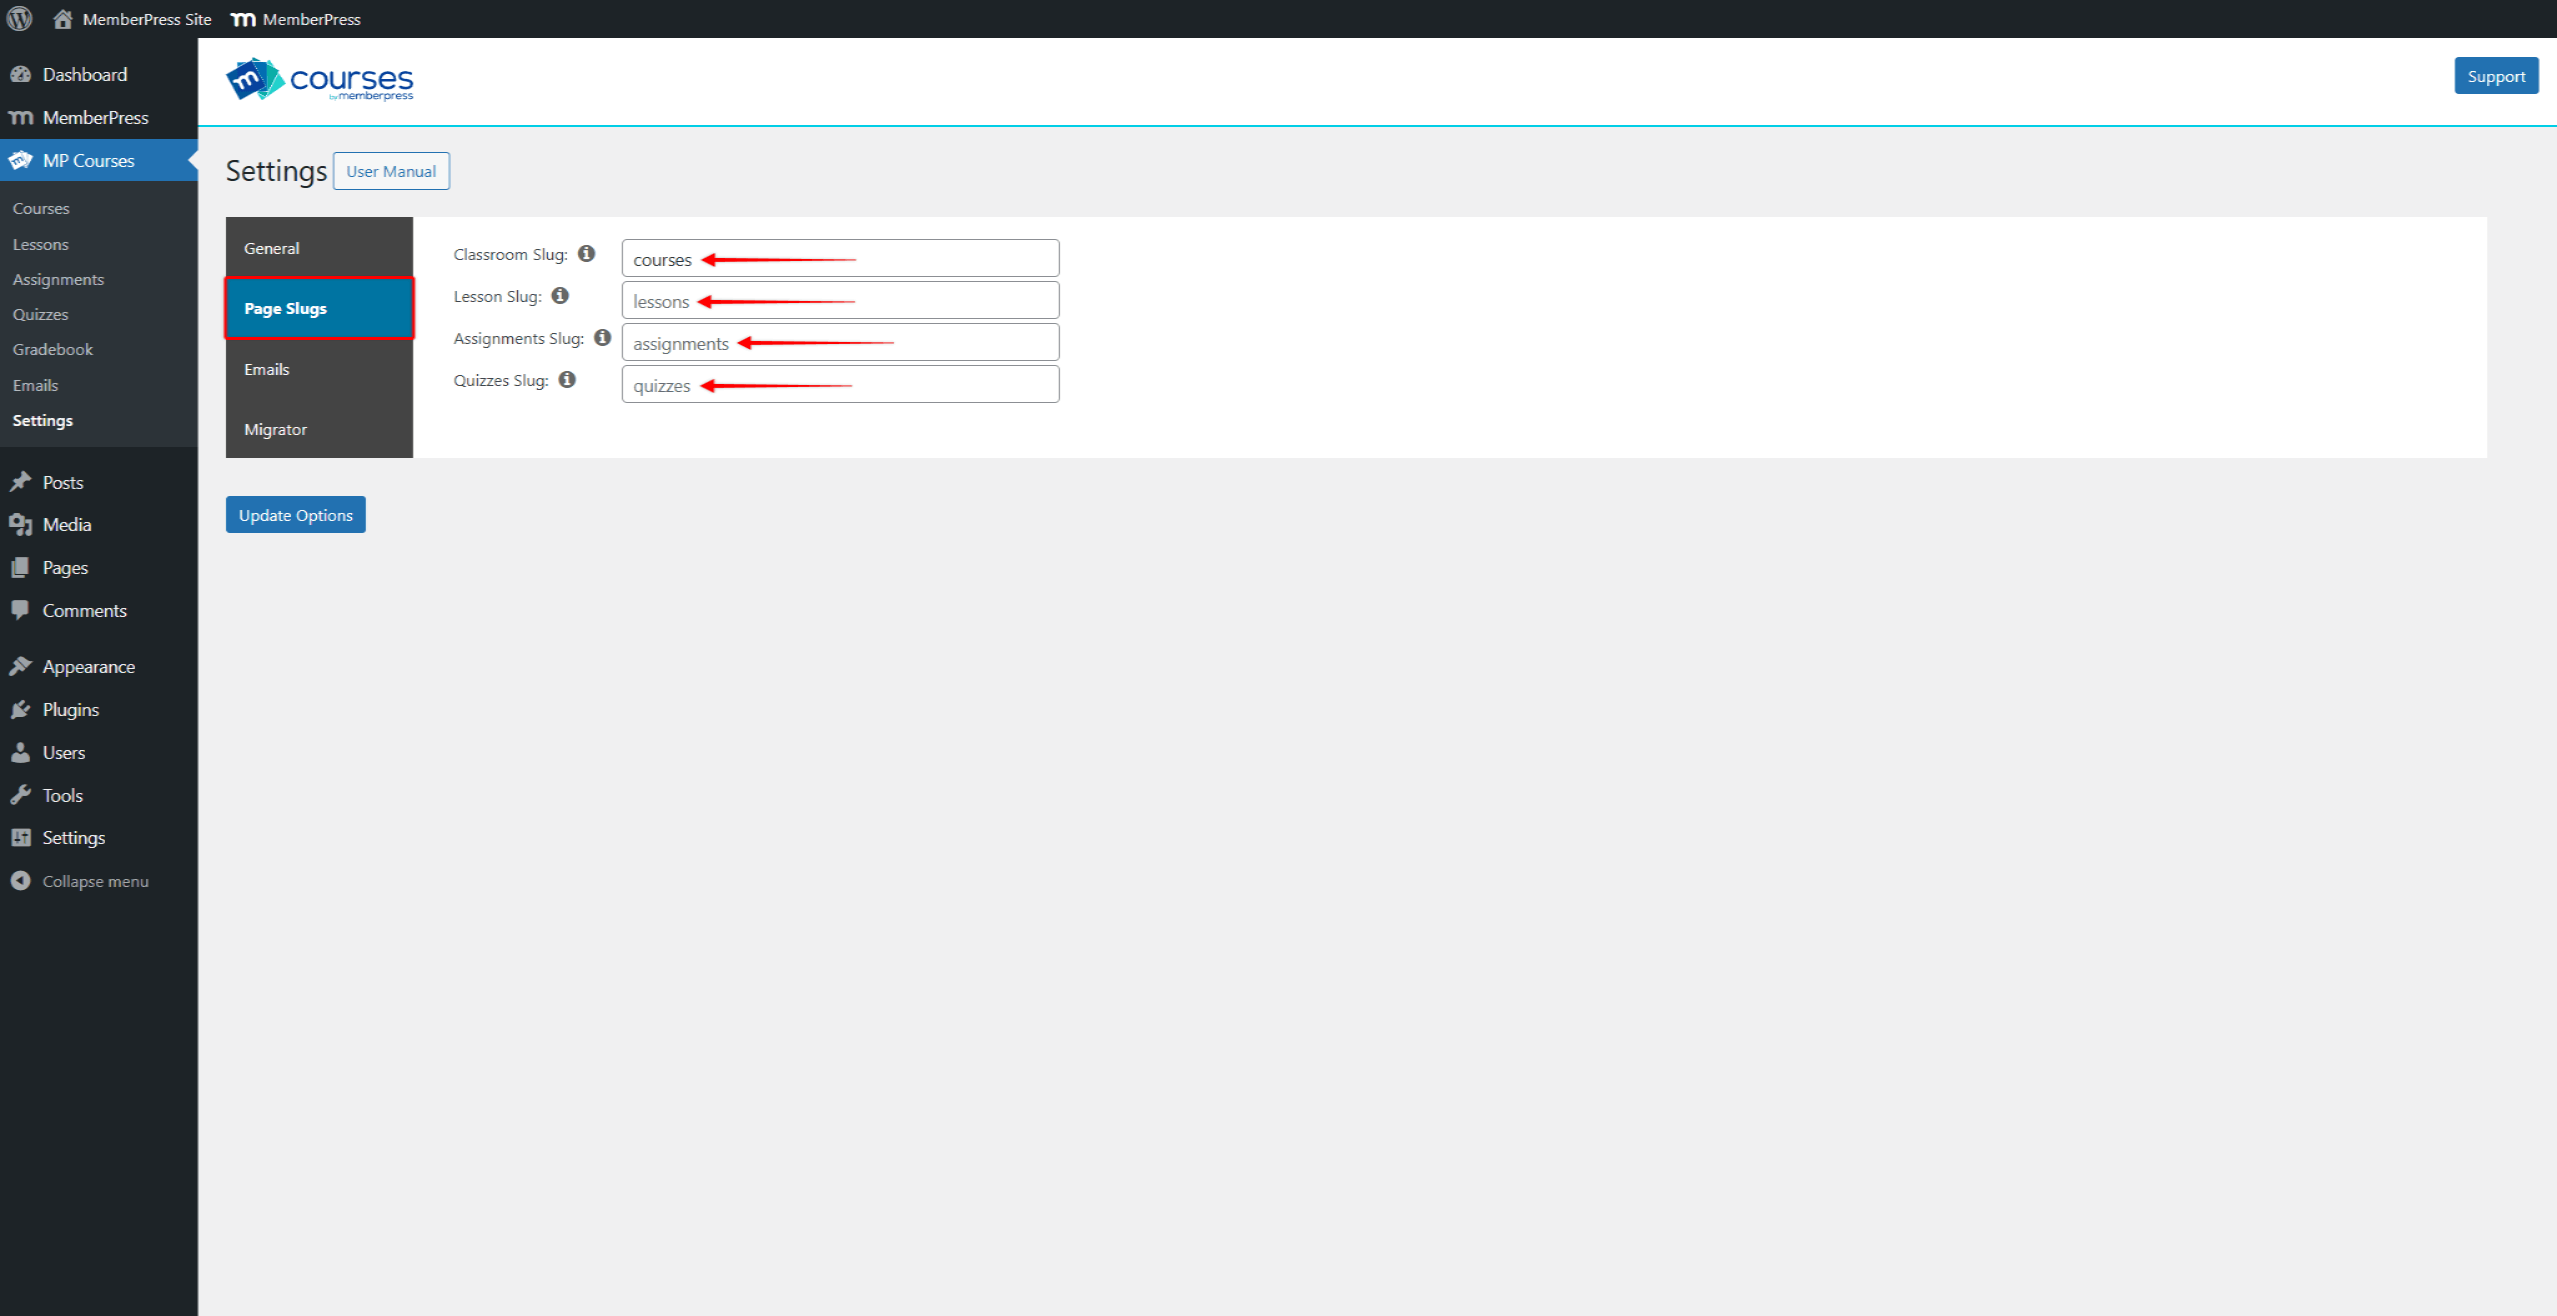
Next, under the Slugs menu item, you will find options to modify default slugs:
- Course Listing Slug: courses and the course listing page use the /courses slug;
- Lesson Slug: the default slug for lessons is /lessons;
- Assignments Slug: the default slug for assignments is /assignments;
- Quizzes Slug: the default slug for lessons is /quizzes.
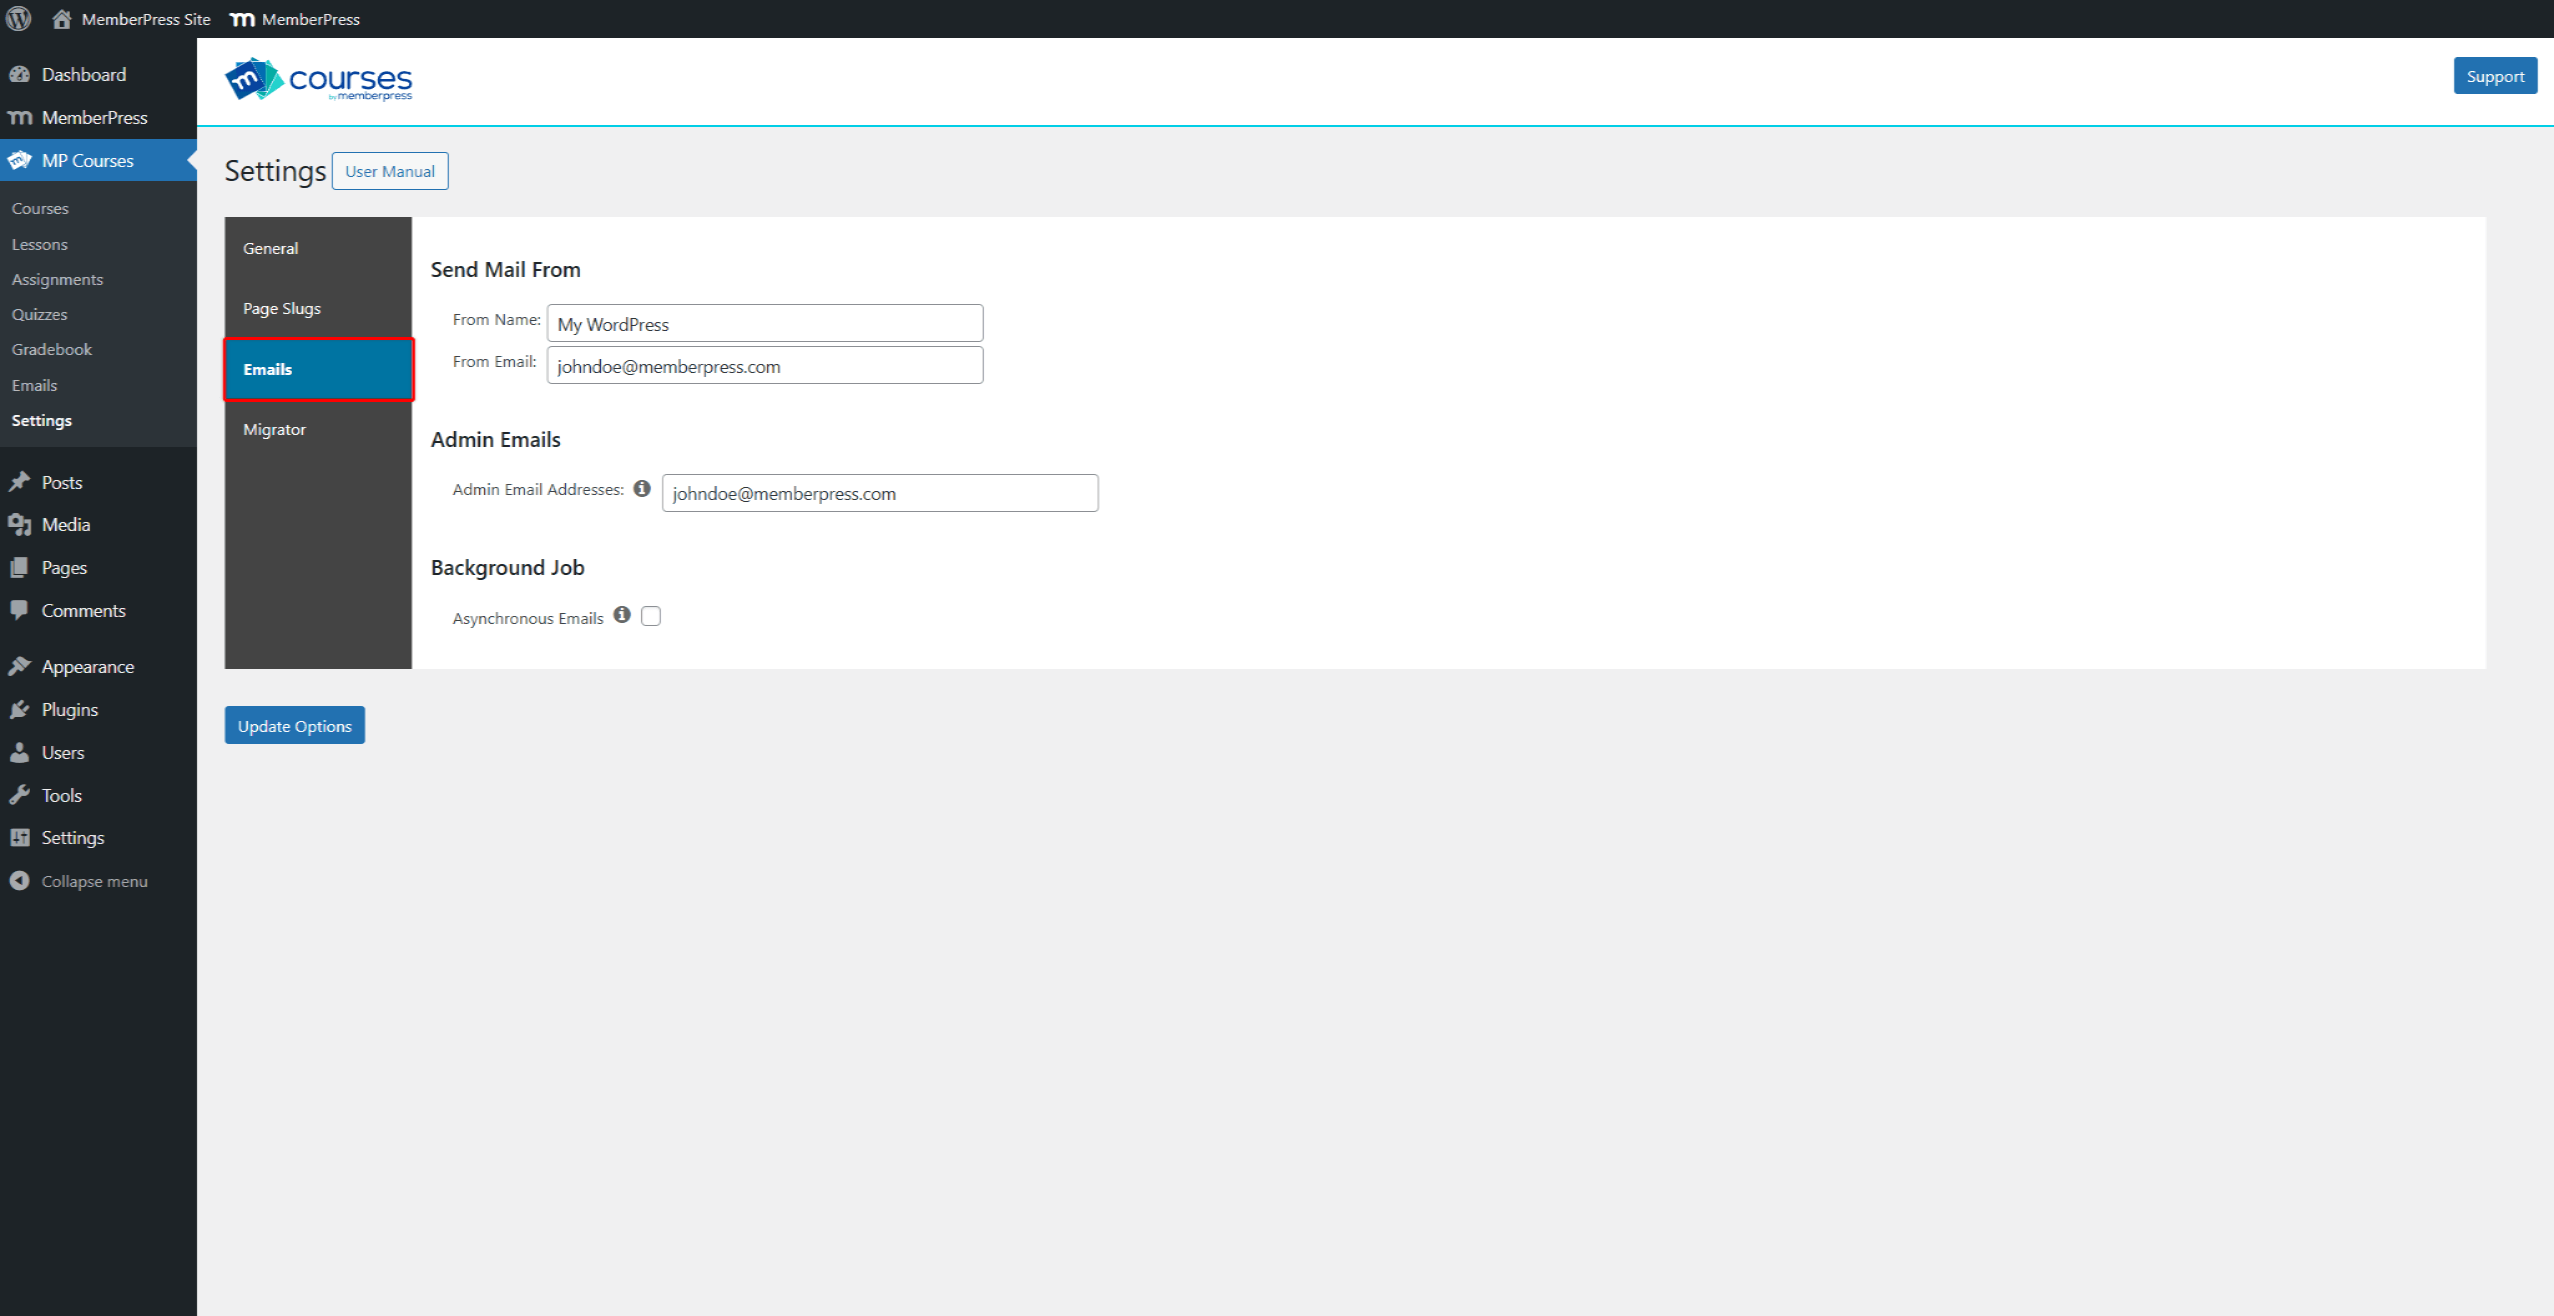
You can also configure the course-related email settings under the Emails menu item.
If you're migrating to MemberPress Courses from LearnDash, you can find built-in MemberPress Courses Migrator under the Migrator menu item.
ReadyLaunch™ Settings
ReadyLaunch™ templates are predesigned MemberPress pages that can be used out of the box.
The ReadyLaunch™ Courses/Lessons template is built for distraction-free learning. This is a full-screen template with its header, sidebar, footer, and styling, removing possible distractions from other website elements.
Manage ReadyLaunch™ Courses/Lessons Template
The Courses/Lessons template can be managed within the MemberPress settings. To do this, you can follow these steps:
- Navigate to Dashboard > MemberPress > Settings > ReadyLaunch™ tab.
- Scroll down to the Pro Mode Templates section and find the Courses/Lessons option. Here, you can toggle the template on or off to enable or disable it. By default, the template will be enabled.
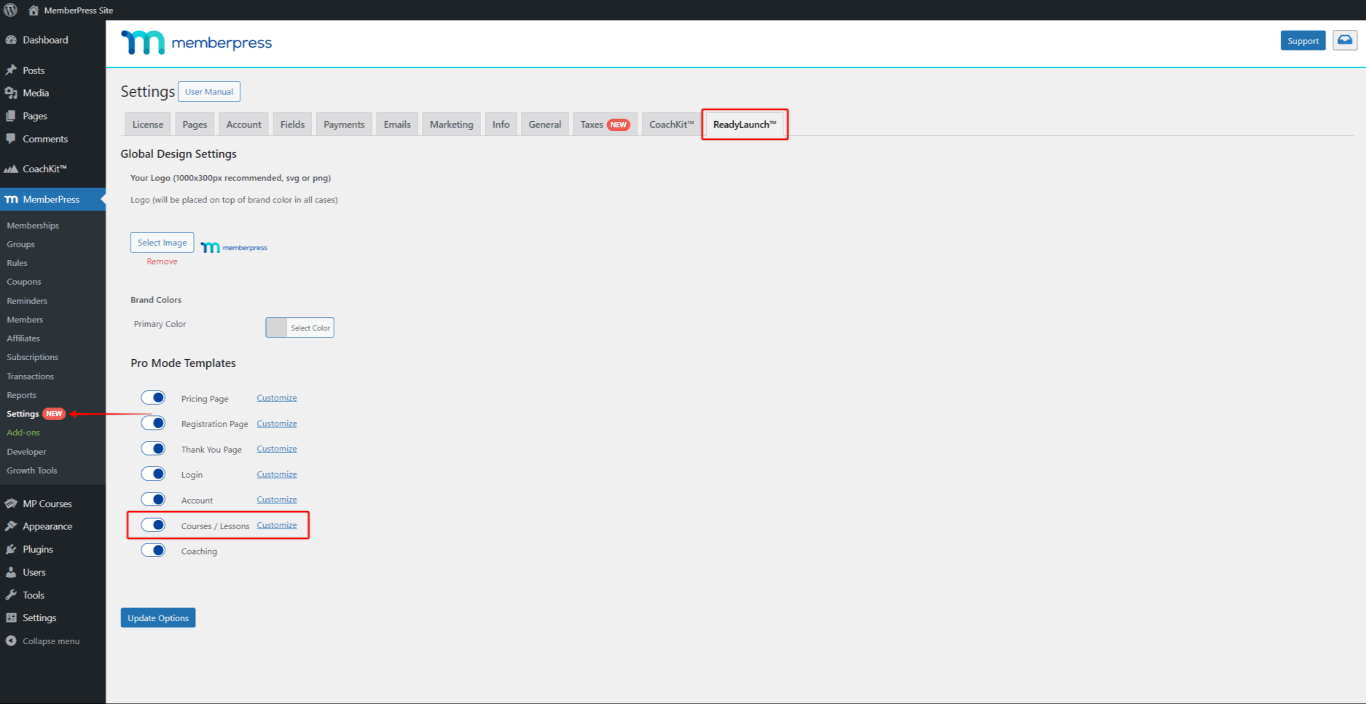
- Also, you can modify the Courses/Lessons template styling by clicking the Customize link next to the template’s name.


