With the MemberPress Order Bumps add-on, you can upsell additional items alongside your memberships at checkout/registration. You can boost income and simplify sales by offering services, digital downloads, or additional subscriptions as order bumps at checkout.
This document guides you through the setup of MemberPress Order Bumps. Also, it explains how to add order bumps for your memberships and sell multiple memberships at the same time.
Order Bumps Setup
To allow members to purchase additional items at checkout, you should install and activate the MemberPress Order Bumps add-on:
- Navigate to Dashboard > MemberPress > Add-ons.
- Browse the add-ons or use the search tool to find Order Bumps integration.
- Next, click on the Install Add-on button. This will automatically install and activate the add-on.
Primary Membership Add-ons
Once the Order Bumps add-on is activated, you can sell order bumps on the membership checkout page.
Order bumps are separate add-on memberships that can be purchased in a bundle with the primary membership subscription.
The membership for which you would like to set order bumps is called the primary membership.
- Navigate to Dashboard > MemberPress > Memberships and click on Edit under your membership name to begin editing that membership.
- Scroll down to Membership Options and click on the newly added Order Bumps tab.
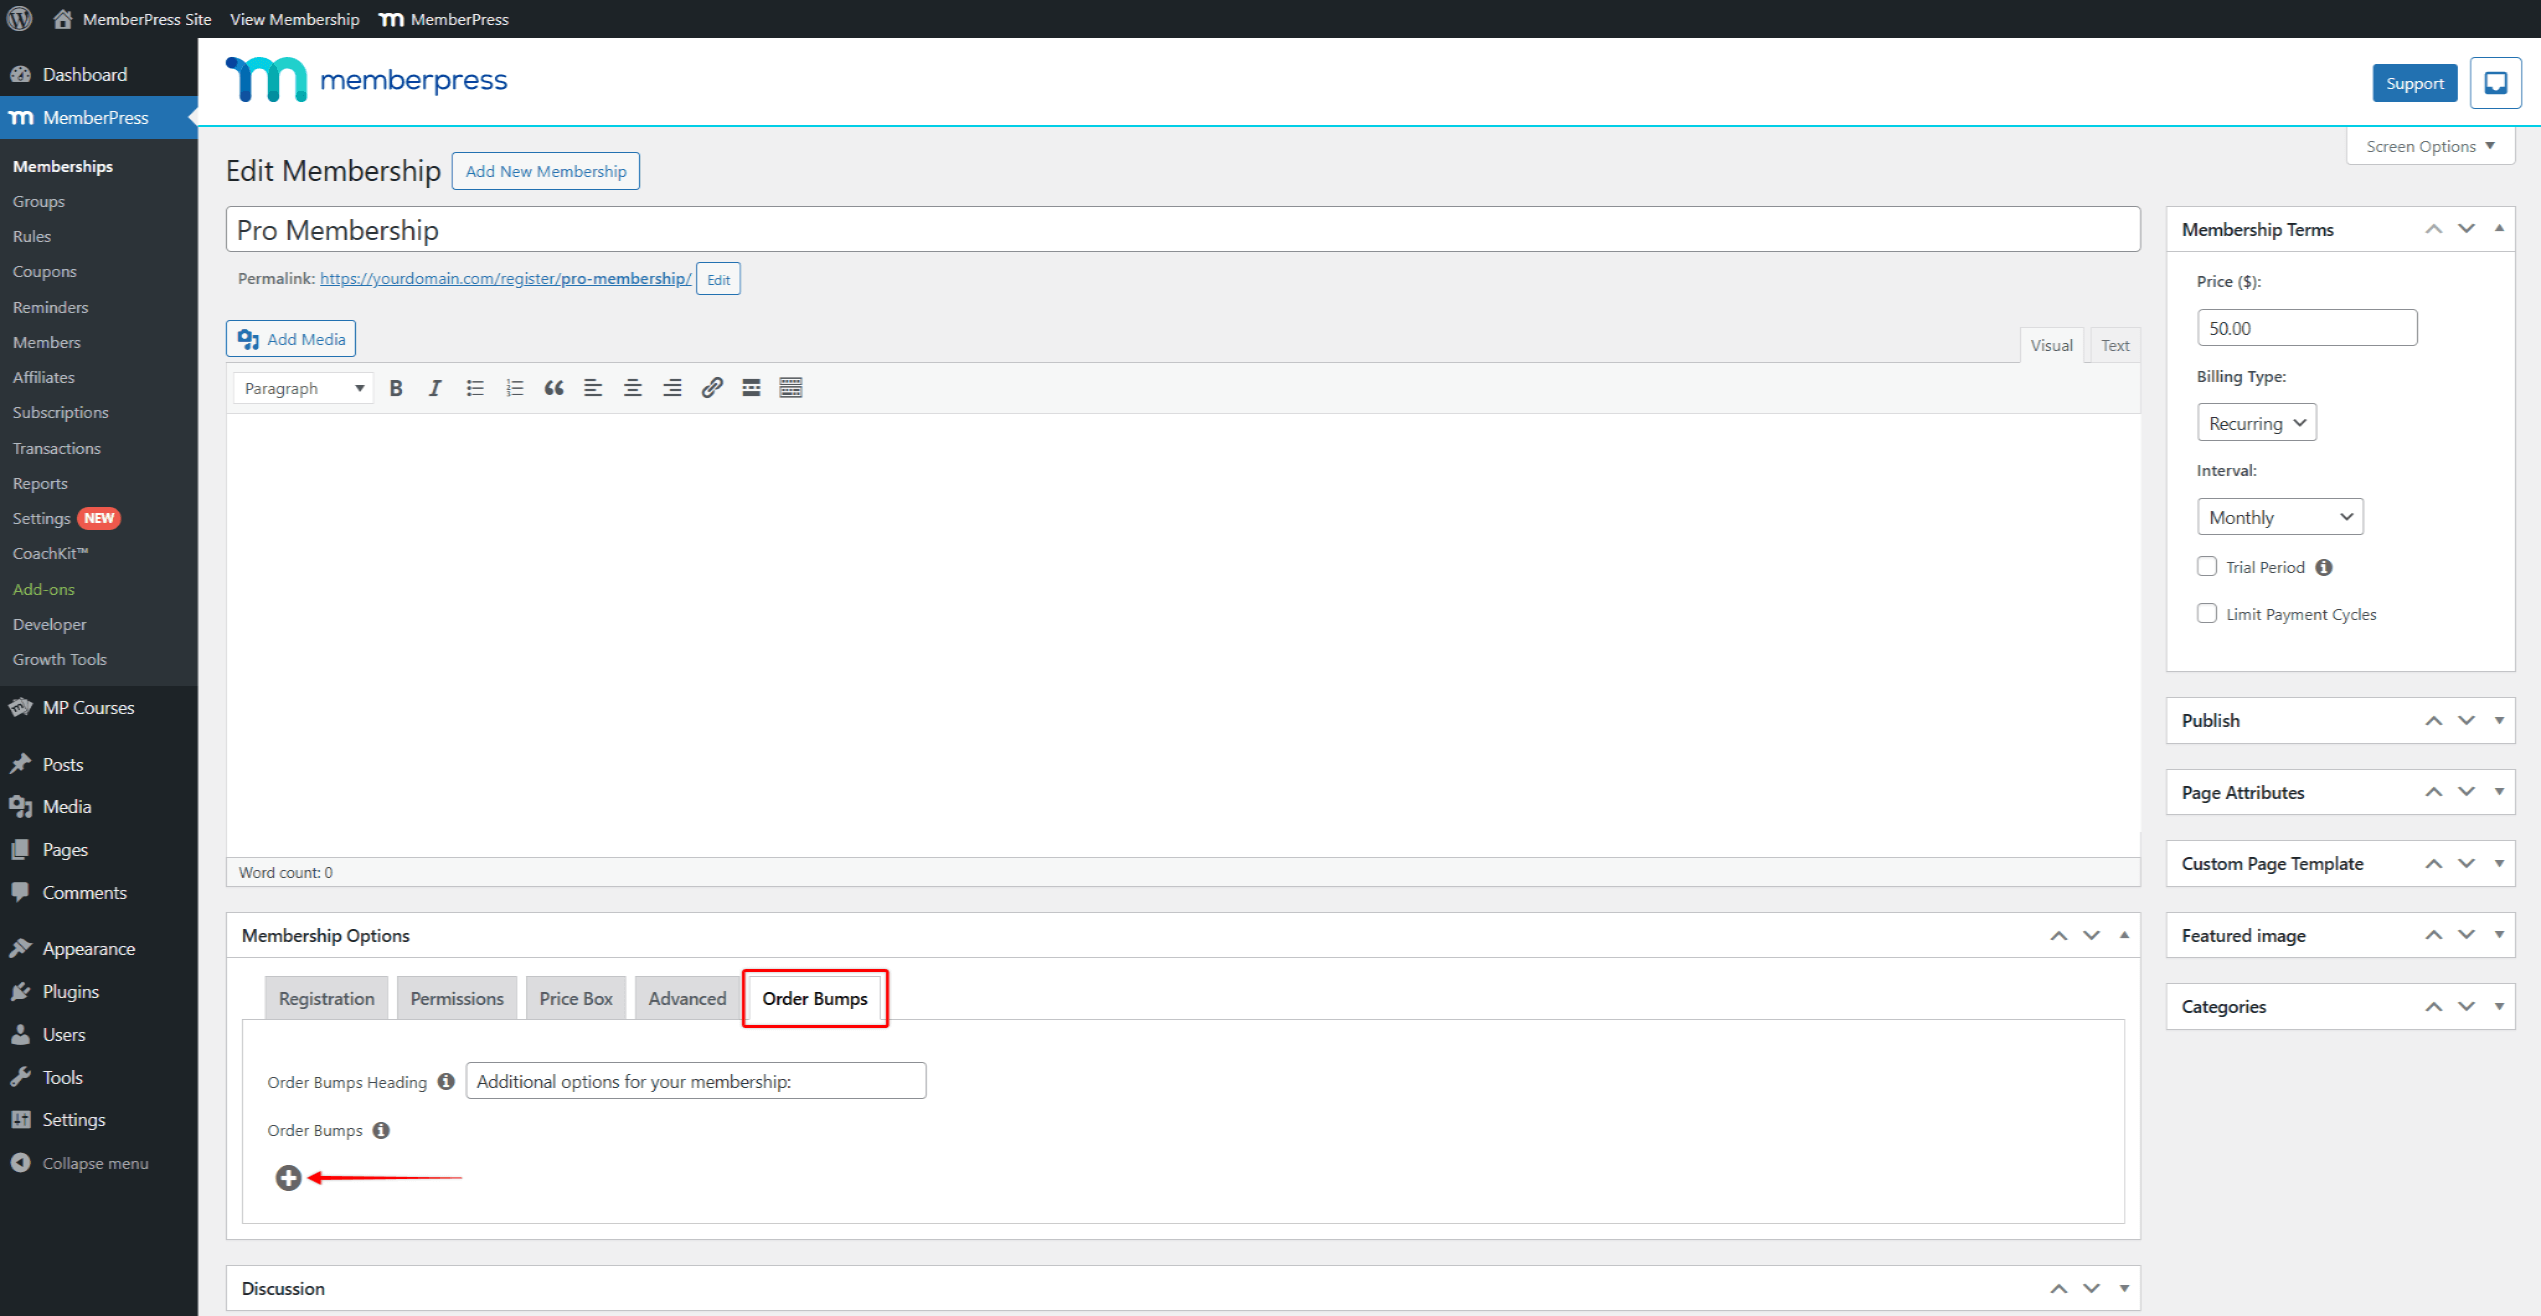
- Here, you can add a custom Order Bumps Heading, use the default one, or leave it empty. This heading is displayed above the order bumps list on the checkout page. This heading can be used to encourage users to scale up their orders.
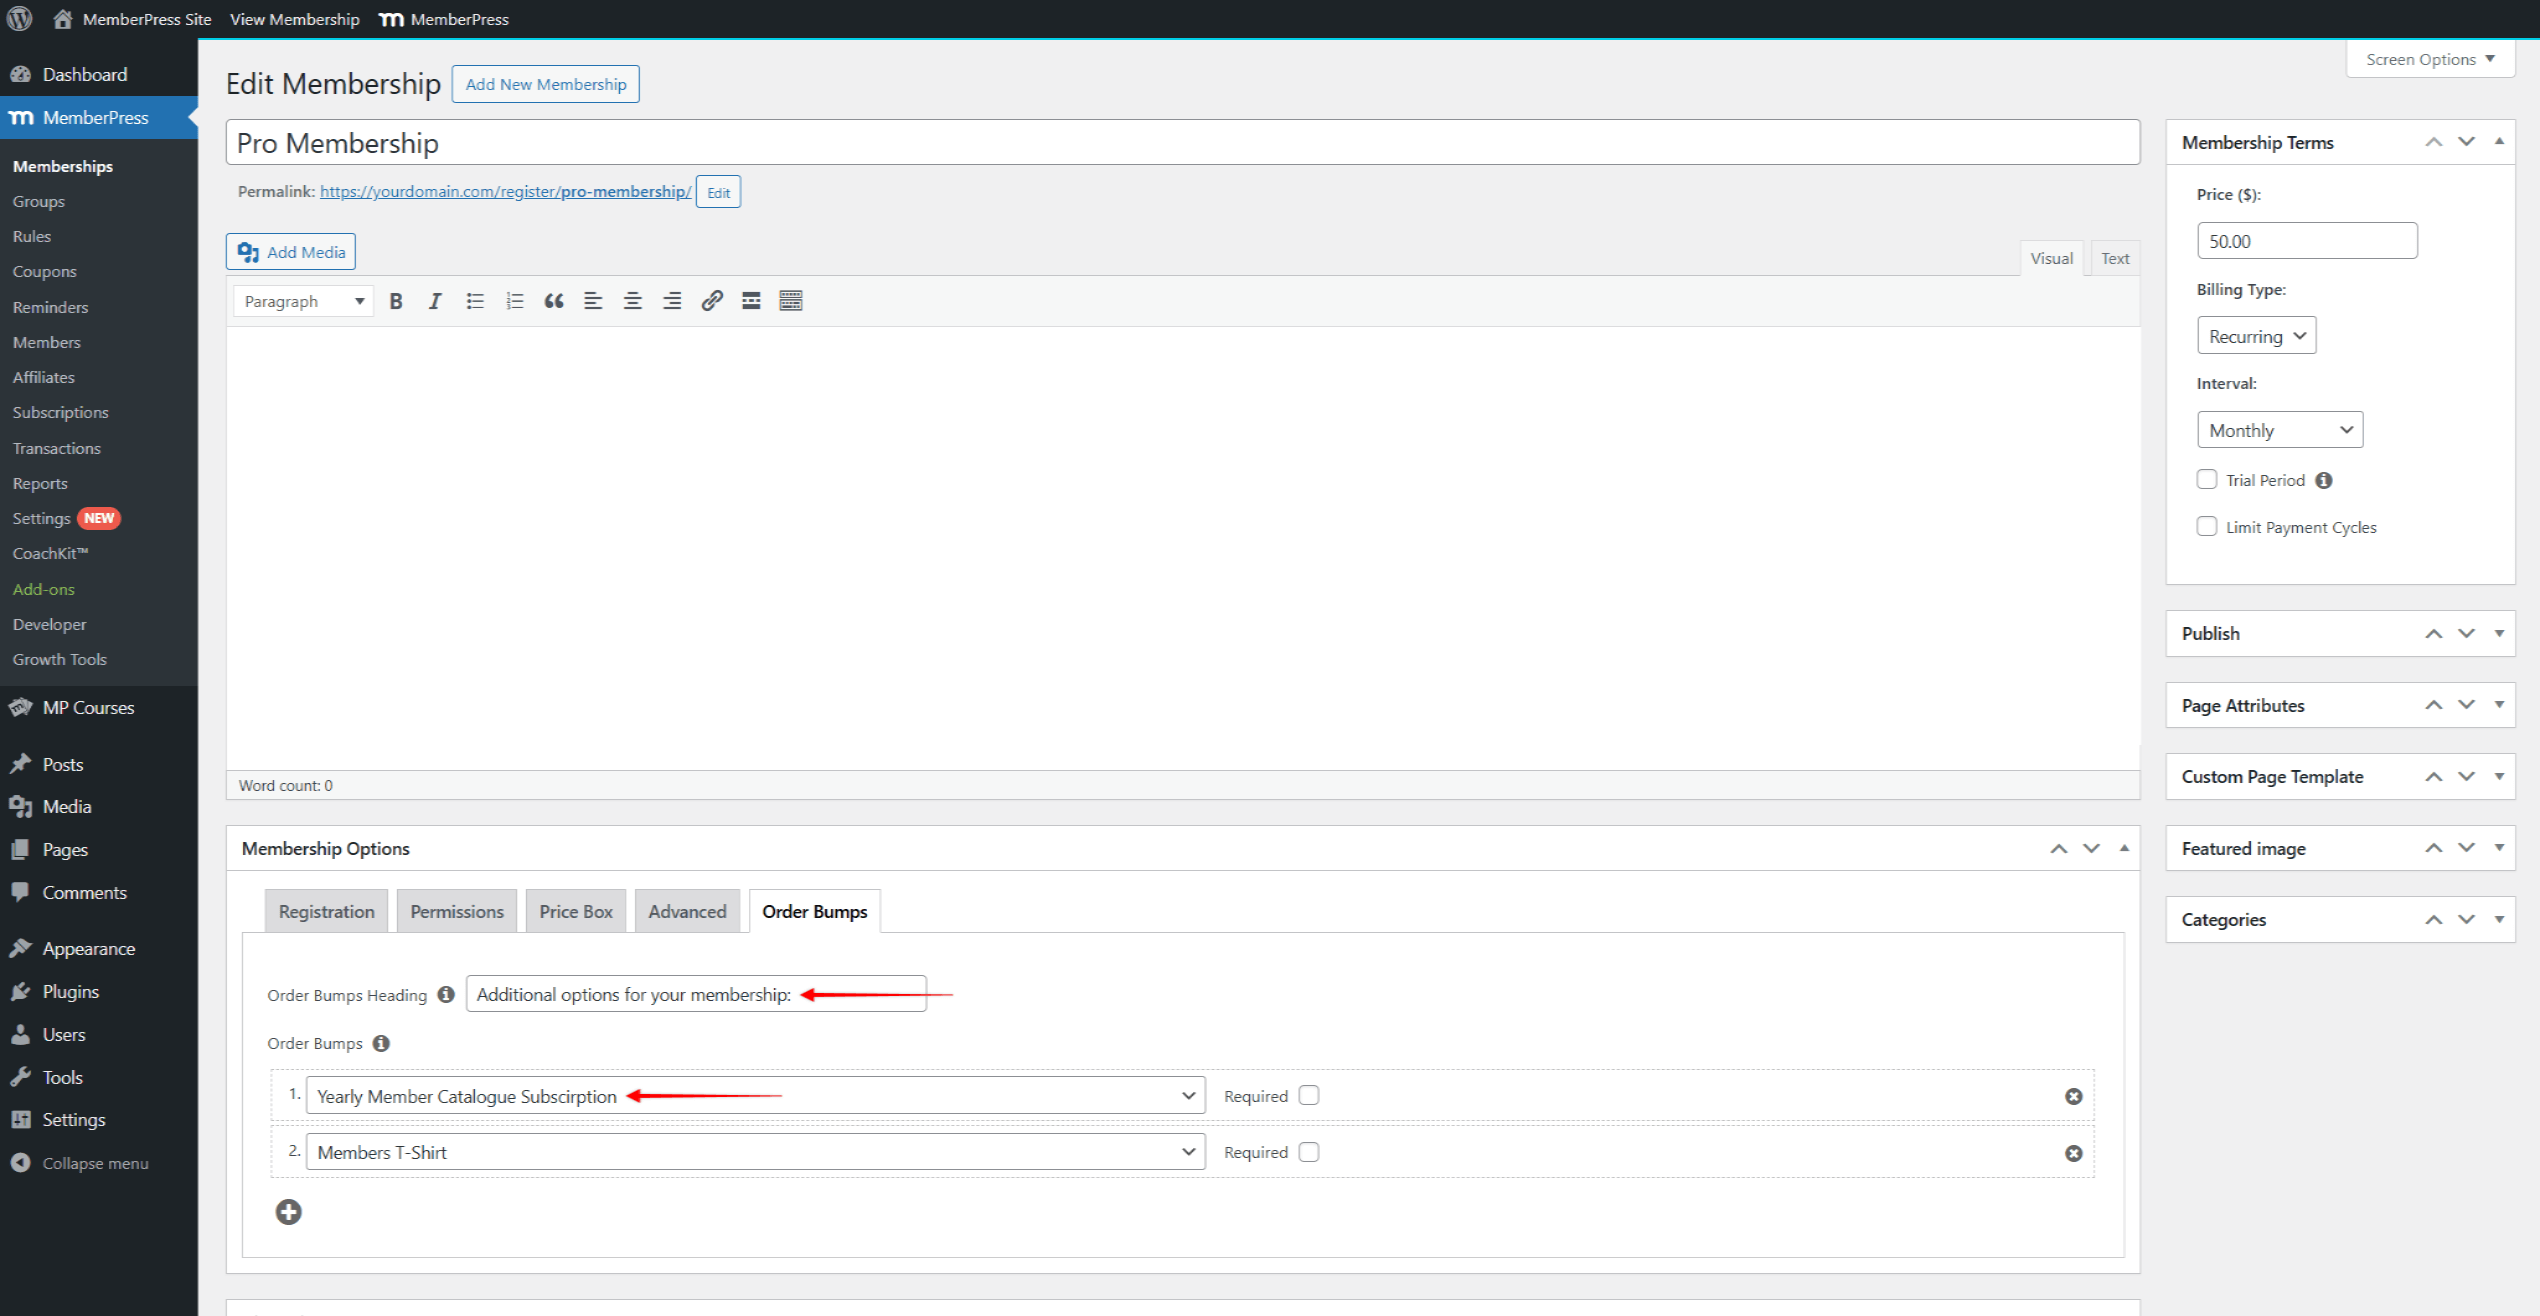
- Next, click the + icon to add an order bump for this primary membership.
- Then, select the desired membership in the dropdown menu to include it as an optional order bump.
- Repeat steps 4 and 5 to add more items. Add all memberships that should be offered as additional purchasing items on the primary membership checkout page.
- In addition, check the Required option for any order bump to make it required instead of optional.
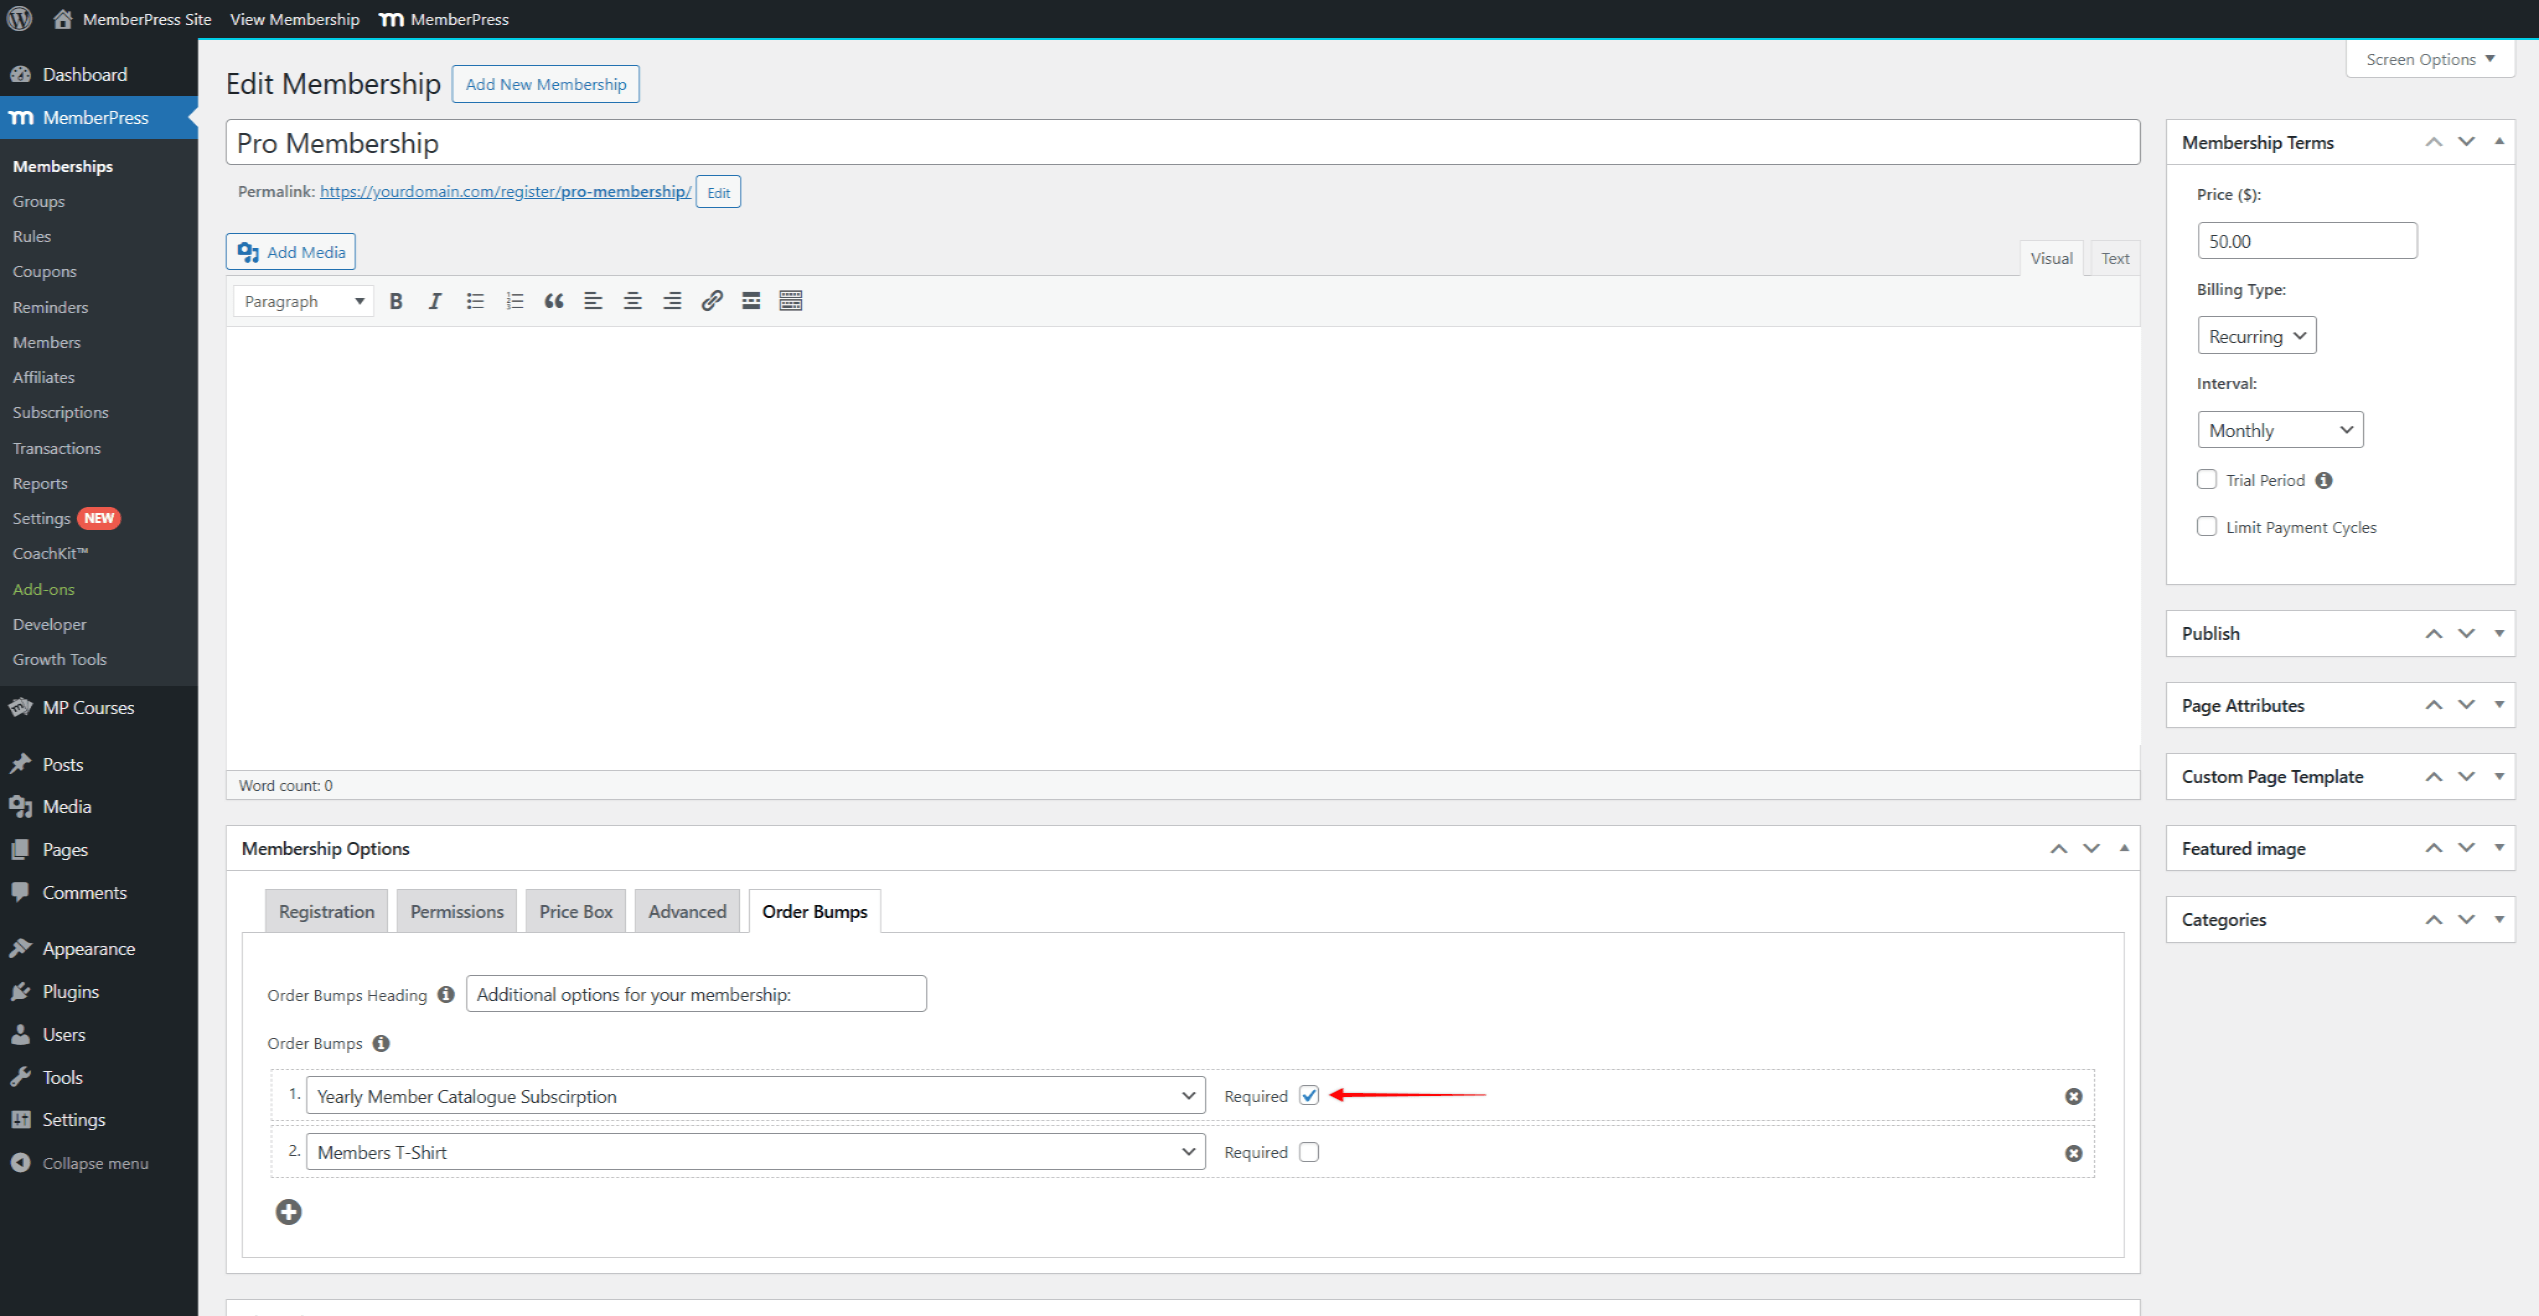
- Click Update to save your changes.
Purchasing Order Bumps
Once the add-ons are set for the primary membership, they'll be available as purchasable options on the primary membership checkout. All selected add-ons will be sold together with the primary membership as a bundle.
The total price for the bundle will automatically be updated when users select order bumps. The order list will show the primary membership and all selected add-on memberships.
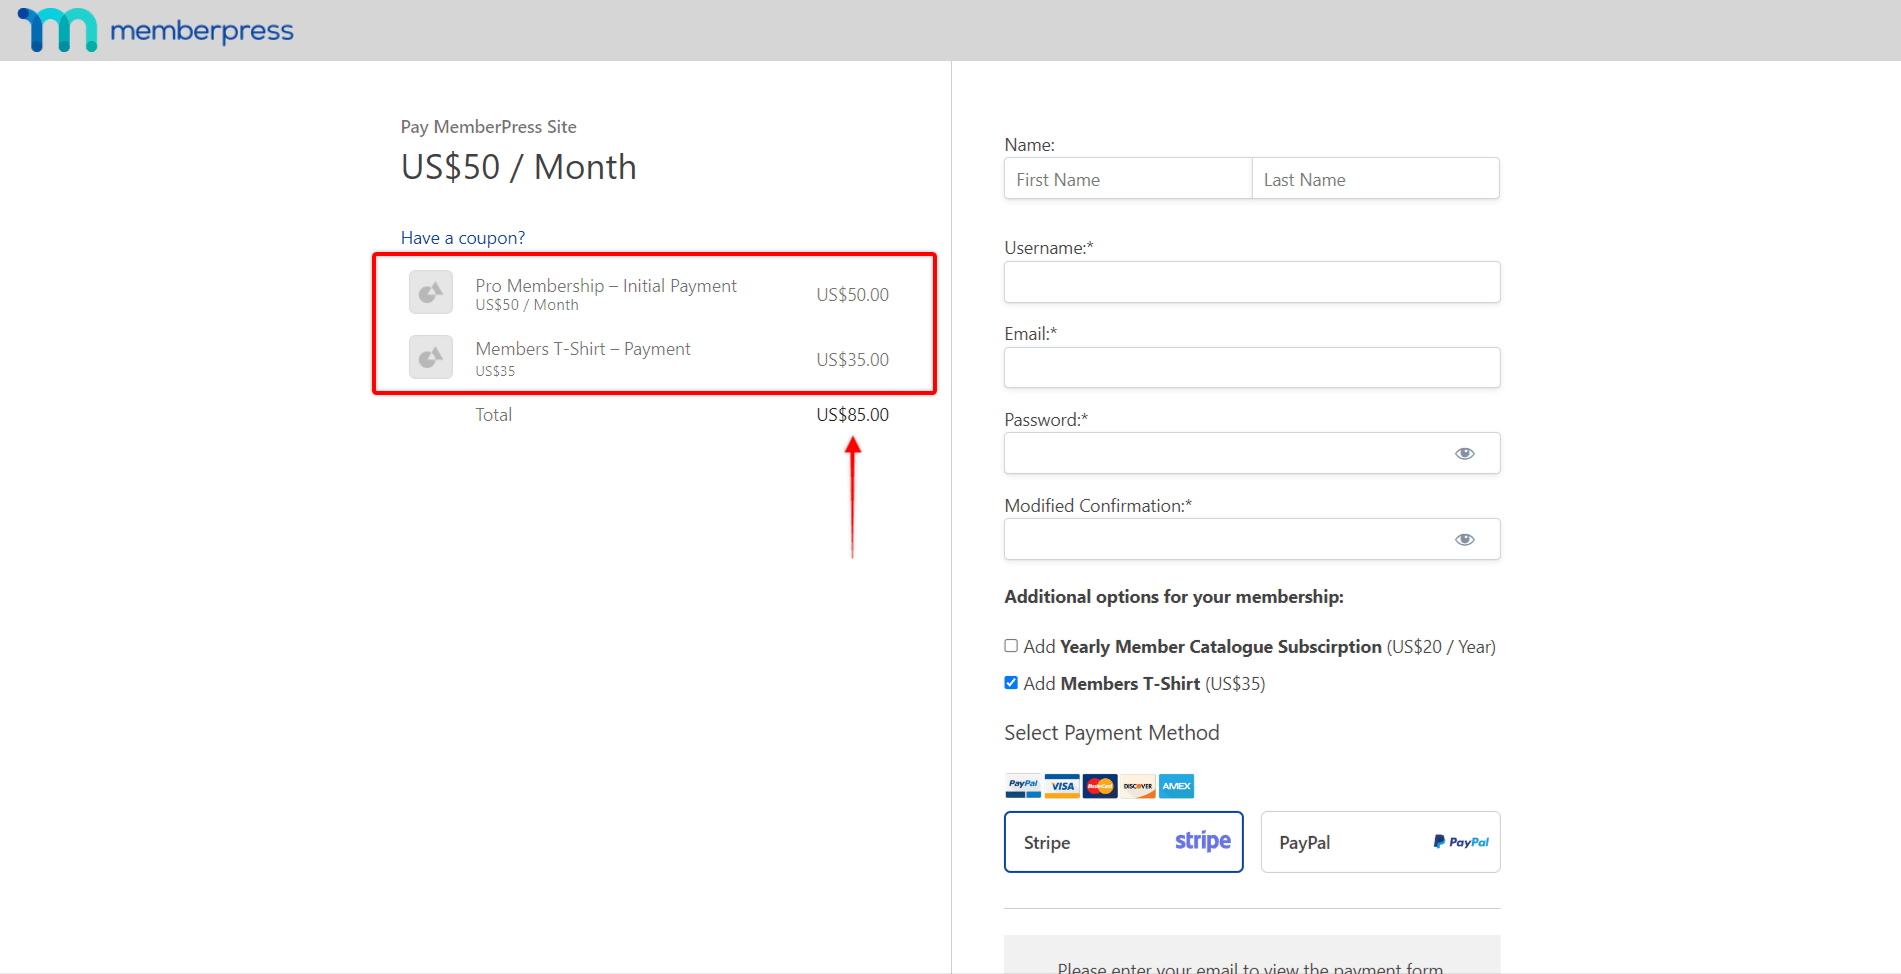
You can use both recurring and one-time memberships as add-ons. Also, they can be paid or free. However, it’s important to mention that the primary membership can’t be set as free.
Supported Payment Gateways
Order Bumps are only supported for online payment gateways (Stripe, PayPal, Square, and Authorize.net).
Therefore, the Order Bumps tab will be hidden if only the offline gateway is enabled on the primary membership.
Further, the order bumps availability on the primary membership registration form will depend on two conditions:
- primary membership payment method settings;
- order bump membership type (recurring or one-time membership).
Below is the list of available payment gateways and the add-on membership types they support:
- Stripe: supports both recurring and one-time add-on memberships;
- Square: supports both recurring and one-time add-on memberships;
- Authorize.net: supports both recurring and one-time add-on memberships;
- PayPal Standard: supports only one-time add-on memberships;
Thus, if PayPal is enabled for the primary membership, users can select it as the payment method for their order. In this case, all recurring order bumps will automatically become hidden.
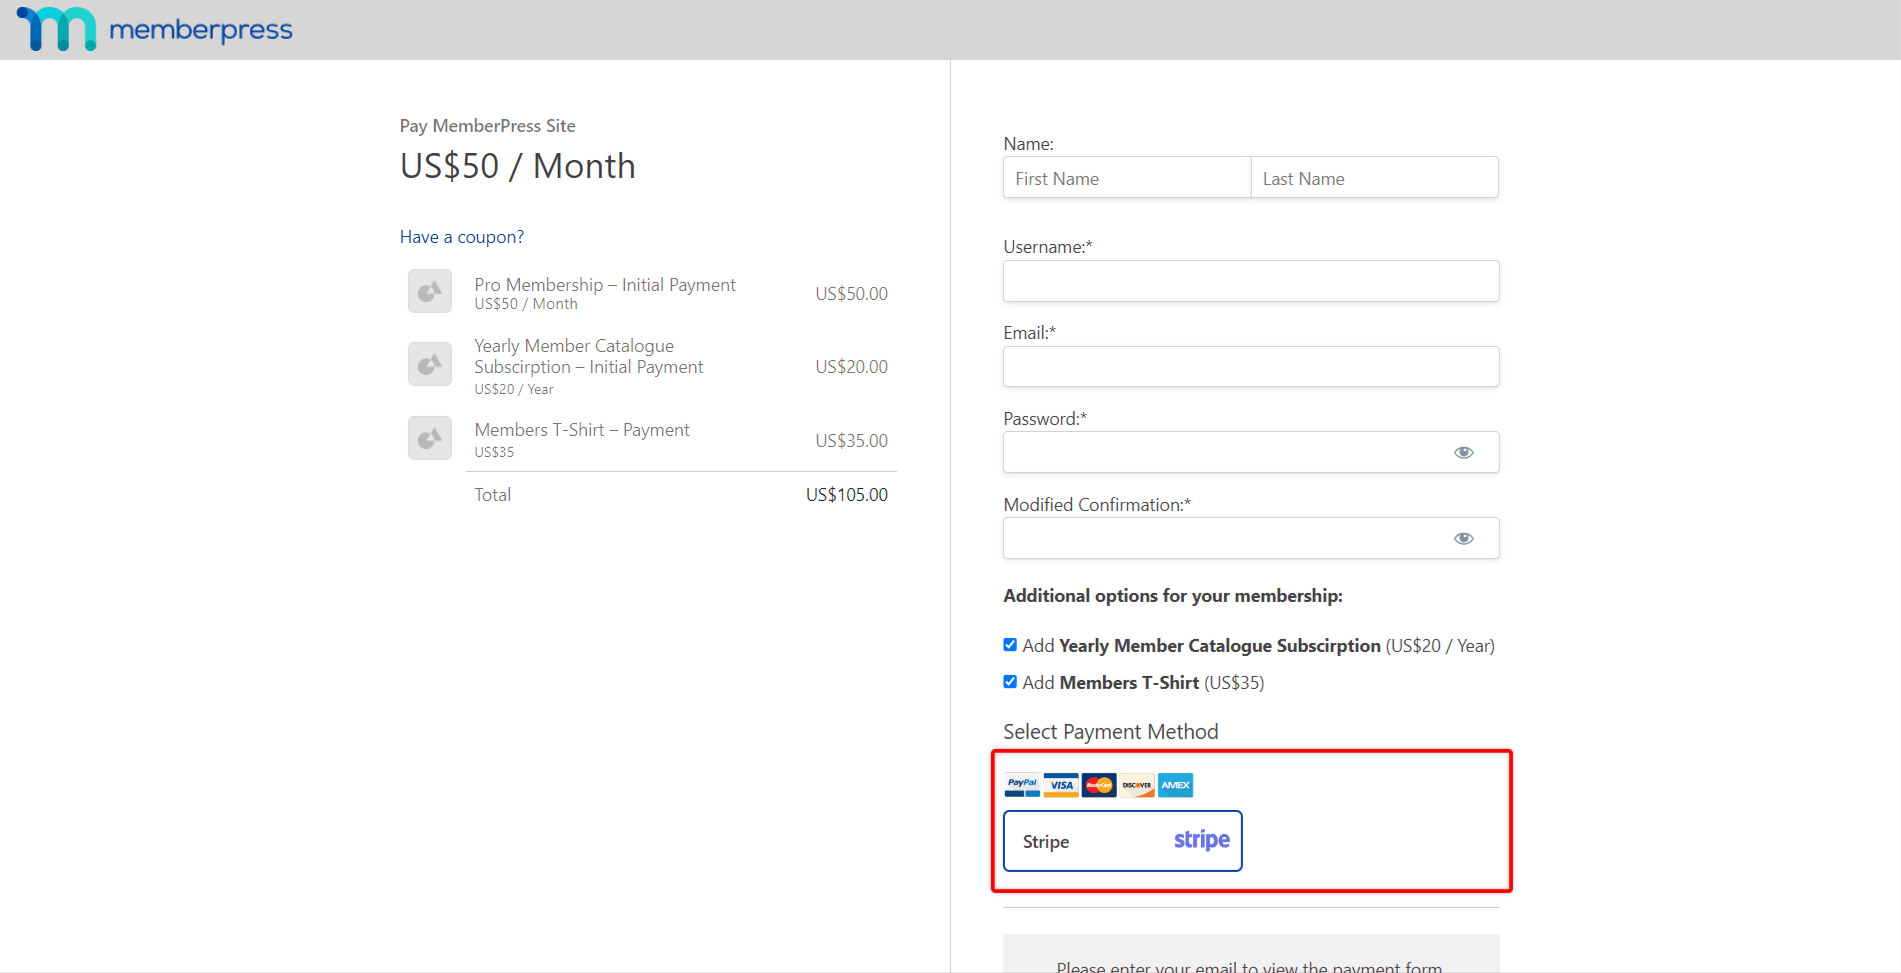
Furthermore, users can select recurring order bumps and then choose PayPal as the payment method. In this case, the checkout page will display a notification requesting the payment option change.
Also, if you disable online payment gateways for the primary membership, order bumps will become hidden on the checkout form.
Required Order Bumps
Required order bumps can be used to add one-time fees (e.g., registration fee) or when users must purchase a bundle.
These memberships will be automatically checked and added to the order list.
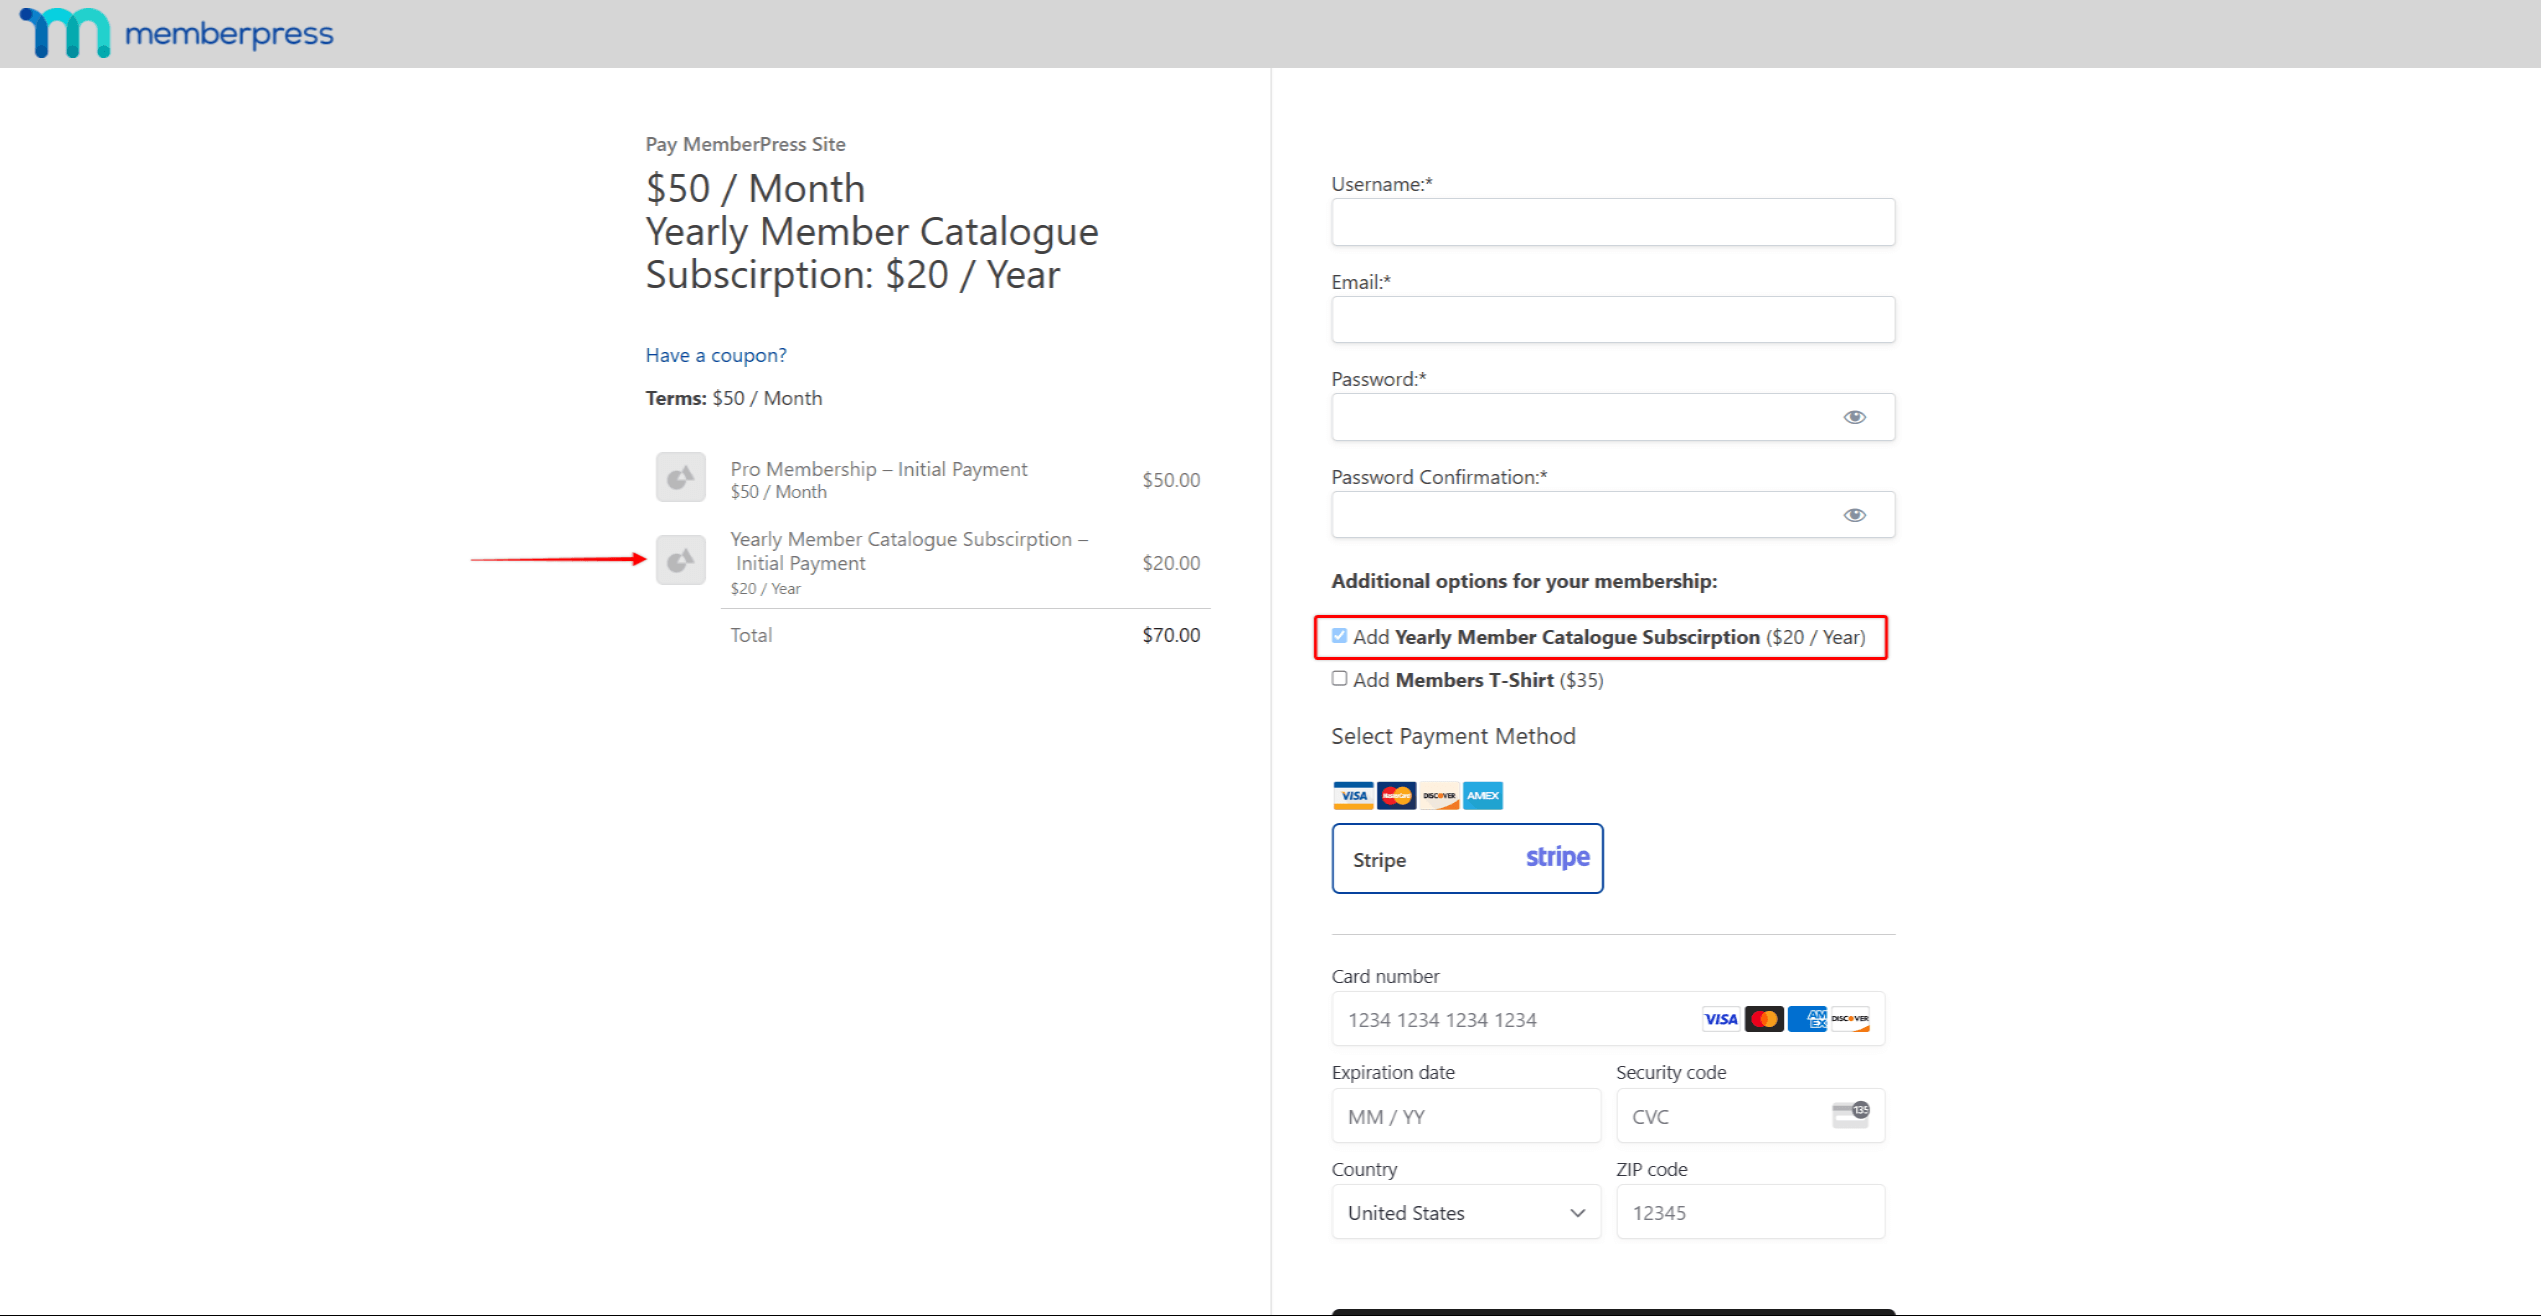
Users won't have the option to remove the required order bumps. If they hover over this add-on, MemberPress will notify them that it is required and can't be removed.
In addition, the required order bump terms will be added to the Terms section of the checkout page.
Managing Order Bumps Subscriptions
After purchasing a primary membership with order bumps, users will be transferred to your set Thank You page.
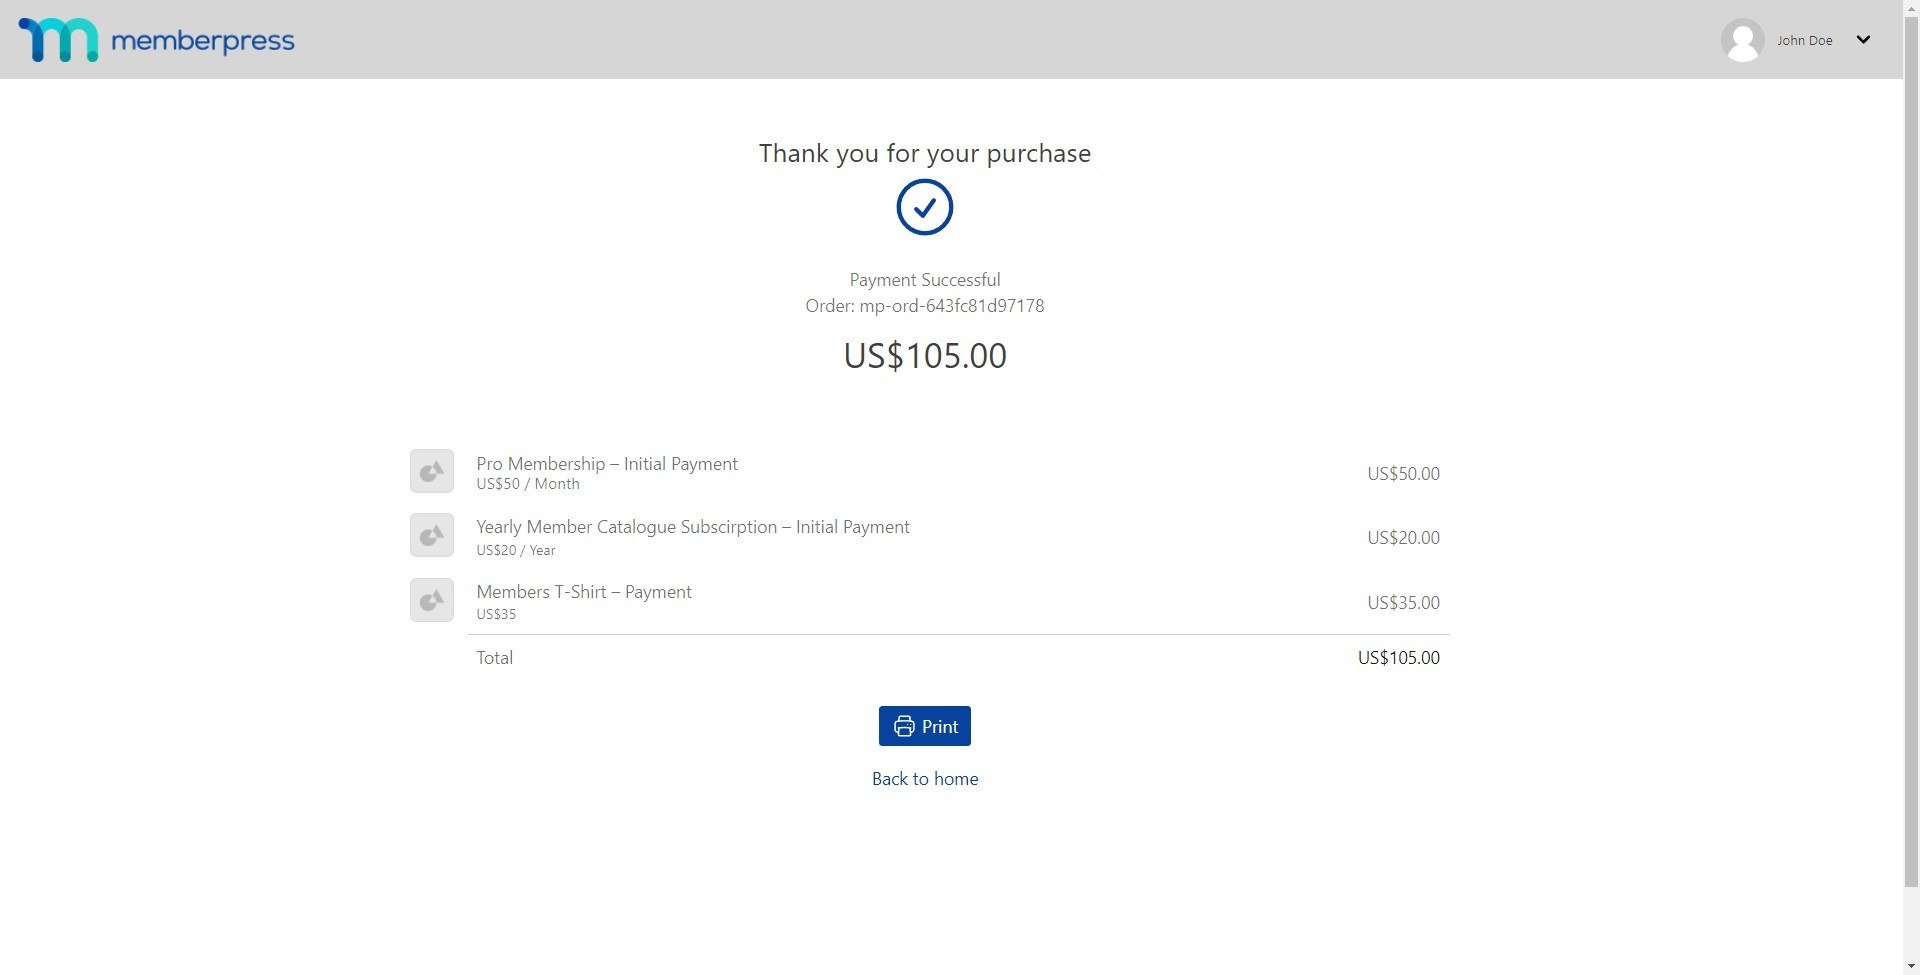
The Thank You page will list all memberships a user has purchased (primary and order bumps).
Users will also receive MemberPress email notifications based on your email settings.
The user will be charged once for the total amount of the bundle, as the first payment for all the memberships is combined.
All these memberships are shown separately on the user’s account and your MemberPress backend, though they share the same transaction.
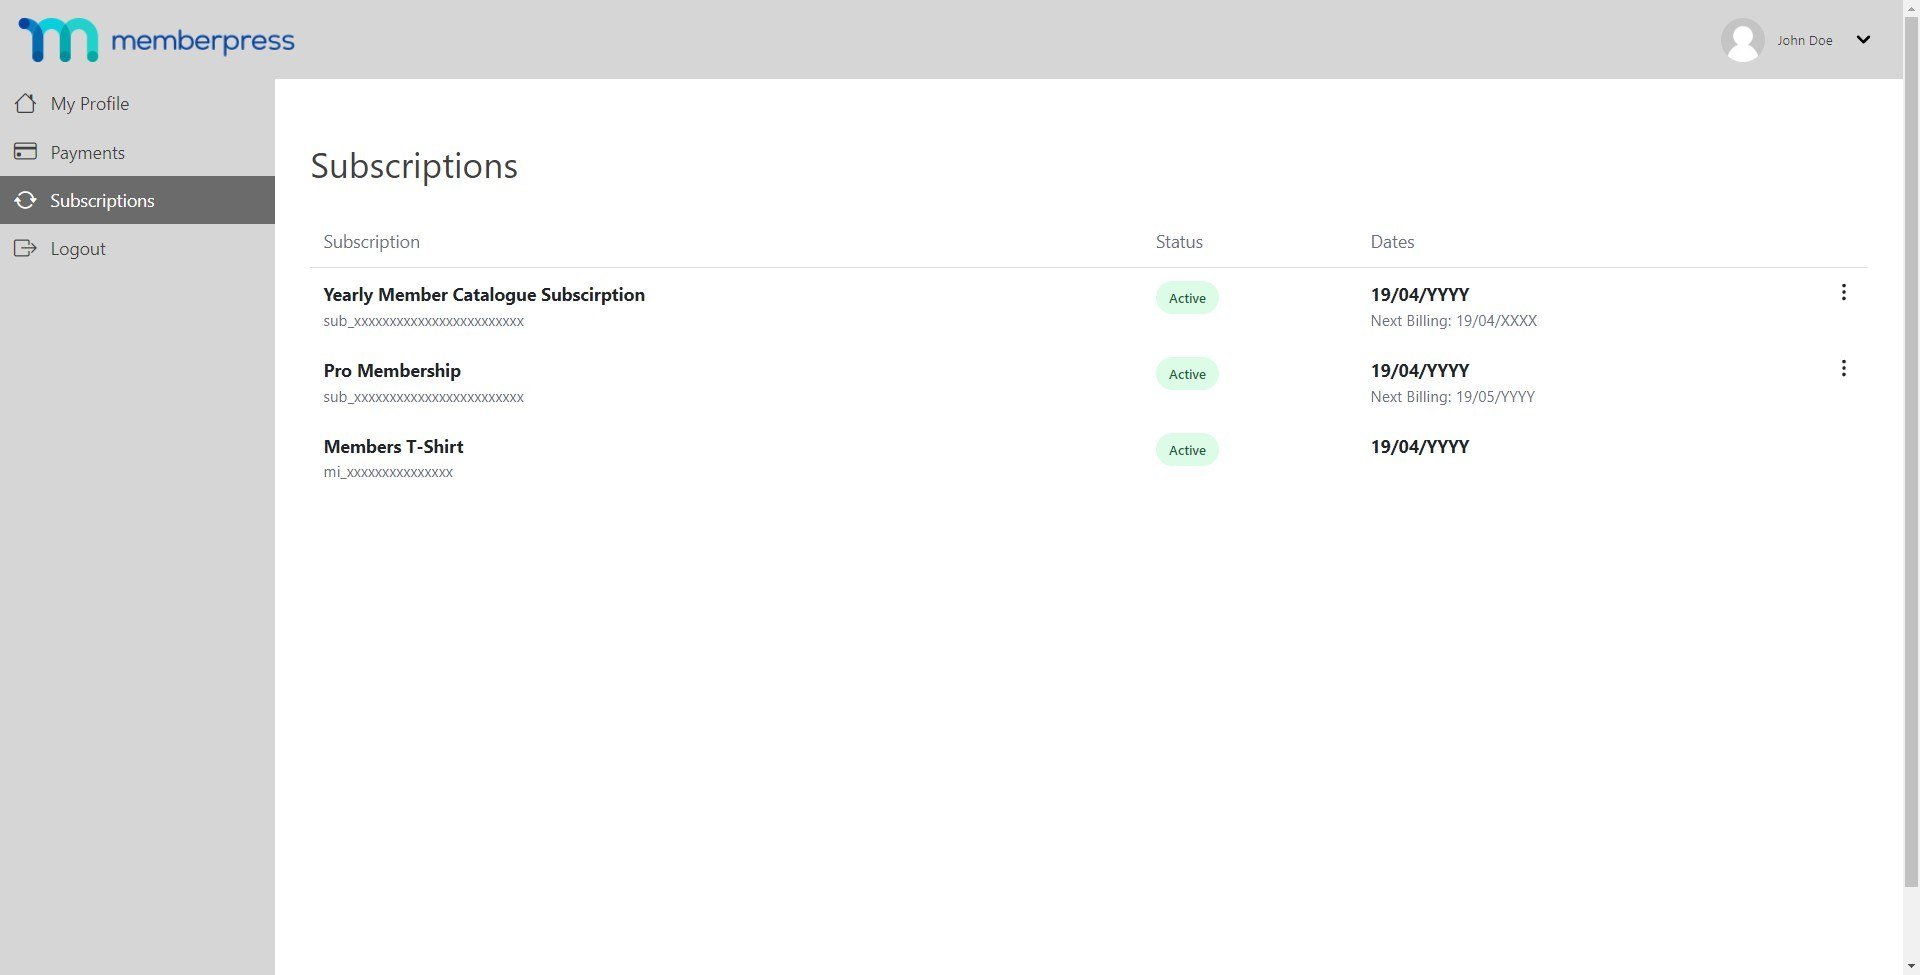
For each order, users will receive a combined MemberPress invoice for the entire purchase. Please make sure you're using the latest version of the PDF Invoices add-on with Order Bumps.
Order bumps and the primary membership can have different billing intervals. This means that, for example, one can be set as a monthly membership and another as a yearly membership. Therefore, each subscription will show its own renewal date, and all renewals will be processed individually. Also, each subscription can be canceled separately.
Refunding Add-on Subscriptions In Stripe
As mentioned, Order Bump purchases are multi-item purchases. Thus, both primary and the order-bump memberships will have a transaction with the mi_xxxxxxx ID format in Stripe.
These transactions can't be refunded directly. To refund these transactions, follow these steps:
- Navigate to Dashboard > MemberPress > Transactions and find the transaction for the membership you want to refund.
- Hover over the mi_xxxxxxx transaction number to see the actual gateway charge ID of that item. The ID should be in the ch_xxxxxxx format.
- Copy and save the gateway charge ID.
- Navigate to your Stripe Dashboard and login.
- Paste the gateway charge ID you copied from MemberPress to the search tool at the top of the Stripe dashboard. Search for the transaction, and click on the matching search result to access the transaction page.
- Refund the transaction in Stripe.
- Next, go back to your website and navigate to the transaction again. Here, manually update the transaction status to Refunded, and save changes.


