Many professional networking sites are now household names, showing there is a large audience for this kind of website. However, the idea of competing with established brands such as LinkedIn can be daunting.
Fortunately, evidence suggests that when it comes to online networking, bigger isn’t always better. Research indicates that curating small networks of close and trusted connections may deliver better results in the long term. Therefore, creating your professional networking site is both possible and potentially profitable.
In this post, we’ll discuss why you may want to create a niche membership site for professional networking. We’ll then show you how to create a fully-functioning network in four easy steps. Let’s get started!
Why You May Want to Start a MemberPress Site for Professional Networking
The Internet has completely revolutionized the way we network. For many people, networking sites are now the go-to places to connect with other professionals, search for job opportunities, and recruit the best talent.
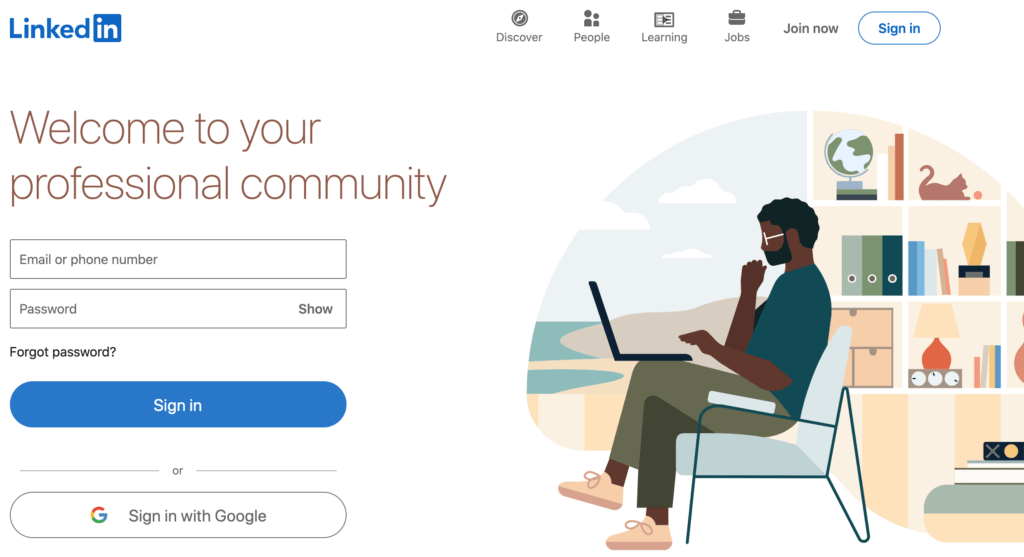
LinkedIn is an excellent example of a professional networking site. With almost 800 million users, this platform shows the popularity of this kind of website:
Social media is a competitive market. However, evidence suggests that people are willing to maintain a social presence across multiple platforms.
In fact, the average Internet user has seven to nine social profiles. If you can offer professionals an engaging experience, you should have no problems convincing them to register. This approach is viable even if these users already have social accounts on other platforms.
One study also found that small networks of trusted contacts may deliver more significant benefits than massive networking platforms. For this reason, you may get positive results by creating a niche site rather than attempting to compete with big names such as LinkedIn.
If you convince professionals to sign up to your membership site, this can be the first step to monetizing your content. You might even offer paid memberships, which grant professionals access to additional features, gated content, and other membership perks:
Even if you don’t offer paid memberships, professionals will typically share their contact information as part of the registration process. In this way, your professional network can be a powerful lead generation tool.
MemberPress Professional Networking Site Example

Powered by MemberPress, Healthcare Business International is an online networking website that administrators, investors, suppliers, and advisors in the healthcare industry depend on for industry news and networking.
HBI covers more than 15 sectors in the health care space, including dentistry, hospitals, and outpatient specialties. They focus on giving professionals a place to find resources around business models, valuations, and innovations in digital health and AI.
How to Start a Membership Site for Professional Networking (In 4 Steps)
Now we’ve covered the benefits and given you an example, let’s see how you can offer a LinkedIn-style experience to professionals. Here’s how to create a successful networking site using our MemberPress plugin.
Step 1: Create Your Membership Pages
Each professional networking site is unique. However, there are some elements that you’ll find across the majority of these websites.
For instance, most networking sites have a page where members can log in and a page where they can view their account:
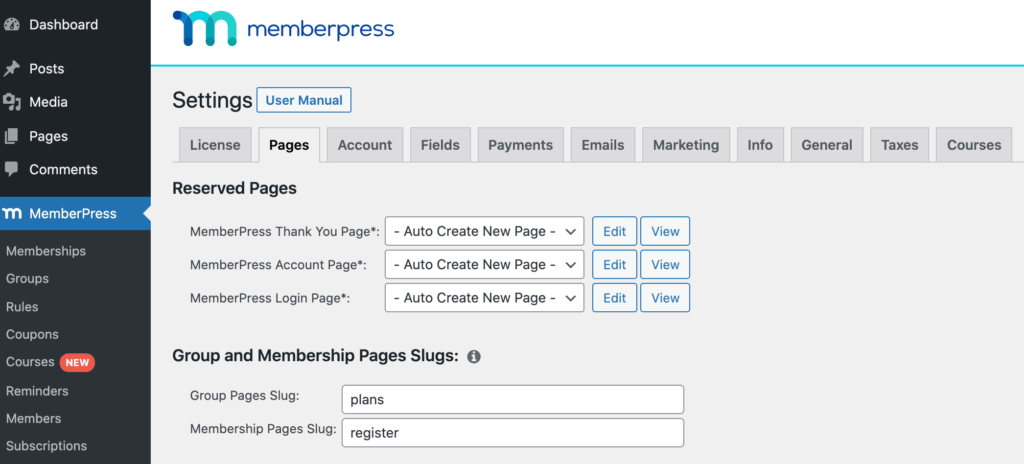
Fortunately, MemberPress can create all of these essential pages for you. After installing and activating the plugin, navigate to MemberPress > Settings > Pages. On this screen, ensure that Auto Create New Page is selected for all of the Reserved Pages dropdowns:
Then, click on Update Options. MemberPress will now automatically generate a login, account, and thank you page:
At this point, professionals can sign into their accounts by navigating to your login page. However, it’s also a good idea to ensure your login form is always within easy reach. For this reason, we recommend adding it to your site’s recurring elements, such as the footer or sidebar.
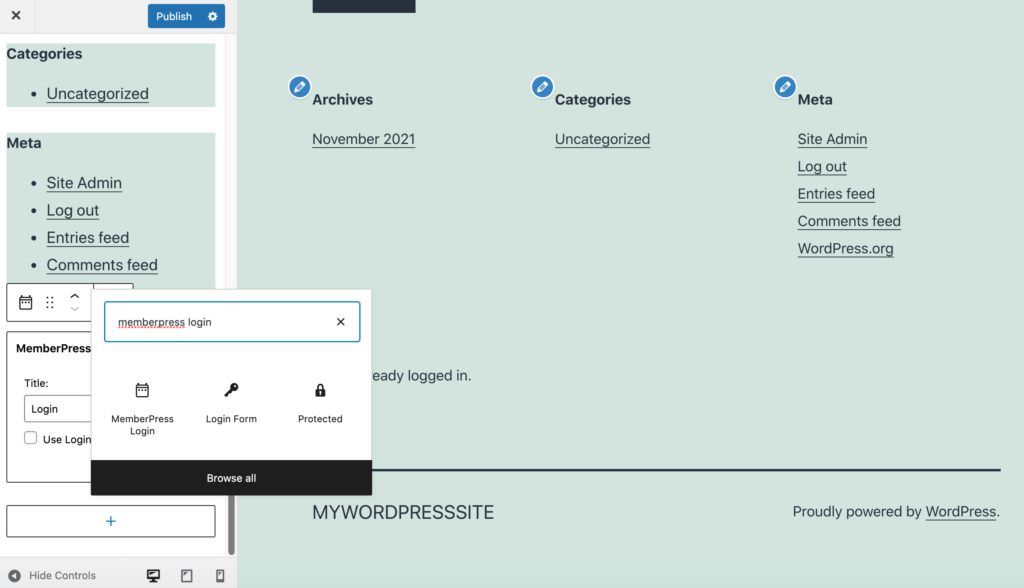
Fortunately, MemberPress provides a ready-made login widget. Simply navigate to Appearance > Customize. You can then select the + button:
Search for the MemberPress Login widget. You can now add this item to any widget-ready area within your website.
Step 2: Add Your Payment Gateways
You may want to utilize your professional networking site as a lead generation tool. Alternatively, you might use memberships to boost engagement and create long-term relationships with professionals. In these scenarios, you may want to offer your memberships for free.
However, many website owners use members’ only sites to monetize their content. If you’re planning to charge for memberships, you’ll need to set up at least one payment gateway.
MemberPress integrates with Stripe, PayPal, and Authorize.net. It also supports offline payments.
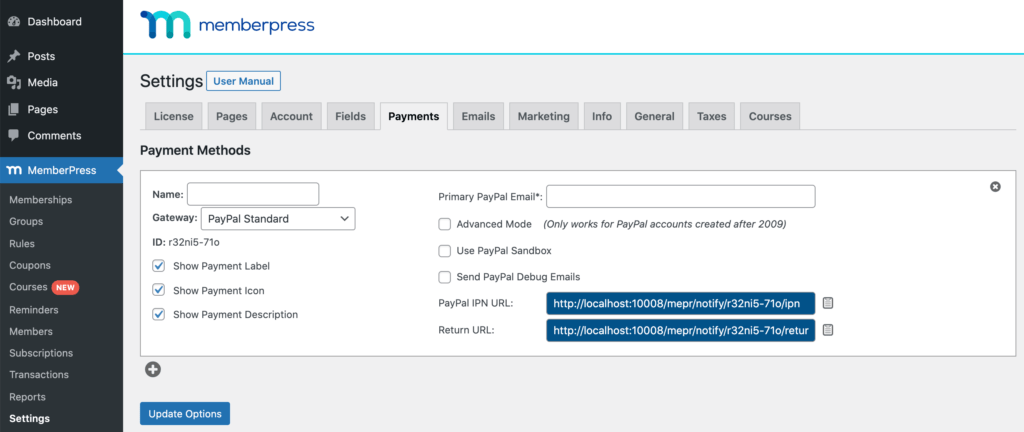
To add one or more payment gateways, navigate to MemberPress > Settings. Then, click on the Payments tab, followed by the + button:
You can now choose your payment gateway. Depending on your selection, you may need to perform some additional configurations.
For example, if you opt for PayPal Standard, then MemberPress will request the email address associated with your PayPal account. If you plan to support multiple payment gateways, you can simply repeat this process.
Step 3: Create Your Membership Levels
Next, it’s time to create your membership levels. You can either offer a single membership that grants professionals access to your entire site or create multiple tiers.
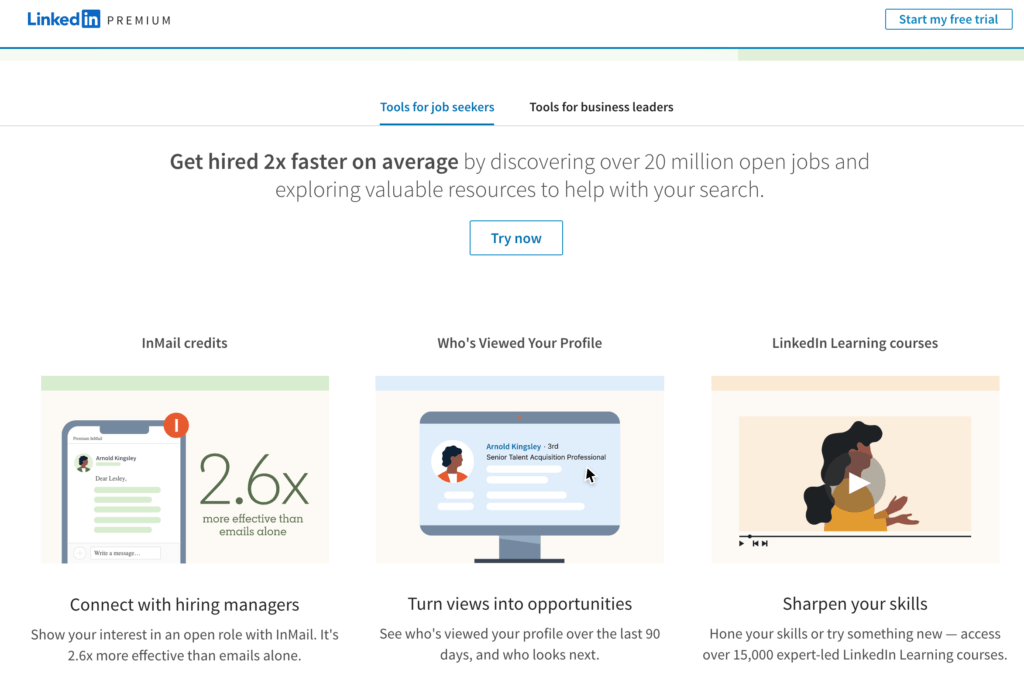
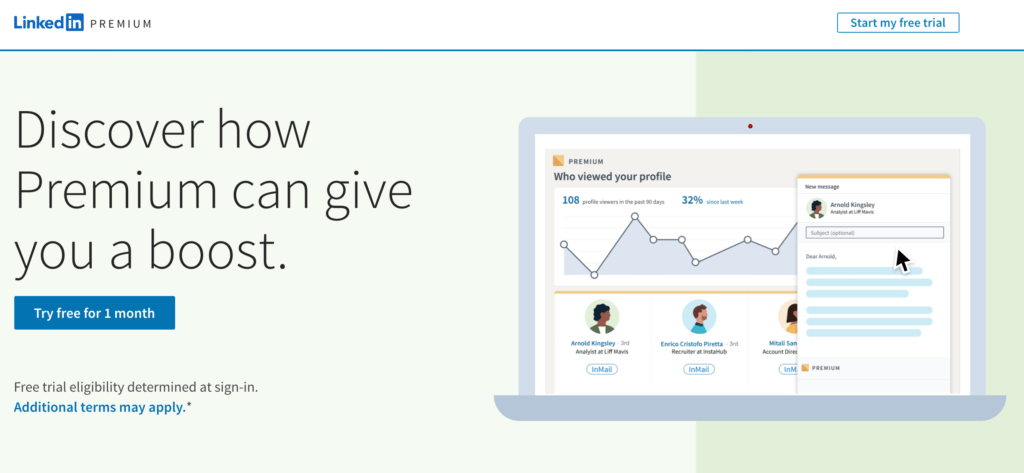
For example, you might follow LinkedIn’s example by offering free and premium subscriptions:
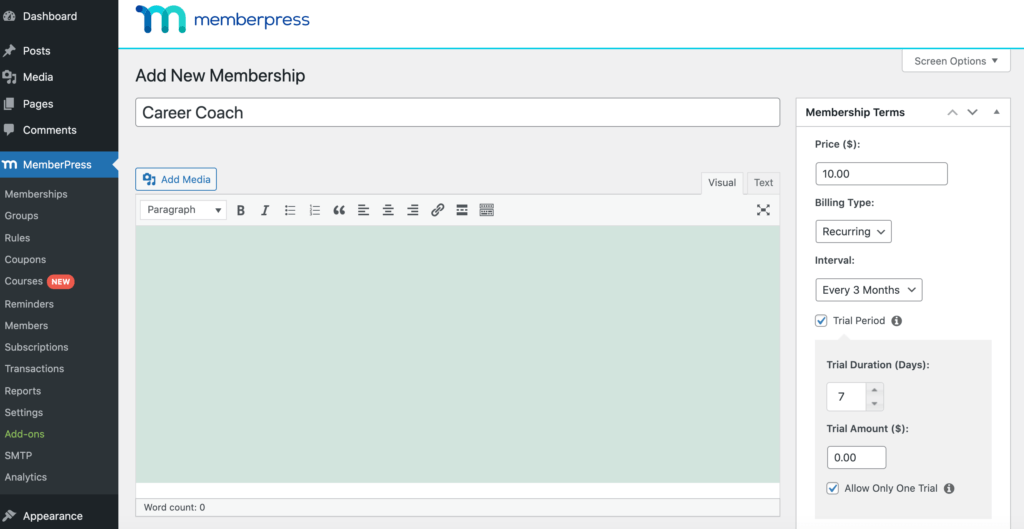
In your dashboard, navigate to MemberPress > Memberships > Add New. You can then enter all the information for this membership level:
Once you’re happy, click on Publish. If you want to offer a choice of memberships, then simply click on the Add New button and create a new package.
Next, you’ll decide the content and perks that you’ll offer to each membership level. For example, you might create a job board or forum that’s exclusive to your paying members.
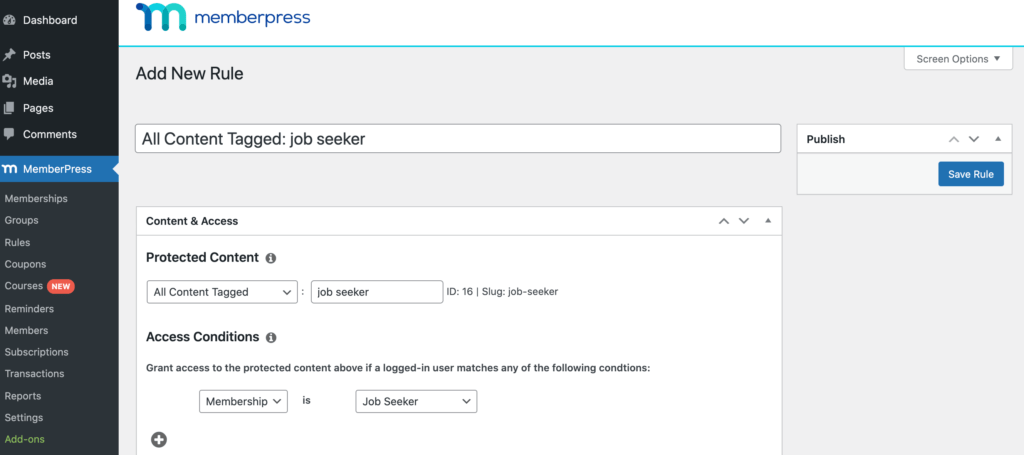
To set these rules, navigate to MemberPress > Rules > Add New:
You can now create the rule. For example, you might specify that all content tagged as “job seeker” will only be accessible to people who’ve purchased your “Job Seeker” membership.
Step 4: Publish a Pricing Page
If you’re offering paid memberships, you’ll need to let potential signups know about your pricing structure. This means creating a page where visitors can see exactly what’s included in each tier. Furthermore, an informative, well-designed pricing page can help boost your conversion rates.
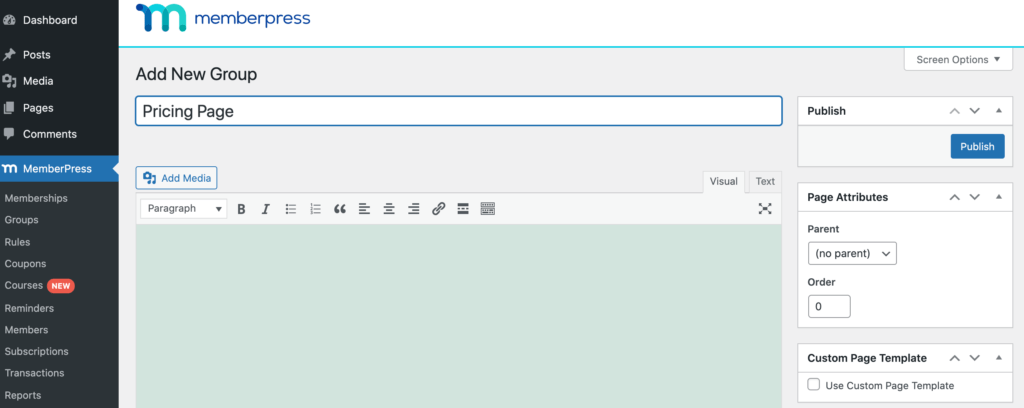
To create a pricing page, navigate to MemberPress > Groups > Add New. To start, give your page a descriptive title:
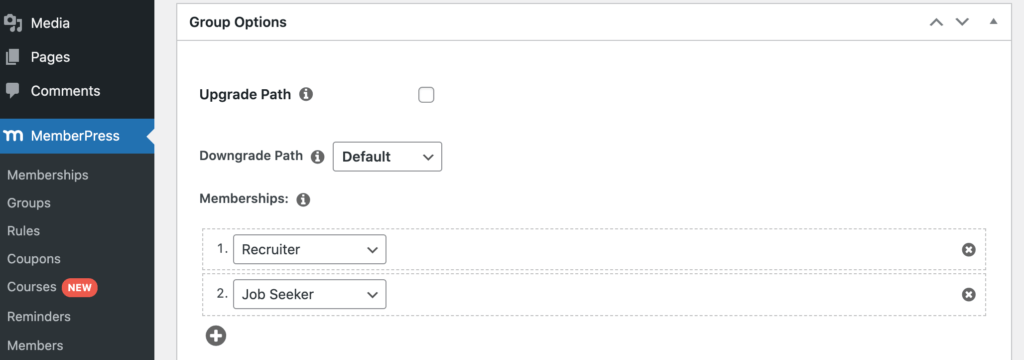
Then, scroll to Group Options and add all the memberships you want to display on your pricing page. You can then choose your theme:
By default, visitors can subscribe to multiple memberships simultaneously, which is excellent for upselling.
For example, professionals may initially be happy with your limited free membership. However, they may decide to upgrade to access the job hunting e-book that you just released.
If you don’t want to give your members the flexibility to enroll in multiple memberships, you can select the Upgrade Path checkbox.
Once you’re happy with the information you’ve entered, you can publish this page. Congratulations, you’ve just created a professional networking site!
Done For You, Done Right
Creating a WordPress membership site with MemberPress is designed to be easy and effective.
Still, we know time is precious – especially if you’re launching a new venture or scaling up.
Our Done For You services take the setup off your plate.
Trust our MemberPress Pros to build your site right, so you can hit the ground running with the world’s favorite membership plugin.
Conclusion
Creating a membership site for professionals is a great way to build long-term relationships with job seekers, recruiters, and networkers. You might use these memberships to monetize your content or offer free registrations as part of a lead generation strategy.
Let’s quickly recap how to create a membership site for professional networking:
- Create your membership levels using the MemberPress plugin.
- Add your payment gateways.
- Create your membership levels.
- Publish a pricing page.
Do you have any questions about building your own professional networking website? Let us know in the comments section below!
If you liked this article, be sure to subscribe to our newsletter in the box up to your right!





grate list of high pa professional networking website.
its great for the people to explore themselvs