Looking to turn your passion for pictures into a business? Think it’s impossible?
Think again! It’s absolutely conceivable to sell your personal images online with WordPress. All you’ll need is your camera, MemberPress, and a little bit of motivation.
In this post, we’ll go over the advantages of selling photos online. Then, we’ll guide you through how to do it using a few simple tools. Let’s dive in!
Tools You’ll Need
Before you start, you might be wondering what digital tools you’ll need to be fully equipped to create your new stock photo business. And you might be surprised by how few there are:
WordPress and MemberPress will serve as the base of your website. Then, using the Photo Gallery plugin, you’ll be able to create a display of your products:
This is a top-notch free plugin, great for building a beautiful, mobile-friendly gallery in just a few minutes. It’s also built with Search Engine Optimization (SEO) and speed in mind. This can help you attract more customers.
The Advantages of Selling Stock Photos Online
A lot of photographers take pictures as a hobby. However, it’s also possible to make money when you sell your personal images as stock photos:
There are many benefits to starting a stock photo business with WordPress. These include:
- Wide international audience: Selling your photos online means no geographical limits – you can promote your work across the globe.
- Work for yourself: Making a profit from your art could mean you’ll never have to join the 9-5 grind again.
- Creative liberty: As a self-employed photographer, you won’t have any assignments to complete or criteria to meet. Also, because WordPress is a non-hosted platform, you never have to worry about getting de-platformed for accidentally missing some guideline in the small-print. You get creative freedom to experiment.
- Passive/recurring income: Selling your work as stock photos also opens up the possibility to make a truly passive income down the road.
You can save the world from the “stock photo aesthetic”

We all recognize that ultra-cheesy stock aesthetic that gives your content an inauthentic, cheap feel. That’s why many companies are looking for unique, higher-quality images to stand out from the competition.
And that’s also why creating a boutique stock photo service can be extra lucrative.
Plus, as a smaller business, you should have more leg room to make your subscription prices more affordable and competitive.
How to Sell Stock Photos with WordPress (In 4 Steps)
Now that you know some advantages of selling your images as stock photos, let’s look at how you can do it.
To get started, you’ll need a WordPress site, plus a collection of your own photos. Let’s get started!
Step 1: Build a Membership Site
The first step to creating your business is to build a membership website. This is usually the best method because subscription plans are the standard when it comes to selling stock photos.
If you’ve already set up your WordPress site, all you need now is a tool to monetize your content.
MemberPress is the perfect plugin for that. With it, you can sell anything imaginable, including online courses, videos, and, of course, photos…
- As one-off purchases AND
- Through packages and subscription plans
And you can do it all in one place.
After you’ve installed and activated our MemberPress plugin, you can follow this quick tutorial:
This tutorial will give you a basic understanding of how your stock photo website will work. We’ll also go into more detail for the most important steps below.
Step 2: Create a Subscription Plan
Once you’ve created a membership site, it’s time to build a subscription plan. This will provide a dedicated space on your website where customers can pay for your artwork.
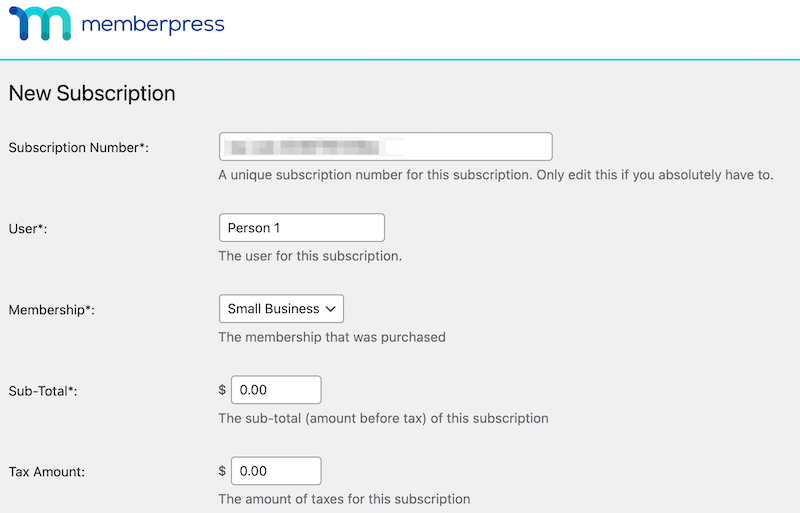
To start, navigate to MemberPress > Subscriptions in your dashboard.
Click Add New. This will take you to a page where you can create a New Subscription:
You can edit different aspects of your subscription, such as the user, sub-total, and tax amount.
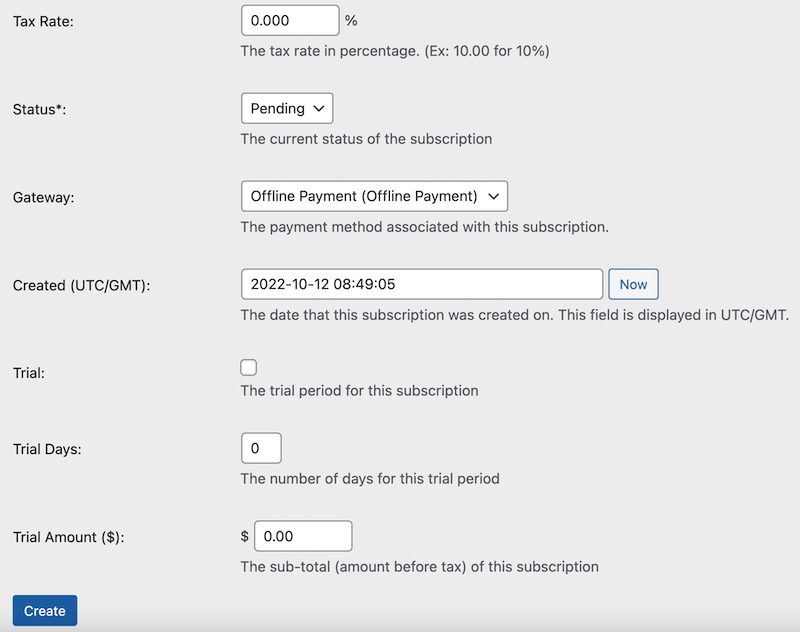
Additionally, you can select the status, choose the payment gateway, and offer a trial run for users:
Hit Create once you’re done. Keep in mind that you can make several plans, offering plan tiers and a pricing table to advertise those packages.
This way, you can give members access to a specific gallery with a certain amount of images. But first, we’ll need to make those galleries!
TOP TIP: While we’re on the topic of taxes, you need to be aware of tax compliance issues that may arise from selling across jurisdictions and internationally.
Check out the MemberPress Stripe Tax integration. It automatically sets the correct amount of tax depending on the address of the customer so you don’t have to sweat it.
Step 3: Add an Image Gallery
Now it’s time to add your photos to your website. To do this, first install and activate the Photo Gallery plugin.
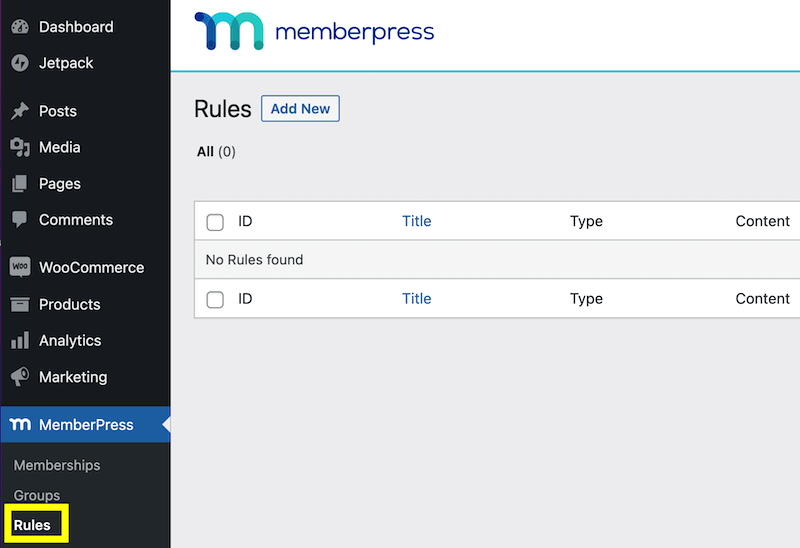
Next, navigate to MemberPress > Rules in your WordPress dashboard:
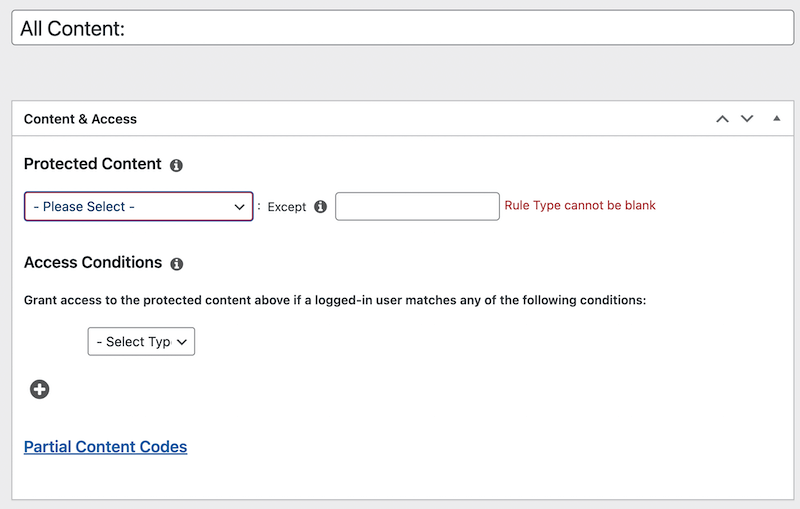
Then, click Add New. This will take you to the page where you can add a new rule. Under the Content & Access section, you’ll find a dropdown menu under Protected Content:
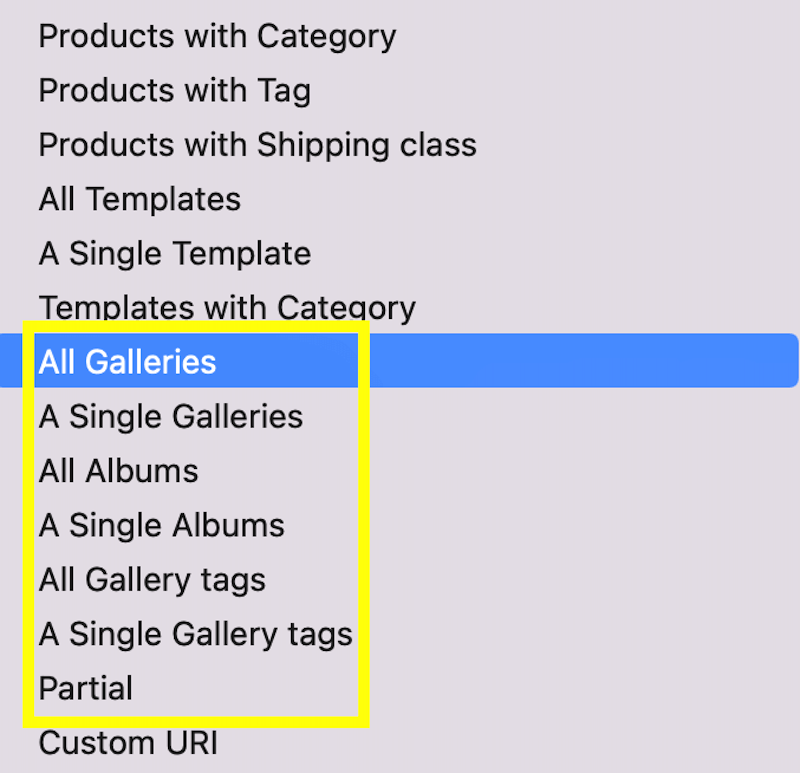
If you click on this menu, you’ll see the following gallery rule options:
These will allow you to protect galleries depending on which option you choose.
For example, if you choose All Galleries, you’ll protect all galleries added through the Photo Gallery plugin.
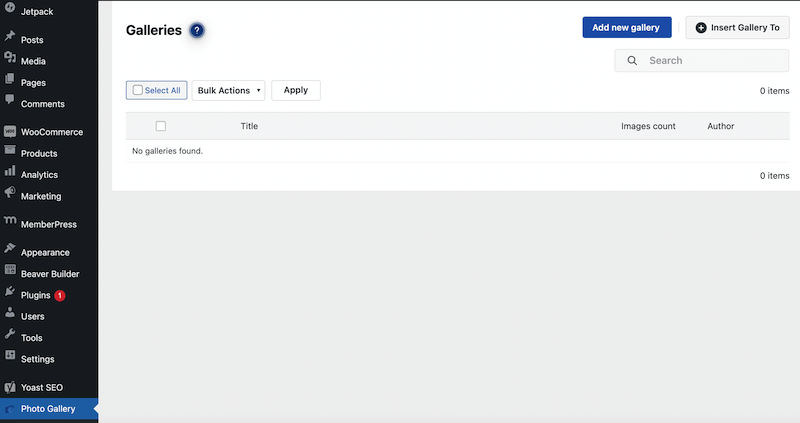
Now, navigate to Photo Gallery in your dashboard:
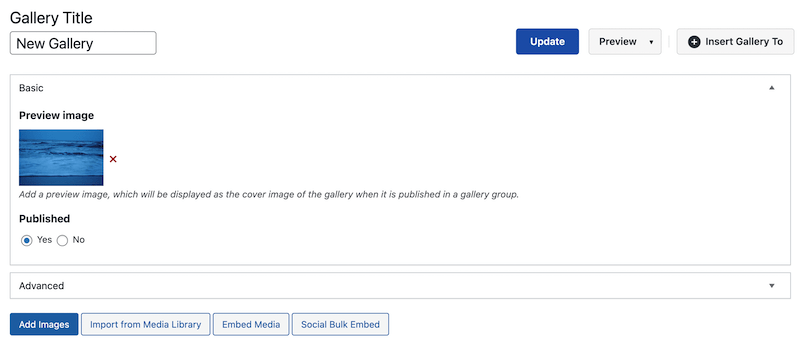
From here, click Add new gallery at the top of the page. Start by adding a title and a preview image:
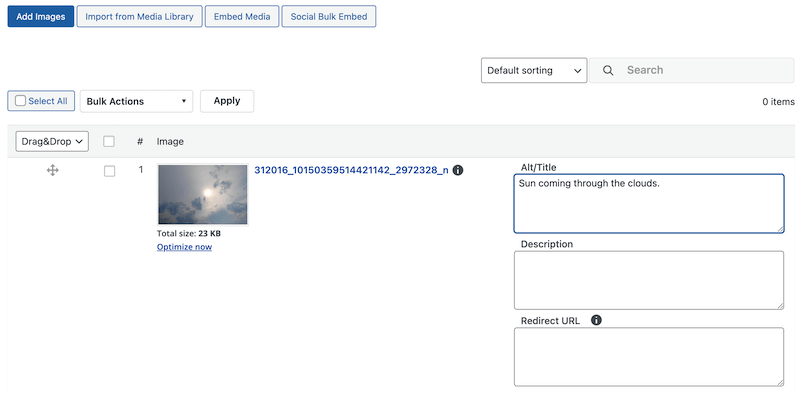
Click Add Images to upload photo files from your computer. Once you’ve uploaded a photo, you can edit the title, description, and alt text:
Make sure to hit Publish once you’re done.
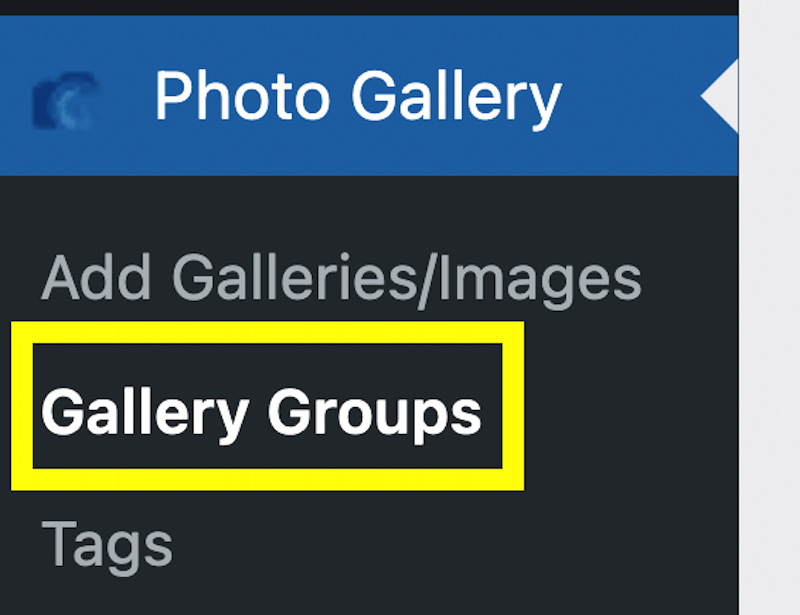
You also have the option to add a gallery group. To do so, navigate to Gallery Groups under Photo Gallery:
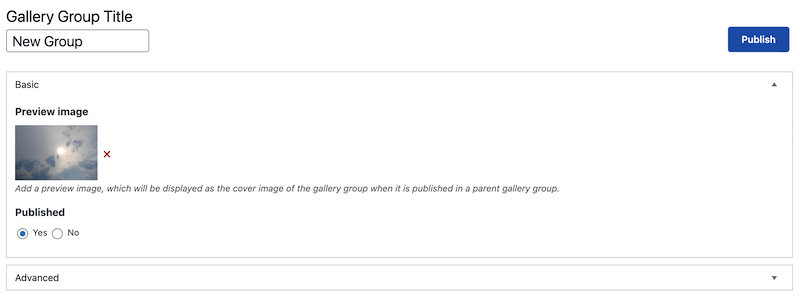
Then, click on Add New Group. You can include a group title and preview image:
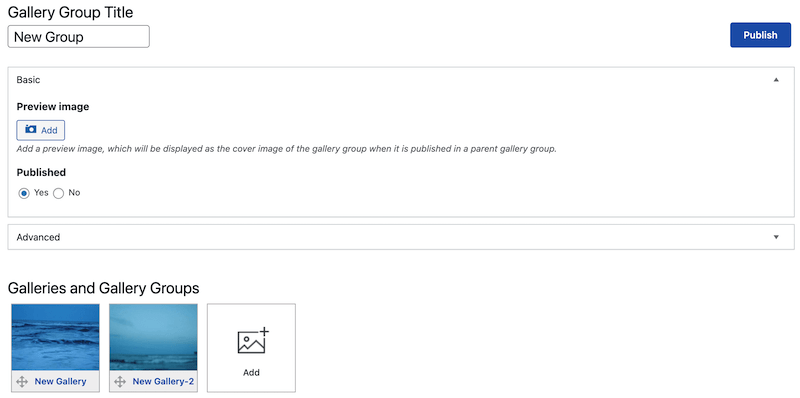
Next, choose the galleries you want to add to your group in the Galleries and Gallery Groups section:
Once you’re done, hit Publish.
Step 4: Restrict Access to Your Gallery
You can now embed a gallery or gallery group into a page or post. However, it will not be protected. Meaning, all users will have access to the images it contains.
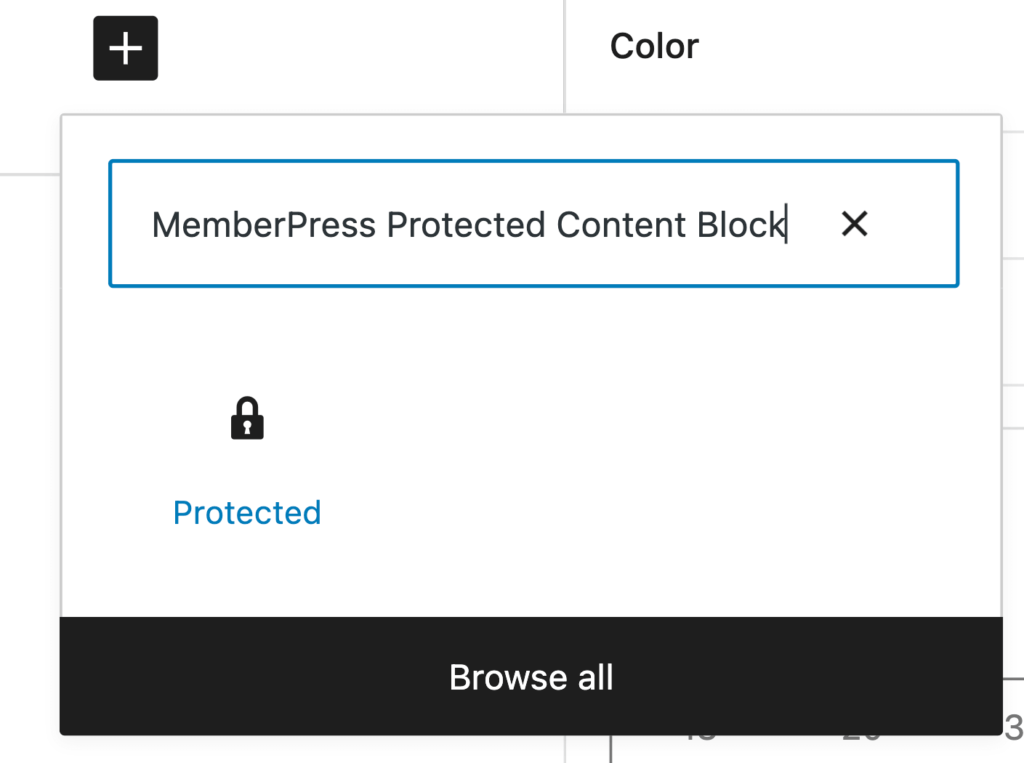
In order to convert it to paywall content, you’ll need to use our Partial rule or a MemberPress Protected Content Block. This way, people will need to pay a membership or plan fee to access your stock photos.
To get started, create a new WordPress page (or use a pre-existing one) for displaying your gallery. Then, add the Protected Content Block in the Block Editor:
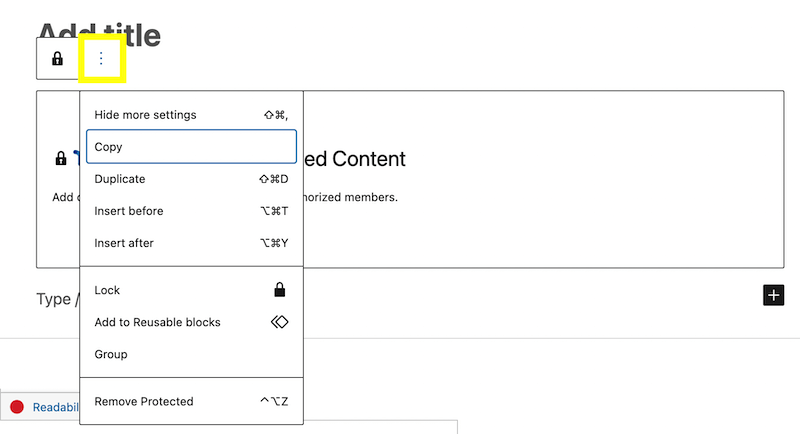
Next, click the three vertical dots to select where you would like to insert the protected content:
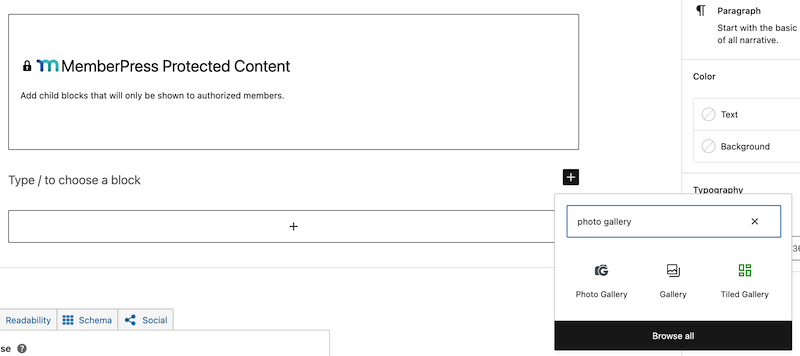
Next search for the Photo Gallery block and insert it:
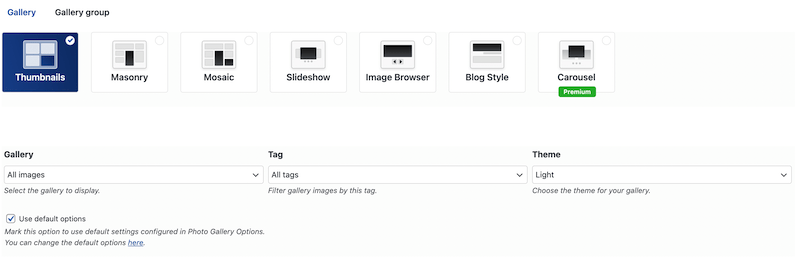
This will open a page where you can choose what gallery to add, as well as your preferred format:
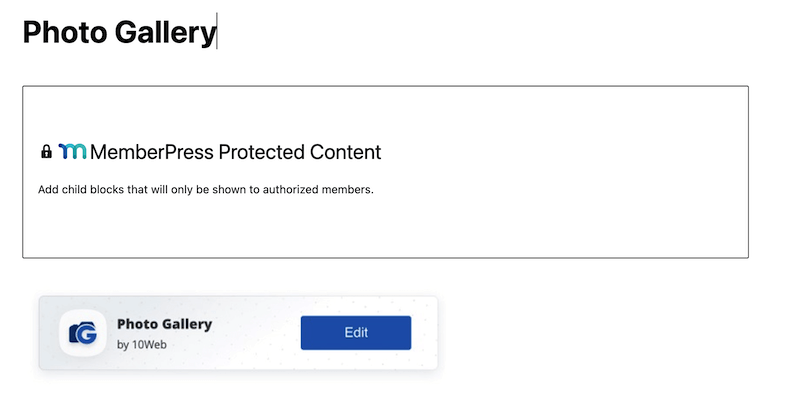
You now have a photo gallery that only authorized members can access:
To take a peek at what your members can access, hit Preview to see the front end of your site:
If you’re happy with the results, you can publish the page. Now, all that’s left is to promote your new stock photo website!
Tips and Tools for Promoting Your Site
The MemberPress blog has all kinds of great resources to support you along the way as you grow your online business. Following are a few to get your started:
- Marketing Tools and Services to Promote Your Site
- How to Identify Your Target Audience (Fast and Free)
- How to Promote Your Website on Instagram
- 3 Marketing Strategies for Successful Membership Sites
- How to Use Influencers to Grow Your Online Business
- How to Start an Affiliate Marketing Program on Your WordPress Site
Conclusion
If you’re a photographer, one of the best ways to make money is selling your work as stock images. This way, you can do what you love and earn a recurring income at the same time.
To recap, here’s how you can sell stock photos with WordPress in four simple steps:
- Build your membership website with MemberPress.
- Create one (or more) subscription plans for your clients.
- Add your image gallery using the Photo Gallery plugin.
- Restrict access to your gallery so that only paying subscribers can view it.

Ready to Start Your Stock Image Business Now?
Get MemberPress today, and watch your recurring income climb to the skies in no time.
Do you have any questions about how to sell your stock photos online? Ask us in the comments section below!





Add a Comment