Have you ever considered spicing up your membership site with something extra useful and valuable? Why not throw in a business directory!

A business directory works as a community builder to turn your site into a buzzing marketplace.
One of the coolest things about a business directory is that it allows your members to showcase their services.
And not just that, it becomes a magnet for visitors.

Not only do people want to swing by, they also stick around, browsing through what you’ve got to offer.
It’s all about unlocking the potential of your platform, giving your members valuable exposure, and enhancing the overall user experience.
In this guide, we’ll walk you through the nuts and bolts of integrating a business directory using the free Business Directory Plugin for WordPress alongside MemberPress.
But What Exactly is a Business Directory?
Many businesses have their details scattered over different platforms, from social networks to review sites.
Customers might find it difficult to connect and match up this information.
Now, imagine having all these businesses, their details, and offerings presented neatly in one place. That, in essence, is a business directory.

A business directory is essentially an online catalog of companies, organized by niche, industry, or location. It includes essential info like business names, locations, ways to get in touch, and the services they provide.
Imagine it as a vast knowledge hub that benefits both listed businesses and your members.
Your audience can easily find and connect with potential vendors or collaborators within your network.

A business directory provides a way to navigate the business landscape in a structured manner.
The question then becomes, how do we create a business directory that checks all these boxes?
The World of WordPress Business Directory Plugins
As a WordPress user, you’re spoiled for choice when it comes to adding a business directory.
For this walkthrough, we’re using the well-loved Business Directory Plugin for WordPress.
It’s completely free, a hit with users, and really delivers. Plus, if you’re itching for more functionality, stepping up to their premium modules is super easy.
That said, the plugin world is vast!
Depending on what you’re looking for, other plugins such as GeoDirectory and Connections Business Directory could be perfect fits.
They’re awesome too and come with both free and premium options to suit your needs.
You can find more detailed information about these and several other plugins in the WordPress directory plugins article on the Kinsta blog.
How a Business Directory Can Help Solve Membership Site Woes
For anyone running an online business, understanding the target audience – their needs and desires – is crucial.
By recognizing the challenges they face (called “pain points”), you can tailor your platform to be the solution they’ve been seeking.

These pain points might be frustrations or issues your users encounter. They can vary significantly among different user groups, or they might be common throughout your audience.
To give you an idea, here’s a snapshot of some typical pain points for online users:
- Information Overload: The internet is a vast landscape of data.
Users can often feel overwhelmed by the number of choices. It can be difficult to filter relevant options.
Your business directory can solve this dilemma by providing a localized and categorized platform of services. - Scattered Resources: Users often find it frustrating to jump between multiple platforms to access different services.
An integrated directory eliminates this problem by serving as a one-stop-shop for various services. - Distrust and Security Concerns: With an increase in online scams, trust in digital platforms is more important than ever.
A well-maintained business directory can build this trust by providing reliable service listings. - Short on Time: In a fast-paced digital world, users appreciate resources that save them time.
Providing a streamlined, easy-to-navigate directory addresses your customers’ need for efficiency.
Now that you’re aware of these pain points, let’s delve into how constructing a business directory addresses these issues.
Leveraging the Power of Business Directories

A well-implemented business directory can boost business by addressing your customers’ needs.
Here are a few of the specifics…
- Curated Options: By offering a handpicked selection of businesses, you can save people time and guard against information overload.
- Integrated Services: By centralizing diverse services on one platform, you’re offering users a seamless experience.
This synergy can boost user retention and engagement rates on your platform. - Safety and Trust: By vetting the businesses listed in your directory, you’re showing your users that their security is important to you.
This in turn builds user trust and loyalty.

- Increased Site Traffic: Business directories act as a powerful magnet, attracting more traffic to your site – which translates into better SEO ranking.
It’s a win-win situation: The businesses enlisted enjoy increased visibility, and your site becomes more popular and therefore ranks higher. - Building Community: Giving your members a platform to list their services fosters a sense of community. It encourages more user interaction and participation on the site.
- Added Value for Members: A business directory is a compelling reason for potential members to join your site and keep existing members coming back.
They constantly offer fresh information about emerging businesses and services making your site a one-stop hub.
Best Practices for Launching Your Business Directory
Starting a directory from scratch can seem daunting – but it doesn’t have to be.
With some key insights and industry best practices, your challenge suddenly becomes a lot more manageable.

- User Experience: Make sure your directory is easy to navigate and understand.
Confusing layouts or complex search processes can be barriers to user engagement.
Keep things simple, with clear categories and filters. - Curation Matters: Maintain the quality of businesses listed on your directory.
Ensuring that listings are legitimate and reliable boosts the credibility of your directory, building trust among your users. - Update Regularly: Keeping your directory fresh with new listings and updated information is crucial.
An outdated directory loses credibility and value for the user.
Regular audits and feedback from listed businesses are recommended. - Monetization Strategies: Consider different monetization strategies, like charging businesses for premium listings or offering advertising space within the directory.
This may increase revenue while maintaining value for your users.
Building Your Business Directory: What Information to Include, and Why

When creating listings in your business directory, the goal is to showcase your members’ businesses in the most engaging and beneficial way.
Establishing a set of fields to include in your listings is essential to achieving this objective.
Here are some vital elements every business listing should consider:
- Business Name: It’s fundamental. Without a business name, users wouldn’t know what business they are looking at.
Make it mandatory for every listing to include it. - Business Description: A short paragraph about what the business does, its specialties, and how it can solve the customers’ problems provides a vivid snapshot that grabs attention.
- Address and Contact Information: This allows potential customers to know where the business is located, how they can reach out, and helps improve local SEO.
- Website and Social Media Links: These links build trust, direct traffic to businesses’ own platforms, and provide a glimpse into the business culture and values.

- Directory Categories and Tags: Categorizing and tagging listings helps users find the right service providers with ease.
- Images and Videos: Visual content creates a more appealing and engaging listing. Consider allowing members to add images or videos of their work.
- Customer Reviews: Positive feedback from previous clients or customers provides reassurance to potential ones.
This makes them more likely to trust and engage with your brand.
Allowing members to review each other’s services can be an excellent way to boost the credibility and overall appeal of your business directory.
How can MemberPress Help You Build a Business Directory?
If you’re aiming to set up a business directory on your membership site, MemberPress has your back.
With its diverse range of features, it simplifies the process, safeguards your content and even pushes you closer to your monetization goal!
Here’s how:
- Restrict Access: Using MemberPress, you can fully restrict your directory, making it an exclusive perk for your members.
It enhances value, rewards your members, and mitigates your security concerns. - Finely Tuned Permissions: Control isn’t just all or nothing with MemberPress.
You can fine tune permissions, to protect specific segments of your directory, keeping some open for public view, and other parts member-exclusive. - Craft Your Monetization Strategy: Whether it’s setting listing duration, scheduling renewals, or integrating secure multi-option payment modules,
MemberPress allows you to set up a directory capable of generating recurring revenue effortlessly.

- Frictionless User Experience: MemberPress has features that allow members to manage their own listings, update their profiles and even track their payment history.
- Keep Up the Engagement: With automated email notifications, MemberPress keeps your members engaged, notifying them about their listing expiry, renewals, and other updates.
- Intuitive Backend Management: Listing management, access rules, or membership maintenance – all of it can be controlled from an intuitive dashboard, making site administration a breeze.
How to Set Up Business Directory Plugin for WordPress
You can easily install Business Directory Plugin from inside your WordPress dashboard.
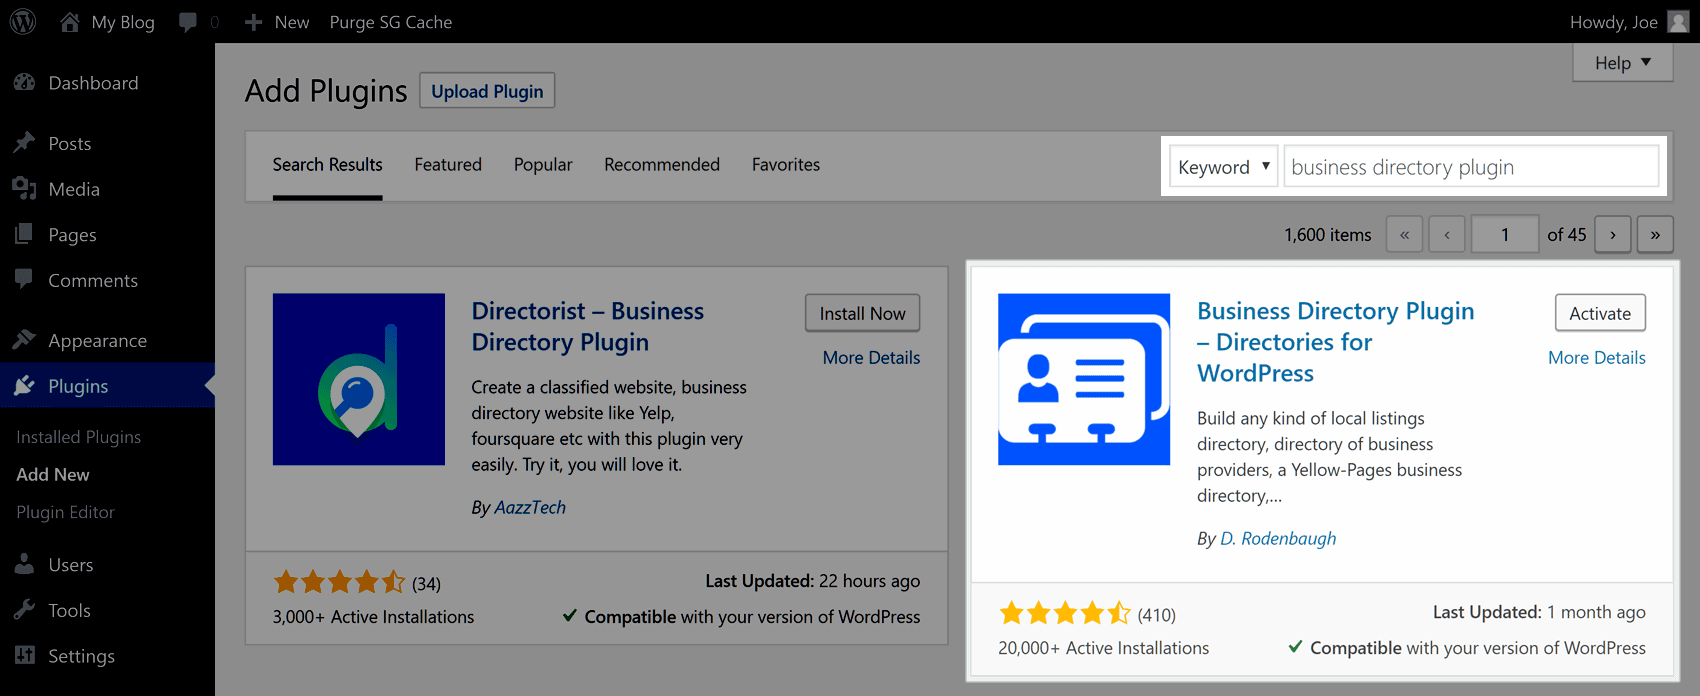
Once you’ve logged in to your WordPress dashboard and installed and activated your plugin, you can start setting it up.
Since we’re using the Business Directory Plugin, we can utilize the helper to quickly create the necessary pages for our directory.
Once you’ve created your pages, you can move on to configuring the plugin itself.
The Business Directory Plugin adds new items to the WordPress dashboard sidebar menu titled Directory and Directory Admin.
From these two menus, you’ll find the controls that allow you to structure how the plugin and your business directory will work.
A good place to start when setting up your directory is the Manage Form Fields screen.
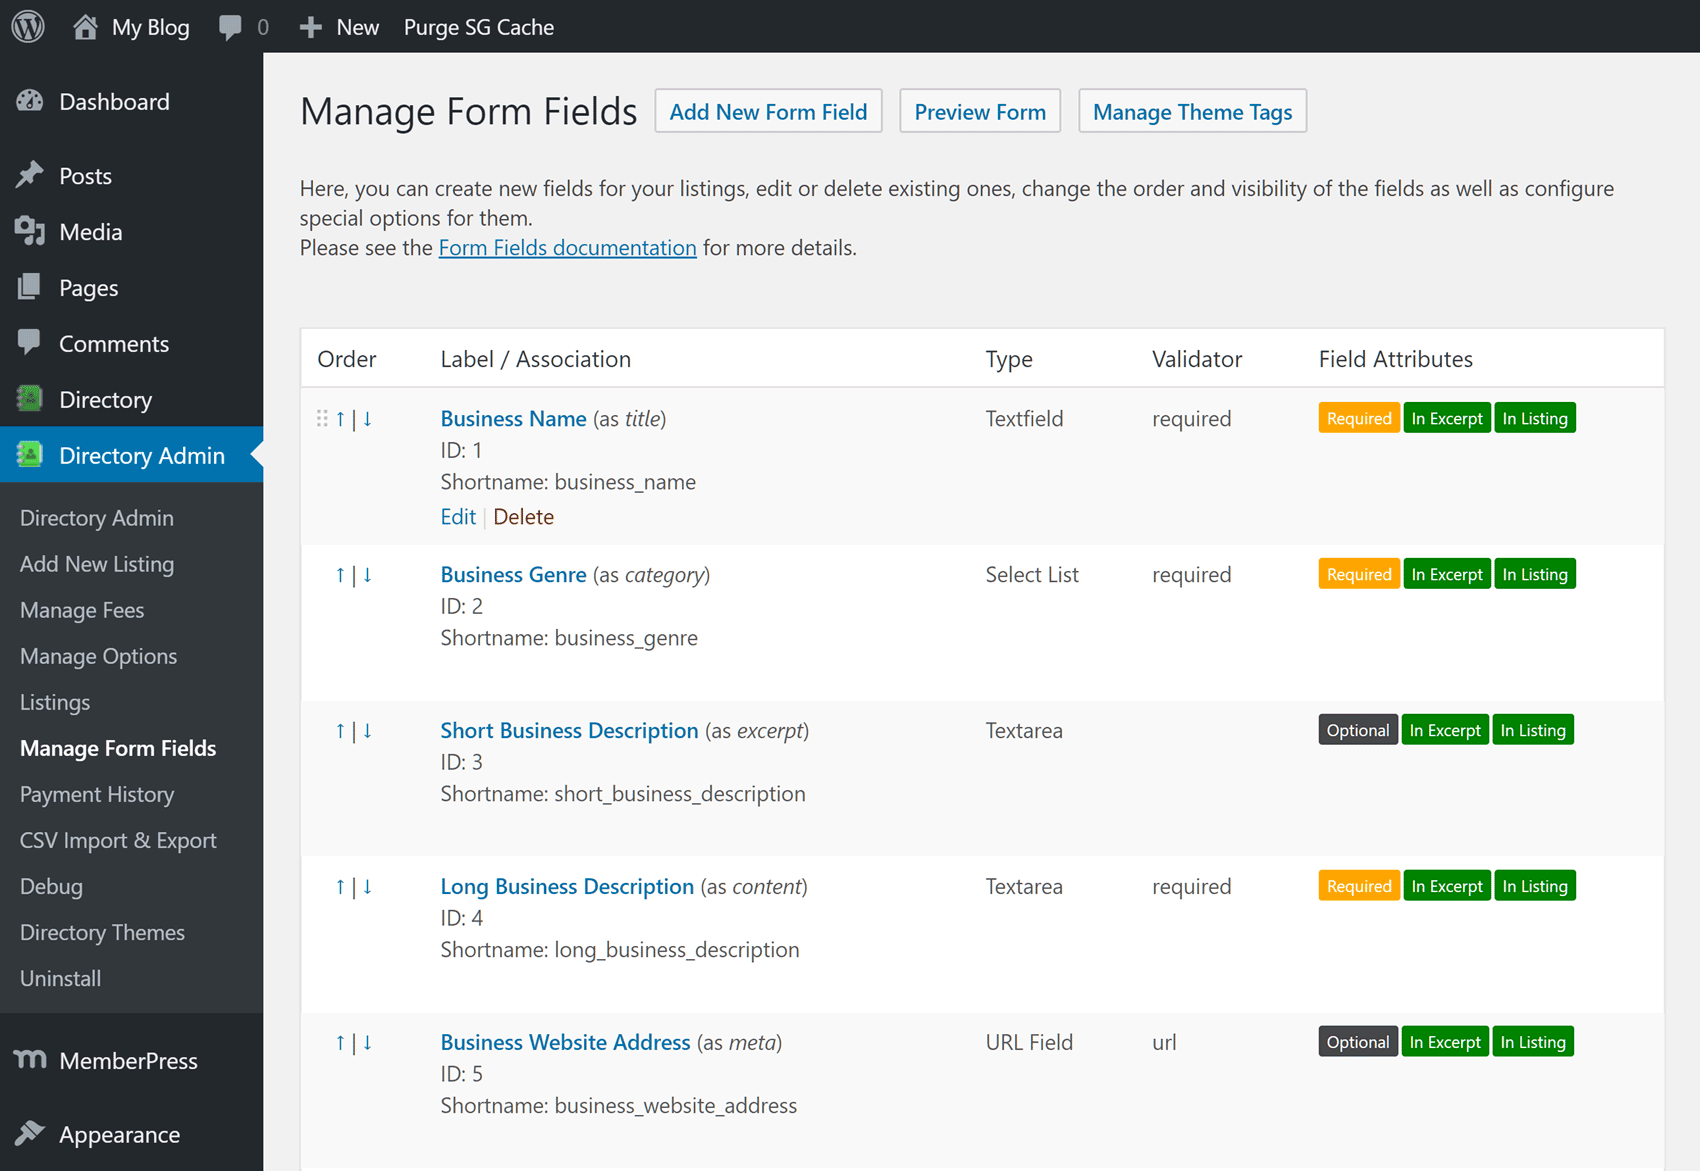
These controls let you determine which fields are available for your listings. The fields define what information your listings will accommodate.
Some examples include the business name, address, and website URL. Business Directory Plugin will also let you easily add new fields to your listings.
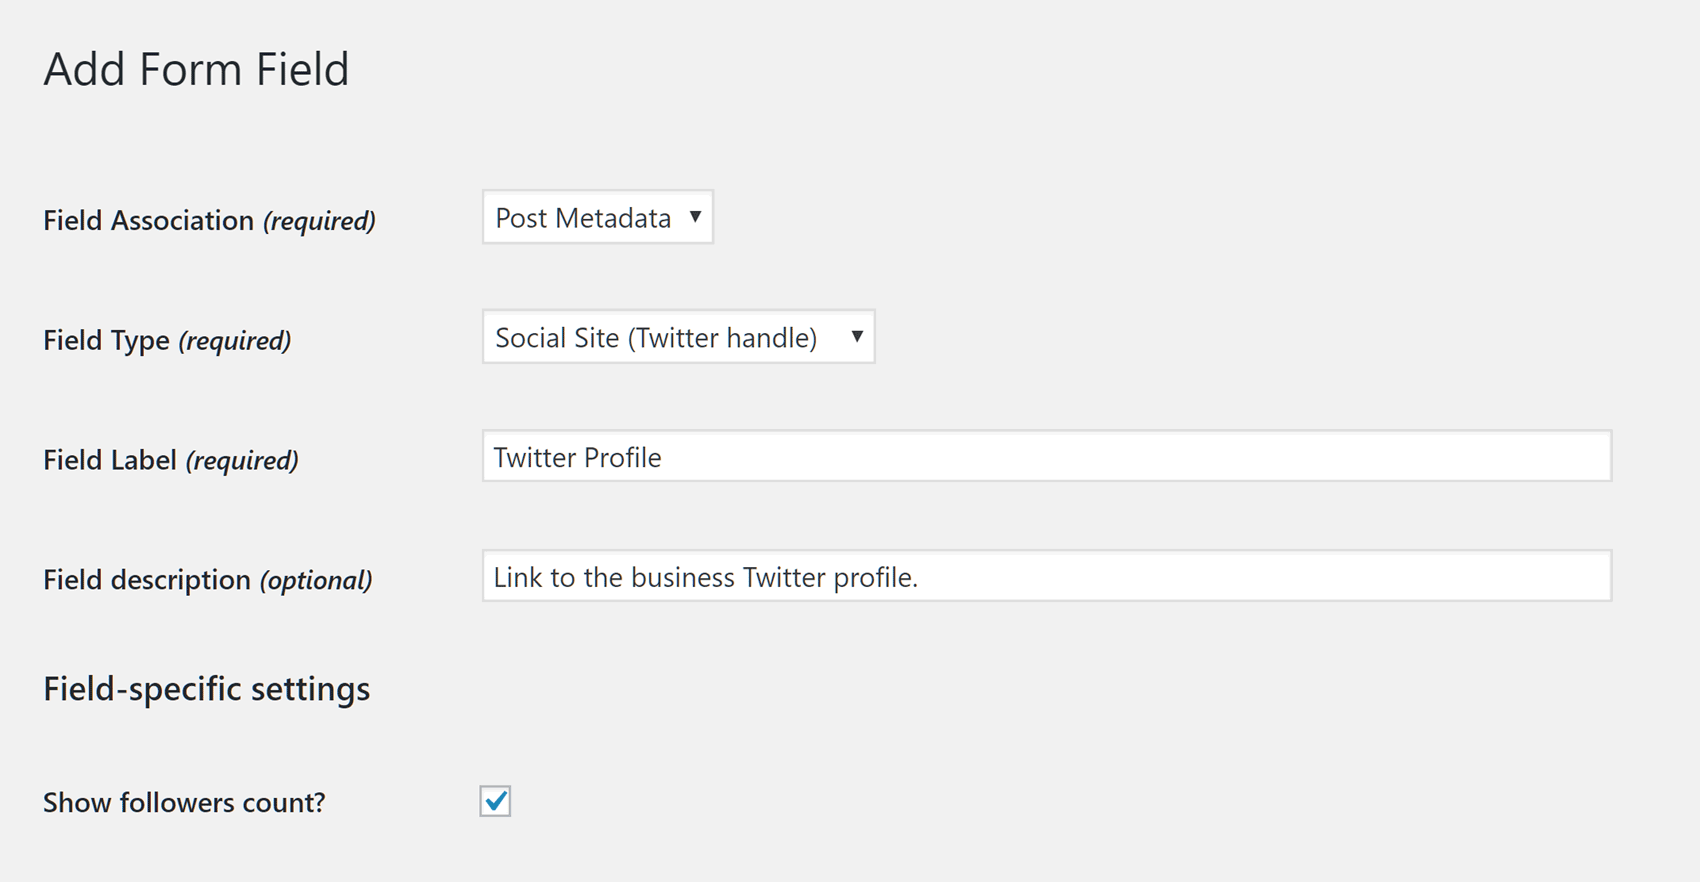
Other areas of the plugin and your business directory that you might want to customize include:
- Directory categories and tags to help you organize your listings
- Listings duration settings to control how long listings are active for
- Contact settings to determine whether visitors can contact listing owners
- Fees and payment settings to charge and collect money in exchange for a listing
Restrict Access to Your Business Directory
The Business Directory Plugin for WordPress lets you control who sees your directory. You can keep it exclusive for your active members or open it up for everyone to check out and use.
However, if you’re using MemberPress alongside Business Directory Plugin, your options for restricting access to your directory are almost unlimited.
With MemberPress, you can protect specific parts of your business directory from non-members, giving you tons of options for setting up and monetizing it.
If you do want to make your directory totally private, you can also control access to the business directory listings page on your website with MemberPress.
Simply visit the Rules page under the MemberPress menu on the sidebar of your WordPress dashboard.
From there, you can create a new rule by selecting A Single Page option and then choosing the page that contains the business directory.
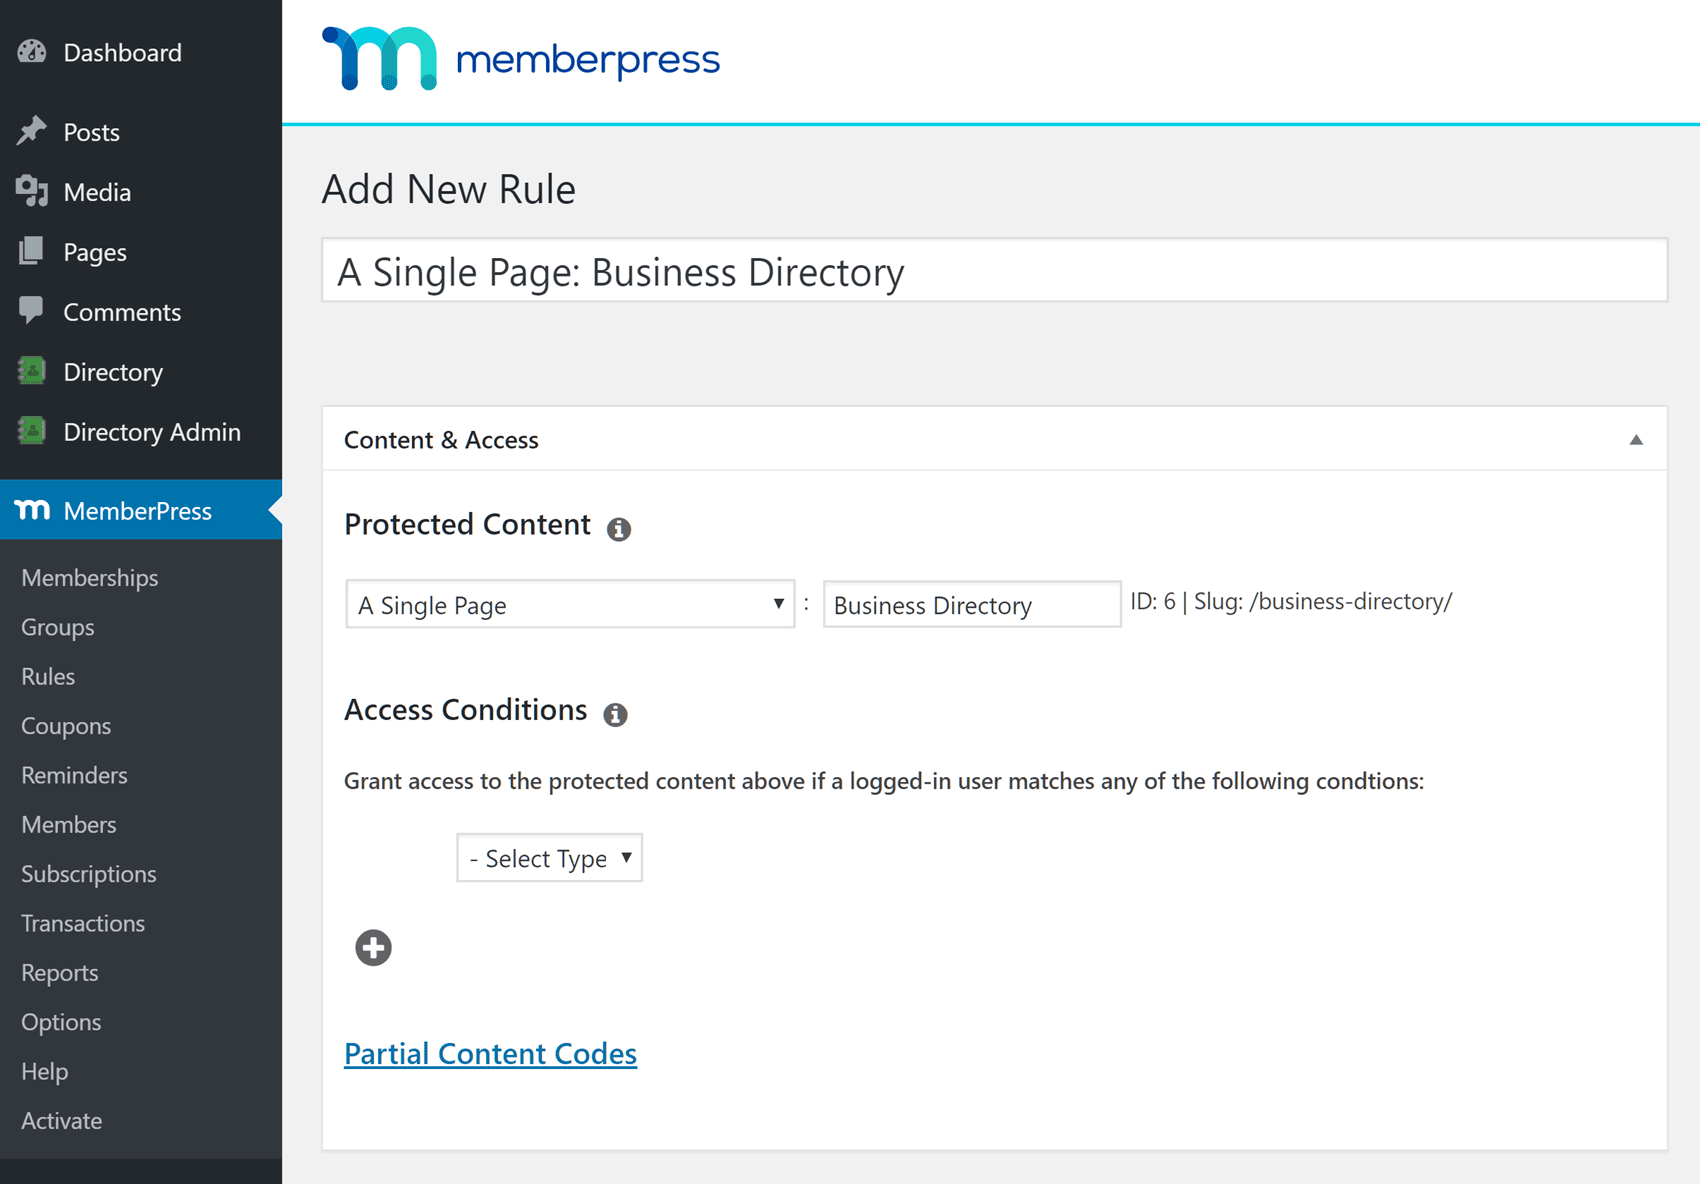
You can then use the Access Conditions settings on the same screen to define which members can view the protected page, based on their membership plan or member name.

Depending on how you set up your plugin, a non-logged in user or member trying to log in will see one of the following:
- The login page,
- A registration page; or
- A custom message.
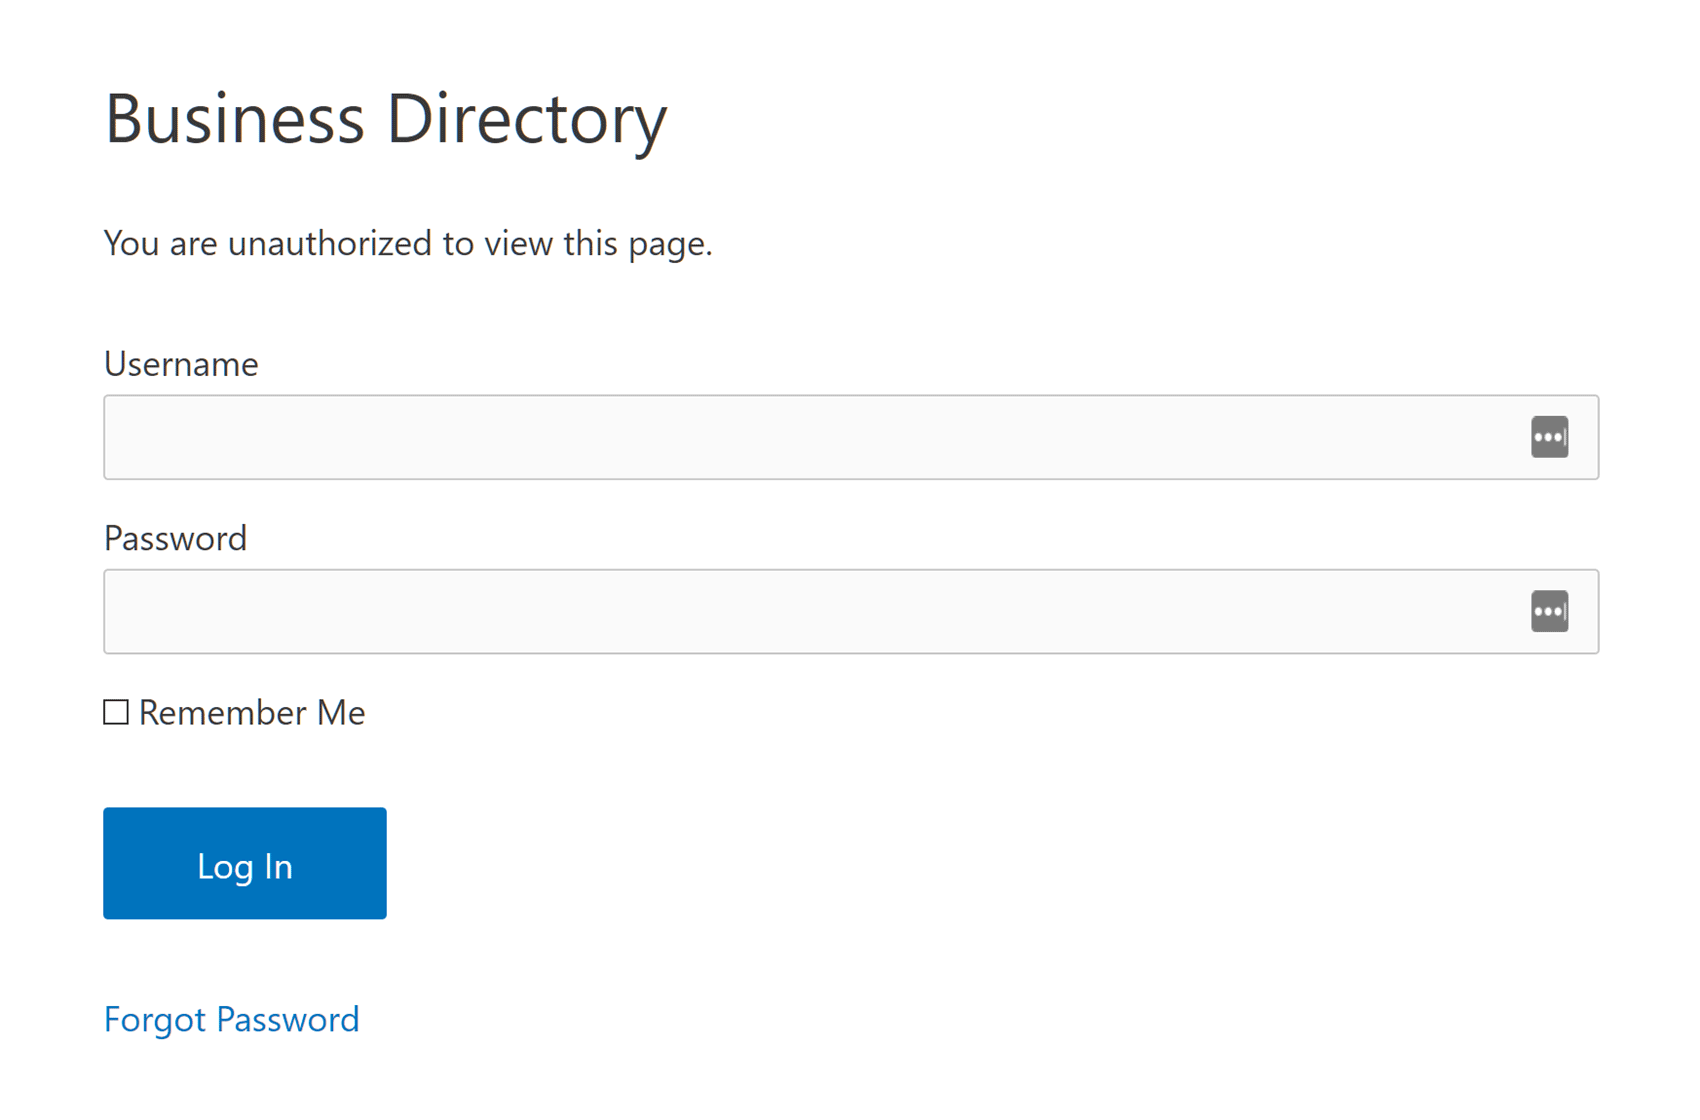
MemberPress has sophisticated rules functionality, allowing you to control much more than just access to the entire business directory.
Depending on how you configure your site, you could restrict access to listings with specific tags, restrict the ability to access the listings creation page, and much more.
Ready, Set, Launch!
There you have it!
The value of a business directory is more being an additional feature in your membership site.
Business directories, when done right (and with the right tools) becomes a powerhouse that:
- Builds and grows communities;
- Provides a resource hub of networking information; and
- Works as a business booster all rolled into one.
And with MemberPress, you’ve got the perfect toolkit to make it happen.
Excited to add a business directory to your site? Share your plans in the comments – we’d love to hear from you!

Get MemberPress Today!
Start getting paid for the content you create.
Eager to integrate a business directory into your membership site? We’d love to hear your plans or thoughts – drop us a comment below!
If you liked this post, make sure you subscribe to the MemberPress blog!


Add a Comment