Having several years of experience in a specific field is a valuable resource. Not only can you continue doing what you love, but you can also make money by sharing your expertise online.
However, if you’re reading this you might not know where to get started.
Fortunately, with the right tools, it’s super easy to sell your expertise online and start earning recurring revenue.
Whether you’re a monster marketer, an accomplished designer, a multi-lingual language person, or a skilled therapist, you can use these tools to offer online courses and subscriptions to your services.
In this post, we’ll show you how to sell your expertise online in 5 simple steps. Let’s get started!
The Tools You’ll Need
If you want to sell your expertise online, you’ll need to set up a website. Let’s look at the 2 main tools you’ll need to get started.
1. WordPress
WordPress is the most popular content management system (CMS) on the market, powering over 43% of the world’s websites. It’s an open-source platform, meaning it’s free to download:
Setting up WordPress is famously easy to do – even for beginners. If you’d like to give it a shot on your own, the WPBeginner Guide below is an excellent place to start.
Hiring a developer is another great option, if you’d rather leave it to the pros. Here at MemberPress, we’ve got a list of trusted partners you might want to check out.
Another option is to use a hosting provider that offers automatic installs.
For instance, Bluehost offers beginner-friendly hosting plans. With these plans, you get a free domain name and SSL certificate, and a one-click WordPress install.
2. MemberPress
With WordPress, you can install plugins to add functionality to your site. The second tool on our list is one such plugin.
MemberPress is an all-in-one membership plugin that enables you to build and sell online courses.
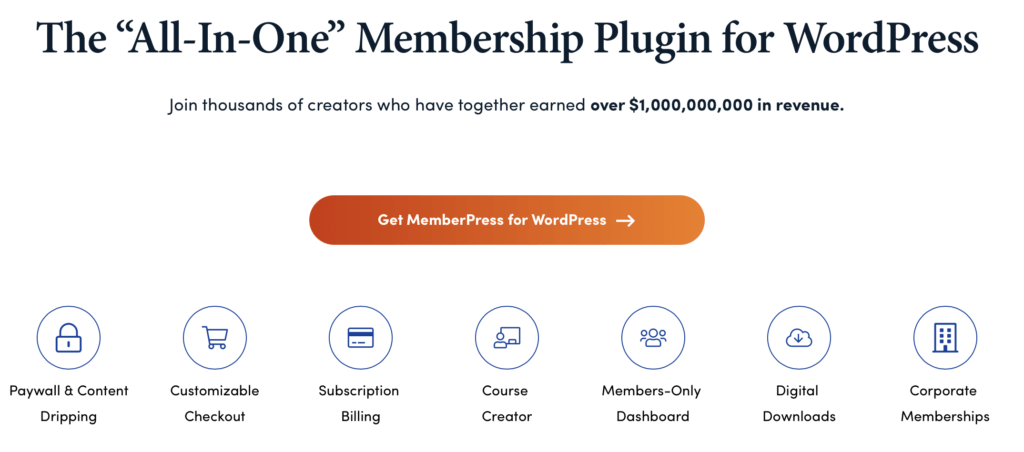
You can also use it to sell subscriptions, accept different types of online payments, and restrict access to your content (set up paywalls).
Like WordPress, MemberPress is incredibly user-friendly. And it comes with a visual drag-and-drop interface to help you create lessons, quizzes, course certificates, and more.
How to Sell Your Expertise Online (In 5 Steps)
Now that you have the tools you need, let’s look at how to start selling your expertise online.
Step 1: Get WordPress and Install MemberPress
To set up your WordPress site, you’ll need to purchase a domain name and web hosting. Once your website is up and running, you can start adding plugins from your dashboard.
As mentioned, the first plugin you’ll need is MemberPress.
Simply purchase your preferred plan from our website, and download the plugin file to your computer.
Then, return to the Plugins page in your WordPress dashboard and click on Upload Plugin:

You’ll need to select the .zip file you downloaded from your MemberPress account. Then, click on Install Now, followed by Activate.
This video walks you through the process step by step:
Once you’ve activated the plugin, head to MemberPress > Settings to enter your license key.
Step 2: Create Your Online Course
Before creating your first course, you’ll want to have your course content written out and ready to go.
Then, head to MP Courses > Add New:

Here, you can enter a title and brief description of your course. Next, switch to the Curriculum tab and click on + to start adding modules and lessons.

You can add your course material by clicking on a lesson. This will take you to a new page where you can create infographics, video content, quizzes, certificates, and more.
This video shows you how to launch your first course:
Additionally, you can organize your content with categories. To do this, navigate to the Courses page and click on Categories:
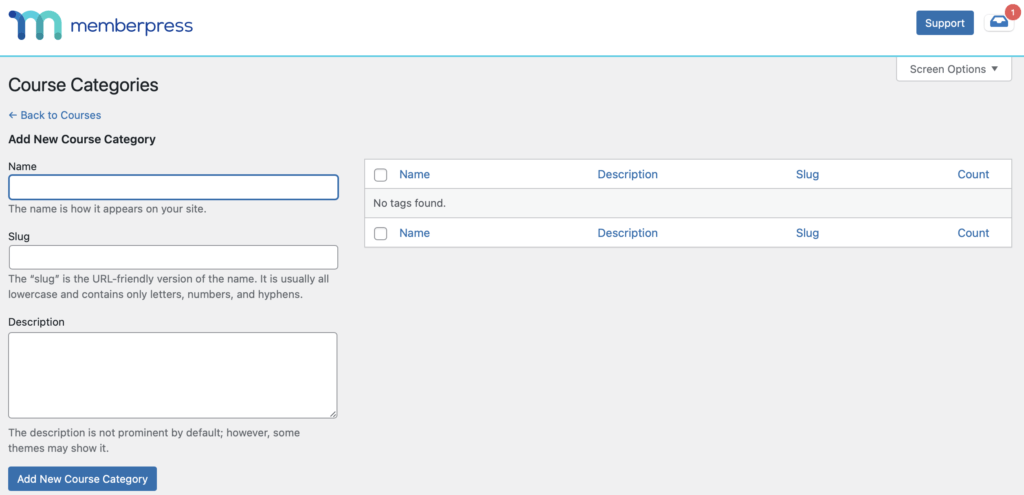
Here, you can create new categories and edit existing ones. Using categories and tags (also called taxonomy) will make it easier to add protection rules for paid content.
Check Out Our Course Certificates Update!
Want to further tap into the potential of recurring revenue from your online courses? With our MemberPress Courses update, you can add completion and expiration dates to your certificates.
By adding an expiry date, students have a clear incentive to come back and update their qualifications.
This not only drives consistent engagement and maximizes your customer lifetime value, but also ensures that your learners remain at the pinnacle of their expertise.
And when these top-tier students succeed and shine in their domains with your brand’s certificate in hand, they stand as living testimonials to the superior quality and credibility of your courses.
Here’s a tutorial on how to offer certificates in MemberPress Courses.
Step 3: Set Up Your Memberships
To monetize your site, you’ll need to set up memberships. This is easy to do with MemberPress. Simply head to MemberPress > Memberships > Add New:
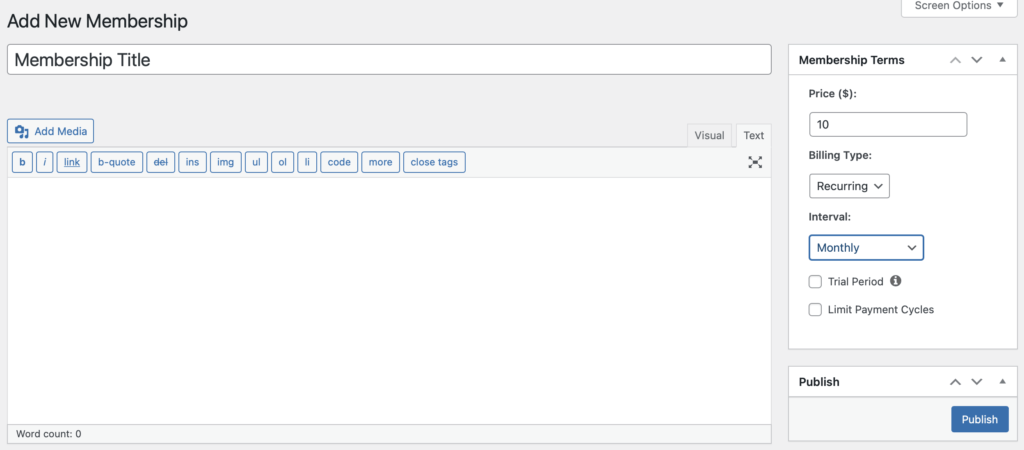
Then, choose a membership name and set a price.
You can set up recurring monthly payments for subscriptions and offer a trial period. Alternatively, you might opt for one-time purchases.
If you scroll down to Membership Options, you can customize your sign-up form and enable welcome emails to greet your subscribers:
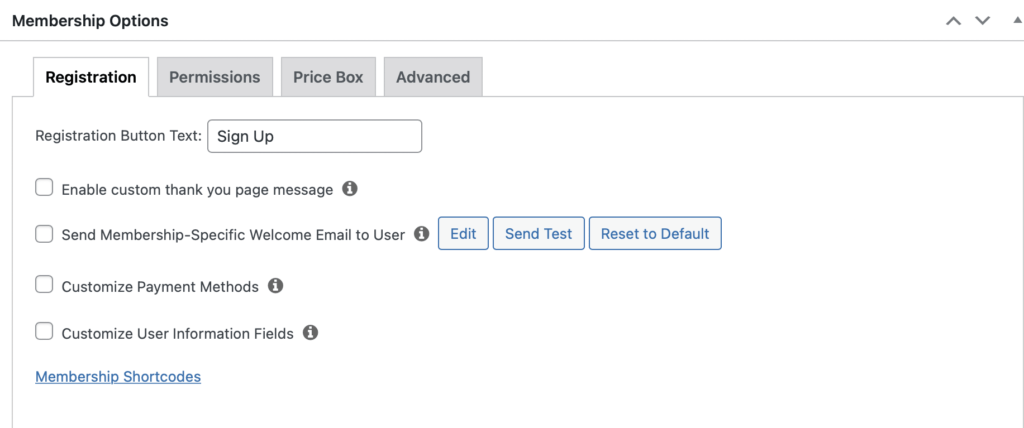
Next, switch to the Permissions tab to set which users can sign up for your memberships.
Under Price Box, you can write a brief description for each of your options, list the benefits of becoming a member, and modify the call to action (CTA) button.
Step 4: Restrict User Access
To restrict access to your paid content, you’ll need to create membership rules. Head to MemberPress > Rules > Add New, then use the dropdown menu to select the content you want to protect.
For example, you might restrict access to:
- All courses
- Sll courses within a certain category
- Single course
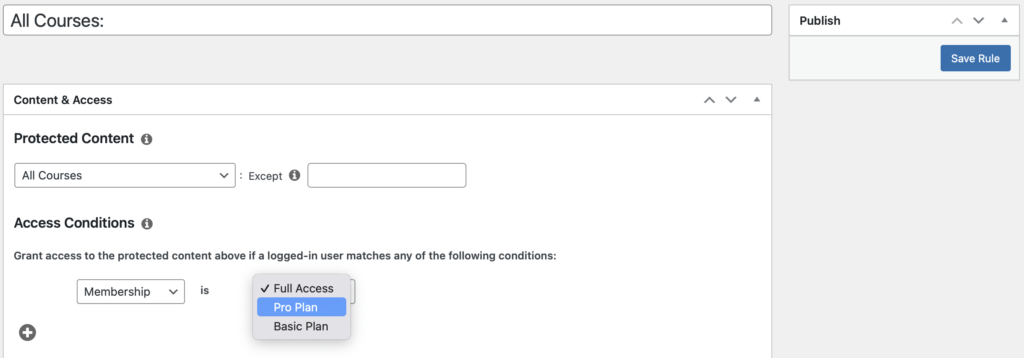
Then, under Access Conditions, choose Membership and find the appropriate membership type.
For instance, you might’ve created a basic course for low-tier members, while more advanced courses can only be accessed by those who purchased a particular membership plan.
You can watch this video to learn more about adding rules in MemberPress:
Step 5: Create Your Login and Registration Pages
Finally, you’ll need to create a registration page so users can sign up for your memberships and courses.
In this video, we show you how to customize this page to fit your needs:
You’ll also need to create a login page so users can access their accounts. MemberPress creates one for you by default, but you can customize it to align with your branding:
Once you have everything in place, you can start promoting your courses and earning recurring revenue!
Option: Turn Your Course Into a Coach-Led Program with CoachKit™
Online courses are a great way to earn recurring revenue with relatively little ongoing input. However, if you want a more hands-on role in your members’ success outcomes, CoachKit™ is the answer.
With the MemberPress CoachKit™ add-on you can offer your members a VIP coach-led experience and guide them through to success with 1:1 support.
Divide your members into cohorts and assign them a coach (that could be you, or another member of your team). The coach will be on hand for advice and support, encouraging members to stay on track towards their goals.
Include your courses in a wider program, set up timed milestones encouraging members to complete assignments before their deadline, and promote engagement with the CoachKit™ habit tracking feature.
It’s all designed for you to offer a highly engaging, interactive experience for your members – one that leads them straight to success, and ultimately boosts your credibility.
Examples of MemberPress Courses
For inspiration, let’s look at a few websites that sell courses through MemberPress.
Dan’s Tutorials
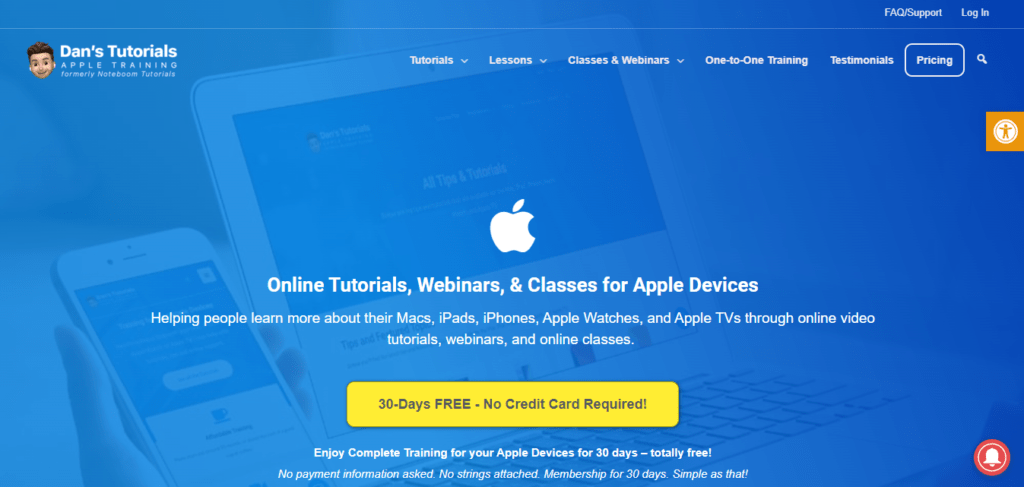
Dan’s Tutorials is a membership site that offers online tutorials for Apple users. Each membership includes video tutorials, lessons, online classes, and webinars.
Using MemberPress, Dan’s Tutorials offers 3 types of memberships: monthly, quarterly, and yearly plans. All plans come with a 14-day trial.
Bulletproof Musician

Bulletproof Musician is an online music school that offers coaching and courses to musicians who want to perform better on stage. These sessions are designed to help performers combat anxiety and become more confident.
The site uses MemberPress for its courses and memberships. Users can sign up for live coaching sessions, take online workshops, purchase a self-paced course, and more.
Conclusion
Selling your expertise online is a great way to share your passion while making money (and even generating some passive income).
And with WordPress and MemberPress, you can get your expertise in front of people likely to benefit from it.
To recap, here are 5 steps to sell your expertise online:
- Get WordPress and install Memberpress.
- Create your online course.
- Set up your memberships.
- Restrict user access.
- Create your registration and login pages.


Add a Comment