

An order bump is an additional product offered during checkout. Customers add it to their purchase with one click, without leaving the checkout. Order bumps help you sell more with each registration.
This document explains how order bumps work in MemberPress and how to configure them. Order bumps are managed by the MemberPress Funnels add-on. Sites without Funnels use the Order Bumps add-on instead.
Order Bumps And MemberPress Funnels
Order bumps are a capability of MemberPress Funnels. Funnels also adds upsells, downsells, and a visual funnel builder. On a site with Funnels active, you configure order bumps in the funnel builder.
The Order Bumps add-on is the earlier way to configure bumps. It works on sites that do not have Funnels active. The two cannot be used together:
- with Funnels active, the Order Bumps add-on cannot be activated. The Add-ons page shows this message: “MemberPress Order Bumps cannot be activated while MemberPress Funnels is active. Order bump configuration is managed through MemberPress Funnels.”;
- if the Order Bumps add-on is already active when you activate Funnels, it stays active but its settings move to Funnels. The Order Bumps tab on each product then points to the funnel builder;
- if you deactivate Funnels later, the add-on’s own Order Bumps tab returns;
- Funnels requires the MemberPress shopping cart. If the cart is disabled, Funnels deactivates. The Order Bumps add-on works with or without the cart.
Order bumps can be membership products or digital products. A standalone registration product can offer bumps through Funnels. It cannot be offered as a bump on a cart product’s checkout. In the product picker, standalone products are greyed out.
Configuring Order Bumps In MemberPress Funnels
In Funnels, order bumps belong to the Checkout step of a funnel. The Checkout step names the product that triggers the funnel. Its order bumps appear on that product’s checkout.
To add order bumps to a product:
- Navigate to Dashboard > MP Funnels > All Funnels, and click Add New.
- In the Choose a Template popup, click Simple Checkout + Bump.

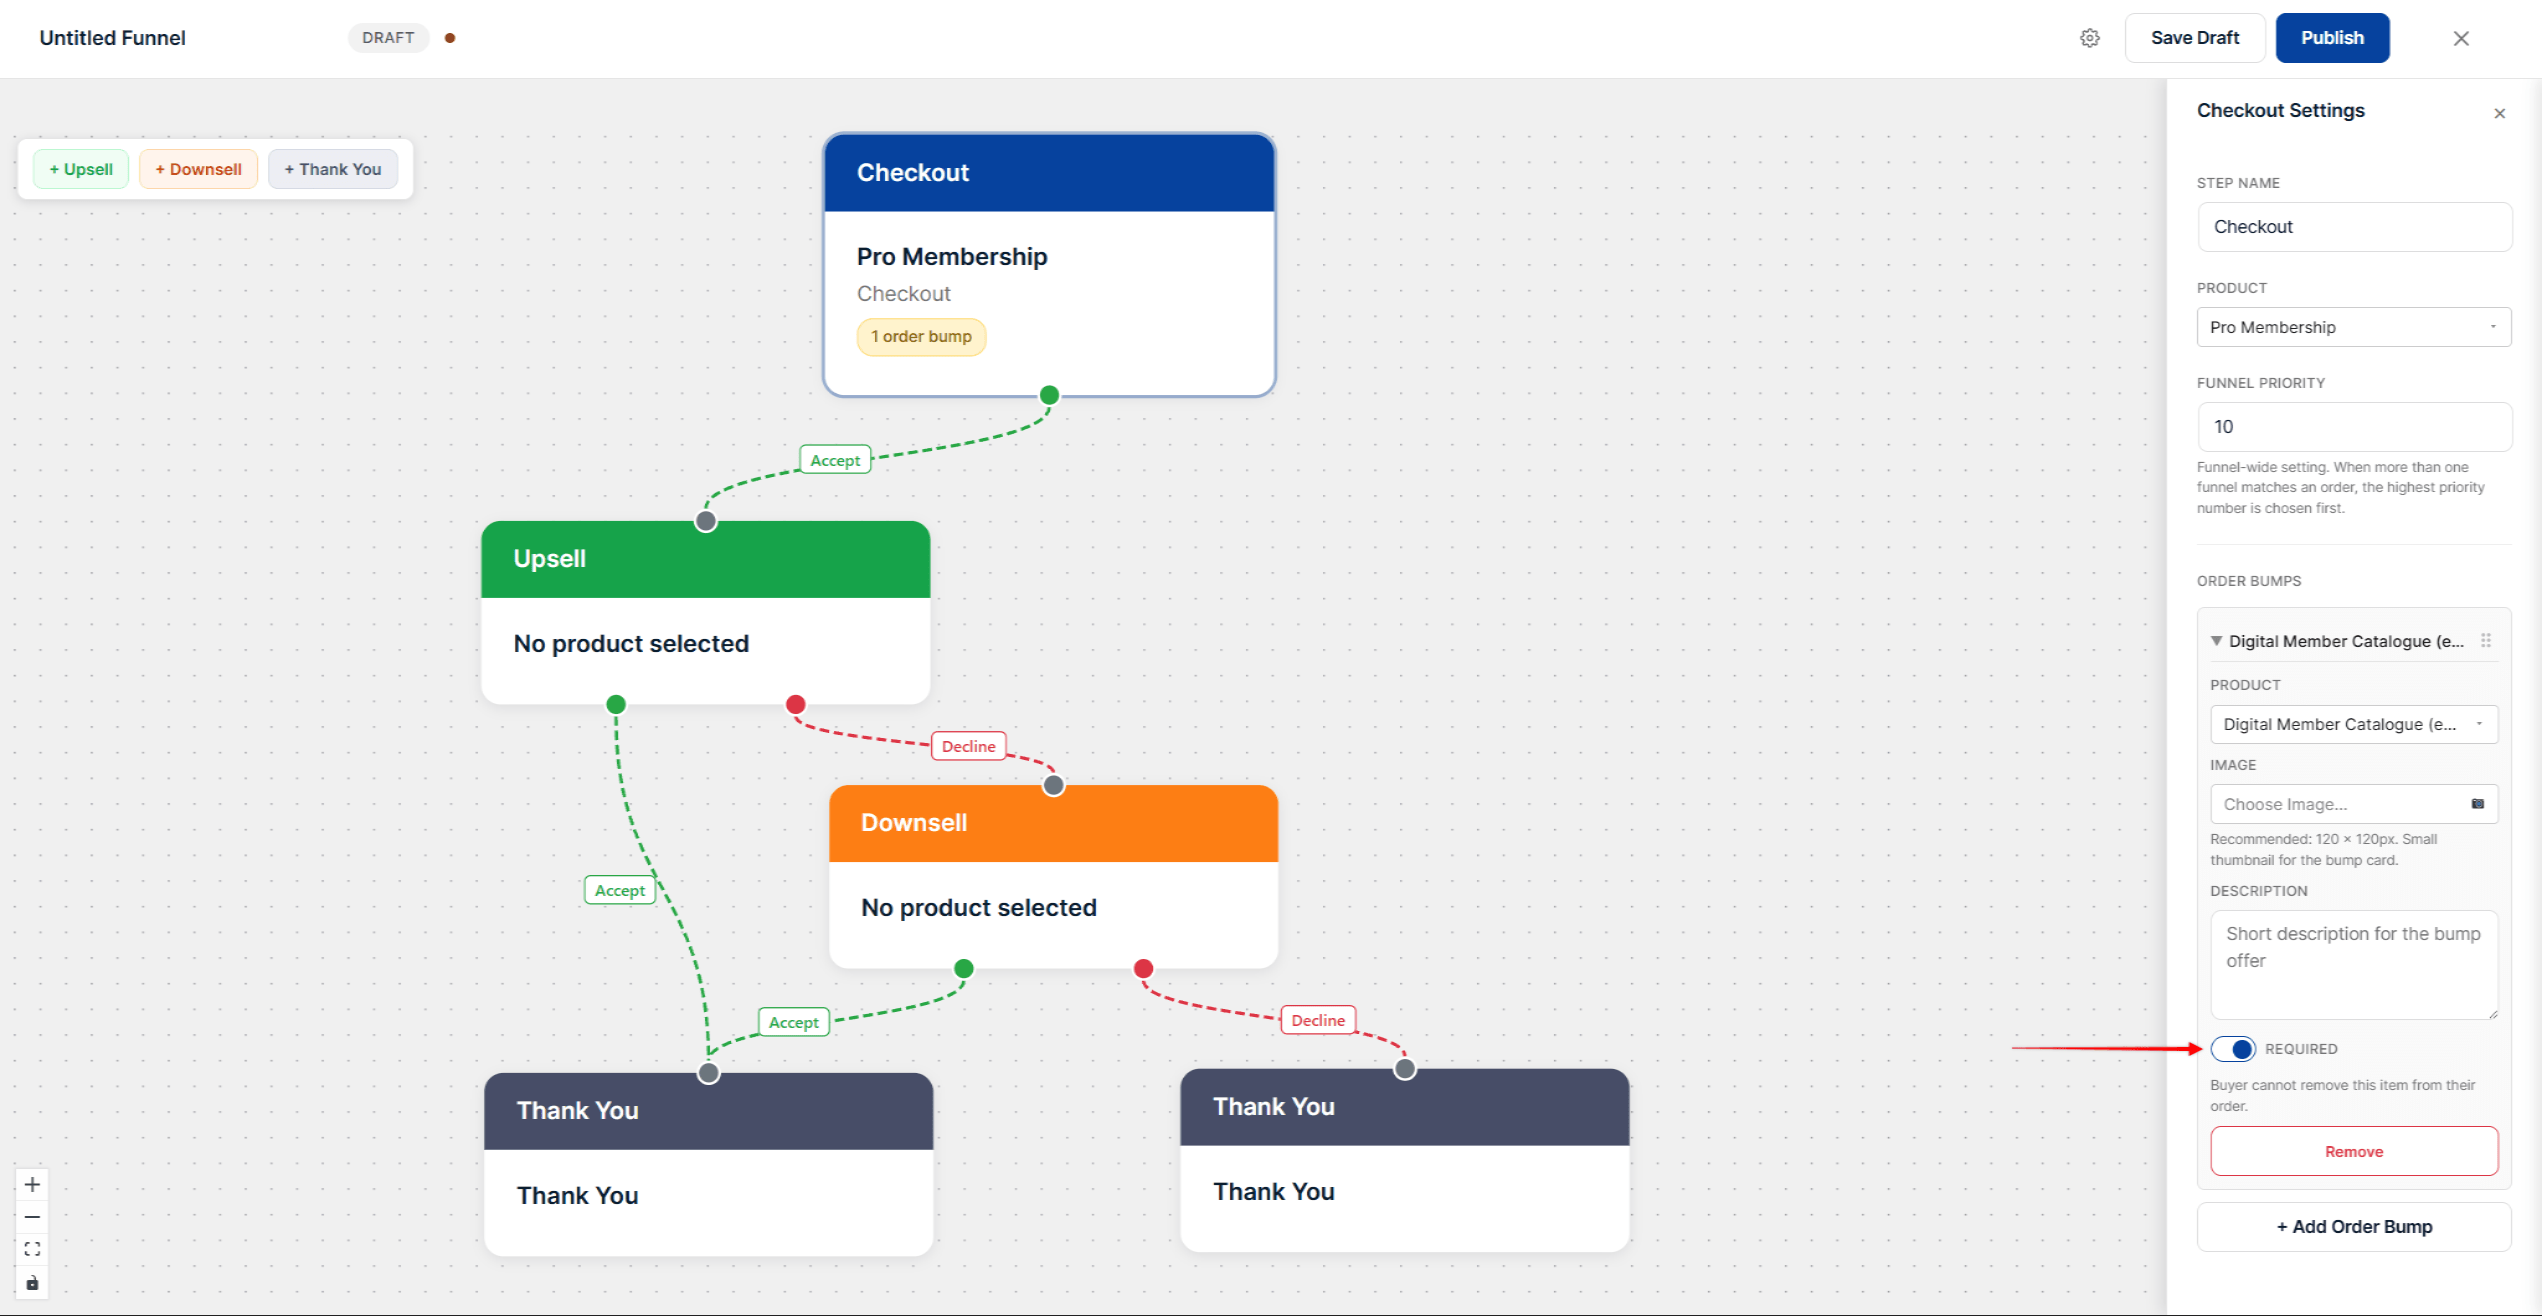
- Click the Checkout card on the canvas. The Checkout Settings panel opens.
- Under Product, click the field and select the product customers buy first.
- Under Order Bumps, click + Add Order Bump.

- For each bump, select the Product. You can add an Image and a Description for the bump card. The recommended image size is 120 × 120 px.
- To make a bump mandatory, enable Required. The buyer cannot remove a required bump from the order.
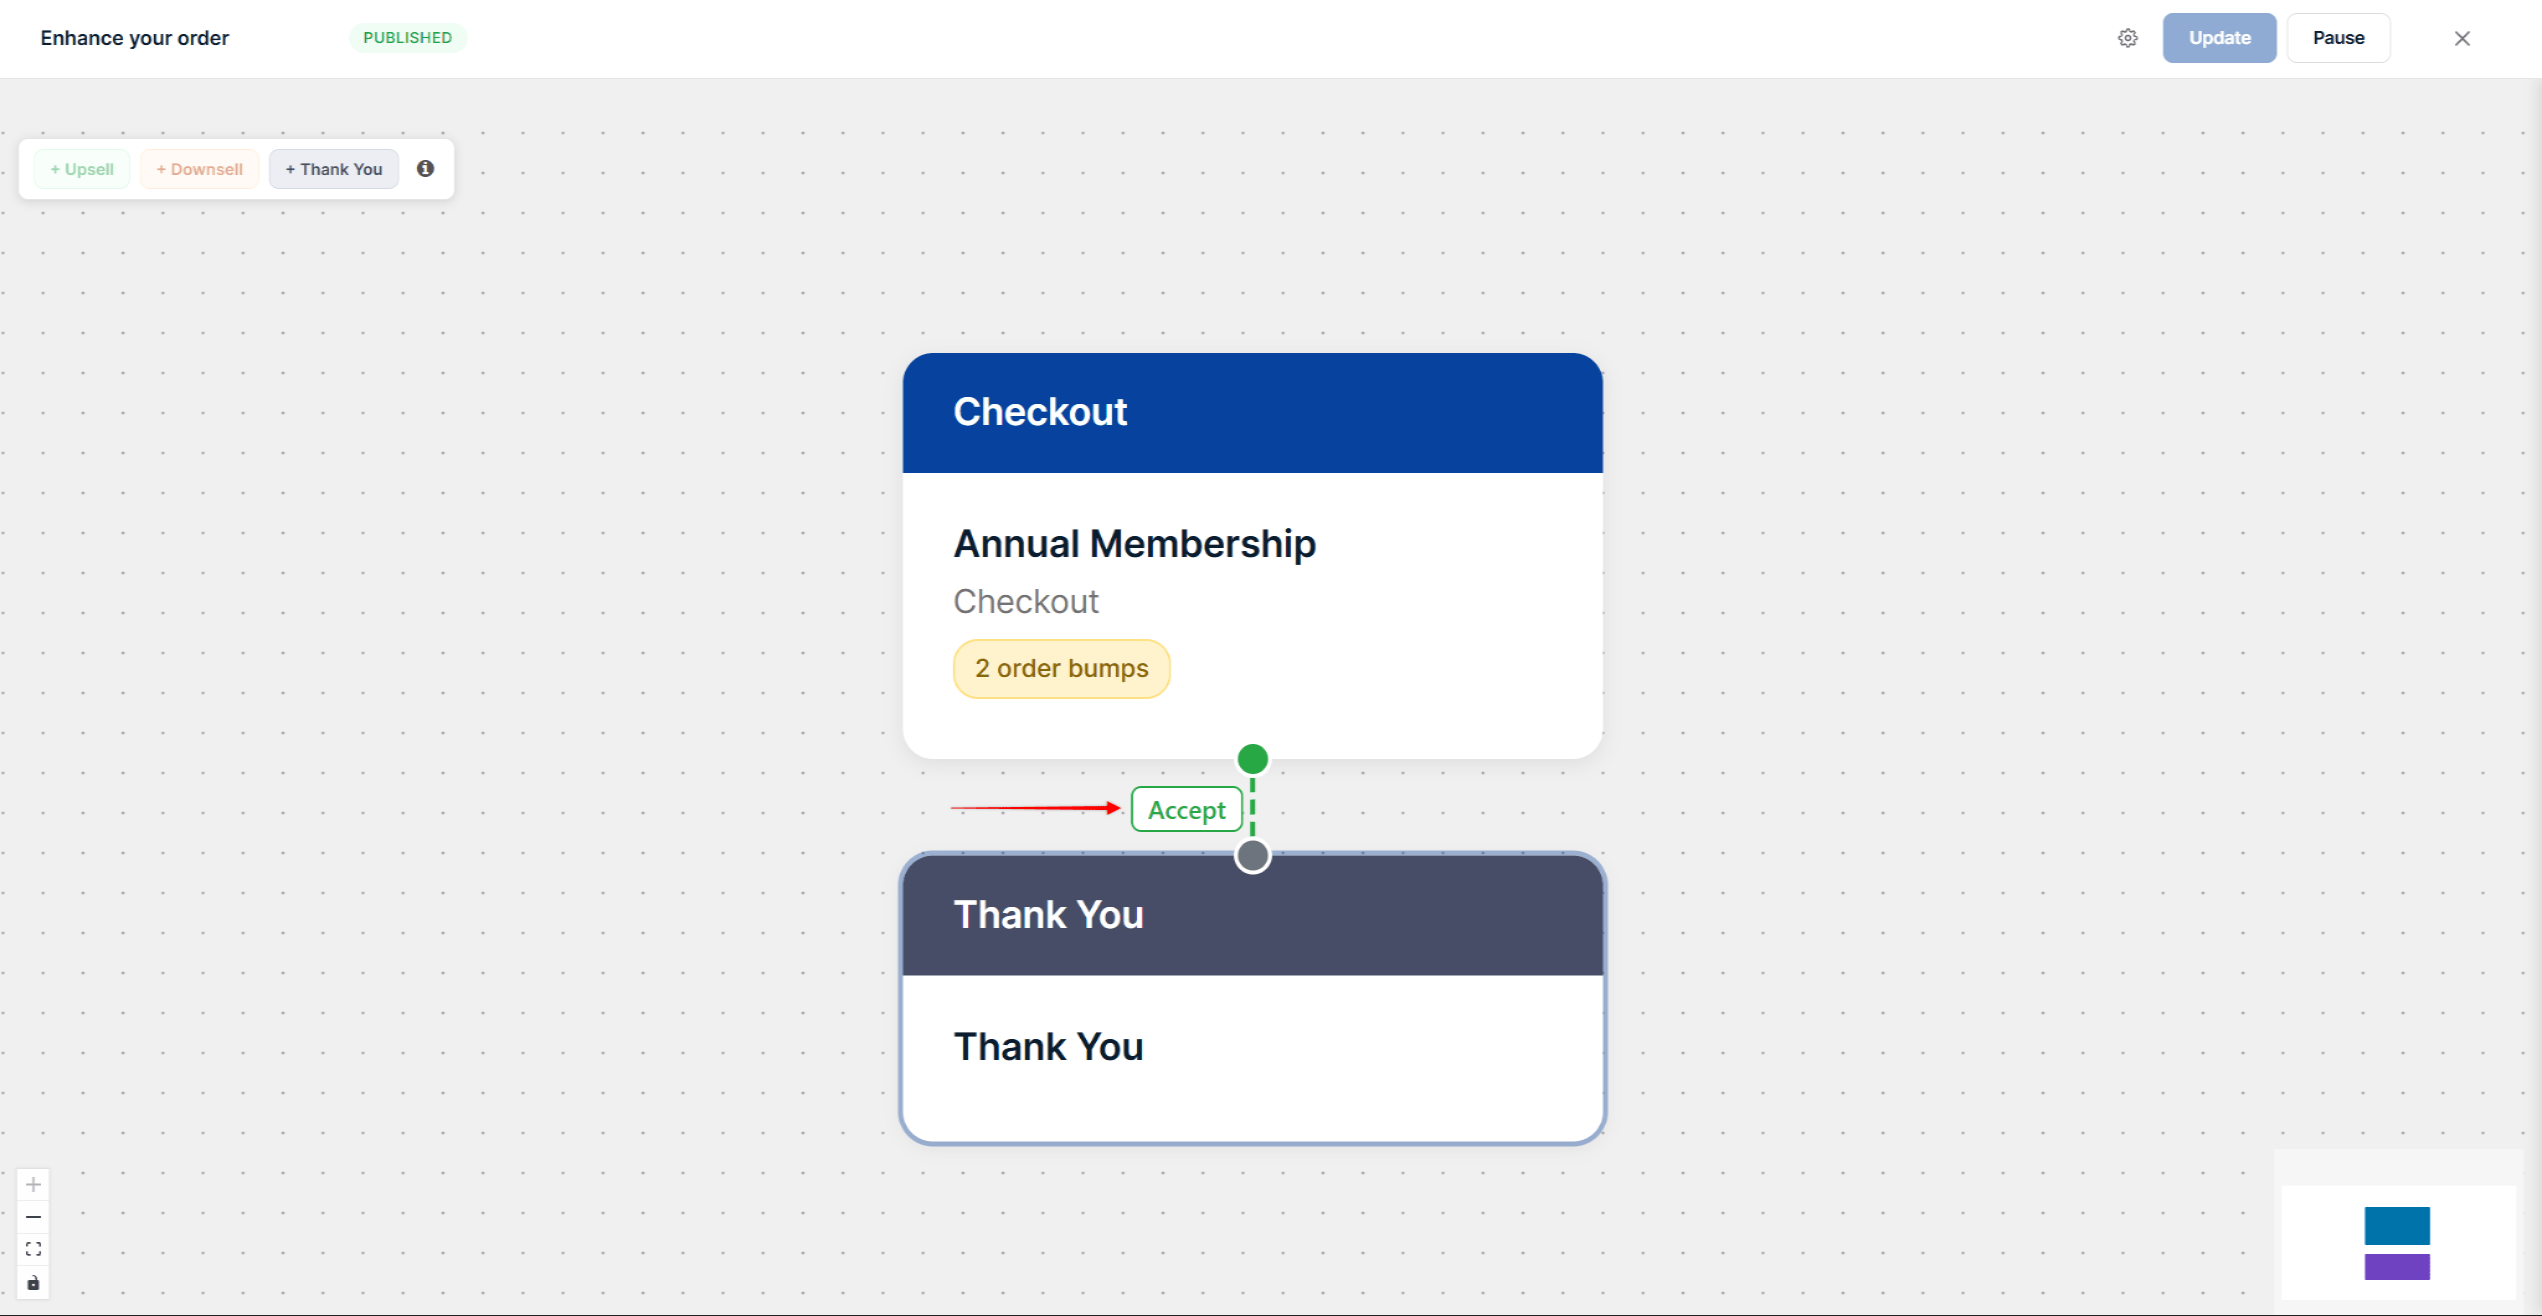
- Every funnel path must end at a Thank You step. The template already connects the Checkout card to a Thank You card with an Accept line.
- Click the funnel title at the top left to name the funnel, then click Publish.
Only one published funnel can use a product as its Checkout product. Publishing a second funnel for the same product fails with this message: “Save failed: This checkout product is already the trigger for the published funnel “…”. Only one published funnel can trigger on a given product.”
You can add as many order bumps as you need. Building funnels with upsells and downsells is explained in Setting Up MemberPress Funnels.
Migrating From The Order Bumps Add-on
When you activate Funnels on a site with existing order bumps, MemberPress migrates them automatically. For each product that had order bumps, Funnels creates one published funnel:
- the funnel title is the Order Bumps Heading you set in the add-on;
- the Checkout step holds the product and all its bumps, in the same order;
- required bumps stay required.
Migrated bumps keep working at checkout. You can edit them in the funnel builder like any other funnel.
Configuring Order Bumps With The Add-on
On a site without Funnels, the Order Bumps add-on configures bumps on each product. First, install and activate the Order Bumps add-on at Dashboard > MemberPress > Add-ons.
Then set up bumps on the primary product:
- Navigate to Dashboard > MemberPress > Products, and edit the membership product.
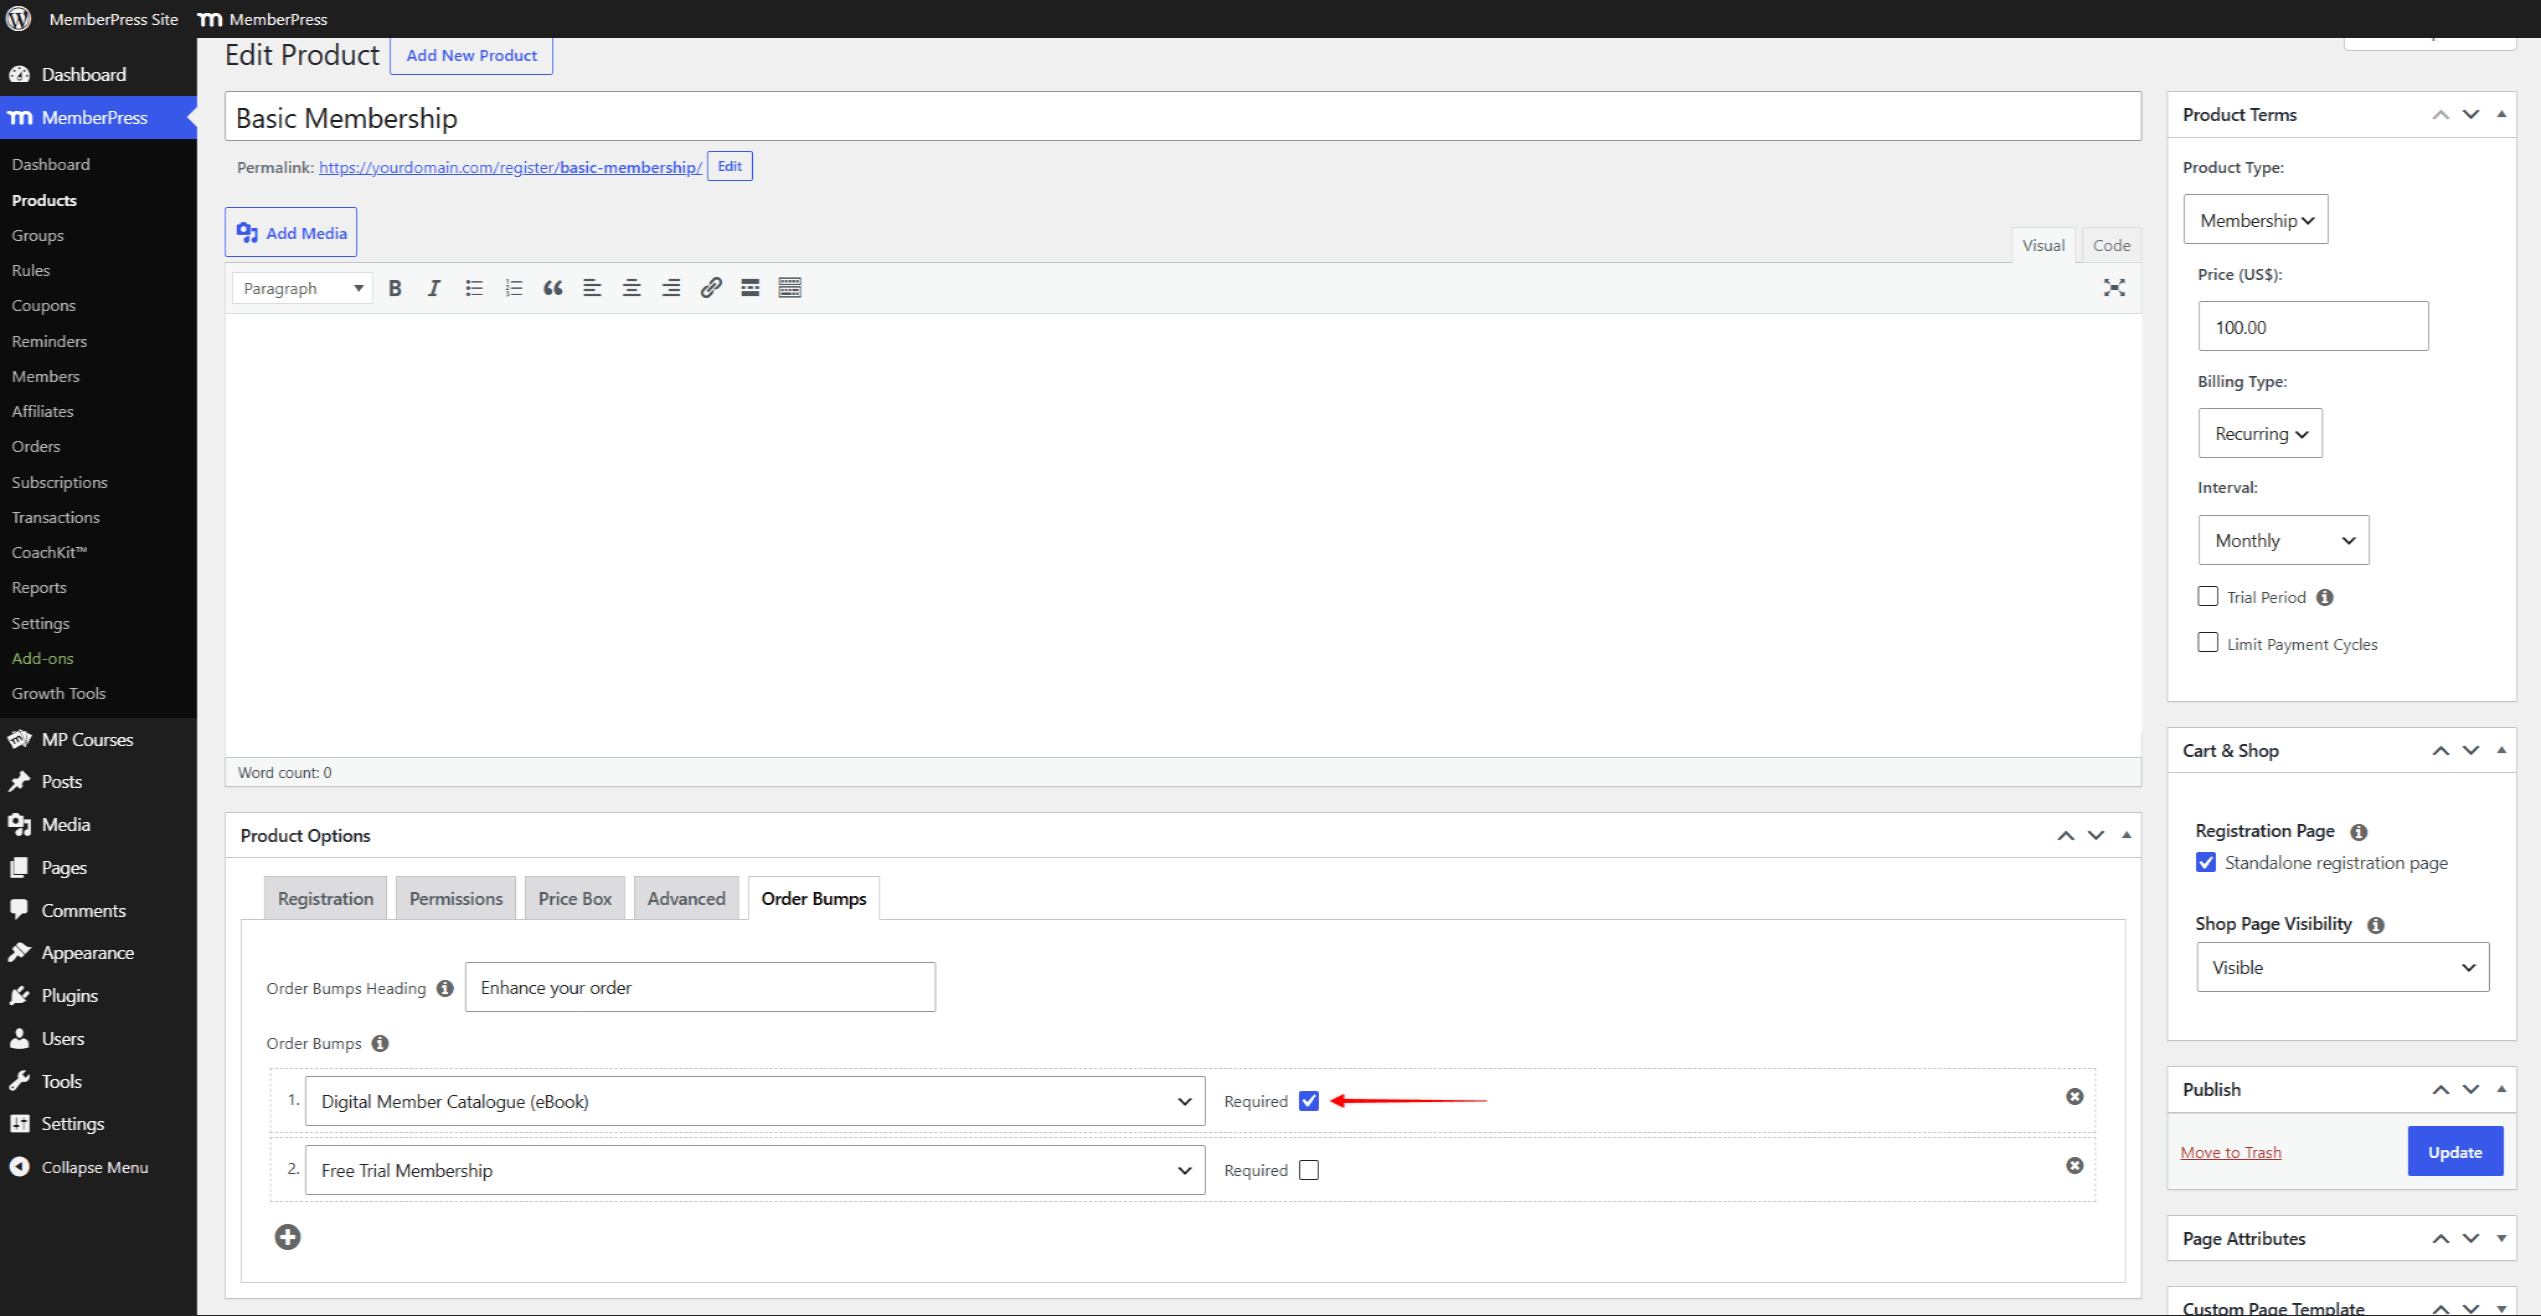
- Scroll down to Product Options, and click the Order Bumps tab.
- Add an Order Bumps Heading. This text appears above the bumps on the registration page. The default is “Additional options for your membership:”.
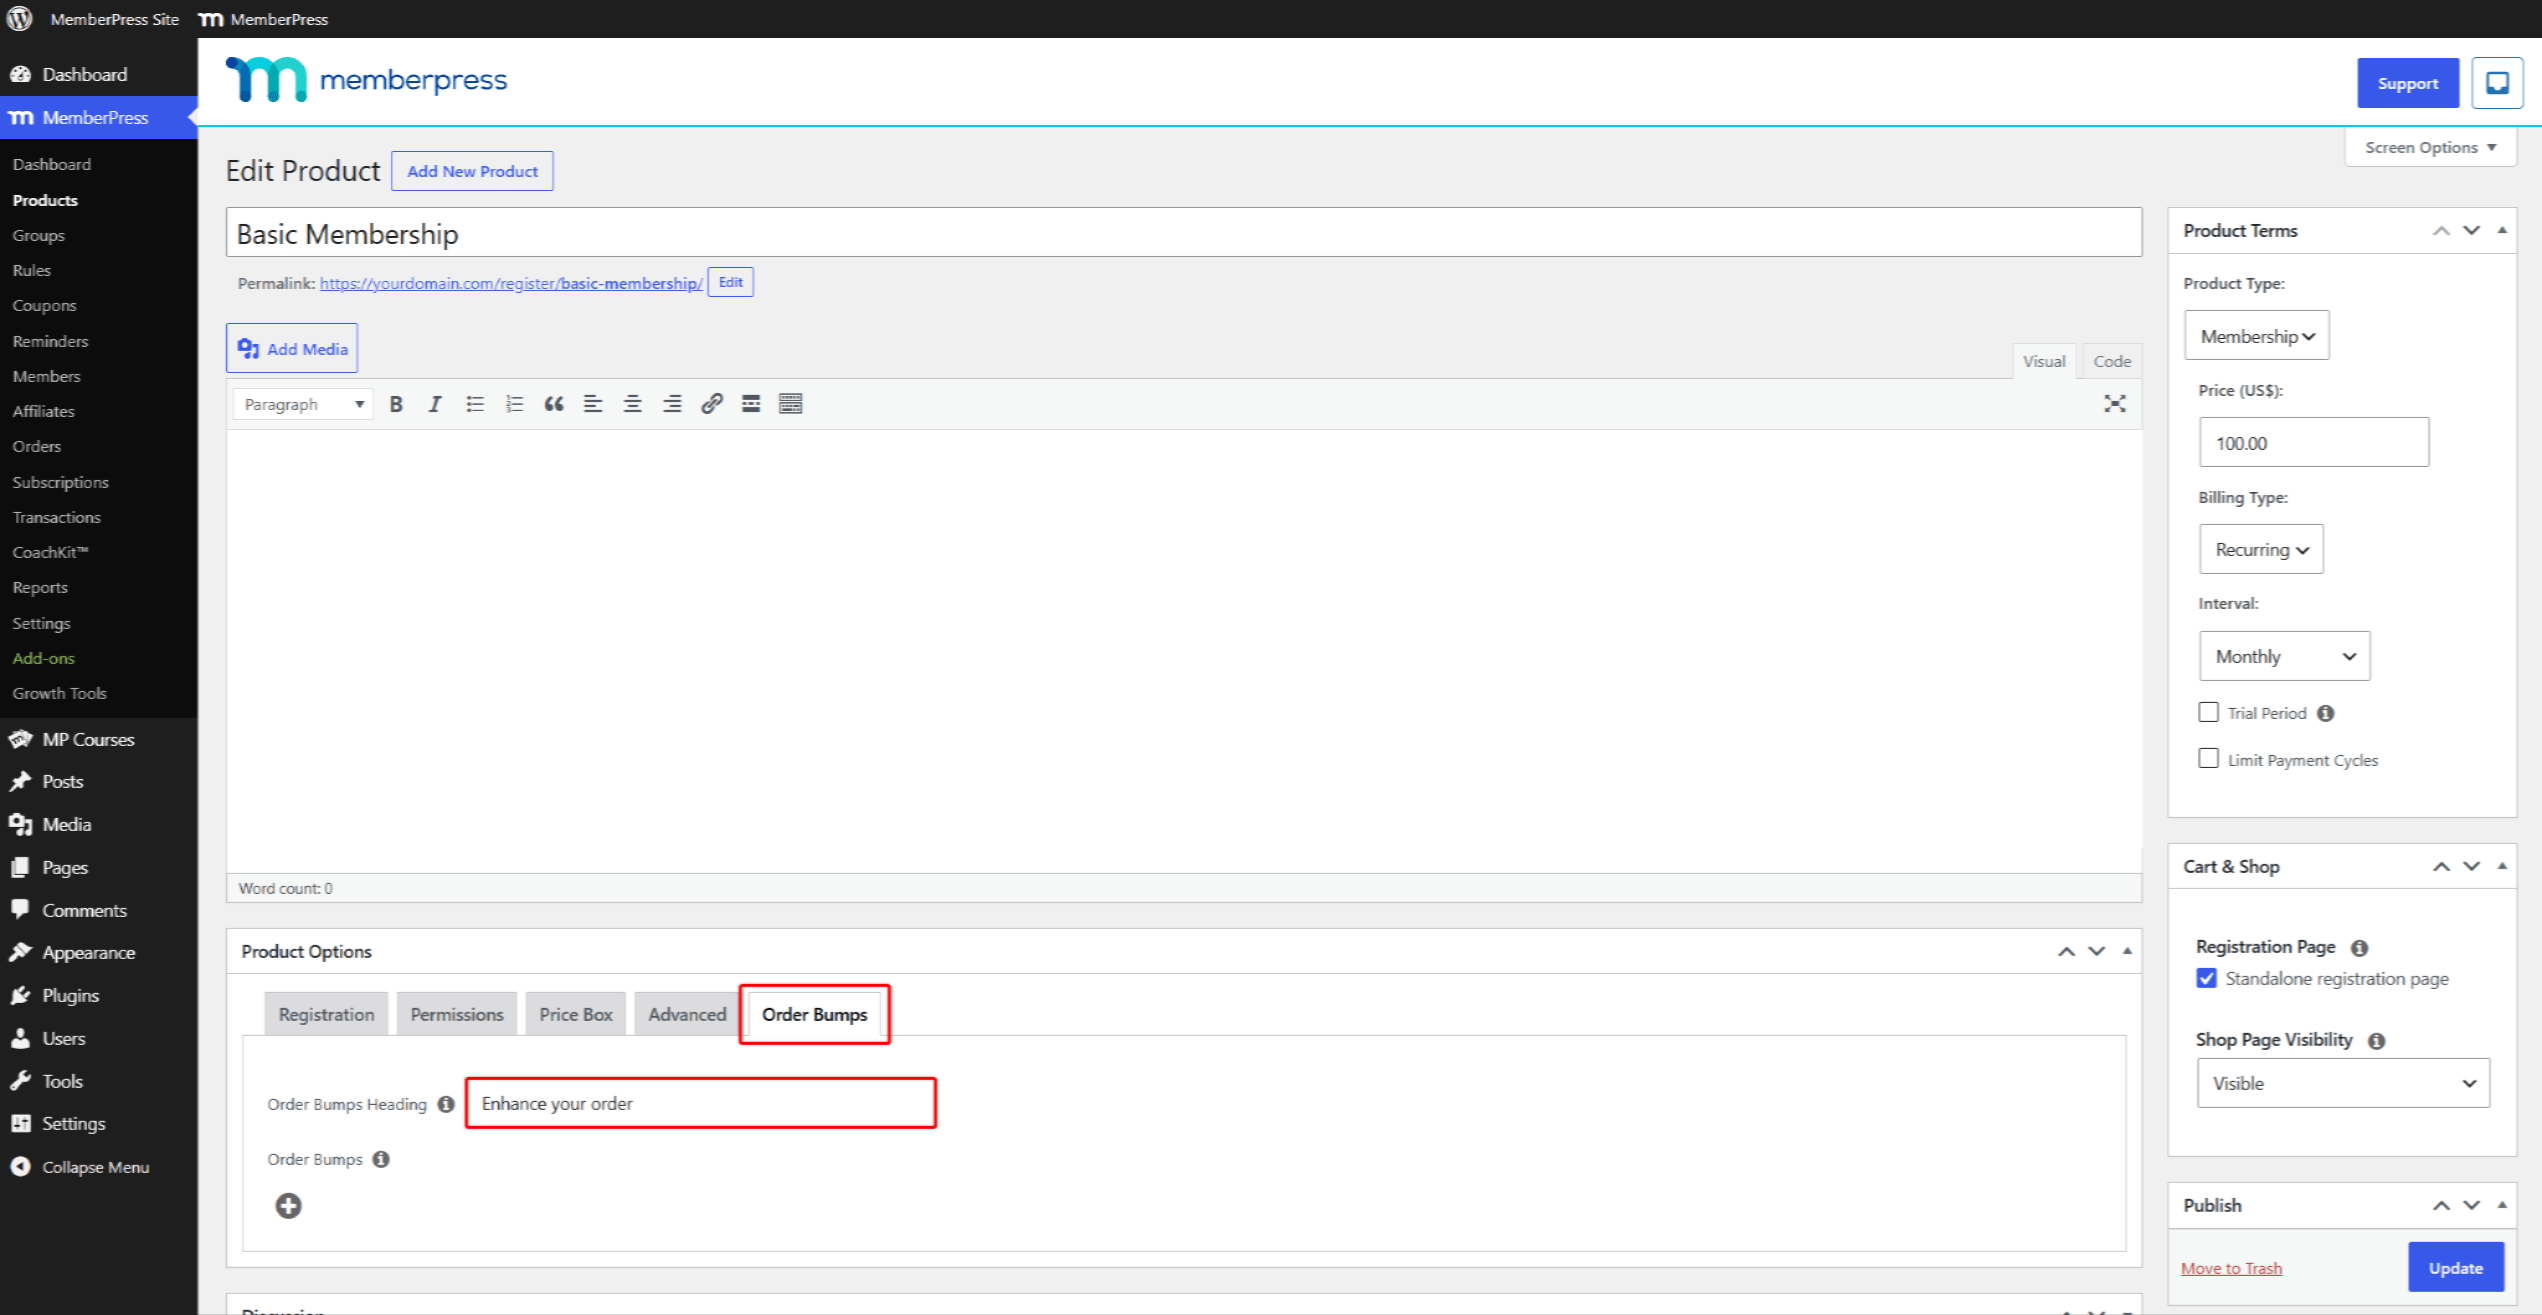
- Click the + icon, and select the product to offer as a bump.
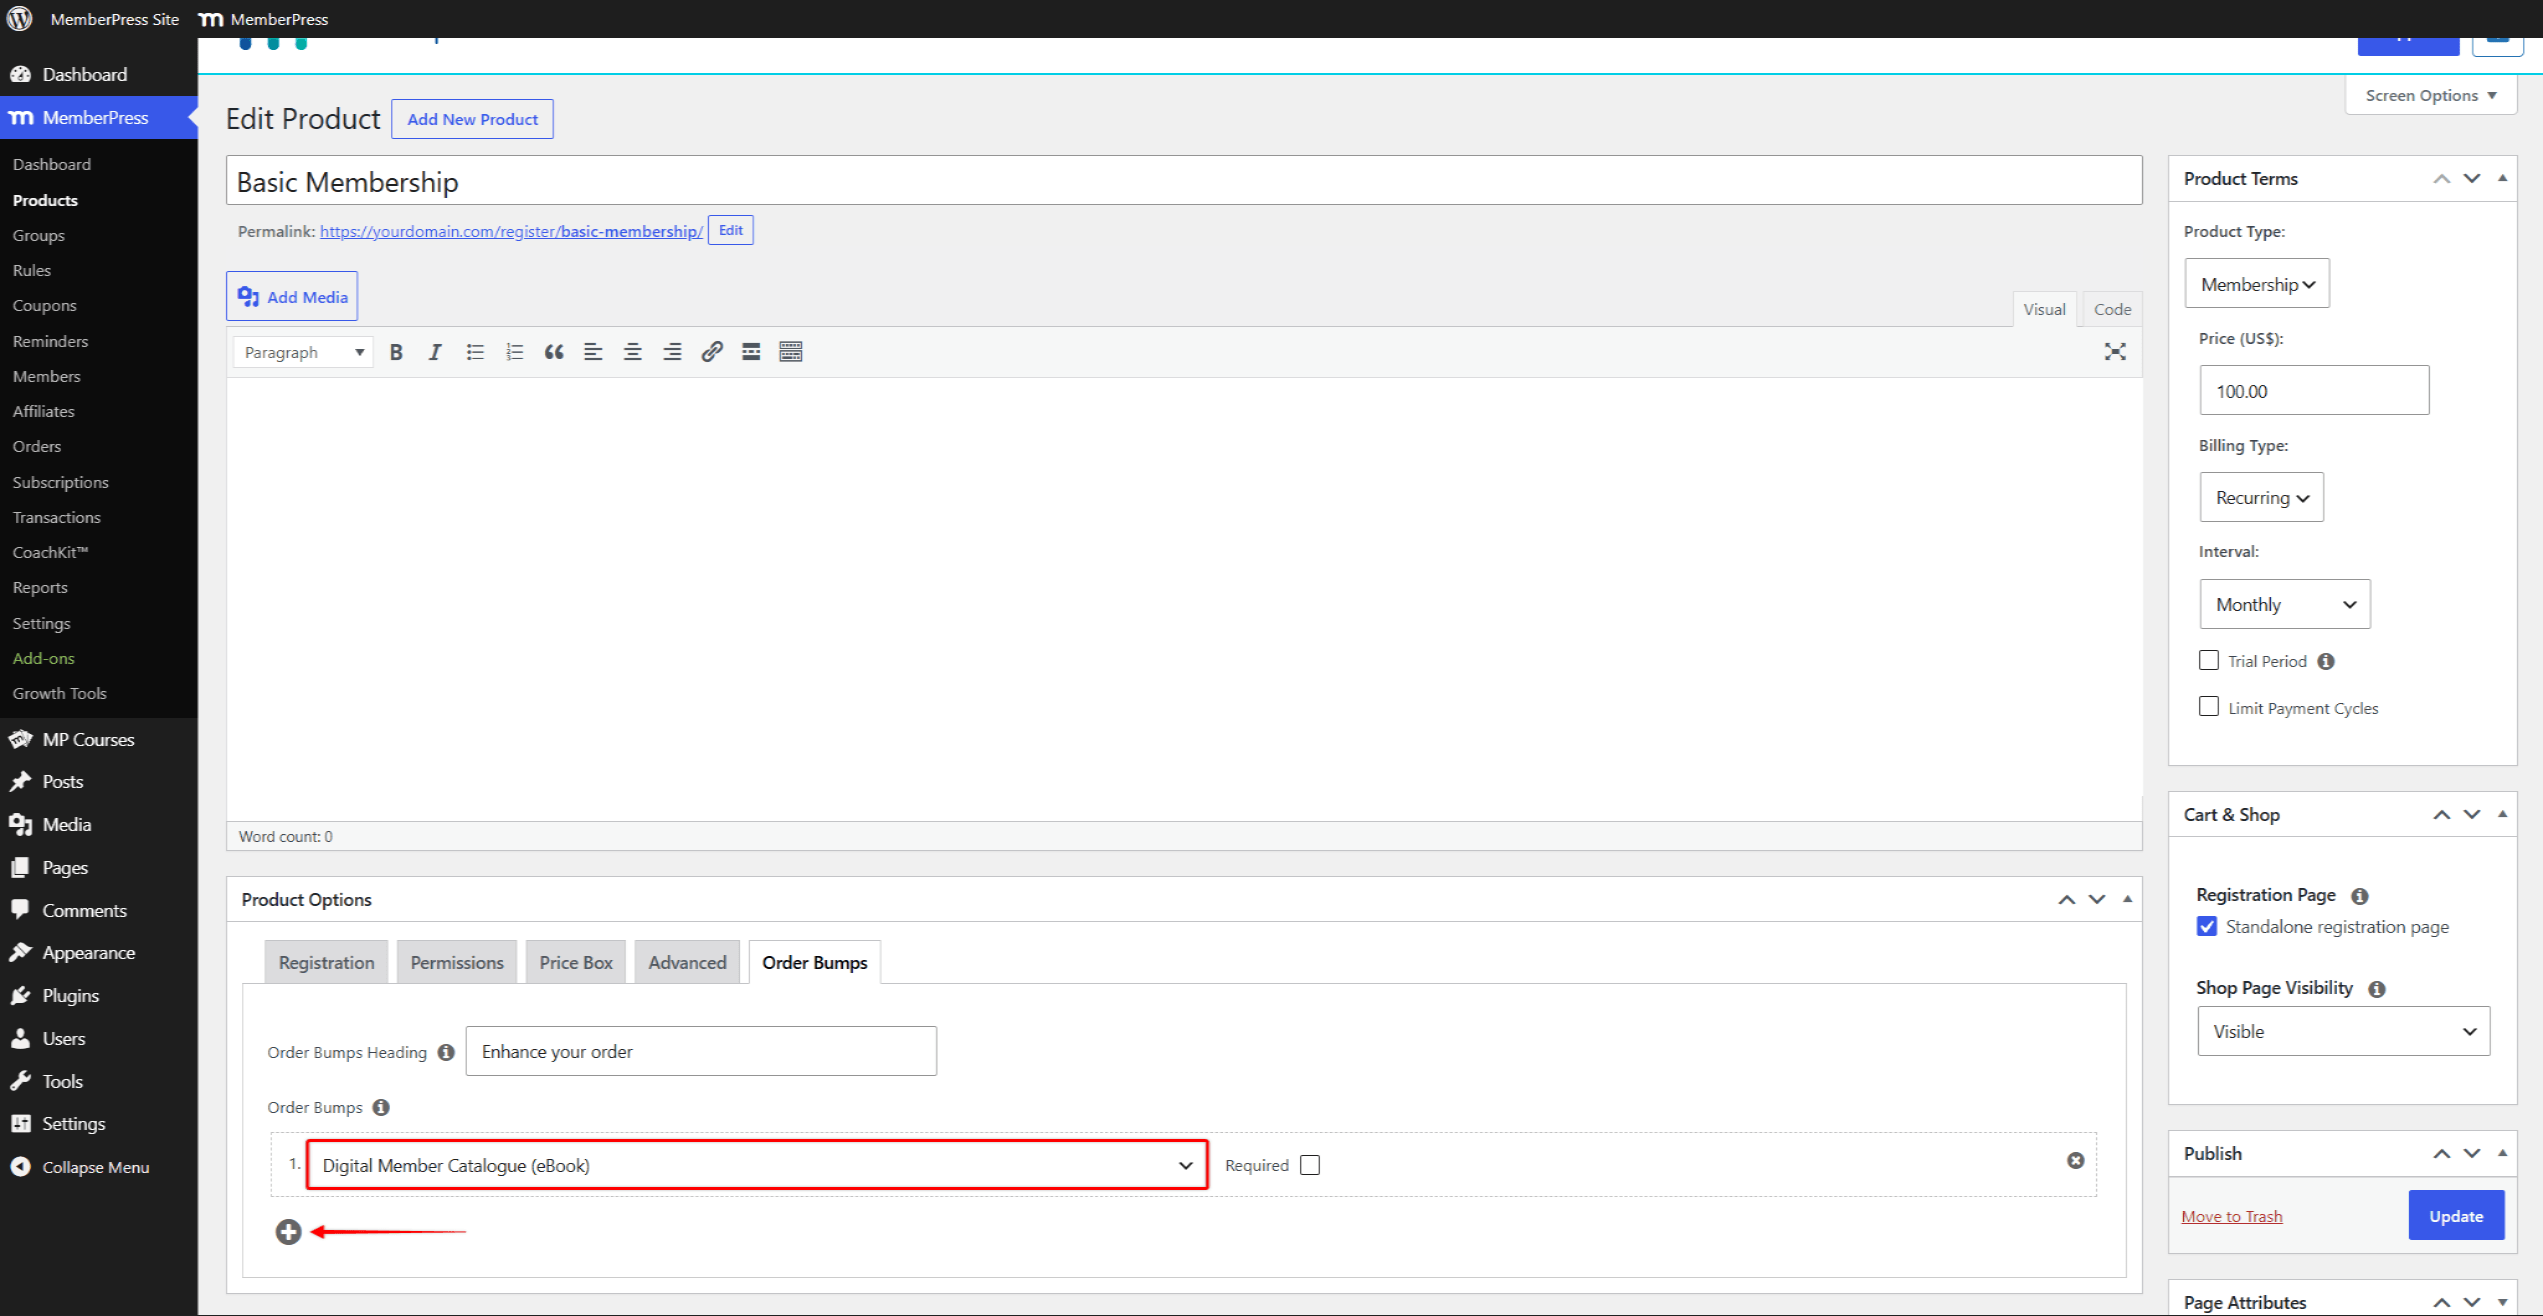
- Repeat step 4 for each additional bump.
- To make a bump mandatory, mark its Required option.
- Click Update.
Purchasing Order Bumps
How customers see order bumps depends on the checkout they use.
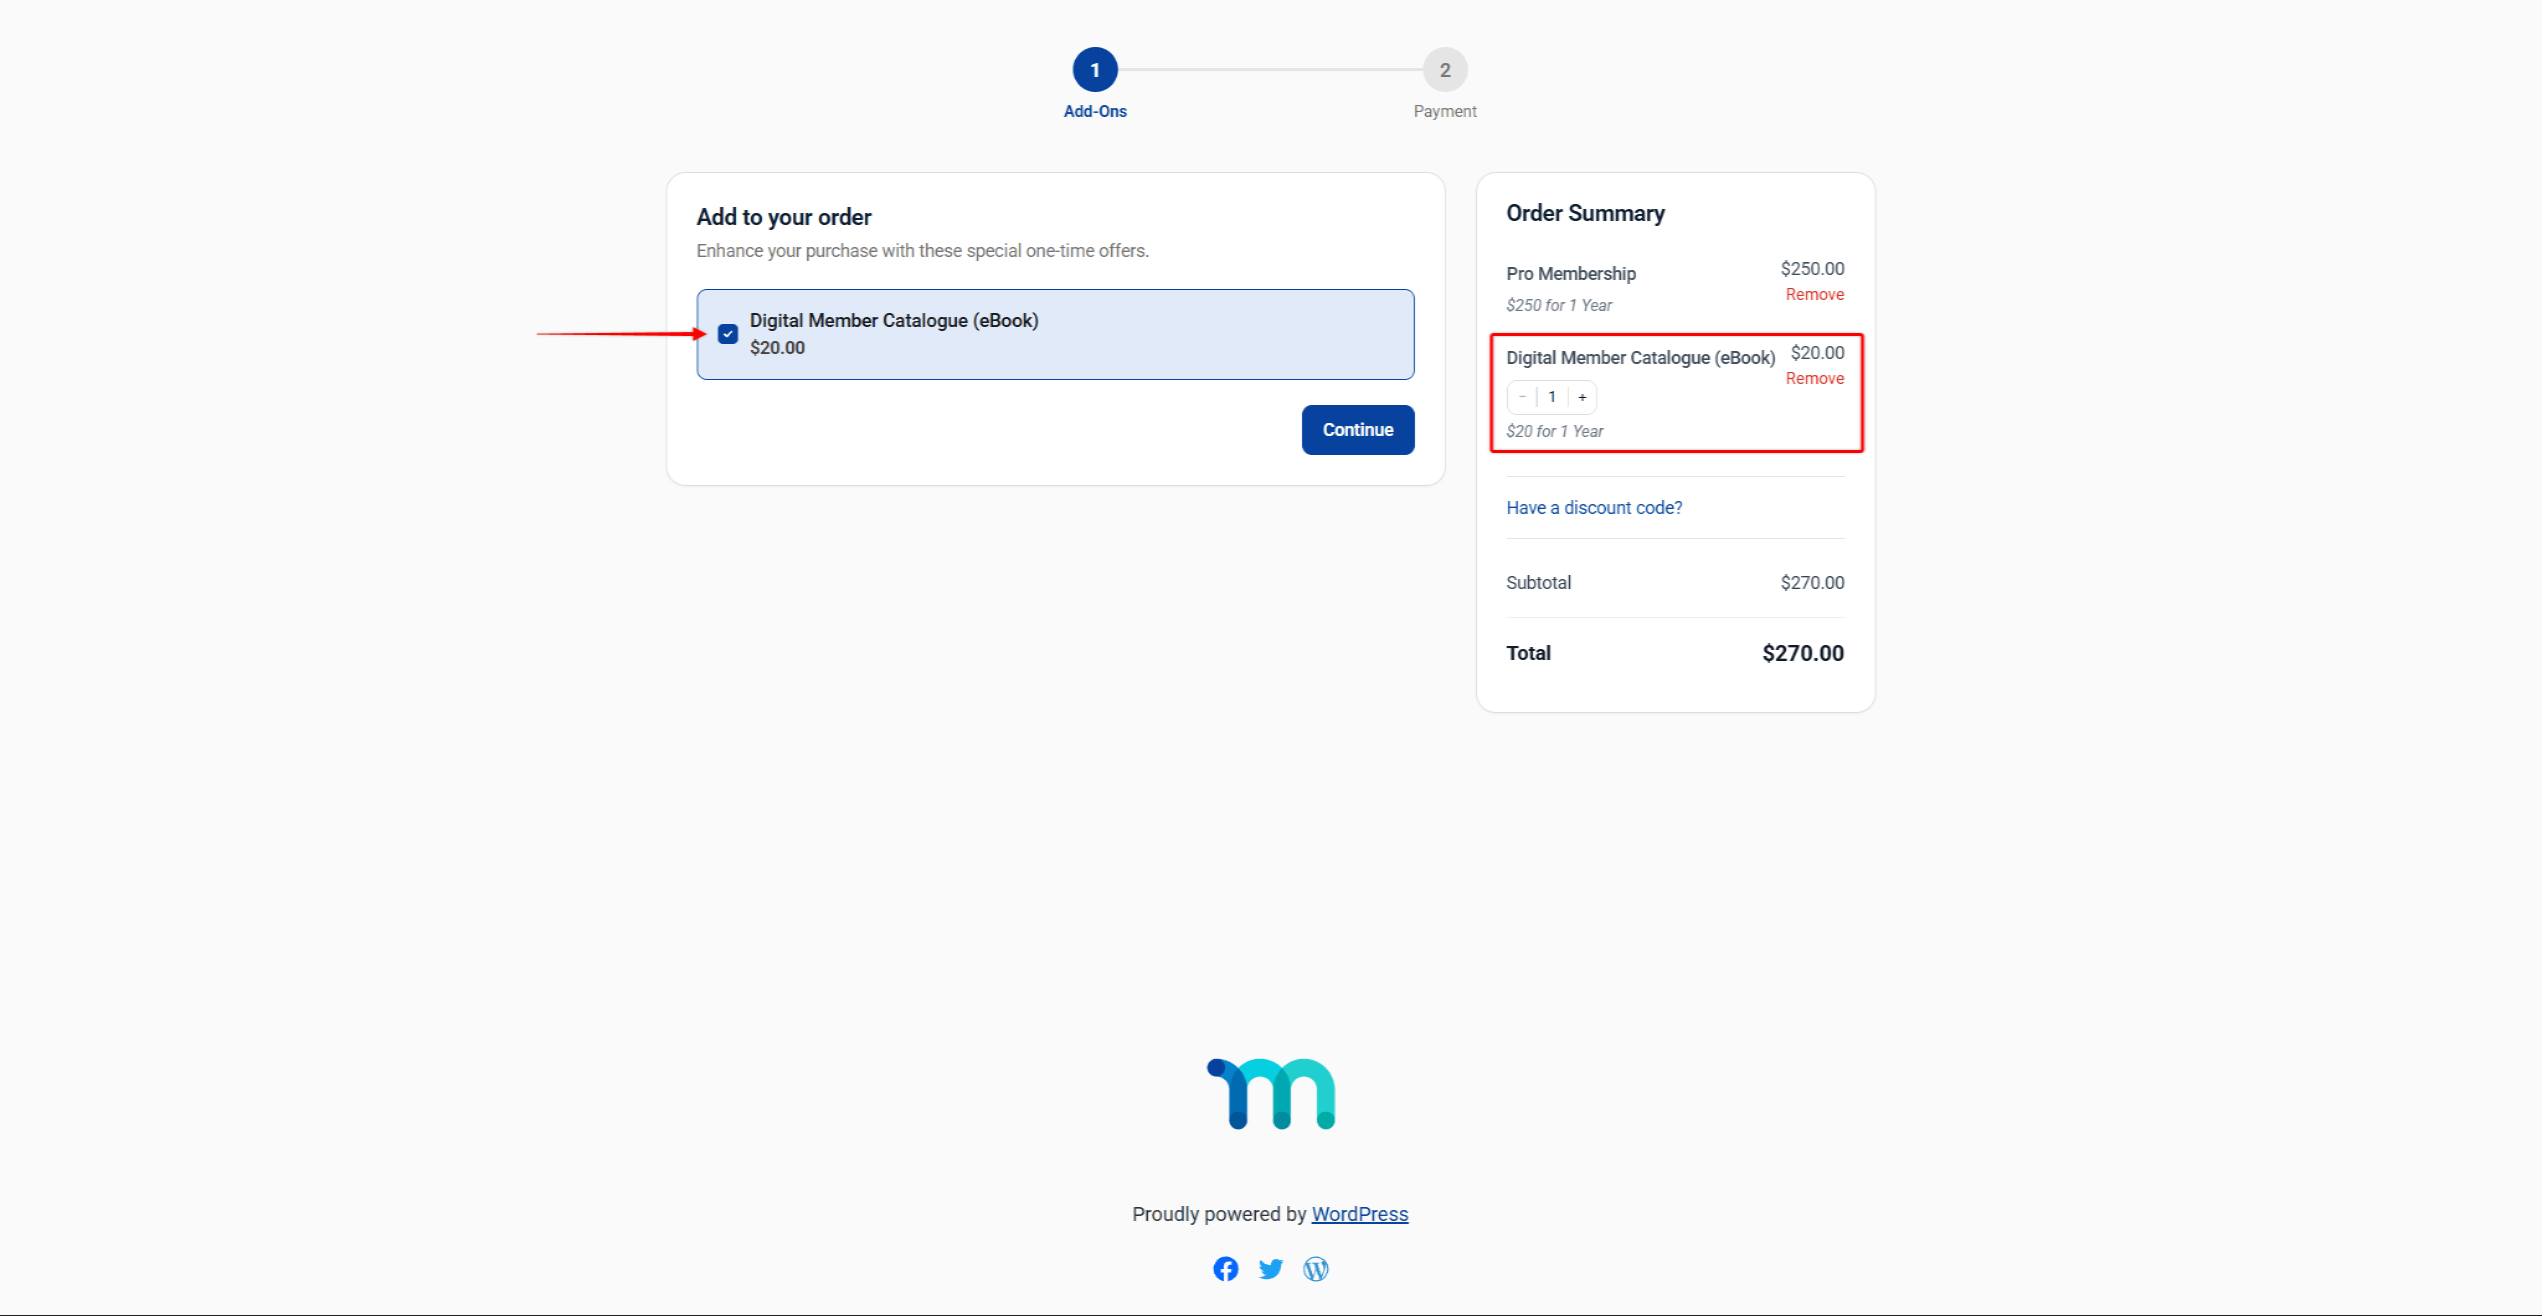
On the cart checkout, order bumps appear on the Add-Ons step, before the Payment step. The heading reads “Add to your order”. Customers mark a bump’s checkbox, and the Order Summary updates. Then they click Continue to pay.
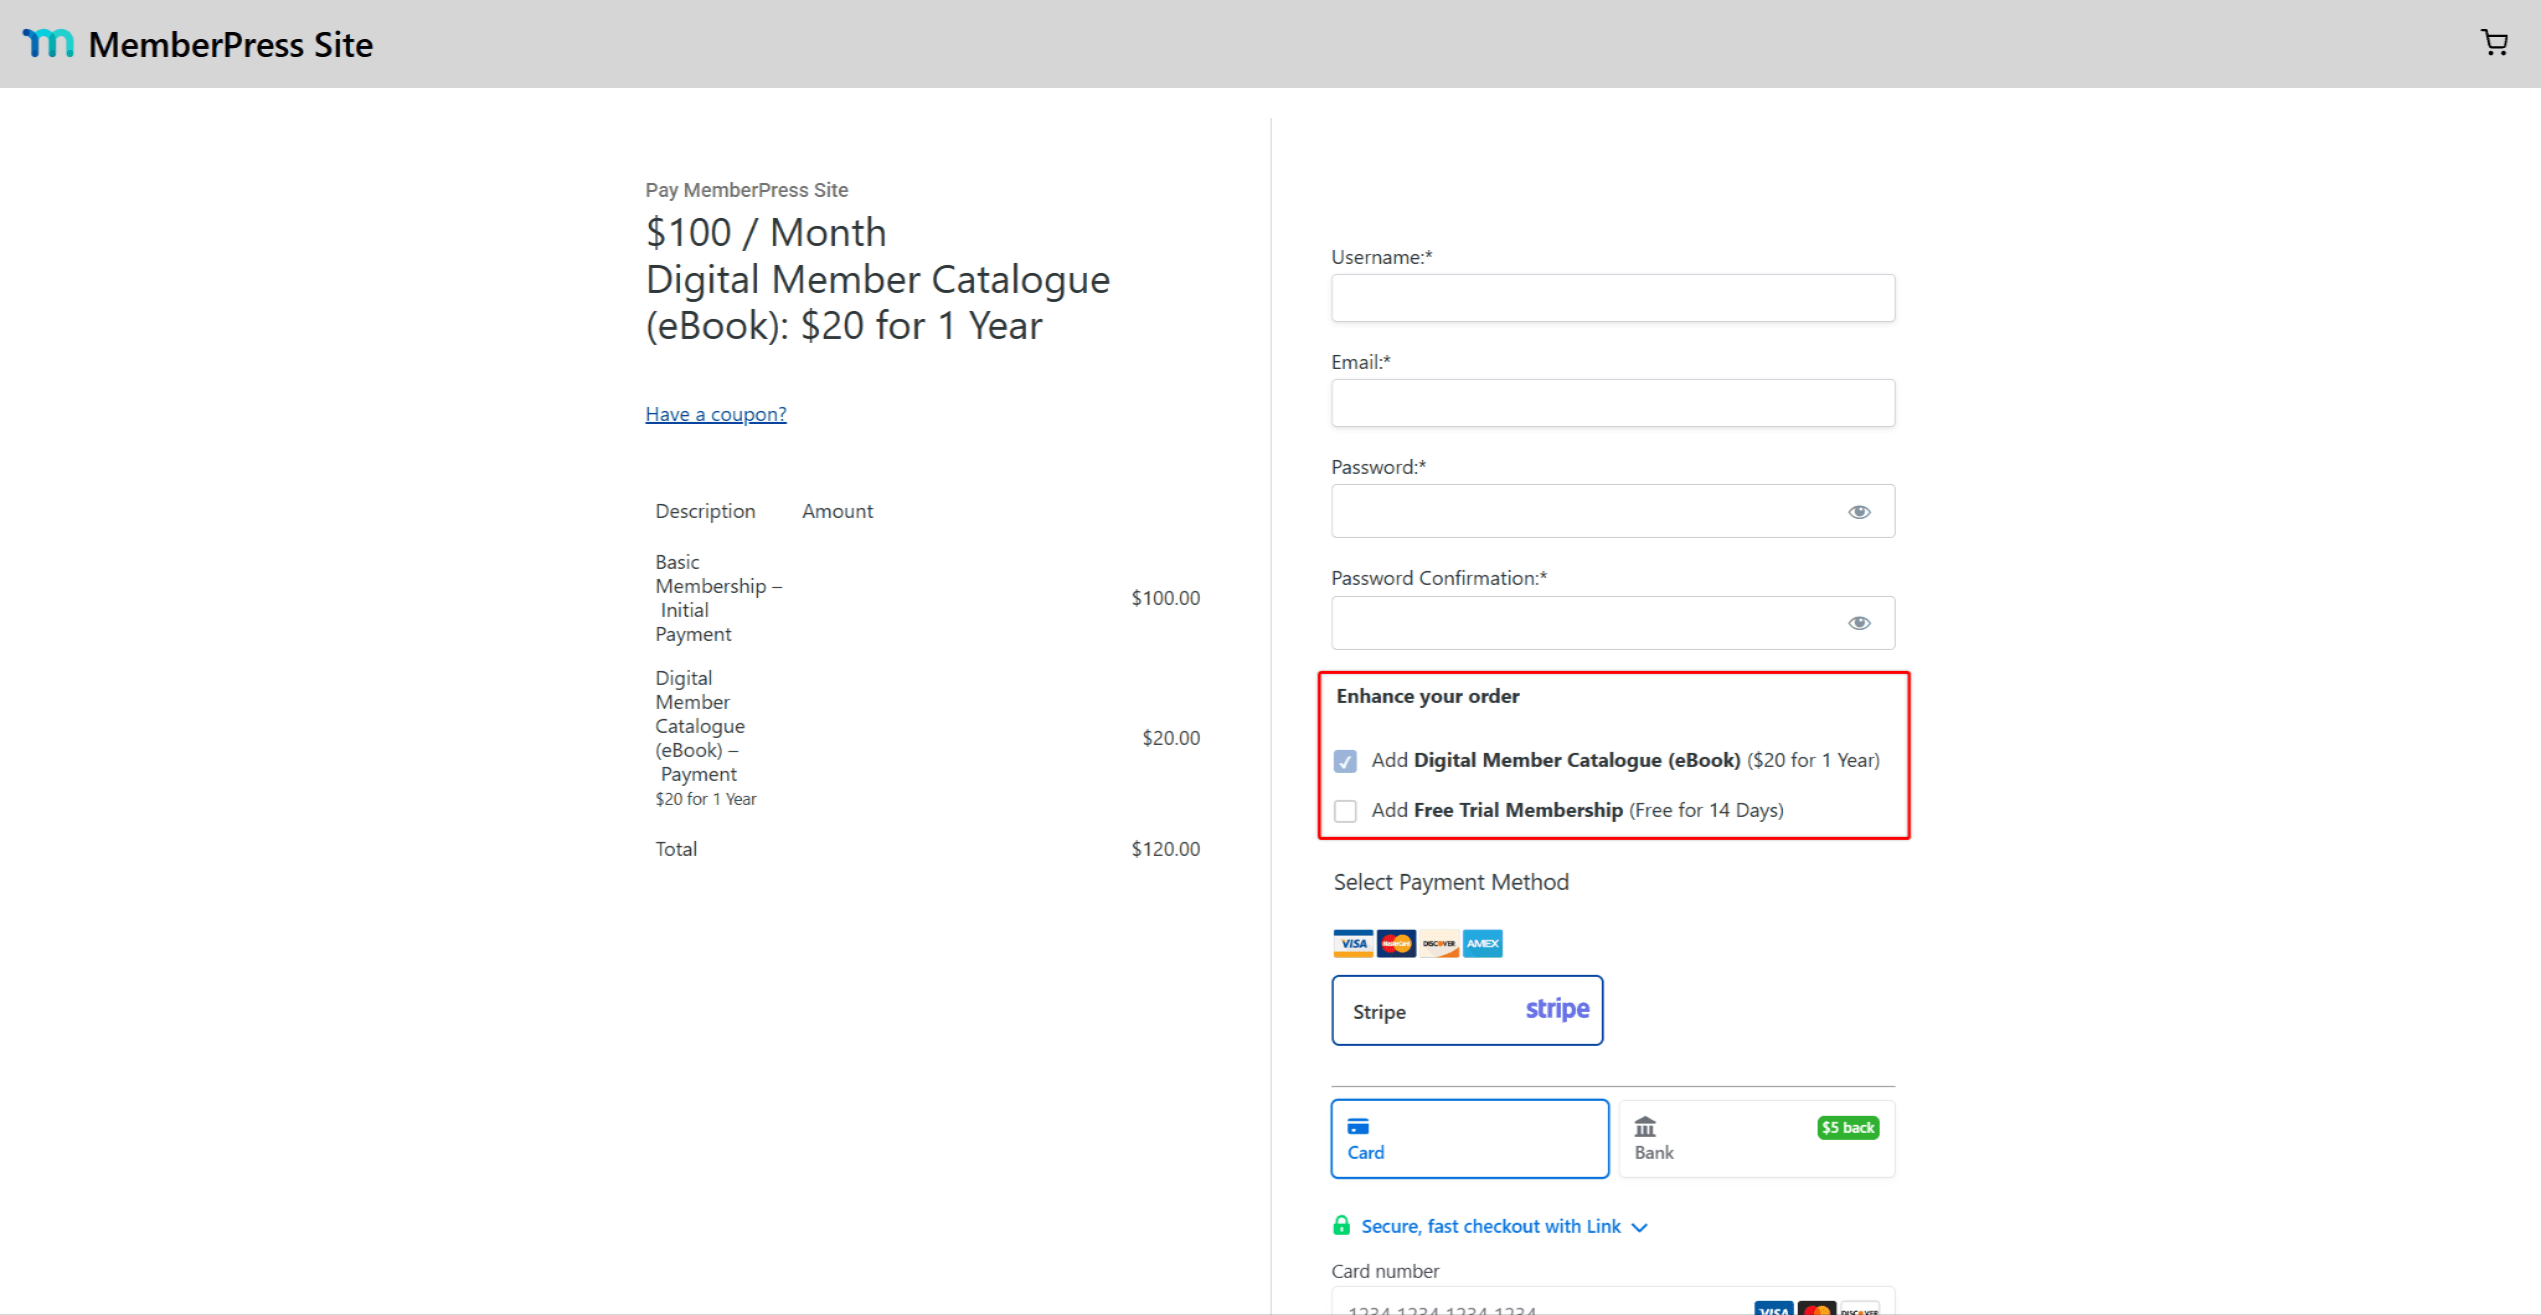
On a standalone registration page, order bumps appear under the Order Bumps Heading, above Select Payment Method. Each bump is a checkbox showing the product name and pricing terms. A required bump is pre-selected and cannot be unchecked.
On the cart checkout, the purchase creates one order with a transaction for every product in it. On a standalone registration page, each accepted bump creates its own subscription and transaction.
Managing Order Bump Subscriptions And Refunds
Each bump has its own subscription. You manage them at Dashboard > MemberPress > Subscriptions like any other subscription.
Purchases made through the cart checkout also appear at Dashboard > MemberPress > Orders. Open the order to see every item with its own Refund button. You can also Refund All, Cancel Order, or Resend Receipt.
Purchases made through a standalone registration page appear at Dashboard > MemberPress > Transactions. Each bump is a separate transaction there.










