Does the thought of making videos for your online business seem out of reach?
Maybe you’ve tried to record yourself before, but wanted to crawl into a sewer of embarrassment after watching it back.
On top of that, with cameras, lights, and file formats, it may seem too complex and pricey.
Sure, you bust a movie on TikTok now and again, but you couldn’t possibly make “real” videos, right?
Hold up.
You can actually make high-quality videos with little more than a smartphone and a $10 microphone.
I’ll go over why and how to do video production for your business, even if the last thing you filmed was on your mom’s old camcorder (good thing no one has a VHS player anymore, huh?).
Why you need to create videos for your business
When you’re growing your business, there’s a lot to do. Video is probably low on your priority list. But, you should nudge it closer to the top. Here’s why…
People expect it
Check out any reputable brand, and you’ll find they at least have some video up. If they don’t, you might scratch your head and think, “Dude, is this company even legit?”
Sure, it’s easy to put a YouTube link on your site’s footer, but when people actually click that sucker, they want to see something.
From unboxing videos, to reviews and customer stories, people love obsessing over products.
That’s because the more they see, the more at ease they are to buy.
Video gives a sense of trust
If people don’t trust you, they’ll get sketched out and run to your competitor. One that doesn’t give off those creepy non-video-having vibes.
The more time that goes by without having a video presence, the longer you’re missing out on potential traffic and sales.
But, won’t I make my brand look cheap?
If you’re making a commercial for TV, sure, maybe it’s time to bring in the pros. But online, it’s a free-for-all.
In the world of TikTok and Instagram, people are used to rough, off-the-cuff video. And a lot of times, it’s actually preferred over polished content.
If you run a small online business, people don’t expect some Scorsese-level production.
You’re not BMW or GEICO, so don’t try to be. These days, consumers crave realness from a company.
Just remember, the “what” is most important.
Video isn’t held to the same standards as written content. Meaning, when it comes to video, your quality has to be good, but not amazing.
As long as people can hear the audio, and they’re not getting motion sickness from what’s on-screen, you’re golden.
Benefits of adding video to your business
Video can help boost your sales if you do it right. You can showcase what you have to offer, and customers can see they’re buying from real people.
There are many other benefits to adding video to your WordPress business. Here are just a few:
Boost SEO
While it’s constantly evolving, Google’s algorithm likes video content.
This is especially true with its new Helpful Content Update. Google wants to promote content that’s “people-first.”
Total video-hours watched continues to grow, so what’s more people-first than giving them what they crave?
Up your conversions
Speaking of Google, they say that digital video is the new window shopping.
It’s even been noted that 88% of people surveyed say they’ve been convinced to buy a product or service by watching a brand’s video.
How many hours have you spent on Yelp scoping out a new restaurant before finally deciding to go? (Don’t lie.)
People shopping for both physical and digital goods do the same.
Increase brand awareness
If you’re creative enough to do it well, video is memorable.
That funny wipe-out clip you use will stick in a viewer’s mind.
It’s been noted that people are twice as likely to share video content than any other type.
It makes sense if you think about it.
How often do you share an article or blog post? Maybe a couple times a week? Maybe a little more if there’s some political drama going on?
Now think about the number of cat-fail IG Reels flying from phone to phone every day. It’s massive!
Get a good ROI
Making videos on the cheap gives a small business a big bang for its buck.
According to a survey by HubSpot, 68% of marketers say content showcasing their products and services generates the biggest ROI.
That’s probably why 56% of brands in one recent survey said they planned to increase their Instagram video investment.
Keep users on your page
The math on this one is simple.
The more time a user spends on a page = the more likely they are to buy.
Wistia found that people spent on average about 1.4x more time on pages with video than on those without!
Attention spans are being twisted in all directions, so keeping people focused on you can be tricky. Video is the perfect tool to grab and keep attention.
With all these benefits, there’s no reason not to learn the basics and start posting videos now.
Types of video for online business
Video can be used for all sorts of things. It can be:
A product to sell
With MemberPress + WordPress, you can easily sell videos online behind a paywall. For example, you could sell:
- Individual videos, for a one-time fee
- Access to a bunch of them, with a monthly or yearly membership
- Episodes released over time, like webisodes or video podcasts
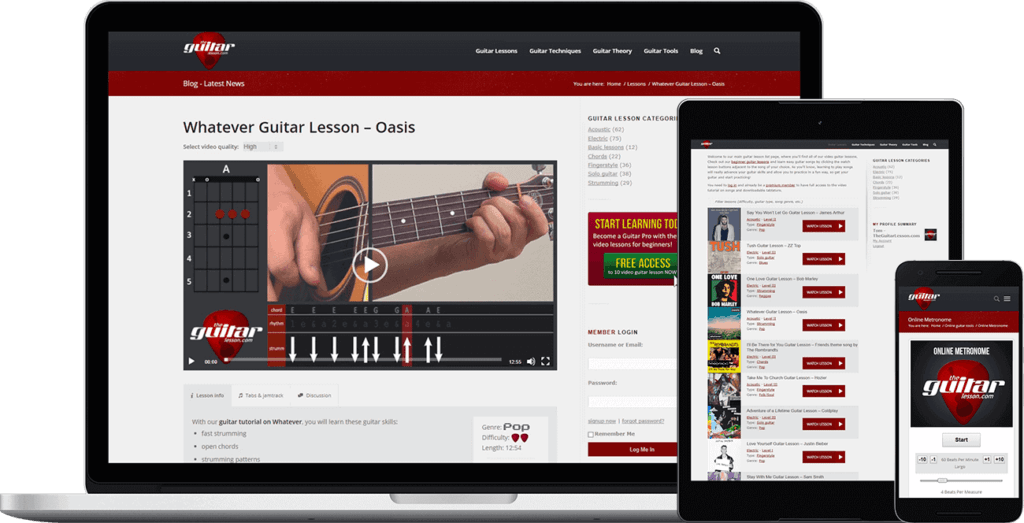
A lot of MemberPress creators sell things like:
- Online video courses
- Fitness routines
- Lessons (music, cooking, and more)
- Tutorials and how-to videos
- Exclusive webinars
- Live classes
- and more!
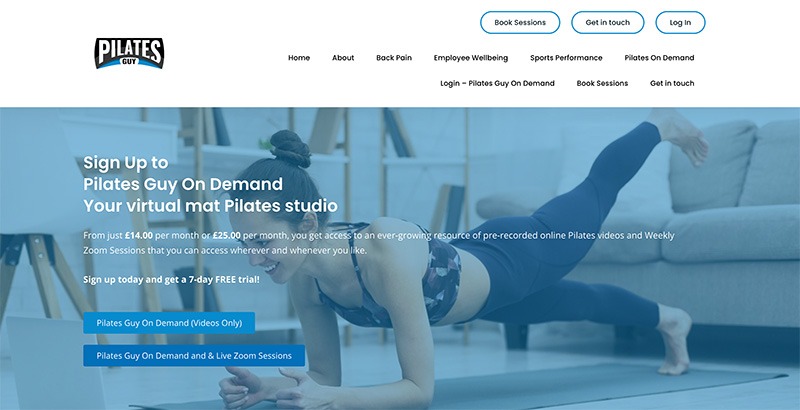
Really, you can charge for anything that takes expertise and time to make.
Marketing Material
Video is one of the best ways to get the word out about your business.
Each social platform has different people using it, and it’s where hot new products are discovered.
Just to give you a few ideas, you can make:
- Behind-the-scenes peaks of your products or business
- Intro or team videos
- Customer stories or reviews
- Promos and teasers for anything you’re selling
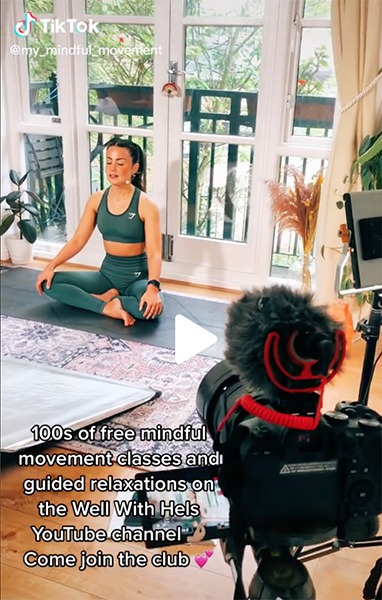
To make things easy, repurpose your longer-form videos into ads and promo clips.
How-to videos
Video tutorials are the best way to help customers use your site or product. If you make it easy, they’ll stick with you and buy more.
Want to dig through Roomba’s user manual to figure out why it’s not finding the charger? Didn’t think so.
But, what if you could just search a video hub? Bingo, there’s almost surely a quick video to help you fix the problem.
Okay, you don’t need any more convincing. So let’s get filming!
How to make videos (on the cheap)
Believe it or not, you may already have the main piece of gear you need.
If not, don’t worry. Your credit card won’t get too dinged up.
Step 1) Choose a recording style
So, you know what kind of video you’re going to make (for example, an online course).
Next, you need to choose how you’re going to film it.
On-camera
This is simple. It’s you, standing or sitting, talking to a camera.
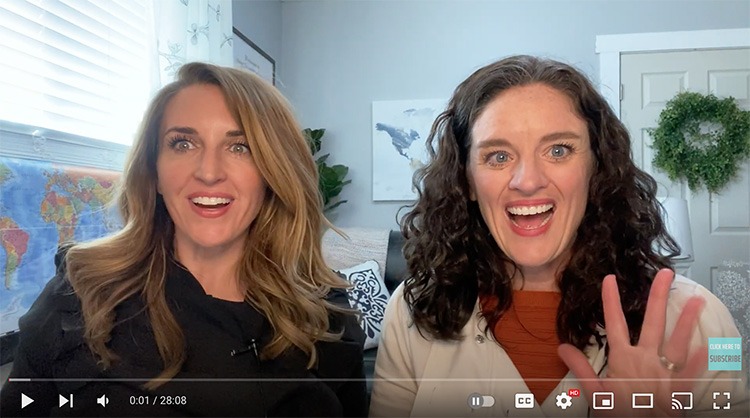
If that sounds daunting, don’t worry.
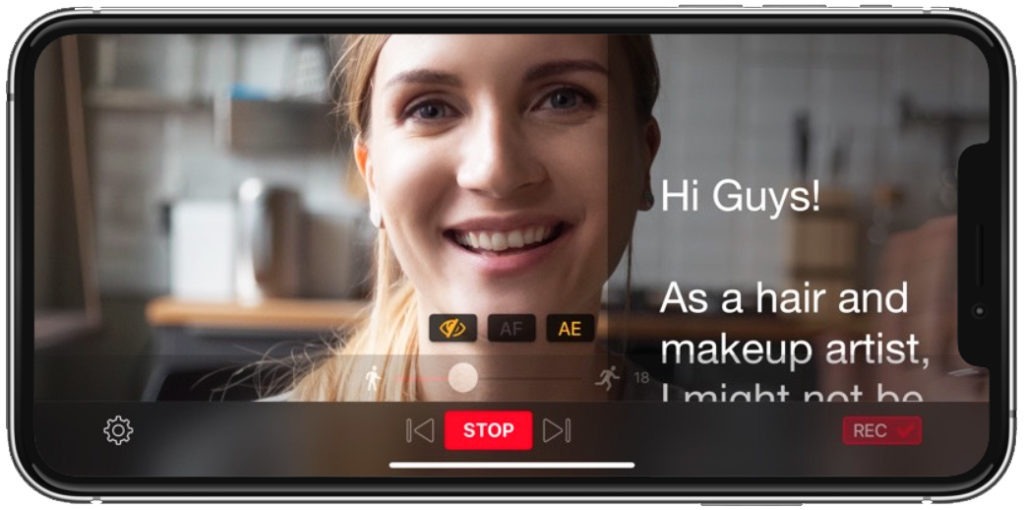
Turn your smartphone into a teleprompter with an app, or get creative and DIY your own.
You can also use the power of editing to cut out mistakes, overlay images to cover up that weird face you just made, and more. See, not so bad.
Off-camera
Having a bad hair year, or just don’t want to be on-screen?
Record a voiceover. This can be:
- Impromptu
- From a written script
- Or Mix and match the two (script an intro and record the rest on the fly)
Then create graphics and screen recordings to edit with your voiceover. This works great for tutorials.
You can also film whatever you’re talking about, whether that’s food, books, crafts, or something else.

Once you pick your recording style, you’ll have an idea of what equipment you need. Which brings us to the next step.
Step 2) Gear up
There are two main things to think about – video and audio.
Smartphone or Camera
To capture video, you have two options:
- A smartphone
- A dedicated camera
If you’re a beginner, use your phone.
Yup, that’s right. Great looking weddings, music videos, and much more have been filmed with an iPhone.
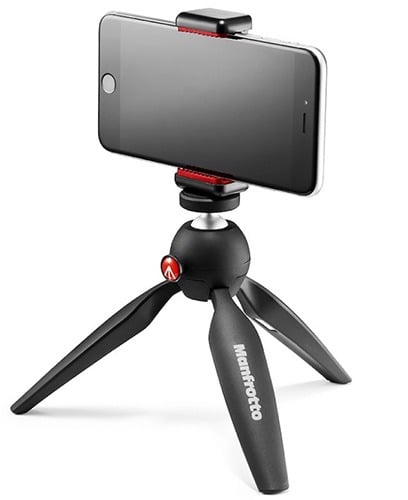
Then, get a tripod and phone clamp. I recommend the Manfrotto PIXI Mini Kit, which has both.
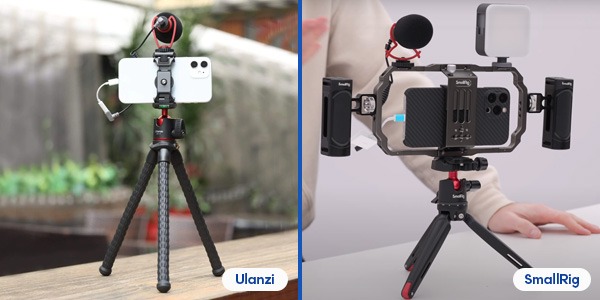
For some cheaper options, check out the Square Jellyfish, ULANZI Mini Flexible Tripod, or Acuvar Flexible Tripod.
You can also buy a smartphone clamp separately, and use whatever affordable tripod you can find.
For some phone-life balance, use a camera instead.
There are plenty of vlog-style cameras under $400 to choose from, such as the Panasonic LUMIX DC-ZS70K or Panasonic LUMIX FZ80.
Or step it up and invest in a more expensive option like the Sony ZV-1.
Then, snag a tripod, a memory card, and you’re ready to go.
Microphone
Sound is more important than video. Did you hear that?
People will put up with low quality video, but if they can’t hear it or it sounds annoying, they’ll turn it off.
Do not use the built-in microphone, on either a phone or camera.
Instead, invest in one of these:
- A tabletop USB microphone, like the Blue Yeti, Blue Snowball, or Samson Q2U. Just make sure it’s USB, otherwise you’ll spend a lot of money on adapters.
Optional: Get a microphone arm stand and pop filter to look like a hip podcaster.

- Lavalier mics. These pin on your shirt, and can often plug right into a smartphone. Check out the PoP Voice Lapel Mic, Pixel Lavalier, or Rode SmartLav+.

Pro-tip: You can also hide the microphone cord under your shirt.
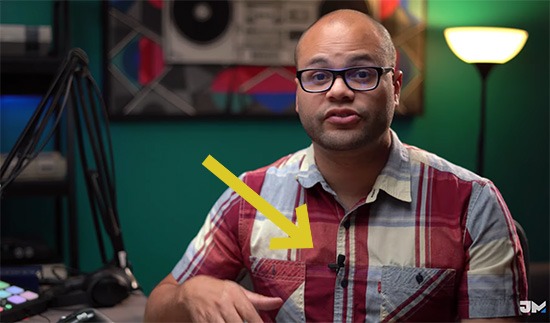
If you have some extra cash, go with a wireless option instead. These come in handy if you’re moving around in a gym or kitchen.
- On-camera or shotgun microphones, like the Movo VXR10.
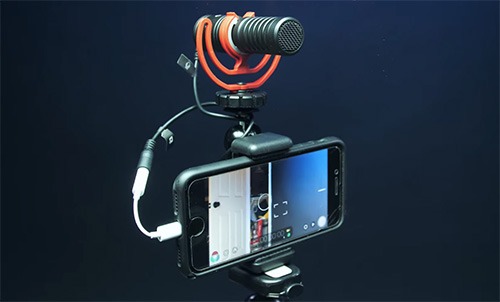
These can be mounted on top of your phone or camera, or placed next to your mouth with a tripod or boom arm. Just be sure to hide the mic in your shot.

Lighting
Your cheapest option is the sun. It’s free, at least until they start charging for it.
Let as much sunlight in the room as you can, without it being too harsh on your subject.
Just be sure to avoid filming with your back to a window.
In a room where the sun don’t shine, try some household or cheap items to light your video. Things like:
- Desk or table lamps
- Paper lanterns
- Clamp lights
Or, snag a more pro option, such as:
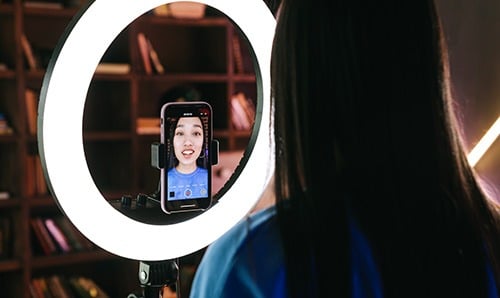
- A ring light like this one from UBeesize
- Video conference lights
- A softbox
YouTube is chock full of videos showcasing creative ways to light videos. You can also find plenty of DIY light kit tutorials online to avoid expensive ones.
Software
Here are some totally free options for recording and editing:
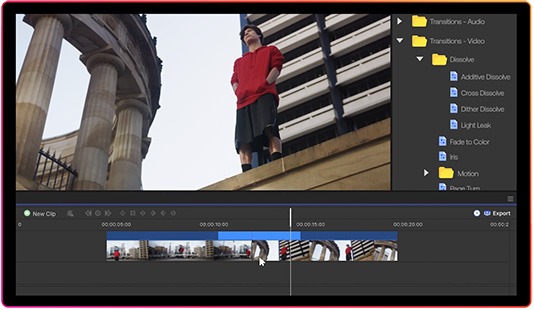
- Use a free video editor like HitFilm or Adobe Express. iMovie works great too.
- Take screen captures with software like OBS or Quicktime.
- Record voiceovers with Audacity.
Step 3) Choose a location
If you’re going to be on-camera, you want your background to be pleasing to the eye. Here are two easy options:
Use an existing space
Use a large, open room. It can be a living room, kitchen, bedroom, etc. You just want to avoid looking cramped or filming yourself directly against a wall.
Here’s some tips:
- Clean up the clutter. This isn’t your Hoarders debut. Also, hide anything embarrassing you have in the background.
- Choose somewhere quiet. This may seem obvious, but even a slight street noise or appliance hum can ruin your audio.
- Avoid empty rooms. Film somewhere that’s full of stuff. Furniture, carpets, pillows, etc all help dampen sound and avoid echo.
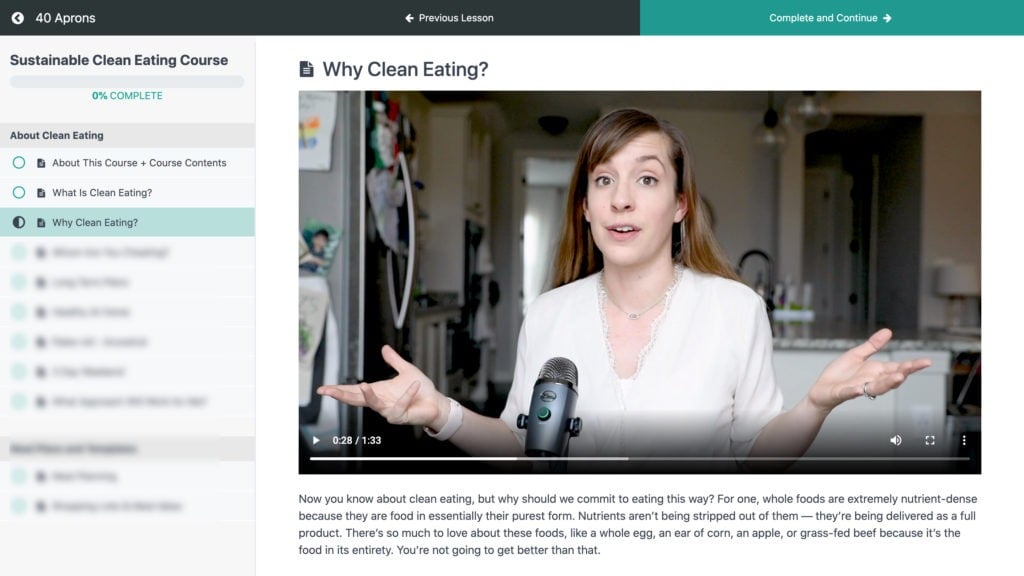
- Also, when you’re positioned on-camera, make sure there’s isn’t anything directly behind your head.

A lot of iPhone lenses let you use a large aperture to blur the background. You can even do this with a built-in feature on newer iPhones.
Build a dedicated backdrop or room
Don’t have a place in your house free of wild kids running around? Build your own dedicated video area.
- Snag some photo paper and lights to create a solid color background.

- Use a wall. Sit 5+ feet away and shine some light behind you to separate yourself from the wall.
- Set up a desk-space with some LED lights like many YouTubers do.
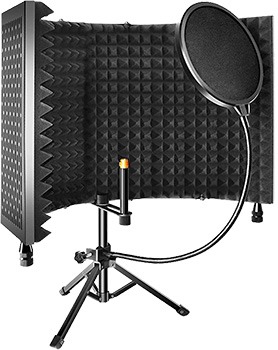
Side-note: If you’re only recording voiceover, surround your microphone with pillows to block out ambient noise, or get a portable sound proofing booth.
Step 4) Film
The moment has finally come, it’s time to hit record.
Find a spot to sit or stand and do whatever it takes to position your camera. Put your tripod on a stack of books if you have to.
Watch up on how to frame a shot to make it look good.
And, as a general rule, film more than you need. You’ll thank yourself later when editing.
Here are some other things to consider:
- Do a few practice runs to get used to talking about your material and warm-up your voice.
- Leave some space on the recording before and after you’re done talking. This gives your footage “room” for transitions in editing.
- Record at least 2-3 takes, so you can choose the best one
While filming, remote start the recordings with your voice or Apple Watch to save you some hassle.
One last thing. Before you wrap up, make sure your footage actually saved. Also, check the sound quality to ensure nothing went wrong.
Step 5) Edit
Now that you have your raw material, it’s time to put it together.
Transfer the video files to your computer (AirDrop works wonders on Mac). Then import them into your editor.
Try to keep your videos short and concise. Remove redundant parts, and long pauses.
Here are some other tips to polish things up:
- Add music. Look through free resources like Pixabay and FreePD
- Adjust the volume of your vocals. You don’t want it too quiet or distorted
- Color-correct your shots so they all match
Then, check the file specifications for the platform you’re uploading to. This will make your video the highest quality possible.
Then, export the file!
Bonus Steps: Host and Sell Your Videos
Once those videos are exported, put them to use!
With MemberPress + WordPress, you’ll be able to monetize your videos in no time.
Step 1) Create a website
First, you’ll need to:
- Get a domain name
- Buy some web hosting
- Install WordPress on your web host
Then, create your site. Use page builders like Beaver Builder or DIVI to make things easy.
Step 2) Install the MemberPress Plugin
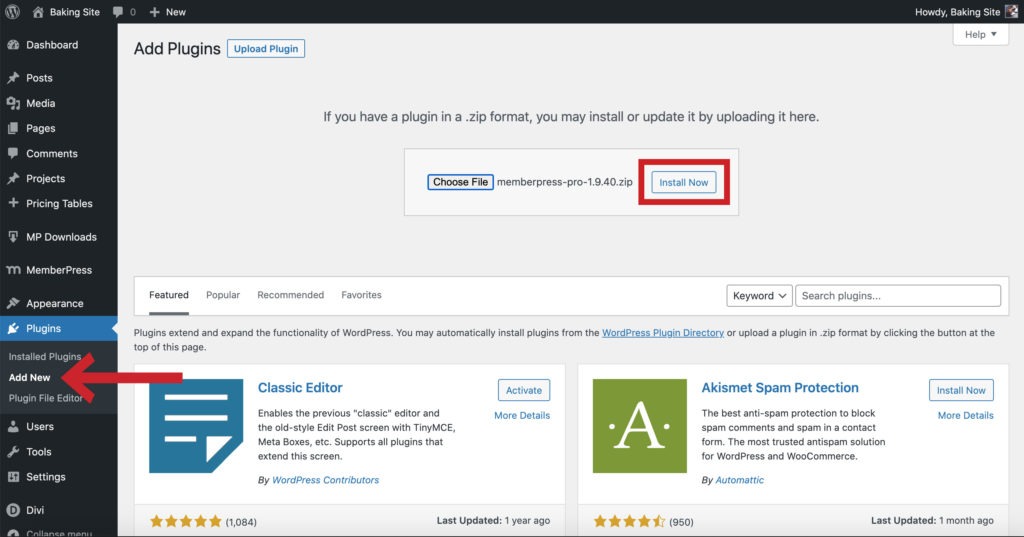
Purchase a MemberPress plan and download the plugin zip file from the Account page of the MemberPress website.
Then upload the plugin from your WordPress Dashboard.
Once installed, the MemberPress Setup Wizard will guide you through the basics, like adding a payment method.
Step 3) Create a membership
This is what will let you sell content.
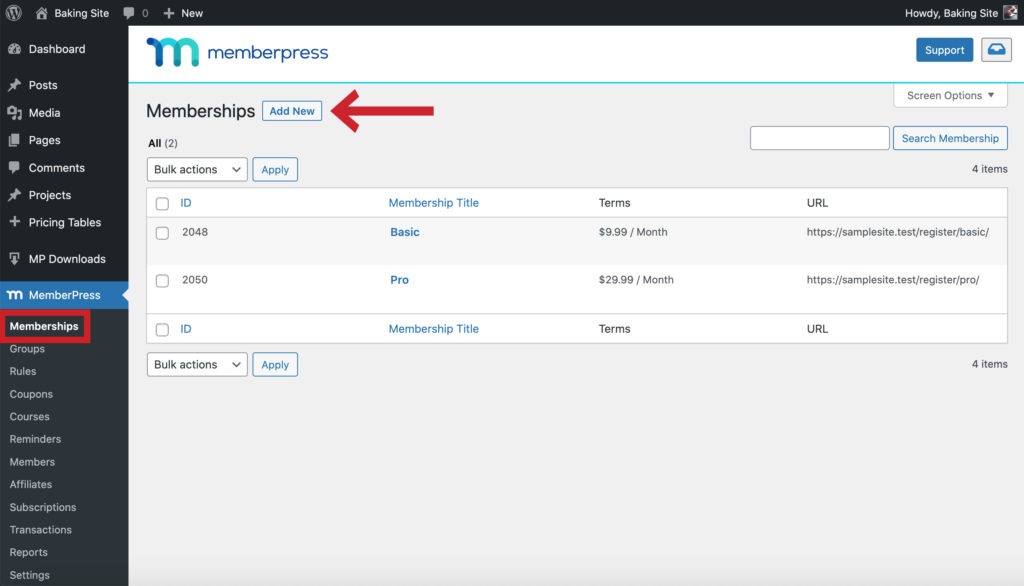
From the left sidebar of the WordPress Dashboard, go to MemberPress > Memberships. Then click Add New.
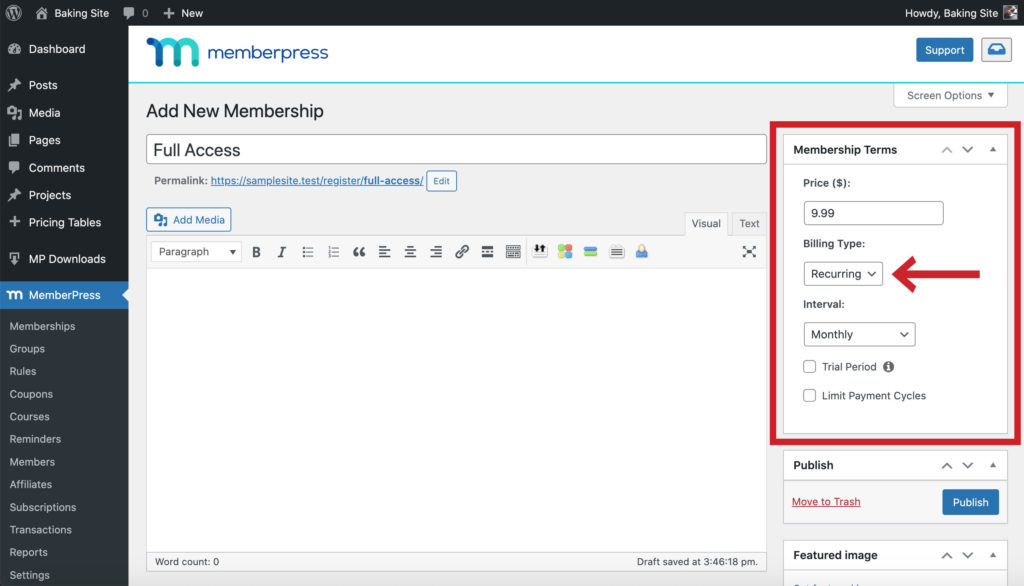
Next, choose your Membership Terms. Your Billing Type can be:
- One-time, where customers are only billed once
- or Recurring, which is billed every month, year, or whatever you choose
Step 4) Upload your video to YouTube and set it to “Unlisted”
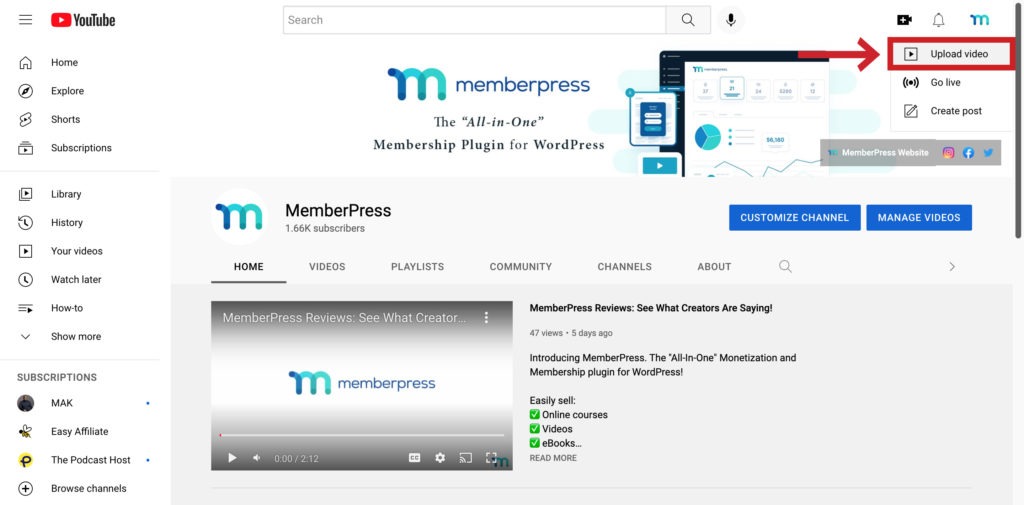
First, log into your YouTube account. Then, click the camera icon in the top-right corner and select Upload video.
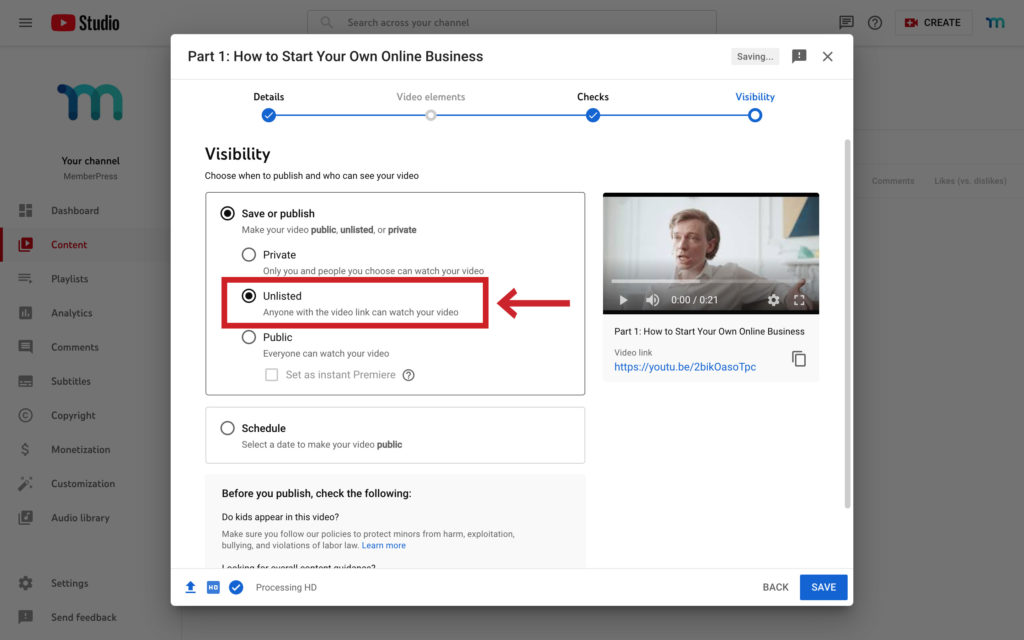
Next, under Visibility, select “Unlisted,” so only those with the video link can see it.
Then click Save. Also, copy your video’s URL for later.
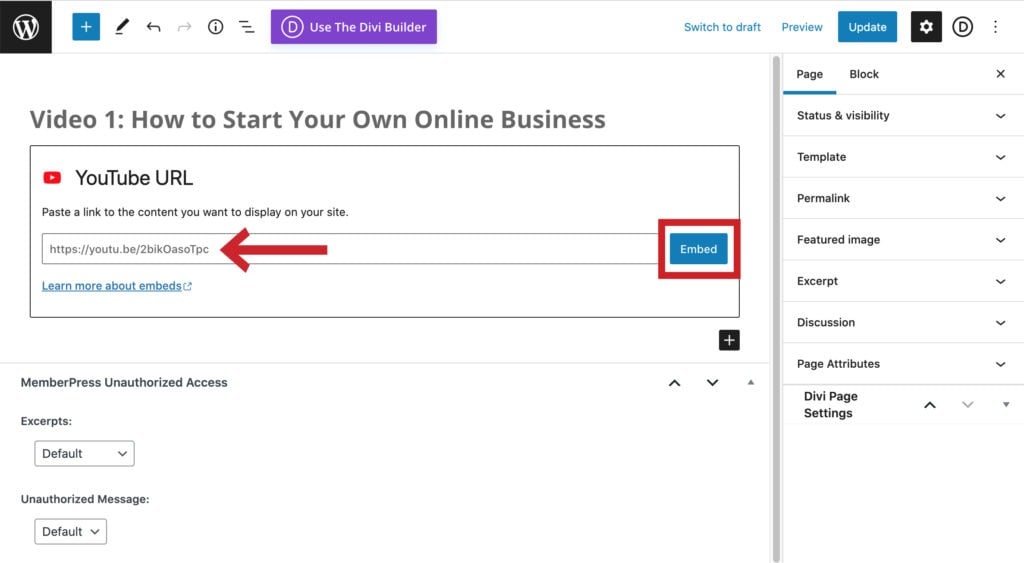
Step 5) Embed the video on your site
Now your customers need somewhere to watch the video.
Use the WordPress YouTube block to insert your video on posts and pages.
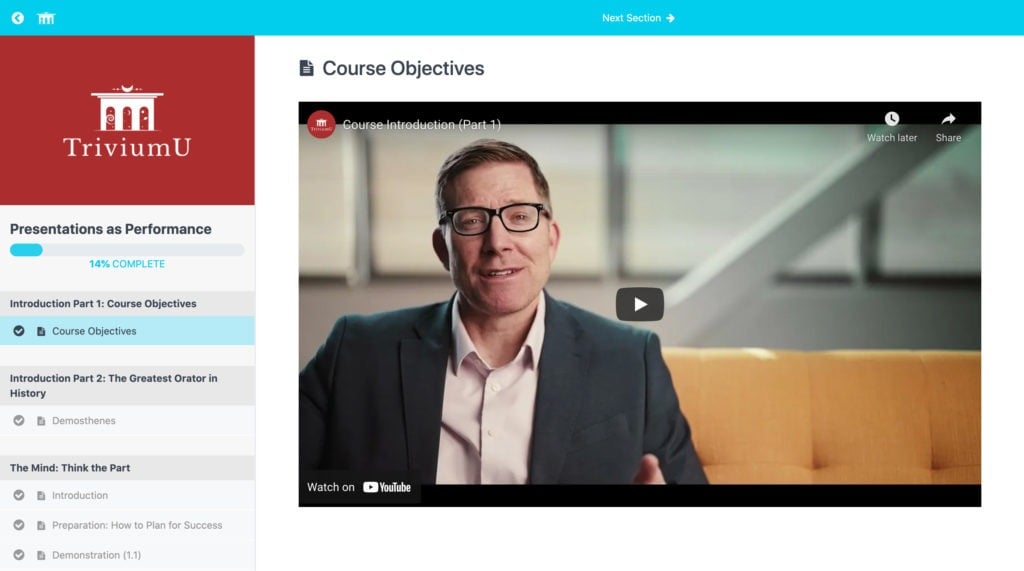
You can even embed it right on a lesson page in MemberPress Courses!
Step 6) Protect your video with a Rule
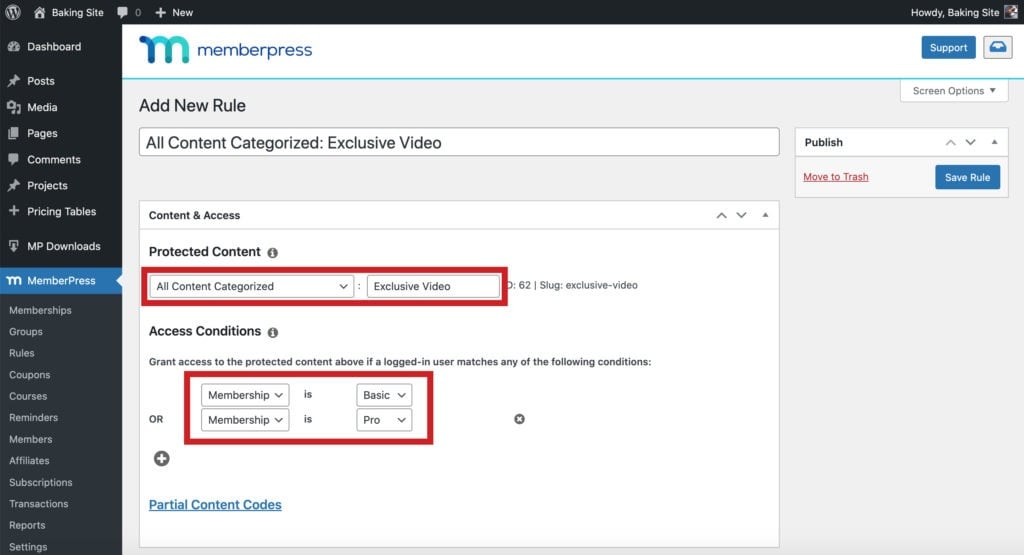
Now you need to use a MemberPress Rule to protect your video, so only those with your membership can get it.
Go to MemberPress > Rules > Add New.
Then, in the dropdown under Protected Content, select one of MemberPress’ many rule types. Wherever the video is on your site, you can protect it.
Next, select which memberships get access to the video under Access Conditions.
Then click Save Rule.
And that’s it! Only people who buy your membership can see your video.
Conclusion
Don’t wait around until you have a bunch of expensive gear and fancy-pants tricks of the trade to start making videos. If you’ve got a smartphone, there’s no reason not to boost your online business with video.
Keep learning with YouTube channels like Cinecom, Parker Walbeck, and Learn Online Video.
Also, follow sites like Videomaker and PremiumBeat for up-to-date tips and recommendations for all things video.
But, most importantly, keep filming and editing.
To recap, here are the steps you need to take to start making your first video:
- Choose your recording style. On-camera, off-camera, or a mix
- Gear up. Use your phone with a tripod and microphone
- Choose a filming location
- Record! Shoot plenty of material, and check your footage before wrapping up
- Edit and export your video
- Host it on YouTube and sell it on WordPress
- Repurpose your videos for social media and promo material.
That’s it! While you won’t be the next Ryan Seacrest over night, with practice you’ll be able to create engaging video content for your WordPress business.
Got questions or additional tips on how to do video production on the cheap? Let us know in the comments below!

Get MemberPress Today!
Start getting paid for the content you create.












Add a Comment